Welcome to the pantry! When I lead the online cleanse, I encourage readers to prepare some recipes that can work in several different meals. Here’s a cache of recipes that can be helpful throughout the year: vinaigrettes to dress those lunchtime salads, condiments to add a bit of thrill to the simplest vegetables and meats, and colorful dips to chase away your late-afternoon munchies. I’ve also included basic methods that you can use to prep your food in advance and take some of the pressure off your day-to-day cooking. And finally, you’ll also find a few notes on ingredients: where to find them and what to look for in the market as you’re choosing them.
PANTRY NOTES
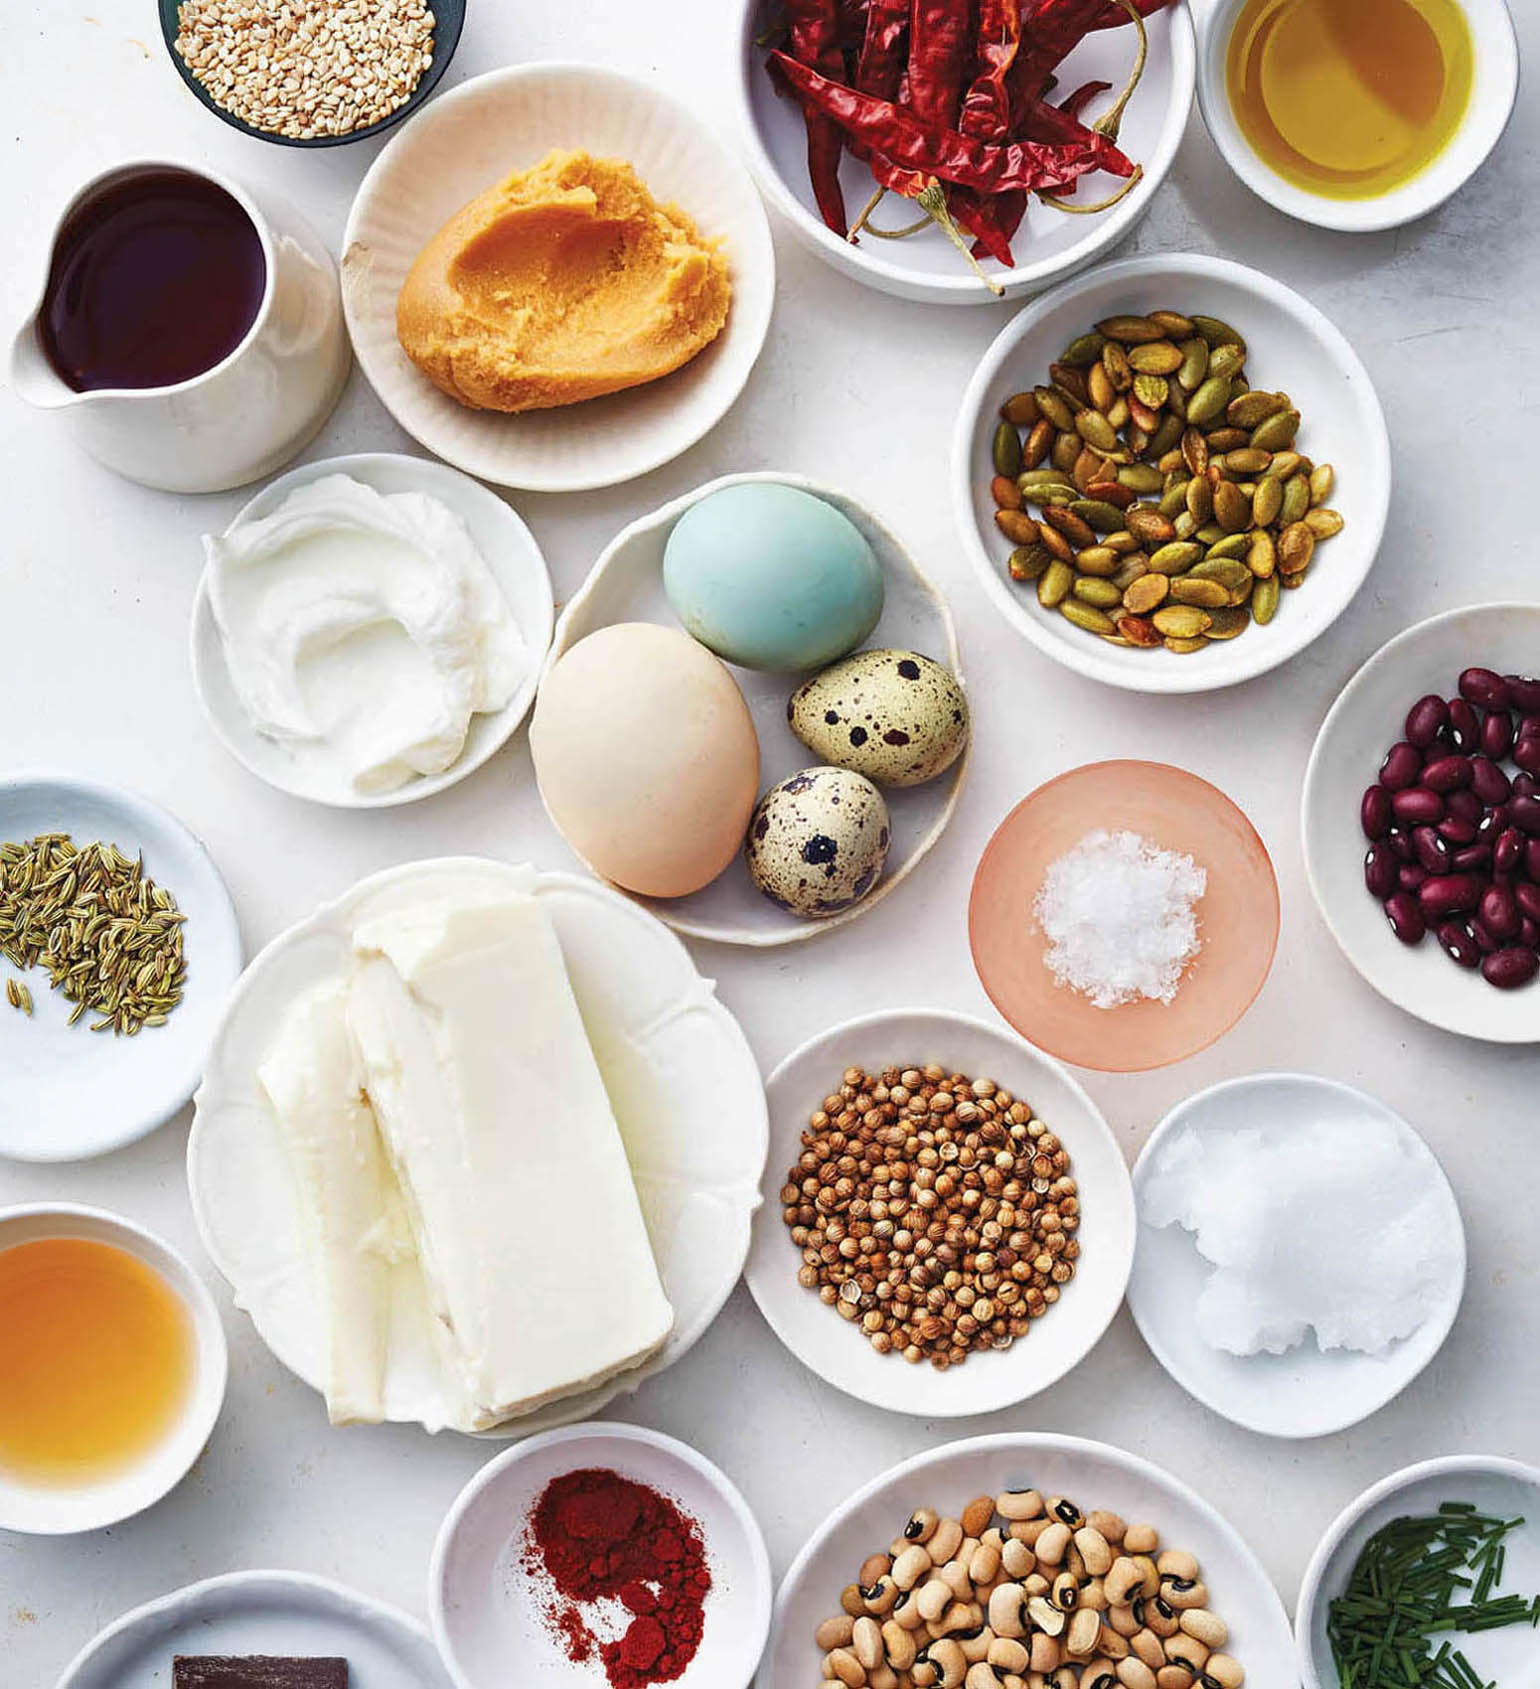
You’ve seen some ingredients popping up throughout the book: the staples of my everyday kitchen. Here are a few sourcing notes on those foundations.
SALT
I used to be a kosher salt fan, and I still like it for even seasoning of large cuts of meat, but I’ve come to appreciate the more direct salinity and finer texture of fine sea salt, so we call for fine sea salt as the basic seasoning. My current favorite is the slightly speckled sugar-textured salt from the Utah salt flats called Real Salt (you can find it on Amazon). No matter what salt you use, remember to salt as you go along, not just at the beginning or the end of cooking. Use a little at a time and adjust with more salt if it’s necessary.
For finishing, we often call for flaky sea salt, which gives crunchy bursts of salinity and texture wherever it lands. I love the delicate pyramidal crystals of Maldon salt, and for a little variety the elegantly smoked version of Maldon salt.
BLACK PEPPER
Salt and pepper are an automatic reflex, and you’ll find freshly ground black pepper called for throughout the book. That said, I often find that dishes are better with just a touch of the pungent stuff (or none at all). Even more than with other seasonings, make sure to start with just a touch of pepper and increase to taste.
RED PEPPER FLAKES
In my home cooking I use red pepper just as much as or more than ground black pepper. You’ll notice we call for medium-hot Mediterranean red pepper flakes, such as Aleppo or Marash. That’s because generic red pepper flakes are so hot you can’t really get any flavor along with the chile heat. Peppers like Aleppo pepper (originally from Syria), Marash (my favorite, available from zingermans.com), Urfa Biber (Turkey), and piment d’Espelette (the Basque regions of Spain and France) all deliver distinctly fruity and/or smoky notes along with a bit of heat. Since they aren’t too hot, you can use enough of them to really taste their impact on the food. And that little bit of heat may give your metabolism a little boost along with your taste buds.
I do use small whole chile peppers, usually chiles de arbol or chiles japones, in longer-cooked dishes. They add distinctive heat and flavor and are easy to fish out when the cooking is done.
SPICES
I lean heavily on spices to give my food flavor without piling on extra calories. In big cities, it’s easy to get a huge variety of spices and blends at groceries, health food stores, and Asian specialty stores. If you don’t have a great selection in your town, however, the Internet is a great place to turn to for spices. World Spice (worldspice.com) is my hometown favorite, and New York’s Kalustyan’s (kalustyans.com) has just about every spice imaginable.
MISO
Miso is a paste of legumes that has been combined with cultured rice or barley to produce a thick fermented paste. Because it’s a live cultured product, it can serve as a probiotic (as long as you don’t kill the microflora with high-heat cooking). But most of all, it adds a wonderful richness to the dressings, marinades, and soups we use it for. In this book, we call for white (or shiro) miso, the gentlest, sweetest variety. From there you might delve into the funkier flavors of barley, chickpea, and red misos. Among other brands, I like South River Miso, made in Massachusetts from traditional Japanese methods.
OLIVE OIL
I love olive oil for its flavor and its lushness, but I don’t make too big a deal about it: I tend to rely on well-priced extra-virgin oil from Crete, which is green and assertive enough to remind you it’s not canola oil but not too aggressively peppery. You can save your very fancy small bottles of olive oil for finishing dishes.
COCONUT OIL
Coconut oil is a solid at room temperature, and it’s become a favorite for sautéing and stir-frying when the flavors are skewing Indian, Caribbean, or Southeast Asian. Keep it out of the direct heat of the sun or your stove, and make sure to keep an extra jar around as a skin-soothing salve.
TOFU
Even though it’s been the butt of countless jokes, tofu takes on great flavor and texture if you handle it well. It’s important to find very fresh tofu and to get the right texture for your needs. For creamy sauces such as Chipotle Mayonnaise, you’ll want extra-soft silken tofu, while for roasting and stir-fries, you want to seek out extra-firm or firm tofu packed in water. To maximize crispness, it’s best to press the excess water from the tofu following the method in the recipes.
PANTRY METHODS
As you go through the cleanse, there are certain key methods and ingredients that come up again and again, so here are the basics to make them easier and better. They’re also the building blocks to improvising your own cleanse-style menus.
HOW TO MAKE A BIG BATCH OF STEEL-CUT OATS
The key to actually eating longer-cooking whole-grain porridge in the morning is to have it ready to go. Here’s a method to make scrumptious steel-cut oats in bulk so that you can just heat and go when you’re sleepy:
Bring 4 cups of water to a boil for every 1 cup of oats being cooked. Add a pinch of salt and stir in the oats. Reduce heat to a low simmer and cook, stirring occasionally, to the desired texture (20 minutes will give you a pretty creamy result). For later use, let cool to room temperature and store in the refrigerator for up to 5 days. To serve, warm the oats in a small saucepan over medium heat or in the microwave. Either way, stir in ¼ cup water or almond milk to keep it from scalding.
Note: You can reduce the cooking time even further by pouring the same amount of boiling water over the oats at night and letting sit at room temperature until the morning. When ready to cook, proceed as above.
HOW TO BOIL AN EGG
I love a hard-boiled egg, one of the most reliable snacks around, though in truth I like them softish rather than completely firm. Place the egg(s) in a small saucepan and cover with water by 1½ inches. Bring to a boil over medium-high heat, then turn the heat off. Let the eggs stand 9 minutes for an egg that’s still a tad runny in the middle, or 10 for one that’s firm but fudgy in texture. Place the boiled egg(s) in a bowl of ice water to stop the cooking, and after a few minutes of cooling, peel them in the water to rinse off any bits of shell.
HOW TO MAKE CHICKEN STOCK
I can be extravagant with my groceries, but I like to get the most out of them, which is why I like to make stock with leftover bones and meat scraps. I do use commercial chicken stock sometimes, but I’m much happier when I brew my own: home-cooked chicken stock tastes both mellower and richer than the canned stuff. I tend to save chicken carcasses in the freezer as my family and I make our way through a few roast chicken meals and then use them for a big batch. If I don’t have any around, I pick up some very inexpensive chicken backs at the store and use them as the basis for my stock. The aromatic elements can vary from batch to batch, but here’s the basic setup:
• Place 2 chicken carcasses, cleaved in half if possible, or 2 pounds chicken backs, wings, or feet in a large stockpot. Cover with water by about 3 inches, and then add vegetables and aromatics, including, ideally, 1 leek, cleaned and halved; 1 carrot; 1 medium onion, halved; 1 bay leaf; 1 garlic head with its upper third sliced off horizontally to expose the cloves below; 4 parsley sprigs; 4 thyme sprigs; 8 peppercorns; and 2 or 3 dried shiitakes. Don’t fret if you don’t have every last ingredient: it will taste nice anyway.
• Bring the water to a boil over medium-high heat, then turn the heat down to a lazy simmer. Skim off any unsightly froth and/or fat at the top of the stock, but unless you’re working in a French restaurant, you don’t need to be too fastidious. Simmer the stock for 3 to 8 hours, making sure the chicken is always covered with water. The shorter time is good for most applications, but if you want a very rich concentrated stock for sauces, go ahead and cook longer.
• Carefully strain through a fine mesh-strainer, pushing on the solids to extract flavor. Discard the solids. If you’re not using it right away, place the hot stock in its container into another bowl or pot of ice water. Stir the stock to chill to room temperature right away.
• Chill the stock completely in the refrigerator; when it’s cold, scrape the congealed fat off the surface. Keep chilled for up to 5 days, or divide into small containers and freeze for up to 3 months. (It freezes well in ice cube trays.)
HOW TO MAKE VEGETABLE STOCK
I really dislike commercial vegetable stock; it has a weird yeasty flavor that reminds me of no vegetable in particular. Since the cleanse tends to generate a lot of vegetable scraps, I try to get a couple of batches of infinitely better homemade vegetable stock going instead. Here’s a rough formula, but please feel free to play around with whatever tasty vegetable leavings you have on hand.
• In a large pot, place 2 leek tops, rinsed and cut into large pieces; 2 carrots, cut into large pieces; 1 cup mushrooms or mushroom stems; 1 onion, cut into 2-inch wedges; 1 parsnip, peeled and cut into large chunks; the fronds and outer layer of a fennel bulb; 4 parsley sprigs; 4 thyme sprigs; 2 tablespoons tomato paste; 1 whole chile de arbol or japones; 1 teaspoon fennel seeds and 1 teaspoon peppercorns.
• Cover with water by 2 inches. Bring the water to a boil over medium-high heat, then turn the heat down and simmer for 25 to 35 minutes.
• Strain the liquid (discard the solids) and cool it to room temperature. Store it in small containers and use it within 5 days or freeze it for up to 3 months. (It freezes well in ice cube trays.)
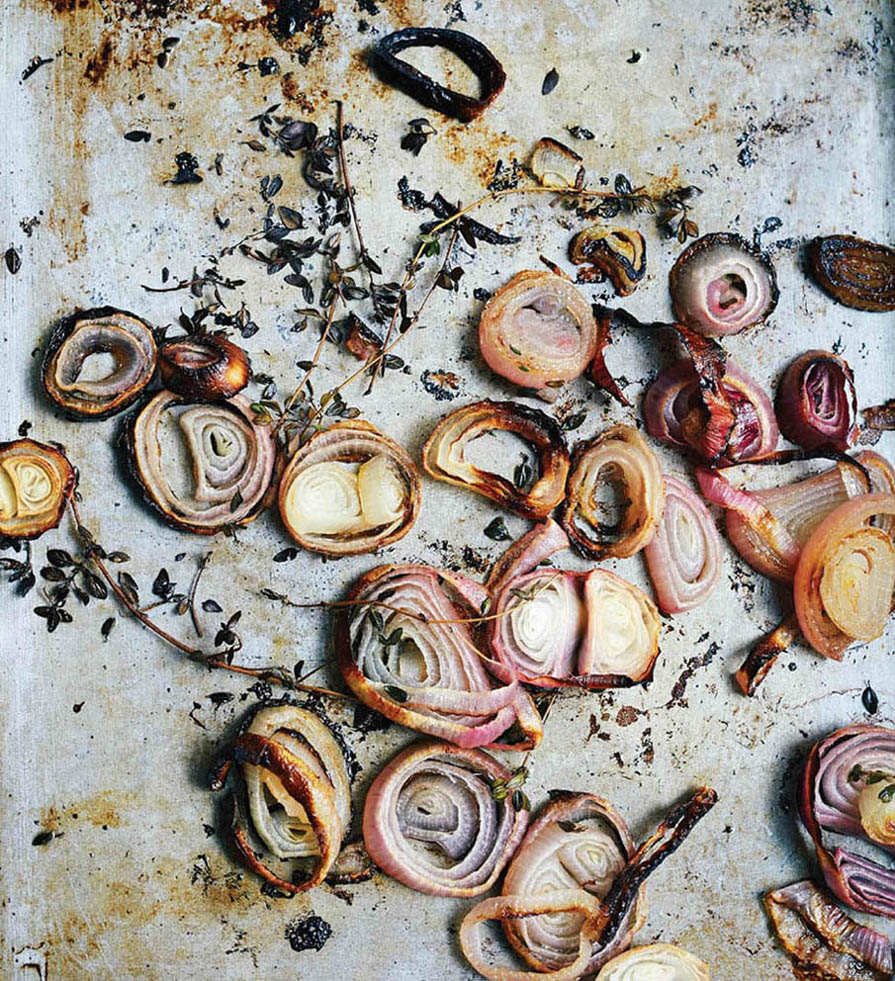
HOW TO ROAST VEGETABLES
I’m a huge sheet pan cook. Roasting vegetables on sheet pans means that I can focus on some more fiddly part of a meal (or help my kids with piano practice) at the same time. Veggies emerge toasty brown and tender, and they’re great to keep around to add texture and flavor to the next day’s lunch salad. Though you’ll find a few variations elsewhere in the book, here’s the basic method for roasting veggies of all sorts.
• Preheat the oven to 425˚F.
• Cut the vegetables either into 1-inch pieces (best for carrots, parsnips, celery root, beets, and large squashes) or ½-inch cross-section slices (best for Delicata squash, fennel, zucchini, and sunchokes).
• Figure about 1 cup raw veggies per person and about 1½ teaspoons olive oil per person. Toss the veggies with oil, salt, and pepper, keeping individual veggies separate from one another.
• If you have it, line the baking sheet(s) with compostable parchment paper (this will save you a little dishwashing work).
• Spread the vegetables out on a single layer on the baking sheet with about ½ inch of space between each piece, using more than one tray if necessary.
• Roast the vegetables in the oven, tossing once during cooking, until they’re tender and browned in spots. The time depends on the vegetable and the chunk size, but figure 15 to 30 minutes. If you have more than one pan, rotate the pans once during the roasting.
For a burst of extra flavor, toss the veggies with something aromatic: 1 grated garlic clove, a teaspoon of finely grated citrus zest, lemon juice, chopped herbs, sesame oil and green onions, and/or hot sauce. Taste and add more salt if necessary.
HOW TO COOK DRIED BEANS
Cooking your own dried beans takes a bit more planning than using canned, but the effort adds so much character to your legume dishes. Here’s the gist, using white beans as a model. You can use this same method for any number of dried beans: pinto, black, flageolet, garbanzos, or gigantes, keeping in mind that cooking times vary considerably.
• Soak 2 cups dried white beans in at least two times their volume of water overnight in the refrigerator.
• Drain the soaked beans and place them in a large pot with any or all of the following aromatic ingredients: 1 peeled carrot; 4 thyme sprigs; 1 leek, rinsed and trimmed; 1 garlic head with its top sliced off to reveal the cloves; 1 small peeled onion; 1 or 2 small dried chiles; 1 teaspoon fennel seeds and/or a bay leaf. Fill the pot with cold water that extends 2 inches above the beans.
• Bring to a boil, skim off the residue that collects at the surface of the water. Turn heat down to a simmer and stir in 2 tablespoons olive oil and about 1½ teaspoons sea salt per quart of water. Cook gently until the beans are tender to their centers, about 35 to 45 minutes.
• Taste beans and add red pepper flakes, additional salt and/or fennel to taste. Let the beans cool in their cooking water. Before serving, drain them and remove the aromatic vegetables.
HOW TO STEAM-ROAST BEETS
Whether you’re making a batch of Roasted Beet and Tahini Dip or just looking for some hefty vegetable flavor for your lunchtime salads, roasted beets are easy to make ahead of time.
• Preheat the oven to 425˚F. Scrub some beets and make sure they’re more or less the same size; cut any gargantuan ones in half. Place them in a single layer in a baking dish or pan with sides at least 2 inches high. Season with salt and pepper, slosh in 1 or 2 tablespoons olive oil, and toss in any herbs (thyme, rosemary, parsley) that you might have on hand. Pour in ¼ cup of water to create steam. Cover the dish securely with aluminum foil and roast until a knife slips into the beets easily, which can take from around 45 minutes to 70 minutes, depending on the size of the beets.
• Cover again tightly as the beets cool to room temperature, so they’re easier to peel. You can peel them by rubbing with a clean kitchen towel (it won’t be clean for long . . .) or with a paring knife. Store in the refrigerator in an airtight container for up to 5 days.
HOW TO BRAISE GREENS
Braised greens are just the thing when you’ve run out of ideas for a side dish, and they’re also a great component to a brown-bag office lunch. The best greens to braise have a little structure, such as chard, kale, cabbage, or escarole. Spinach is absolutely delicious, too, of course, but it will wilt down to almost nothing, so be sure to use enough to make it worth your while, or mix it in with something else. Very broadly speaking, 1 bunch spinach will serve 2 people.
• Wash the greens: Cut the greens off any sturdy stems. Immerse the greens in a large bowl of water and swish them around. Keep them in the bowl until you start cooking. If you’re working with chard, chop the stems into small pieces and include them with the leaves.
• In a large skillet with a cover, over medium heat, heat 1 tablespoon of olive oil per bunch of greens. Slip a sliced garlic clove and a pinch of red pepper flakes (preferably a medium-hot Mediterranean chile, such as Aleppo or Marash). Stir, then pull the leaves up out of their washing water and place them in the skillet. Cover and cook until the leaves have wilted a bit and are easy to stir with tongs. Season them with salt and stir well. Cook until tender; spinach will cook the quickest, then chard, kale, escarole, and cabbage. Remove the greens and season with salt to taste.
• For extra flavor, stir in any of the following: lemon juice; fresh herbs, such as dill, cilantro, mint, and/or basil; toasted nuts or seeds; a teaspoon of sesame oil; or the hot sauce of your choice.
HOW TO BLANCH VEGETABLES
Blanching vegetables means cooking them briefly in boiling water; it’s a great way to have some nonraw vegetables around for snacking or tossing in a grain salad. When I’m doing a cleanse, it’s a great way to prepare for both lunch salads and snacks, when I might want a little textural variation from raw veggies alone.
• Set a big pot of salted water over medium-high heat and trim and cut the vegetables to the desired size.
• When the water comes to a boil, add the vegetables in separate batches. Leafy greens take 15 seconds to 2 minutes, depending on their heartiness. Green beans and asparagus take 1 or 2 minutes to get to a crisp-tender state. Root vegetables and crucifers like broccoli and cauliflower take longer, though if you want them to finish quickly, simply cut them in smaller pieces.
• Use a slotted spoon or spider to fish your blanched veggies out of the water. If you’re trying to maximize crispness, you can remove them from a pot to a bowlful of ice water. Once they’re cool, drain, then lay them in a single layer on a baking sheet covered with a towel or paper towel so they dry further.

HOW TO TOAST NUTS AND SEEDS
Nuts and seeds taste better when they’re toasted, and since they’re a big part of the cleanse, it’s a worthy step. One good thing is that you can store cooled, toasted nuts and seeds in an airtight container for 3 to 5 days before using, so they’re ready to go when a recipe calls.
Small nuts and seeds, such as slivered almonds, pine nuts, amaranth, flaxseeds, pumpkin seeds, sesame seeds, sunflower seeds, chia seeds, and whole spices, are best toasted in a pan (you can use the same method for unsweetened coconut flakes, as well). Place the nuts or seeds in a dry skillet over medium heat (only one kind at a time! Nuts and seeds toast at different rates). Stir the nuts or seeds as they cook. Some seeds, such as amaranth, pumpkin seeds, and flaxseeds, will helpfully let you know when they’re done by popping and snapping vigorously. Others, particularly higher-oil ones, such as pine nuts, hempseeds, and sesame, will not give such audible cues; just look for a slight golden shift in color, and don’t step away until they’re done: these are the easiest to burn. Place the toasted seeds on a cool plate to cool; otherwise, they may overcook from the residual heat in the pan.
Larger nuts, such as pecans, hazelnuts, pistachios, walnuts, cashews, and almonds, do best toasting in the oven. Preheat the oven to 300˚F and have a rimmed baking sheet ready for each variety you’re toasting. Spread the nuts in an uncrowded layer on the baking sheet and toast them in the oven until they’re fragrant and slightly golden at their centers; from 6 minutes to 15 minutes depending on the nut. Pecans and pistachios are the quickest; other nuts can take considerably longer.
HOW TO REST MEATS
Letting meat rest for a while before carving or serving allows juices to be more thoroughly reabsorbed by the meat. Slice too early, and a lot of the moisture in your lamb or your chicken will end up on the cutting board, but if you wait a bit, say 10 minutes, you’ll find that most of the juices will stay where you want them. It’s also a good idea to rest your meat because when you remove meat from the oven the temperature will continue to rise for a bit before cooling off. Throughout the book we give you a few target temperatures for roasting meats and poultry to doneness. Those are final temperatures. So if you want your lamb or your flank steak medium-rare, remove it from the oven around 125˚F to 128˚F for a final resting temperature closer to medium-rare’s 130˚F (see here). Also remember that this effect is more significant in larger cuts of meat; a chicken cutlet will not increase in heat as much as a big roast beef.
HOW TO SUPREME CITRUS FRUIT
Here’s how to make neat, membraneless segments, or supremes, of lemons, oranges, or grapefruit:
• Cut a ½-inch slice off the top and bottom of one fruit and place it with the flat side down. Using a sharp knife in a curving downward motion, slice off a band of the skin, pith, and a thin layer of flesh from the fruit. Rotate and repeat until the fruit is completely skinned. Holding the fruit in hand, cut a V shape parallel to the membranes of each section to release the crescent of citrus flesh. Repeat with the remaining sections of the fruit.
• If you need juice from the fruit, once you’ve cut all the sections, squeeze the membrane to extract the juice.

HOW TO COOK WHOLE GRAINS AND OTHER SIDES
Healthier eating can come with small switches: even if you’re not doing the whole cleanse, try switching whole grains for white pasta or rice a couple days a week. Cracked bulgur, millet, and quinoa are the fastest to cook, in about 15 minutes, with no previous soaking. They’re the speed grains, and good to keep in mind if you’re pressed for time.
Most often, I recommend cooking whole grains like pasta in a large quantity of salted water, just like pasta. I bring the water to a rolling boil, add the grains, and then reduce the heat so they cook at a steady simmer. Simply drain the grains before including them in a pilaf or salad. I use this method for farro, barley, millet, and quinoa.
The exceptions to the pasta-style rule are cracked grains, such as bulgur and cracked freekeh, and whole-grain rices, which I cook like, well, rice. It seems to keep them fluffier than the other style. Place these in a pot with the correct amount of water and a pinch of salt. Bring to a boil, then reduce the heat and cover. Simmer until the water is fully absorbed and the grains are fluffy (see the approximate cooking times in the chart). Stir, then turn off the heat, cover the pan again, and let steam for 5 minutes. They may still need a little draining at this point.
SOAKING
You can soak long-cooking grains before cooking to cut back significantly on the cooking time. I recommend doing this especially with farro, unhulled barley, wheat berries, whole freekeh, and rye berries. When you’re ready to cook, drain and use fresh water to cook the grains with the pasta method.
COOKING AHEAD
Whole grains generally store really well; in fact, you may find they hydrate more fully if you cook them and then store them at least overnight in an airtight container in the refrigerator. Once you’ve cooked them, toss them with a small bit of olive or neutral oil and spread them out on a sheet pan to cool until room temperature, then place them in an airtight container and chill until ready to use. It’s best to use refrigerated grains within 5 days of cooking.
If you need to make the grains further ahead, cool them fully and then freeze them in an airtight container. To thaw, place the quantity you need to cook in a strainer and run cool water over the grains, breaking up chunks with your hands.
Reheating: I usually reheat refrigerated or thawed grains in a small saucepan over medium heat with ¼ cup water or stock. You can also place them in a microwave-safe container, sprinkle with a couple of tablespoons of liquid, cover, and microwave until warm.
COOKING WHOLE GRAINS AND OTHER SIDES
