This section will use AWS to train a deep learning model from Chapter 9, Anomaly Detection and Recommendation Systems. This will include setting up the machine, accessing the machine, downloading the data, and running the model. We are going to use a pre-built AWS AMI from RStudio that has TensorFlow and Keras already installed. For details on this AMI, go to this link: https://aws.amazon.com/marketplace/pp/B0785SXYB2. You will need to sign up for an AWS account if you do not already have one at https://portal.aws.amazon.com/billing/signup. Once you have signed up, follow these steps to create a virtual machine that has a GPU on AWS:
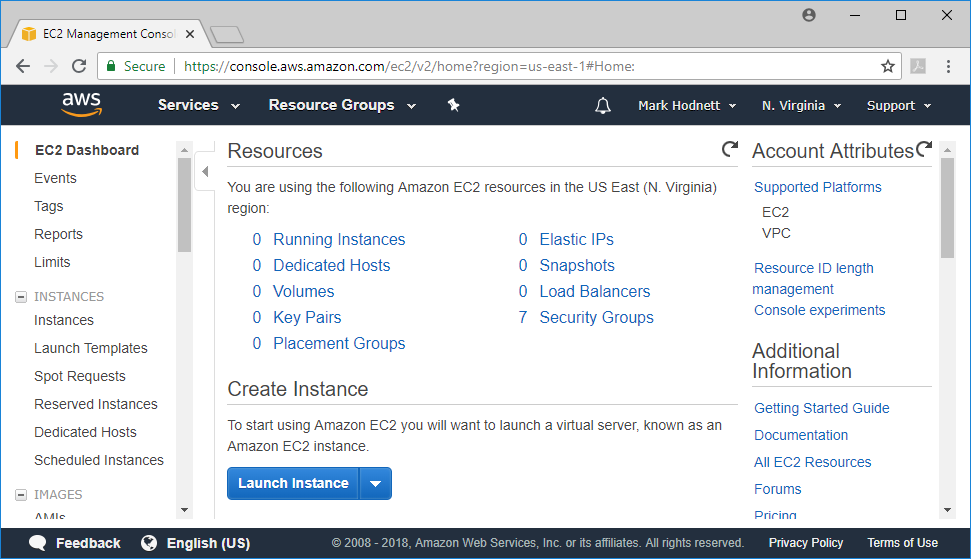
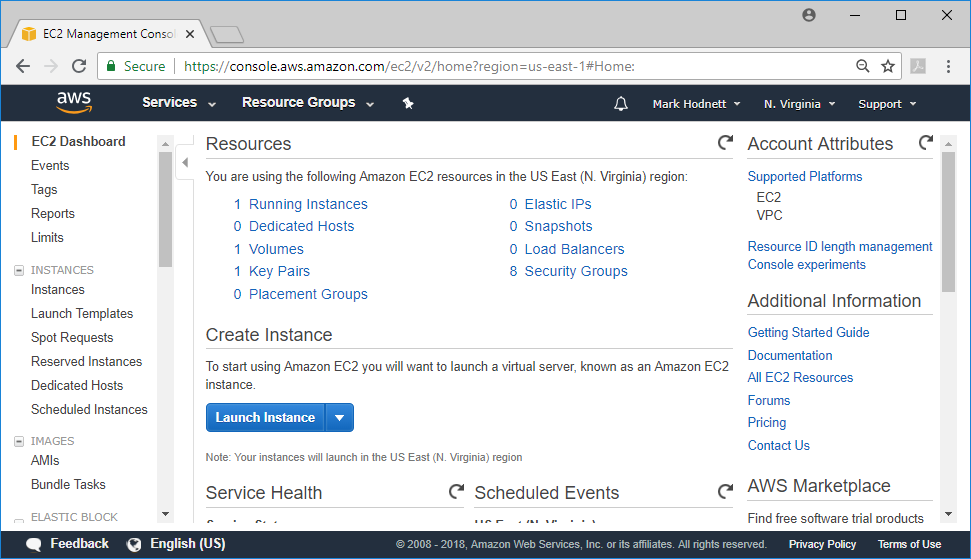
- Log in to the AWS console and select EC2. You should see a screen similar to the following. This is the web interface for creating new virtual machines:
- Click on the launch instance button and the following page will load.
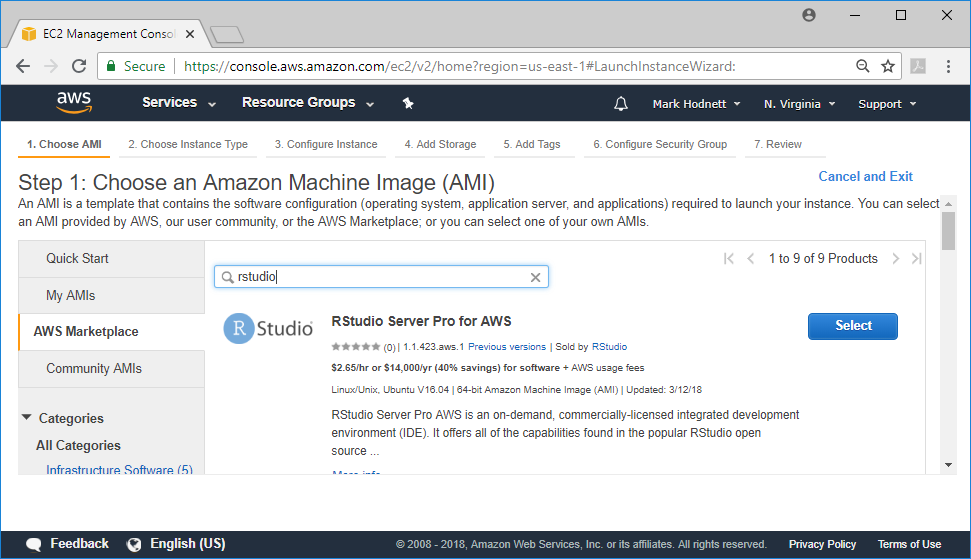
- Click AWS Marketplace on the left and in the search box type rstudio (see the following screenshot).
- Select RStudio Server with Tensorflow-GPU for AWS. Be aware that there is another option with the word Pro – this is a paid subscription with additional costs, so do not select this AMI:
- Once you click Select, the following screen may appear with some additional information on accessing the instance. Read the instructions carefully, as they may have changed from what's shown in the screenshot that follows:

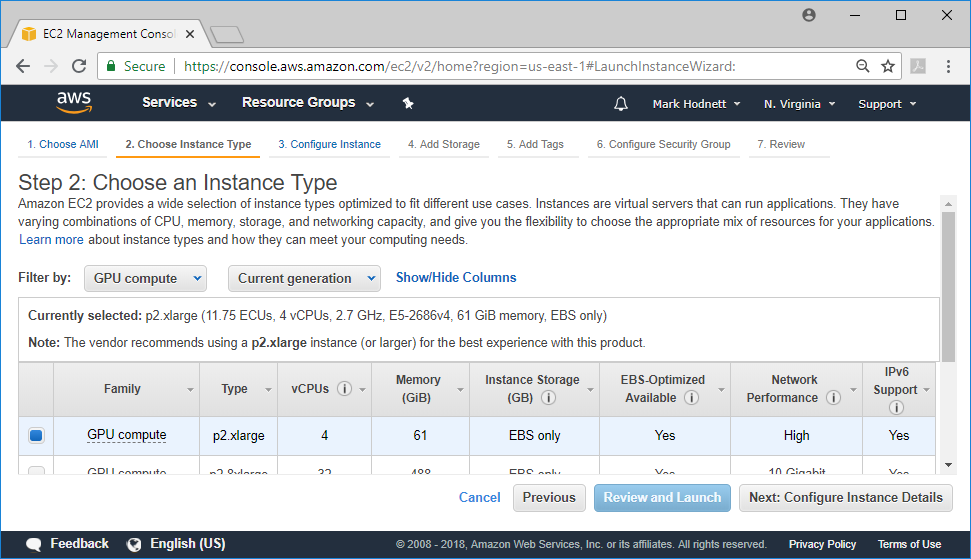
- When you click Continue, the following screen will appear for the machine type. It is vital to select a machine that has a GPU, so from the Filter by: option, select GPU compute and then select p2.xlarge from the list. Your options should look similar to the following screenshot:
- When you click Next, you will get to the following screen with various configuration options. The default options are OK, so just press Next again:

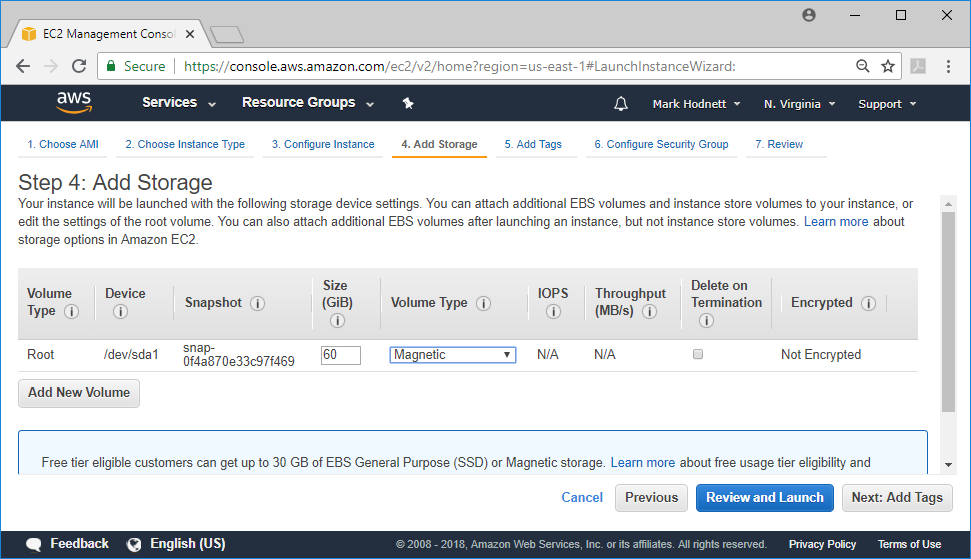
- This screen allows you to change the storage options. You may need to add additional storage depending on the size of the data. Storage is relatively cheap, so I recommend going with 3x-5x the size of the input data.
- Click Next to go to the following screenshot:
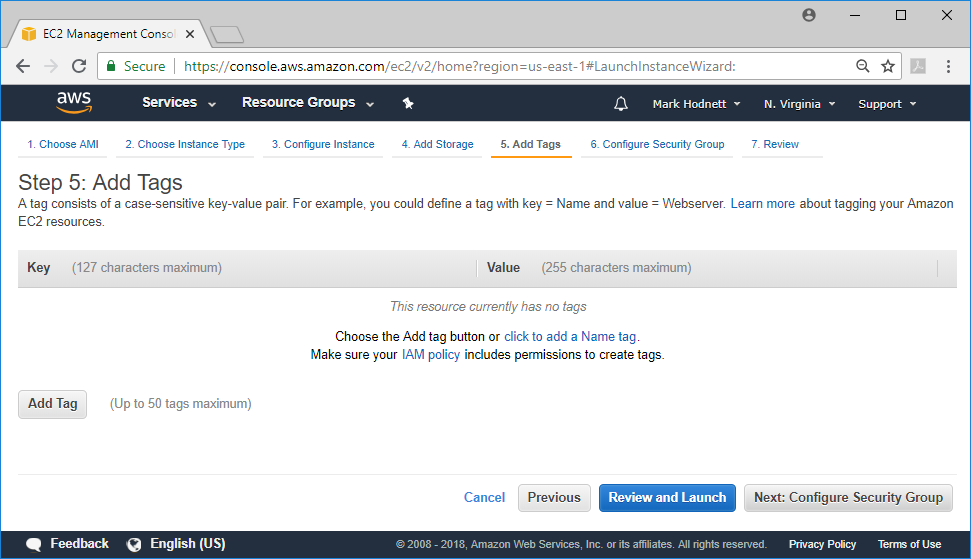
- The following screen is not important – tags are used to keep track of resources in AWS, but we do not need them. Click Next to go to the following screenshot:
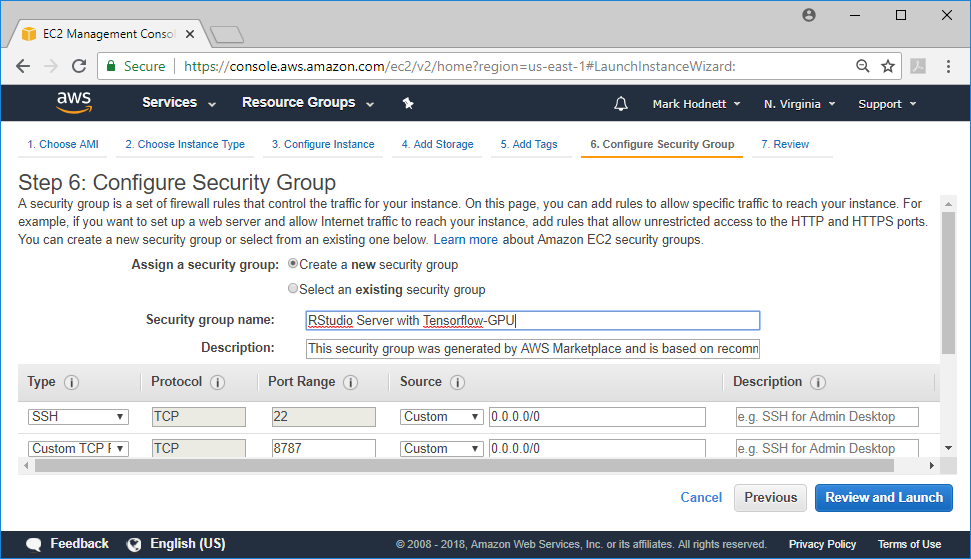
- The following screenshot shows security options. AWS restricts access to instances, so you must open any needed ports. The defaults provided here allow access to port 22 (SSH) to access the shell and also for port 8787, which is the web port that RStudio uses. Click Review and Launch to continue:
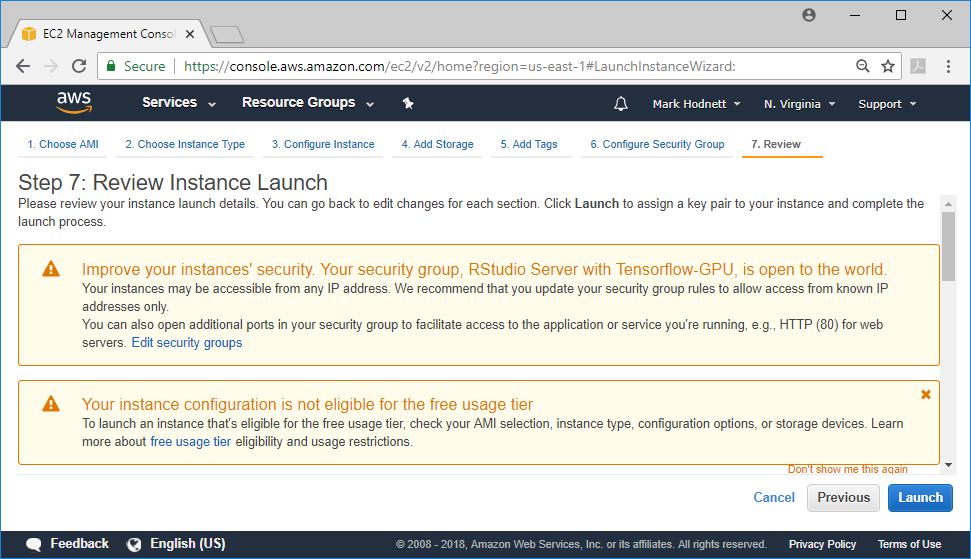
The following screenshot will appear. Note the warning messages regarding security – in a production environment, you would probably want to address these.
- Click the Launch button to continue:
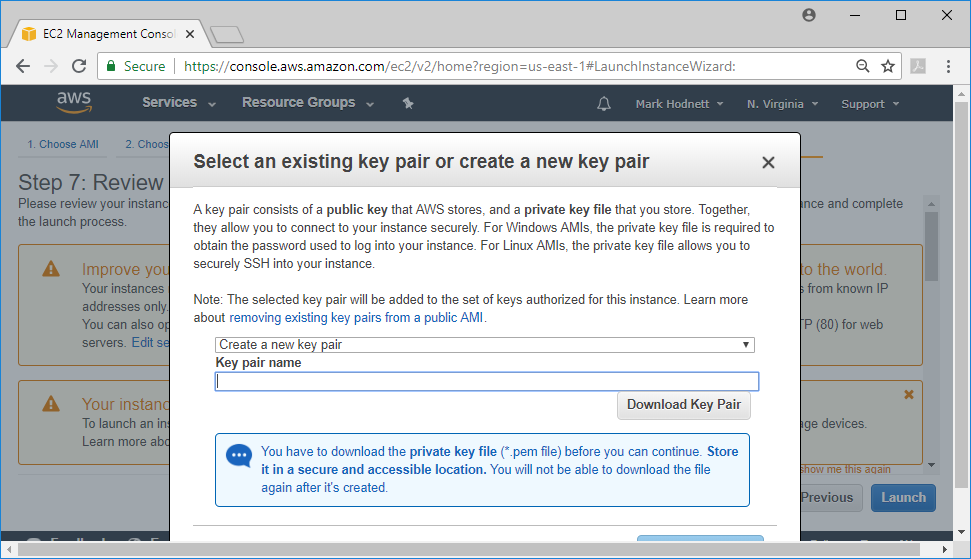
- You will be asked for a key pair. If you have not already created a key pair, then select the option to do so. Give it a descriptive name and press the Download Key Pair button. Then, click on Launch Instances:
- Once you have completed this, you can go back to the EC2 dashboard and you will see that you have 1 Running Instances. Click on that link to move on to the details of the instance:
- Here, you will see the details of the instance. In this case, the IP address is 34.227.109.123. Also note down the instance ID that is highlighted, as this is the password that is used to connect to the RStudio instance:
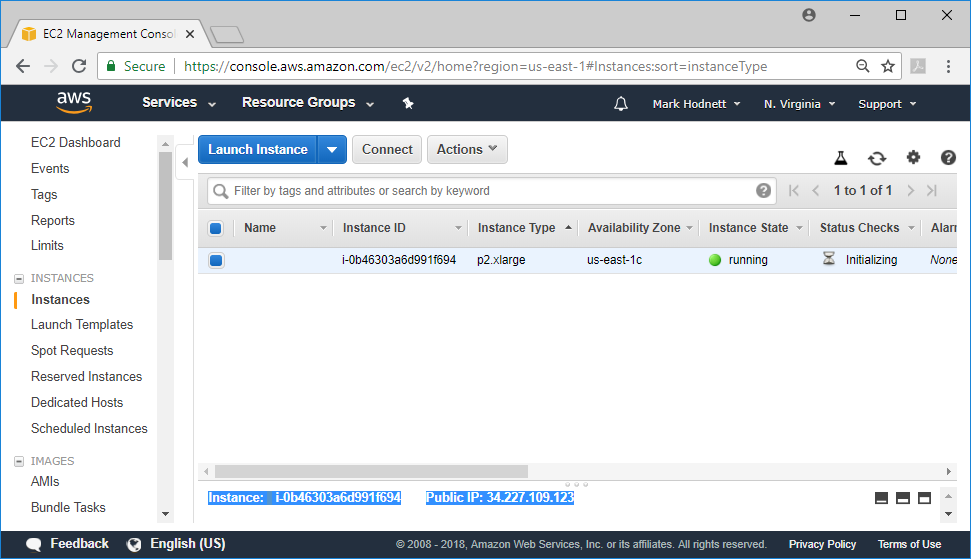
- Open another web page and browse to the IP address of your machine and add :8787 to access the link. In my example, the link is http://34.227.109.123:8787/. Instructions for logging in are in Figure 10.6, that is, use rstudio-user as the username and the instance ID as the password. You should also consider changing the password as per the instructions.
- When you log in, you will see a familiar interface – it is similar to the RStudio desktop program. One difference you have is the Upload button on the bottom-right pane, which allows you to upload files. In the following example, I have uploaded the data and the script from Chapter 9, Anomaly Detection and Recommendation Systems, for the Keras recommender example and ran it successfully:
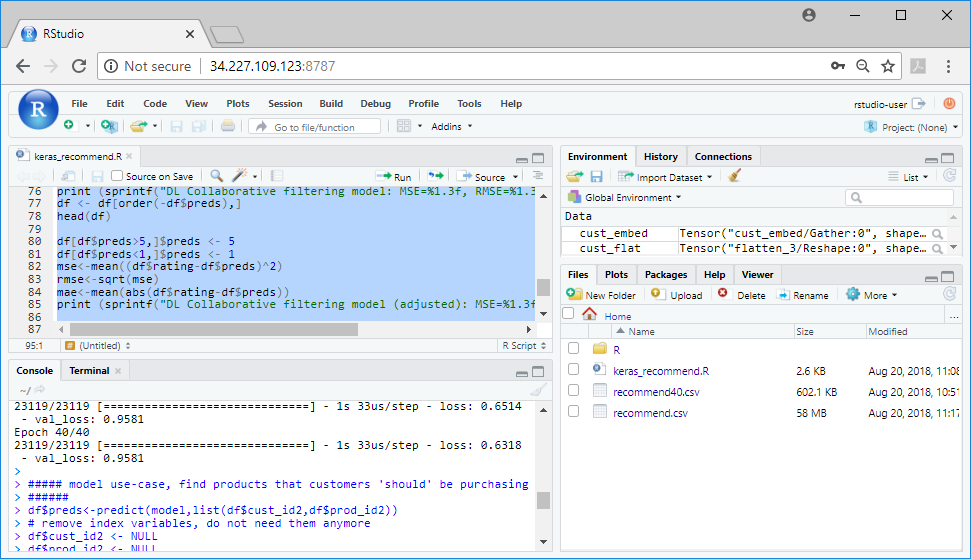
The web interface in RStudio is similar to using RStudio on your local computer. In Figure 10.16, you can see data files that I have uploaded (recomend.csv, recomend40.csv) and the R script in the Files in the bottom-left window. We can also see the code that was executed in the Console window in the bottom-left.
This finishes our example on how to set up a deep learning machine in AWS. Again, remember that you will be billed for as long as the computer is running. Ensure that your instances are terminated, otherwise you will continue to be charged. To do so, go back to the EC2 dashboard, find the instance, and click on the Actions button. A pop-up menu will appear, where you can select Instance State and then select Terminate:
