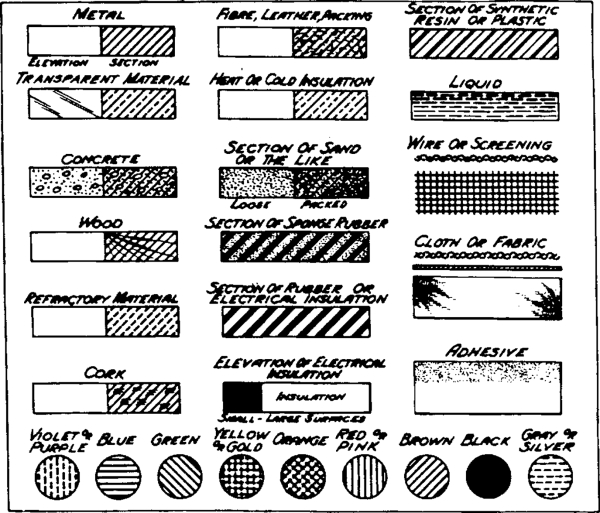
The first rule in patent application drawings is not a rule which comes from the USPTO or the courts, but it is a very good rule regardless: Hire a professional patent draftsman. There are many rules and requirements regarding line thickness, margins, paper quality, shading, what should be shown, what shouldn’t be shown, and so forth (found in the Manual of Patent Examining Procedure [MPEP] § 608.02), and a professional draftsman is set up in ways which the typical inventor or practitioner simply isn’t. Just as an example of the various considerations which must go into patent drawings, the following two pages are from MPEP §608.02 regarding shading and proper types of dashed lines to be used (there are three different types of dashed lines):
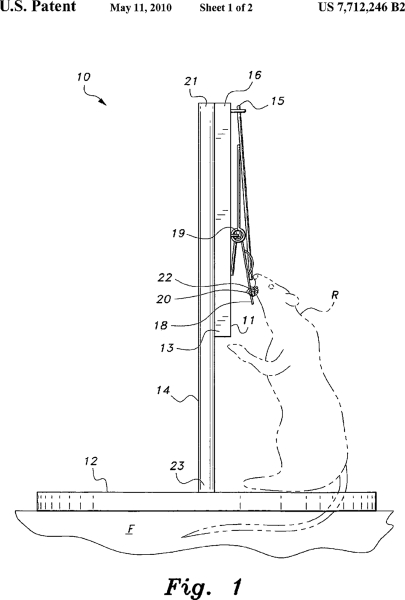
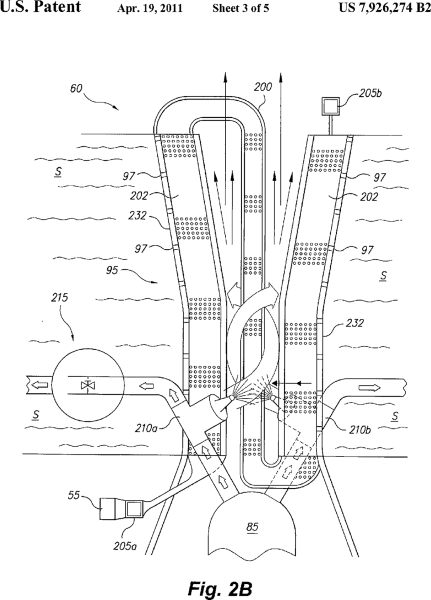
The second rule of patent application drawings, and this is the important one, is that if you claim it, you have to show it. Patent application drawings are used in interpreting the claims. For an apparatus or system, every element or limitation that can be shown in drawing form must be shown in the drawings, with an element number (if appropriate). This applies to the elements and limitations of both independent and dependent claims.
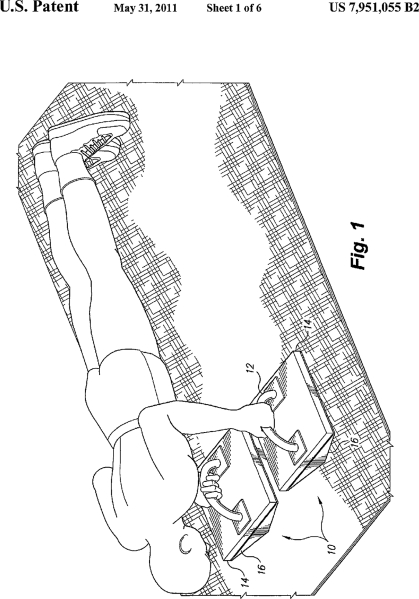
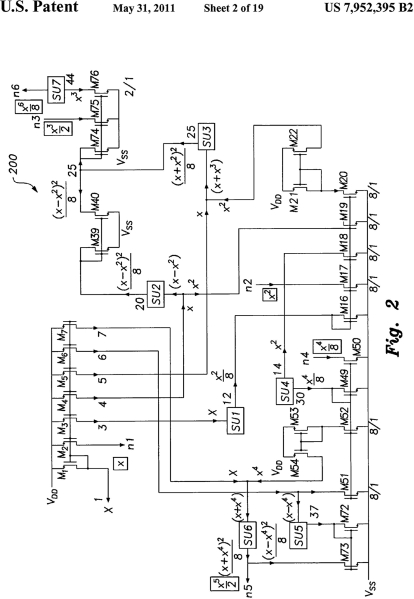
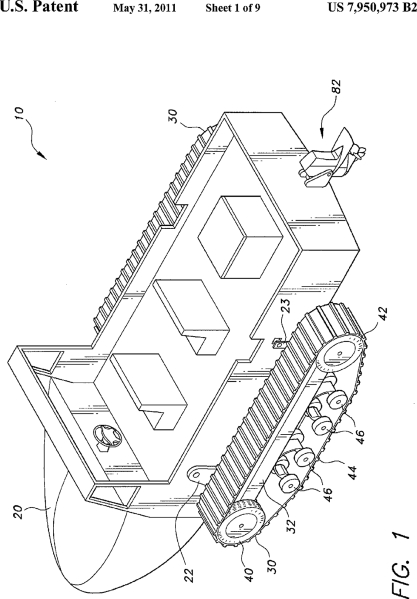
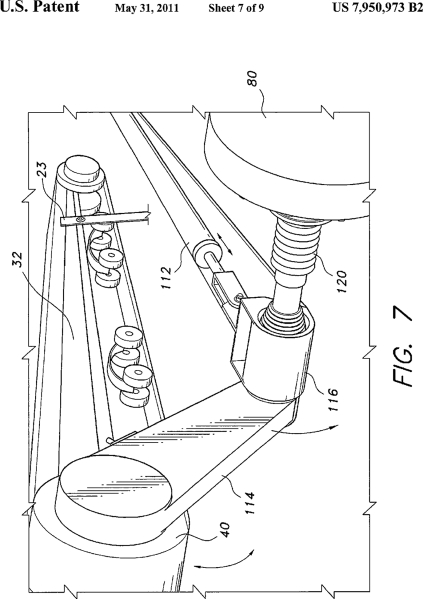
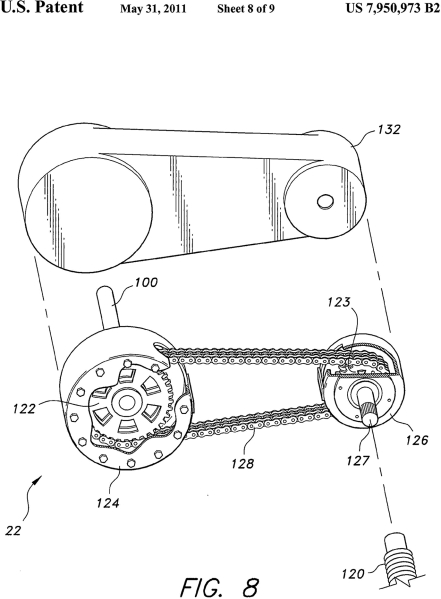
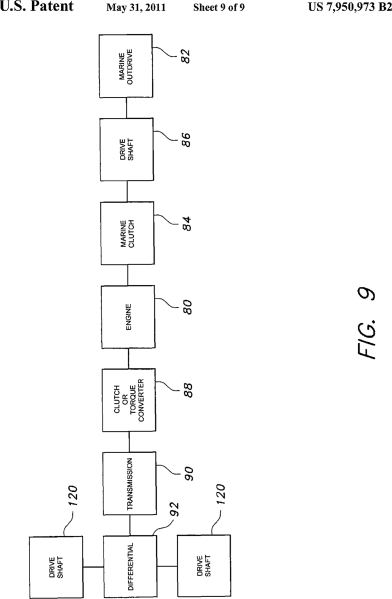
There is no simple or generalized rule as to what patent application drawings should look like, since they vary from application to application. They are dependent upon the nature of the invention and what you choose to claim. The following examples are intended to show the great variety in patent application drawings:
(1) at least one process claim including the term “process” or “method” in its introductory phrase;
(2) at least one composition claim including the term “composition,” “compound,” “mixture,” or “pharmaceutical” in its introductory phrase;
(3) at least one claim directed to a coated article or product or to an article or product made from a particular material or composition (i.e., an article of known and conventional character (e.g., a table), coated with or made of a particular composition (e.g., a specified polymer such as polyvinyl-chloride));
(4) at least one claim directed to a laminated article or product (i.e., a laminated article of known and conventional character (e.g., a table)); or
(5) at least one claim directed to an article, apparatus, or system where the sole distinguishing feature is the presence of a particular material (e.g., a hydraulic system using a particular hydraulic fluid, or a conventional packaged suture using a particular material).
For a more complete explanation about when a drawing is required, see MPEP §601.01(f).
The patent or application file contains at least one drawing executed in color. Copies of this patent or patent application publication with color drawing(s) will be provided by the Office upon request and payment of the necessary fee.
(b) Photographs.
(1) Black and white. Photographs, including photocopies of photographs, are not ordinarily permitted in utility and design patent applications. The Office will accept photographs in utility and design patent applications, however, if photographs are the only practicable medium for illustrating the claimed invention. For example, photographs or photomicrographs of: electrophoresis gels, blots (e.g., immunological, western, Southern, and northern), auto-radiographs, cell cultures (stained and unstained), histological tissue cross sections (stained and unstained), animals, plants, in vivo imaging, thin layer chromatography plates, crystalline structures, and, in a design patent application, ornamental effects, are acceptable. If the subject matter of the application admits of illustration by a drawing, the examiner may require a drawing in place of the photograph. The photographs must be of sufficient quality so that all details in the photographs are reproducible in the printed patent.
(2) Color photographs. Color photographs will be accepted in utility and design patent applications if the conditions for accepting color drawings and black and white photographs have been satisfied. See paragraphs (a)(2) and (b)(1) of this section.
(c) Identification of drawings. Identifying indicia should be provided, and if provided, should include the title of the invention, inventor’s name, and application number, or docket number (if any) if an application number has not been assigned to the application. If this information is provided, it must be placed on the front of each sheet within the top margin. Each drawing sheet submitted after the filing date of an application must be identified as either “Replacement Sheet” or “New Sheet” pursuant to § 1.121(d). If a marked-up copy of any amended drawing figure including annotations indicating the changes made is filed, such marked-up copy must be clearly labeled as “Annotated Sheet” pursuant to § 1.121(d)(1).
(d) Graphic forms in drawings. Chemical or mathematical formulae, tables, and waveforms may be submitted as drawings and are subject to the same requirements as drawings. Each chemical or mathematical formula must be labeled as a separate figure, using brackets when necessary, to show that information is properly integrated. Each group of waveforms must be presented as a single figure, using a common vertical axis with time extending along the horizontal axis. Each individual waveform discussed in the specification must be identified with a separate letter designation adjacent to the vertical axis.
(e) Type of paper. Drawings submitted to the Office must be made on paper which is flexible, strong, white, smooth, non-shiny, and durable. All sheets must be reasonably free from cracks, creases, and folds. Only one side of the sheet may be used for the drawing. Each sheet must be reasonably free from erasures and must be free from alterations, overwritings, and interlineations. Photographs must be developed on paper meeting the sheet-size requirements of paragraph (f) of this section and the margin requirements of paragraph (g) of this section. See paragraph (b) of this section for other requirements for photographs.
(f) Size of paper. All drawing sheets in an application must be the same size. One of the shorter sides of the sheet is regarded as its top. The size of the sheets on which drawings are made must be:
(1) 21.0 cm. by 29.7 cm. (DIN size A4), or
(2) 21.6 cm. by 27.9 cm. (8 ½ by 11 inches).
(g) Margins. The sheets must not contain frames around the sight (i.e., the usable surface), but should have scan target points (i.e., cross-hairs) printed on two cater-corner margin corners. Each sheet must include a top margin of at least 2.5 cm. (1 inch), a left side margin of at least 2.5 cm. (1 inch), a right side margin of at least 1.5 cm. (5/8 inch), and a bottom margin of at least 1.0 cm. (3/8 inch), thereby leaving a sight no greater than 17.0 cm. by 26.2 cm. on 21.0 cm. by 29.7 cm. (DIN size A4) drawing sheets, and a sight no greater than 17.6 cm. by 24.4 cm. (6 15/16 by 9 5/8 inches) on 21.6 cm. by 27.9 cm. (8 ½ by 11 inch) drawing sheets.
(h) Views. The drawing must contain as many views as necessary to show the invention. The views may be plan, elevation, section, or perspective views. Detail views of portions of elements, on a larger scale if necessary, may also be used. All views of the drawing must be grouped together and arranged on the sheet(s) without wasting space, preferably in an upright position, clearly separated from one another, and must not be included in the sheets containing the specifications, claims, or abstract. Views must not be connected by projection lines and must not contain center lines. Waveforms of electrical signals may be connected by dashed lines to show the relative timing of the waveforms.
(1) Exploded views. Exploded views, with the separated parts embraced by a bracket, to show the relationship or order of assembly of various parts are permissible. When an exploded view is shown in a figure which is on the same sheet as another figure, the exploded view should be placed in brackets.
(2)
Partial views. When necessary, a view of a large machine or device in its entirety may be broken into partial views on a single sheet, or extended over several sheets if there is no loss in facility of understanding the view. Partial views drawn on separate sheets must always be capable of being linked edge to edge so that no partial view contains parts of another partial view. A smaller scale view should be included showing the whole formed by the partial views and indicating the positions of the parts shown. When a portion of a view is enlarged for magnification purposes, the view and the enlarged view must each be labeled as separate views.
(i) Where views on two or more sheets form, in effect, a single complete view, the views on the several sheets must be so arranged that the complete figure can be assembled without concealing any part of any of the views appearing on the various sheets.
(ii) A very long view may be divided into several parts placed one above the other on a single sheet. However, the relationship between the different parts must be clear and unambiguous.
(3) Sectional views. The plane upon which a sectional view is taken should be indicated on the view from which the section is cut by a broken line. The ends of the broken line should be designated by Arabic or Roman numerals corresponding to the view number of the sectional view, and should have arrows to indicate the direction of sight. Hatching must be used to indicate section portions of an object, and must be made by regularly spaced oblique parallel lines spaced sufficiently apart to enable the lines to be distinguished without difficulty. Hatching should not impede the clear reading of the reference characters and lead lines. If it is not possible to place reference characters outside the hatched area, the hatching may be broken off wherever reference characters are inserted. Hatching must be at a substantial angle to the surrounding axes or principal lines, preferably 45°. A cross section must be set out and drawn to show all of the materials as they are shown in the view from which the cross section was taken. The parts in cross section must show proper material(s) by hatching with regularly spaced parallel oblique strokes, the space between strokes being chosen on the basis of the total area to be hatched. The various parts of a cross section of the same item should be hatched in the same manner and should accurately and graphically indicate the nature of the material(s) that is illustrated in cross section. The hatching of juxtaposed different elements must be angled in a different way. In the case of large areas, hatching may be confined to an edging drawn around the entire inside of the outline of the area to be hatched. Different types of hatching should have different conventional meanings as regards the nature of a material seen in cross section.
(4) Alternate position. A moved position may be shown by a broken line superimposed upon a suitable view if this can be done without crowding; otherwise, a separate view must be used for this purpose.
(5) Modified forms. Modified forms of construction must be shown in separate views.
(i) Arrangement of views. One view must not be placed upon another or within the outline of another. All views on the same sheet should stand in the same direction and, if possible, stand so that they can be read with the sheet held in an upright position. If views wider than the width of the sheet are necessary for the clearest illustration of the invention, the sheet may be turned on its side so that the top of the sheet, with the appropriate top margin to be used as the heading space, is on the right-hand side. Words must appear in a horizontal, left-to-right fashion when the page is either upright or turned so that the top becomes the right side, except for graphs utilizing standard scientific convention to denote the axis of abscissas (of X) and the axis of ordinates (of Y).
(j) Front page view. The drawing must contain as many views as necessary to show the invention. One of the views should be suitable for inclusion on the front page of the patent application publication and patent as the illustration of the invention. Views must not be connected by projection lines and must not contain center lines. Applicant may suggest a single view (by figure number) for inclusion on the front page of the patent application publication and patent.
(k) Scale. The scale to which a drawing is made must be large enough to show the mechanism without crowding when the drawing is reduced in size to two-thirds in reproduction. Indications such as “actual size” or “scale ½” on the drawings are not permitted since these lose their meaning with reproduction in a different format.
(l) Character of lines, numbers, and letters. All drawings must be made by a process which will give them satisfactory reproduction characteristics. Every line, number, and letter must be durable, clean, black (except for color drawings), sufficiently dense and dark, and uniformly thick and well-defined. The weight of all lines and letters must be heavy enough to permit adequate reproduction. This requirement applies to all lines however fine, to shading, and to lines representing cut surfaces in sectional views. Lines and strokes of different thicknesses may be used in the same drawing where different thicknesses have a different meaning.
(m) Shading. The use of shading in views is encouraged if it aids in understanding the invention and if it does not reduce legibility. Shading is used to indicate the surface or shape of spherical, cylindrical, and conical elements of an object. Flat parts may also be lightly shaded. Such shading is preferred in the case of parts shown in perspective, but not for cross sections. See paragraph (h)(3) of this section. Spaced lines for shading are preferred. These lines must be thin, as few in number as practicable, and they must contrast with the rest of the drawings. As a substitute for shading, heavy lines on the shade side of objects can be used except where they superimpose on each other or obscure reference characters. Light should come from the upper left corner at an angle of 45°. Surface delineations should preferably be shown by proper shading. Solid black shading areas are not permitted, except when used to represent bar graphs or color.
(n) Symbols. Graphical drawing symbols may be used for conventional elements when appropriate. The elements for which such symbols and labeled representations are used must be adequately identified in the specification. Known devices should be illustrated by symbols which have a universally recognized conventional meaning and are generally accepted in the art. Other symbols which are not universally recognized may be used, subject to approval by the Office, if they are not likely to be confused with existing conventional symbols, and if they are readily identifiable.
(o) Legends. Suitable descriptive legends may be used subject to approval by the Office, or may be required by the examiner where necessary for understanding of the drawing. They should contain as few words as possible.
(p) Numbers, letters, and reference characters.
(1) Reference characters (numerals are preferred), sheet numbers, and view numbers must be plain and legible, and must not be used in association with brackets or inverted commas, or enclosed within outlines, e.g., encircled. They must be oriented in the same direction as the view so as to avoid having to rotate the sheet. Reference characters should be arranged to follow the profile of the object depicted.
(2) The English alphabet must be used for letters, except where another alphabet is customarily used, such as the Greek alphabet to indicate angles, wavelengths, and mathematical formulas.
(3) Numbers, letters, and reference characters must measure at least.32 cm. (1/8 inch) in height. They should not be placed in the drawing so as to interfere with its comprehension. Therefore, they should not cross or mingle with the lines. They should not be placed upon hatched or shaded surfaces. When necessary, such as indicating a surface or cross section, a reference character may be underlined and a blank space may be left in the hatching or shading where the character occurs so that it appears distinct.
(4) The same part of an invention appearing in more than one view of the drawing must always be designated by the same reference character, and the same reference character must never be used to designate different parts.
(5) Reference characters not mentioned in the description shall not appear in the drawings. Reference characters mentioned in the description must appear in the drawings.
(q) Lead lines. Lead lines are those lines between the reference characters and the details referred to. Such lines may be straight or curved and should be as short as possible. They must originate in the immediate proximity of the reference character and extend to the feature indicated. Lead lines must not cross each other. Lead lines are required for each reference character except for those which indicate the surface or cross section on which they are placed. Such a reference character must be underlined to make it clear that a lead line has not been left out by mistake. Lead lines must be executed in the same way as lines in the drawing. See paragraph (l) of this section.
(r) Arrows. Arrows may be used at the ends of lines, provided that their meaning is clear, as follows:
(1) On a lead line, a freestanding arrow to indicate the entire section towards which it points;
(2) On a lead line, an arrow touching a line to indicate the surface shown by the line looking along the direction of the arrow; or
(3) To show the direction of movement.
(s) Copyright or Mask Work Notice. A copyright or mask work notice may appear in the drawing, but must be placed within the sight of the drawing immediately below the figure representing the copyright or mask work material and be limited to letters having a print size of 32 cm. to 64 cm. (1/8 to 1/4 inches) high. The content of the notice must be limited to only those elements provided for by law. For example, “©1983 John Doe” (
17 U.S.C. 401) and “*M* John Doe” (
17 U.S.C. 909) would be properly limited and, under current statutes, legally sufficient notices of copyright and mask work, respectively. Inclusion of a copyright or mask work notice will be permitted only if the authorization language set forth in § 1.71(e) is included at the beginning (preferably as the first paragraph) of the specification.
(t) Numbering of sheets of drawings. The sheets of drawings should be numbered in consecutive Arabic numerals, starting with 1, within the sight as defined in paragraph (g) of this section. These numbers, if present, must be placed in the middle of the top of the sheet, but not in the margin. The numbers can be placed on the right-hand side if the drawing extends too close to the middle of the top edge of the usable surface. The drawing sheet numbering must be clear and larger than the numbers used as reference characters to avoid confusion. The number of each sheet should be shown by two Arabic numerals placed on either side of an oblique line, with the first being the sheet number and the second being the total number of sheets of drawings, with no other marking.
(u) Numbering of views.
(1) The different views must be numbered in consecutive Arabic numerals, starting with 1, independent of the numbering of the sheets and, if possible, in the order in which they appear on the drawing sheet(s). Partial views intended to form one complete view, on one or several sheets, must be identified by the same number followed by a capital letter. View numbers must be preceded by the abbreviation “FIG.” Where only a single view is used in an application to illustrate the claimed invention, it must not be numbered and the abbreviation “FIG.” must not appear.
(2) Numbers and letters identifying the views must be simple and clear and must not be used in association with brackets, circles, or inverted commas. The view numbers must be larger than the numbers used for reference characters.
(v) Security markings. Authorized security markings may be placed on the drawings provided they are outside the sight, preferably centered in the top margin.
(w) Corrections. Any corrections on drawings submitted to the Office must be durable and permanent.
(x) Holes. No holes should be made by applicant in the drawing sheets.
(y) Types of drawings. See § 1.152 for design drawings, § 1.165 for plant drawings, and § 1.173(a)(2) for reissue drawings.
