Week 14
Symbolic Collage on Wood
BY COREY MOORTGAT | from The Art of Personal Imagery
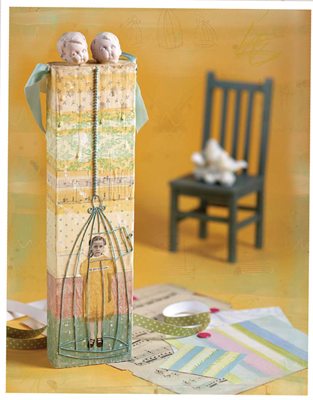
This week's project allows you to use acrylic paint in various ways by adding washes to mute papers, providing detail and changing the hues of elements. While you play with these new paint possibilities, explore the idea of collaging onto three dimensional surfaces.
Materials
 block of wood 2″ × 4″ × 13″ (5cm × 10cm × 33cm)
 strips of different patterned scrapbook papers or vintage wallpapers
 decoupage medium
 paintbrush
 acrylic paint
 scissors
 glue stick
 tissue paper
 collage images and words
 Golden Artist Colors glaze (Yellow Ochre)
 wire cutters
 thin craft wire
 heavy-duty all-purpose cement adhesive
 6″ (15cm) length of ball chain
 beeswax
 2 ceramic doll heads
 hammer
 nails
nails
 14″ (36cm) length of ribbon
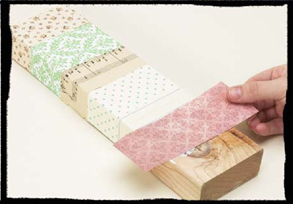
1. Adhere papers to the wood
Cut strips of decorative papers and adhere them to the front, sides, top and bottom of the block using decoupage medium applied directly to the wood.
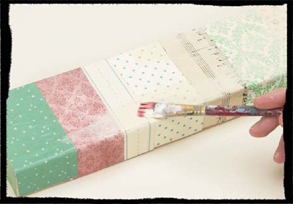
2. Apply paint to mute the colors
Brush a translucent or watered-down off-white acrylic paint over the patterned paper on all six sides. Allow a few minutes of drying time.
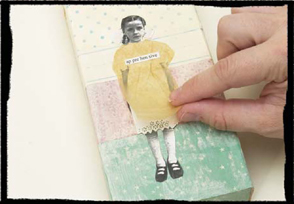
3. Adhere collage elements
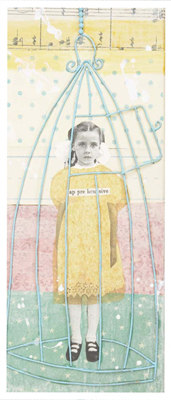
Cut out the collage image of your choice and use a glue stick to position it on the front of the board. Here, I used a photo of a little girl. I then cut out a tissue-paper dress, which I layered on top of her image with a glue stick. I glued the word “apprehensive” on her dress to complete the main subject of my collage.
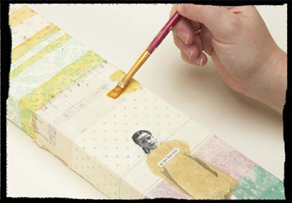
4. Layer the glaze and paint
Paint random stripes with the Yellow Ochre glaze to balance the color of the tissue-paper dress. To finish, splatter white acrylic paint over the surface of the collage.
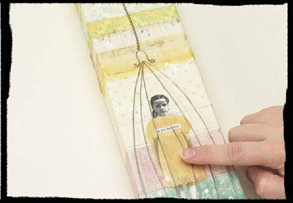
5. Apply the wire and chain
Use a wire cutter to cut pieces of wire and begin to form the shape of a birdcage around the girl. Use a heavy-duty cement to adhere the pieces of metal to the collage surface. Lay a length of ball chain from the top of the cage to the top of the block and cement that into place as well.
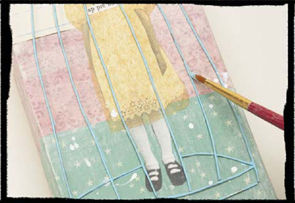
6. Paint the wire
Using a small detail paintbrush and blue acrylic paint, very carefully paint all the metal wires and chains. (Another option would be to buy wire in the color you want so you can skip this step.)
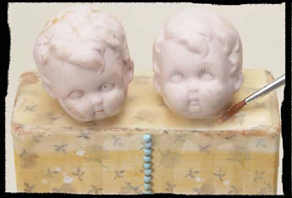
7. Attach the ceramic figures
Stand the block of wood up on its end so the front of the collage is facing you. Melt some beeswax in a pot on the stove, in a mini pot for heating potpourri or in a specially designed melting product. Dip the bottom of each ceramic head into the wax, and adhere them to the top edge of the wood block. Then use a paintbrush to drip melted wax around the heads, letting the excess drip down the front and sides of the collage.
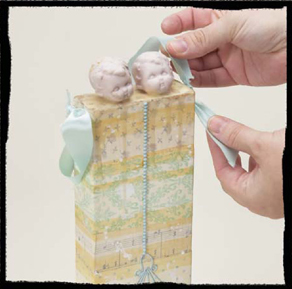
8. Attach a ribbon
Hammer a nail into each side of the board about ¼″ (6mm) from the top. Tie an end of the ribbon onto each nail to create a hanger for the piece.
