Week 16
Digital Painting
BY SUSAN TUTTLE | from Digital Expressions
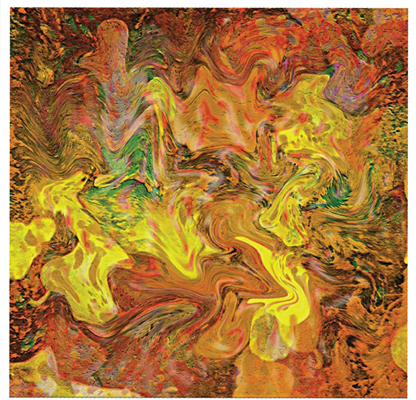
This project may stretch you way out of your comfort zone and right into the digital world. While not technically involving paint, it allows you to create a digital painting that replicates the look of a traditional one. Using Photoshop Elements, you can splat, scrape, add and pull off digital paint to create interesting effects using multiple layers.
Digital Materials
 Two custom Photoshop Elements brushes: paint splatter, splotches or other abstract painted effects
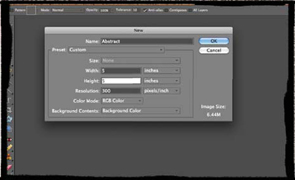
1. Open a new blank document
Set the background color to black. Then open a new blank file. Size it as desired (mine is 5″ × 5″ [13cm × 13cm]) with a resolution of 300. Set the Color Mode to RGB Color and set Background Contents to Background Color. This will be your working file. Change the Background layer to Layer 0.
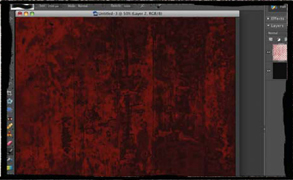
2. Stamp the first custom brush
Load your first custom brush and select it. I loaded a custom brush made to look like peeling paint. Size the brush very large (so it will be near the size of the working file) and select a new foreground color (I chose red) for the brush. Create a new layer and stamp the brush once on the new layer. Resize the layer as needed to fit the working file.
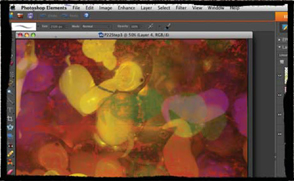
3. Stamp the second brush
Load your second custom brush and select it. I loaded a custom brush made to look like paint splats. Size the brush very large and select a foreground color (I chose green) for the brush. Create a new layer and stamp the brush once on the new layer. Repeat to add additional colors on new layers. Then set the Blending Mode of the stamped layers to Linear Dodge, which increases the brightness and will result in some new, surprising colors.
4. Rotate the canvas and adjust the lighting
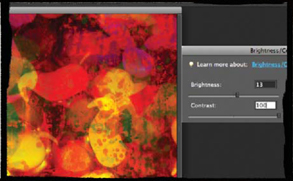
When creating an abstract image like this, it's a good idea to rotate the canvas to vary the look of the stamp work. Then merge the visible layers. Adjust the Brightness/Contrast as desired. I changed the Brightness to +13 and Contrast to +100.
Tip
If you don't have large custom brushes to load for this piece, you can create a similar look using the brushes that are already installed in the Brushes Menu in the Brush Toolbar. Instead of stamping once with a large brush, stamp multiple times to create the look of paint splotches and splatters.
5. Add additional brushwork
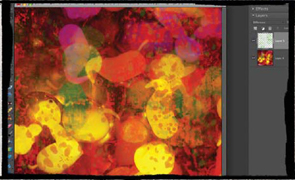
If your piece needs more color or depth, just add some more brushwork! Choose one (or more) brushes and put each set of brushwork on a new layer. Adjust the Blending Mode and Opacity as needed. The colors in my piece weren't sitting right with me, so I added splashes of green with the Flat Bristle 111 pixels brush from the Thick Heavy Brushes drop-down menu. I then set the Opacity of the new layer to 36-percent and the Blending Mode to Difference, which made the green more orange (a nice surprise). I also added purple with the Soft Round 100 pixels brush from the Faux Finish Brushes drop-down menu. I set the Blending Mode to Hard Light and the Opacity to 76-percent.
6. Apply the Craquelure Filter and adjust the sharpness
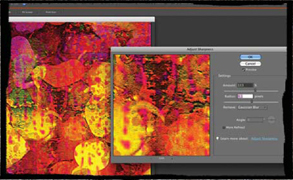
Merge the visible layers. To add texture and realism to the piece, apply a filter. The Craquelure Filter (FILTER>TEXTURE>CRAQUELURE) will make your work appear like you built the paint up in an impasto fashion. I set the levels as follows: Crack Spacing: 77; Crack Depth: 6; Crack Brightness: 10. If the look of the piece is a bit fuzzy, adjust the sharpness.
7. Place the image in a new file and add a drop shadow
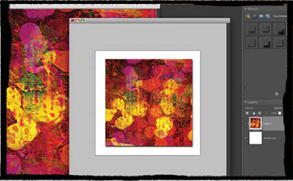
Open a blank file about 1″ (3cm) larger than the working file. Set the Resolution to 300, Color Mode to RGB Color and Background Content to white. Then move the layer in the working file into the blank file. This will be your new working file. Go to the Effects Palette and click on the Layer Styles icon. Choose Drop Shadows as the style and choose the icon for Low. Double-click to apply the shadow. Click on the “fx” icon in the Layers Palette to adjust the shadow's settings. Merge the layers.
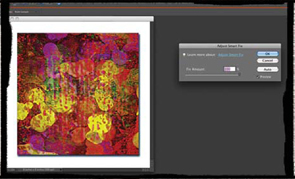
8. Soften and adjust the piece
To soften the piece, select white as the foreground color. Select the Brush Tool and choose the Soft Round 100 pixels brush from the Faux Finish Brushes drop-down menu and set it to an Opacity of 47-percent. Apply the white, semi-transparent paint to random areas of your piece. If you're not quite satisfied with the colors at this point, play with various settings until you are. I felt my colors looked a little too bright, perhaps a bit pseudoneon. To correct this, I went to the Adjust Smart Fix Menu and set the Fix Amount to 100-percent. This step softened the colors a bit and turned the electric pinks into purple hues.
Basic Photoshop Elements Techniques
CONVERTING THE BACKGROUND LAYER
To protect the original image, the Background layer is locked. To alter the layer, you must unlock it by converting it to a regular layer. Double click on the Background layer in the Layers Palette and rename it Layer 0 (the default name).
CREATING A NEW LAYER
Whenever you add an image to your piece (e.g., dragging a new photo into your working file) the program automatically puts it on its own new layer. You can also create a new layer manually by going to Layer>New>Layer which is helpful when you are adding brush strokes.
SELECTING COLORS
To choose a paint color (to apply with tools such as the Brush Tool, Pencil Tool and Paint Bucket Tool), click on the Set Foreground Color box at the bottom of the Tools Palette. A box will open, allowing you to choose from a broad range of hues. To choose a background color, click on the box behind the foreground color box.
MERGING LAYERS
To organize and simplify working files, you can combine multiple layers, making them into one layer. (Just be sure you will not want to manipulate the layers later on.) To do this, select the layers you want to merge in your Layers Palette by holding down the Command key (the Ctrl key on a PC). At the same time, click on the layers you want to merge. They will be highlighted once you click on them. Release the Command key when you have finished selecting the layers. Then, go to Layer>Merge Visible to merge them. Keep in mind that once layers are merged, they cannot be changed (only added to). Flattening an image (Layer>Flatten Image) merges all layers, and also turns transparent areas to white.
ADJUSTING THE BRIGHTNESS /CONTRAST
 Enhance>Adjust Lighting>Brightness/Contrast
 Layer>New Adjustment Layer>Brightness/Contrast
This adjustment allows you to easily manipulate the tonal range of your imagery. If you move the brightness slider to the right, you will increase tonal values and highlights. If you move it to the left, you will decrease values and increase shadows. The contrast slider allows you to increase or decrease the range of tonal values in your imagery.
ADJUSTING THE BLENDING MODE
You can adjust the Blending Mode of a layer by clicking on the layer in your working file or in the Layers Palette. Then make a selection from the Blending Mode drop-down menu located at the top of the Layers Palette.
ADJUSTING THE OPACITY
You can adjust the Opacity levels of a layer by clicking on the layer in the Layers Palette and moving the Opacity slider located at the top of the Layers Palette. You can also adjust the Opacity of various tools in their respective toolbars. Just move the slider to the left to increase transparency.
ADJUSTING COLOR AND SHADOWS WITH ADJUST SMART FIX
Enhance>Adjust Smart Fix
This automatic feature corrects the overall color balance and improves shadow and highlight detail.
USING THE EFFECTS PALETTE
You can access filters in two locations — either by going to the Filter Menu at the top of your screen, or by going to the Effects Palette located above the Layers Palette. The Effects Palette provides numerous possibilities for your imagery — the effects are categorized by Filters, Layer Styles and Photo Effects (see the icons at the top of the Effects Palette). In the Effects Palette, you can see thumbnails that demonstrate the look of each effect. (Note: If you want to preview and adjust various filters on your actual imagery, go to Filter>Filter Gallery.)
USING THE BRUSH TOOL
Both the Brush Tool and the Pencil Tool allow you to draw. The Brush Tool creates softer strokes, while the Pencil Tool creates hard-edged lines. You can chose your Brush type and adjust Size, Mode (Blending Mode) and Opacity in the Brush Toolbar. You can also explore additional options in the Additional Brush Options box (just click on the paintbrush icon to the right of the Opacity setting). You can chose various brush presets when using a variety of tools besides the Brush and Pencil tools.