Week 21
Texture Paste Design
BY LISA M. PACE | from Delight in the Details

Combining texture paint with acrylic paint provides a raised texture design, which you can apply to a myriad of projects. In this project, the raised design is applied to the chipboard cover of a mini scrapbook album, but this technique would work equally well on canvas, wood or other substrates. Incorporate this technique into a work-in-progress, or let it kick-start a new creation.
Materials
 stencil with floral design
 texture paste (any color)
 palette knife
 optional: removable tape
 acrylic paint (neutral color for the background and 2 colors for the design)
 paintbrush
 neutral-colored fluid chalk ink
 water
water
 thin-bristle brush
 transparent glitter glue
 vintage buttons
 strong adhesive (such as hot glue)
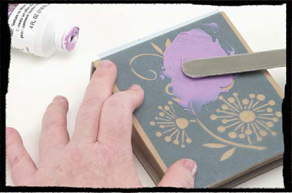
1. Spread the paste
Place a stencil over the background surface. Using a palette knife, spread texture paste over the stencil making sure to keep the stencil in place. (You can secure it with removable tape if needed.)
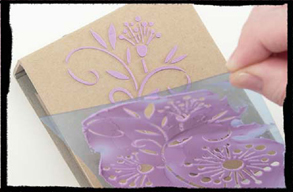
2. Remove the stencil
Once the stencil design is filled with texture paste, gently remove it from the background. Allow the texture paste to dry completely.
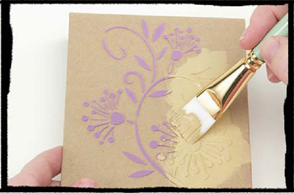
3. Paint the background
Paint the entire background, including the design, using a neutral-color of acrylic paint.

4. Apply chalk ink to the background
Apply a blend of neutral-color chalk inks to the painted background. Apply the ink in light circular motions to create a shaded effect.
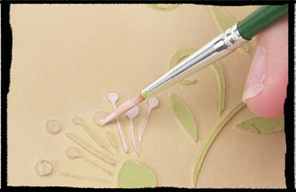
5. Paint a design
Add about 1–2 teaspoons (5–10 ml) of water to thin the other two colors of acrylic paint. Using a thin-bristle brush, apply paint to color the textured design. Allow the paint to dry.
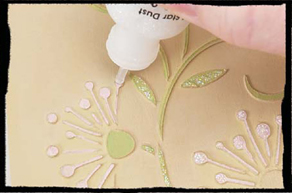
6. Add glitter glue and buttons
Accent the textured design using transparent glitter glue. Attach a button to each flower center using a strong adhesive, such as hot glue.