Week 30
Distressed Painted Face
BY KELLY RAE ROBERTS | from Taking Flight
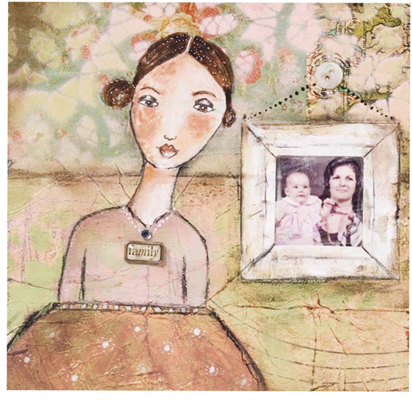
Painted faces can be added to a variety of mixed-media pieces to add a personal touch. Try this week's distressed painted face project for a way to let loose and have fun. The somewhat weathered but sweet face is created using paint and sand-paper — there are no mistakes with this very forgiving technique. You'll also find ideas for finishing touches, including the use of gel pens, glazes, ink pads and ephemera.
Materials
 rhinestone bezel
 heavybodied Golden acrylics Titanium White, Burnt Sienna, Burnt Umber and Raw Sienna
 fluid acrylics in various colors
 Tattered Rose Distress Ink (Ranger)
 gesso
gesso
 small paintbrush
 fine detail paintbrush
 white gel pen
 charcoal pencil
 fine-grit sandpaper
 optional: charcoal blender
 optional: Raw Umber glaze
 optional: heat gun
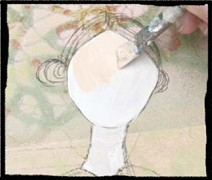
1. Layer skin tones of paint
Use a charcoal pencil to sketch your subject on a painted surface. To paint this face, we're going to layer skin tones of heavy-bodied acrylic paint and then sand them away to create an even, blended surface that appears weathered. Start by applying a layer of gesso on the face and neck area of your subject to create an opaque base. Then blend Titanium White, Burnt Sienna and Raw Sienna heavy-bodied Golden acrylics and apply a thick coat of the mixture to the face and neck area. Let it dry a bit, or give it a quick blast with a heat gun.
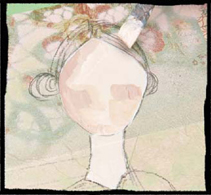
2. Layer darker paint in areas of shadow
Add a bit more of the Burnt Sienna and a little bit of Burnt Umber to your mixed paint. Apply the darker color to one edge of the face, where the shadows might rest, and to the cheek and eyebrow areas. When using this technique, I always start with the shadowy areas first, and then work my way to the lighter areas.
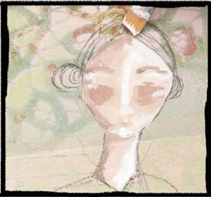
3. Add white paint to highlight areas of light
Apply some Titanium White thickly to areas where the light might rest. I'm targeting the bridge of her nose, a bit of one side of her forehead, and areas near her eyes, chin and forehead. The effect should be splotchy and uneven; don't worry if it looks messy — in fact, it should. Let it completely dry before the next step.
4. Sand layers of paint
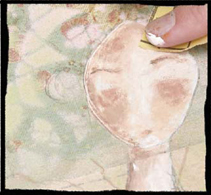
Take a piece of very fine-grit sandpaper (the finest grit you can find) and very lightly begin sanding the heavy layers of paint on the face and neck until you get the blended effect you want.
5. Draw and paint facial features
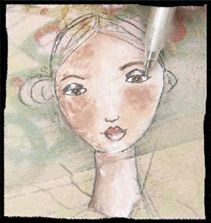
Use a charcoal pencil to draw in fine-detail lines for the facial features — eyes, nose, lips, eyebrows and hair line. Blend the lines with a charcoal blender to soften them a bit if you want to. Finish the face by using a detail paintbrush to color in the lips and eyes and a white gel pen to add detail to the whites of the eyes.
6. Add finishing touches
Paint the hair with fluid acrylic paint and use the white gel pen to add highlights and definition. Use fluid acrylics (I mixed a few shades with a Raw Umber glaze) to color in the dress with a transparent hue so all the layers beneath show through. Use a soft charcoal pencil to redefine any lines that have been painted over and add any embellishments (I added a belt). Use a white gel pen and a rhinestone bezel to create a necklace. Lightly rub a Tattered Rose Distress Ink pad over the surface of the dress and the background to highlight the wrinkles in the tissue paper, giving the piece an aged look.