Week 5
Emboss-Resist
BY BERNIE BERLIN | from Artist Trading Card Workshop
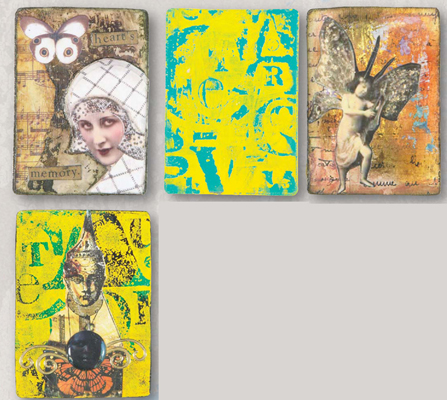
Having fun with embossing powder and an iron can create unexpected depth and an unusual effect. This process is similar to that of using masking fluid with watercolor, though the finished product is often a bit more distressed looking. This week, take the time to experiment with something new — new supplies, unusual tools or unexpected colors — to really pump up your art!
Materials
 2½″ × 3½″ card (6cm × 9cm)
 brush
brush
 acrylic paint
 stamp
stamp
 clear embossing pad
 clear embossing powder
 heat gun
 scrap paper or cardstock
 iron
iron
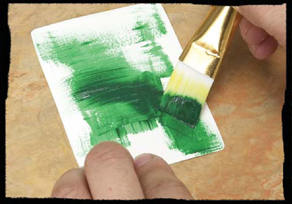
1. Coat a card with paint
Cover a card with a layer of acrylic paint. This will be the color that will show through the resist. Add another color if you wish.
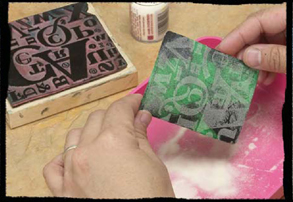
2. Stamp and add the powder
After the card is dry, stamp an image over the paint using a clear embossing pad. Sprinkle on enough clear embossing powder to cover the card and tap off the excess.
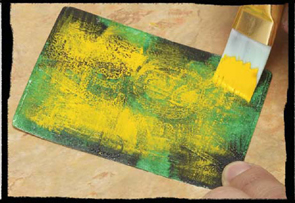
3. Drybrush a contrasting color
Melt the powder using a heat gun. Drybrush over the embossed card with a contrasting acrylic color. Let dry.
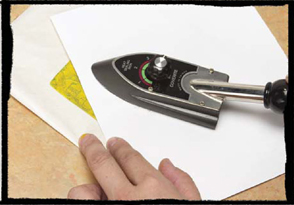
4. Apply a hot iron
Place a scrap of paper over the painted card (be sure you're working on a heat-resistant surface) and apply a hot iron over the paper using a good amount of pressure.
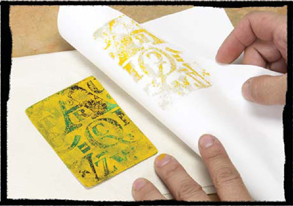
5. Peel off the scrap paper
While it's still warm, peel off the scrap paper. You'll see some of the paint is removed. This is good! Go over the card again with the iron, using a clean area of the scrap paper. You can repeat this process again to create more depth, or simply collage onto the card now, as it is.