Week 8
Special Occasion Collage
BY COREY MOORTGAT | from The Art of Personal Imagery
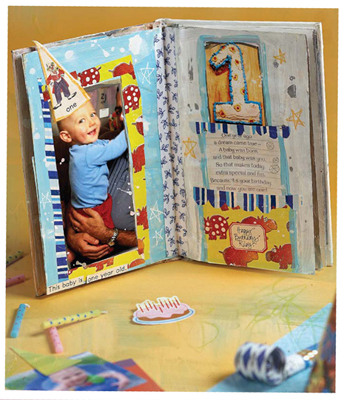
Collages provide a special way to mark significant occasions, like first birthdays. This week, you'll make a collage to commemorate a special birthday celebration utilizing memorabilia and available remnants from the occasion. Applying background paint colors and adding brush details are the keys to creating colorful layers in this collage.
Materials
 vintage book
 bulldog clips
 white gesso
 paintbrush
 photographs or printed images
 glue stick
 craft acrylic paint
 water
water
 paper towels
 scissors
 scraps of wrapping paper from birthday presents
 cut-out sentiment from birthday card
 Golden Artist Colors glazes (Fresco Cream and Aquamarine)
 words/phrases cut out from a vintage book
 water-soluble crayons
 pencil
 Uni-ball Signo white gel pen
 strip of fabric
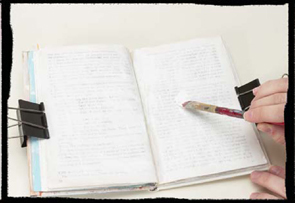
1. Prepare the pages
Take a vintage book, clip the pages open to hold them steady and coat the pages in white gesso to give them some stiffness and tooth. (If you are working with very thin pages, you may want to adhere several pages together with gel medium for added thickness before coating the pages with gesso.) Allow the gesso to dry.
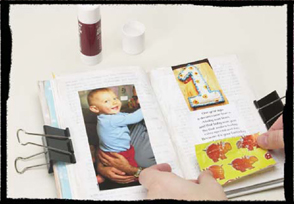
2. Adhere images
Lay out the images you've selected in the composition of your choice. Use a glue stick to completely cover the entire back surface of each element (especially the corners!) before pressing them into place.
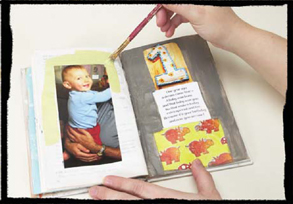
3. Apply paints
Select a background color and begin painting the surface of the page around the collage items. Here, I used gray and green acrylic paints as base colors on opposite sides of the spread. Allow a few moments for the paint to dry, depending on the effect you want to create. Leave the paint a bit wetter if you want the next layer of paint to blend in a bit, or let it dry completely if you want the top layer of paint to stand more on its own.
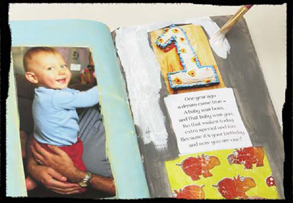
4. Layer paints
Experiment with layering different shades of paint until you create a look you like. Once the background colors I chose had been painted, I didn't think the end result looked bright and cheerful enough for a celebratory birthday spread. I added a turquoise blue around the focal photo to accentuate the color of his shirt and a coat of white to the gray to brighten it up a bit. I allowed some of the first coat's colors to remain around the borders of the images.
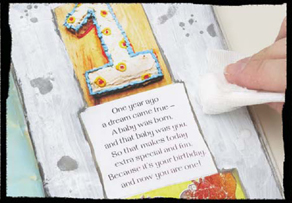
5. Splatter with water
Splatter water onto the wet white paint, wait a few minutes while the rest of the paint dries and then blot the water spots with a paper towel to allow the first layer of paint to show through.
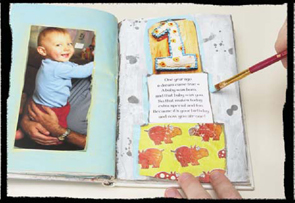
6. Paint details
Here, I outlined the collage elements on the right-hand page with a bit of blue paint to make the page look more unified with the left-hand page.
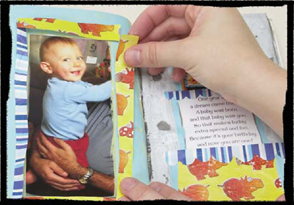
7. Layer papers
Cut strips of wrapping paper and adhere the paper elements to the collage with a glue stick to deepen the layered effect.
8. Add collage elements
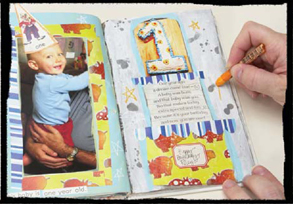
Use a glue stick to adhere a few final collage elements, like words and images cut from vintage books. Using a white gel pen, a pencil and water-soluble crayons, start adding some final details. Here, I outlined the image used to create the hat and sketched some stars and other elements on the background.
9. Add fabric
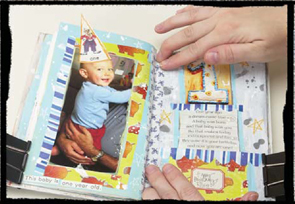
Splatter white acrylic paint on the background. As a final touch, use a glue stick to adhere a strip of fabric along the center of the spread to cover and reinforce the binding, further unifying the two pages as one work of art.
10. Apply glaze
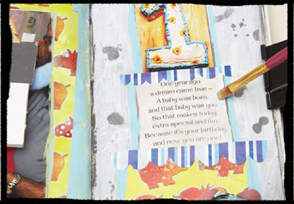
Brush glaze over the white paper so it is not quite so stark in comparison to the other elements of the collage. Here, I used a Fresco Cream glaze and then Aquamarine glaze.