MONKEYS, SKELETONS, DINOSAUR BONES
The hand speaks to the brain as surely as the brain speaks to the hand. — ROBERTSON DAVIES, What’s Bred in the Bone
Monkeys
Monkeys make first-rate models. Their groupings, their chatter, their articulate hands grooming and gesticulating all point out their uncanny resemblance to us. As monkeys scamper around, it is difficult to record their movements. The handwriting exercise is an ideal precursor to this exploration of drawing a volume in motion across a field of paper.
Coordinating with the Monkeys in Motion assignments at Central Park Zoo, the students are also asked to study monkey skeletons at the Museum of Natural History. At this same point in the semester, live models and human skeletons are being posed side-by-side in weekly studio sessions (see pp. 51–54).
ASSIGNMENT
Track the movements of the monkeys across the page. As the design evolves, observe their groupings and individual postures. At the same time, notice the spaces created between these clusters and the separate monkeys. Do not draw small, individuated monkey portraits; render the monkeys as they scuttle about. Consider how drawing this activity will provide a passageway or gesture to move the viewer’s eye across the paper. Two or three pages—the first page in vine charcoal on 18" x 24" (or larger) newsprint, the following pages in any preferred drawing medium on any paper. About 1 hour.
Museum of Natural History. Draw the monkey skeletons from three different points of view, each time depicting the entire skeleton at once, seeking gesture and volume and avoiding a bone-by-bone description. Consider the skull, ribcage, and pelvis as containers of volume around the axis of the spine. Vine charcoal. 18" x 24" (or larger) newsprint. 10 to 15 minutes per drawing.
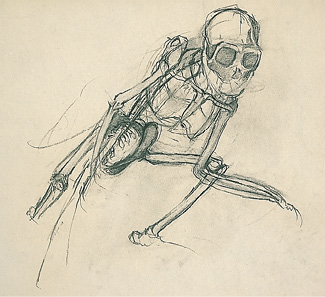
FIGURE 1
Blind-contour Drawing. Draw the contour or edges of the skeleton. Do not look down at the paper, save for occasional momentary glances. The pencil traces the slow movement of the eye across the skeleton, bone-by-bone, each edge described by a sharp, hard line. Do not erase. Let the drawing contain the history of the edges the eye traversed. The exercise should be accomplished with painstaking slowness, with a relatively hard, sharpened pencil or pen on white paper. 45 minutes to 1 hour.
Freestyle Study. Encompass all or most of the skeleton in an underdrawing. An underdrawing is a light, rapid study in which the artist marks the major masses and thrusts of the figure or object under consideration. It is kept light so that subsequent marks can further define the artist’s gathering intention. Investigate some major aspect of the structure with a sharper focus, always with reference to its relation to the spine—ribcage to spine, limb to pelvis to spine, etc. Any medium or paper. At least 1 hour.
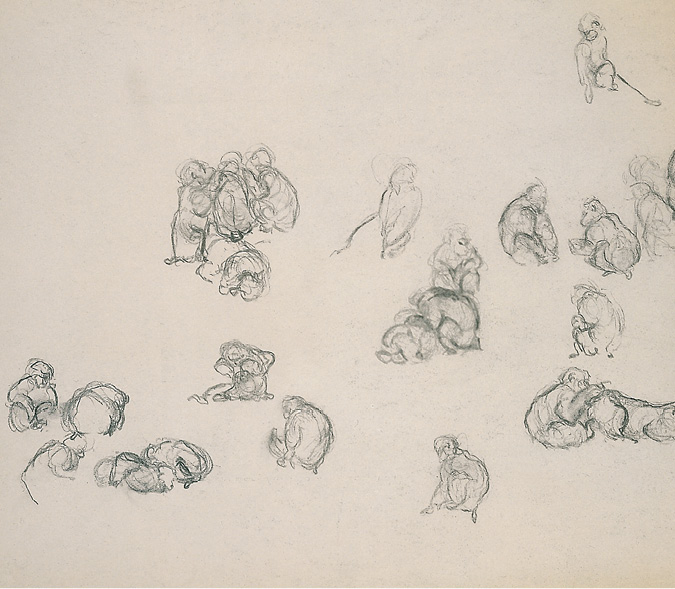
FIGURE 2
The drawing reveals true hand-to-eye engagement. There is clear evidence of lighter underdrawing with a second level of darker, more emphatic marks that assert the bending of a spine, the flexing of a haunch. The viewer’s gaze transverses the page, guided by certain implicit visual pathways. For instance, the eye might begin at lower left, ascend vertically, and descend in clockwise fashion. The stone ledges on which monkeys sit or clamber are not drawn; they are implied by the position of the monkeys’ rumps, which form a series of brief, broken horizontal lines. Most important is the evident engagement of the student’s hand, mind, and eye—all in constant conversation.
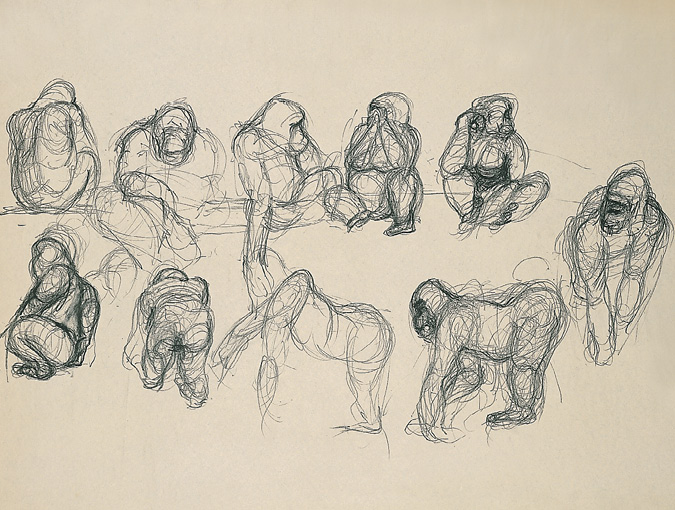
FIGURE 3
The stop-motion account of an individual monkey’s activity loops its progress from seated to walking to seated once again. Rapid underdrawing of major masses is evident as the student envisions the skeleton and the body’s major masses beneath the fur. The darker marking builds the form and further animates the gesture of each posture.

FIGURE 4
The animation of the drawing attests both to its author’s fluid hand and to the compelling drama of the skeleton’s posture. Observe the assertive range of calligraphic writing that descends in a spiral from the skull, through the ribcage, pelvis, knee, and eventually to the paw. Confidently placed shapes of tone create a handsome counterpoint to the elegant line.
Figures 5 and 6 are by the same student and attest to drawing as a process in which more than one study is made toward a final outcome.
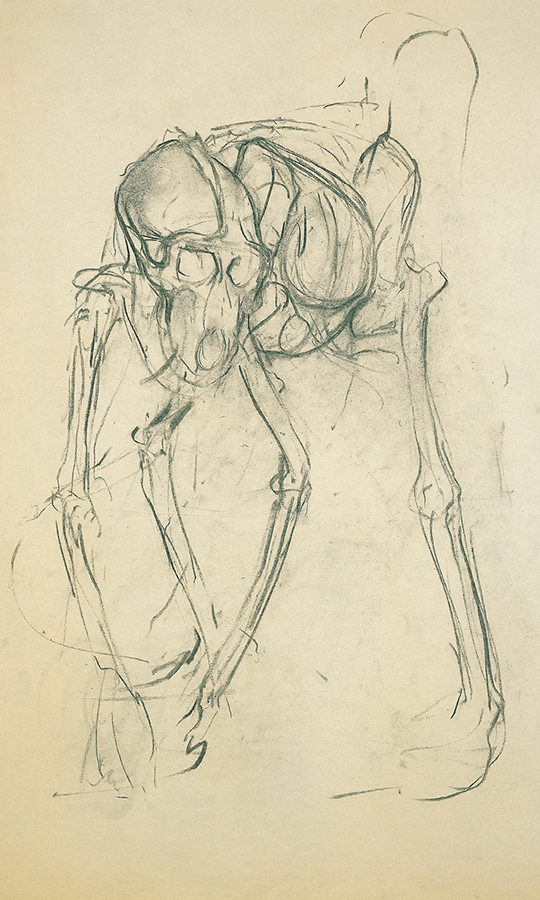
FIGURE 5
The fluidity of line in the drawing, a deftly drawn precursor to figure 6, enhances the monkey skeleton’s staged animation.
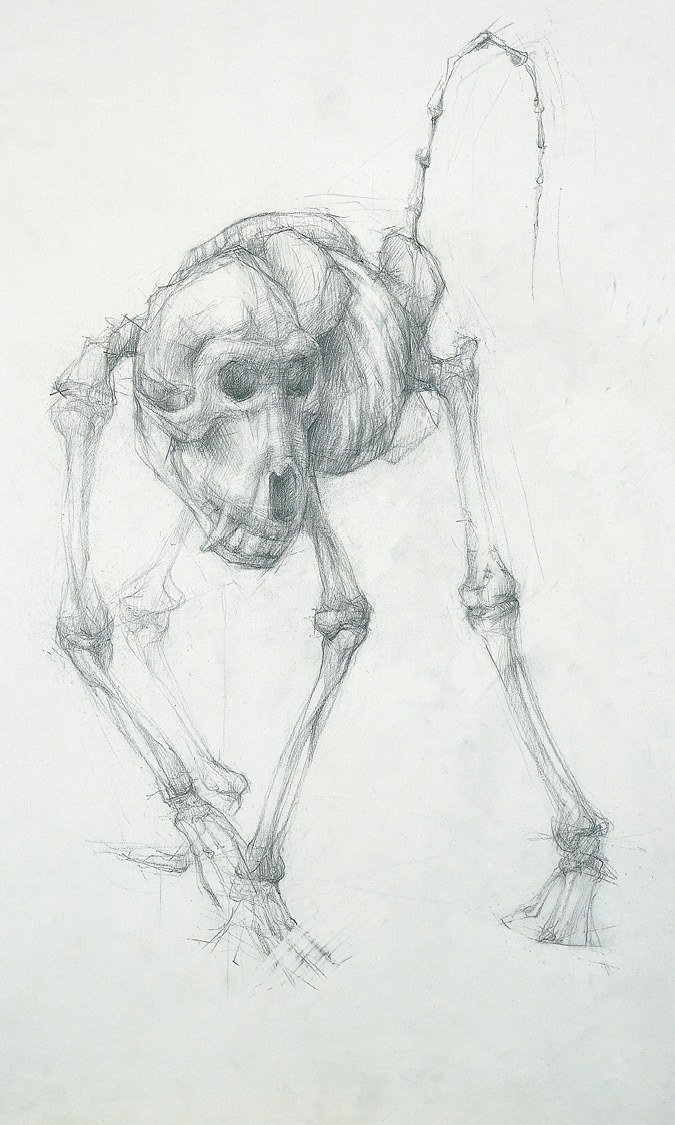
FIGURE 6
The drawing is a testament to both the author’s masterful craft and acute observation. The dark creates a passageway across the drawing, moving in small staccato increments along the arched tail. After punctuating intervals in the rib cage, the dark tone moves on to become an uncanny black gaze, then descends along the creature’s left fore and hind paws. The issue of focus also comes into play. The more darkly incised left hind foot is brought forward to the same plane as the left hand, enhancing the spine’s motion forward. The almost head-on point of view furthers the illusion of the skull’s being thrust in front of the picture plane.
Dinosaurs
After a couple of weeks of drawing monkeys and their bones, the next project is to draw from the museum’s dinosaur skeletons. Here, issues of scale and structure are dramatically evident. The sequence of assignments here essentially follows that of the monkey skeleton sequence.
ASSIGNMENT
Draw the entire dinosaur skeleton. The challenge here is to scale such an enormous form to the size of the page. These are relatively quick studies, each drawing taking 15 to 20 minutes. Again, draw the three studies from different vantage points, avoiding the most conventional view, the profile. Vine Charcoal. 24" x 36" (or larger) newsprint.
Blind-contour Drawing. Reinterpret the blind-contour as a negative-space drawing, with the following difference: the contour lines define the spatial intervals between bone and bone. This time, the focus is on the negative or leftover space, not the bones. Pointed pencil or pen on white paper. In 1 hour consider the work finished.
Freestyle Study. Draw a part of the entire skeleton. Reference an adjoining skeletal structure—for example, ribcage to spine to beginning of pelvis, skull to neck to beginning of ribcage, or limb to pelvis to spine. Next, make a freestyle drawing where an underdrawing of the entire skeleton is the first step. As with the monkey assignment, bring a portion of the skeleton into greater focus upon this scaffolding. Any medium on any paper. 1 hour each drawing.
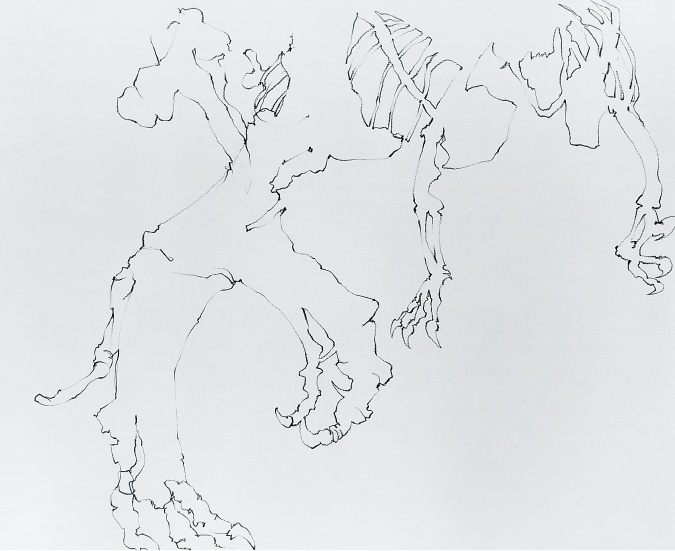
FIGURE 7
Flat patterning results from the negative-space/blind-contour approach. Due to the fact that it is not a profile perspective, the drawing achieves an intriguing and unexpected pattern. Careful observation, of the talons in particular, has lent the drawing an element of charged surprise. The way the drawing is framed also contributes to its success. The creature, all but contained by the page, with a small portion of the spine sliced off by the top edge of the paper, appears to be entering the space of the page from above, the talons of its forelimbs moving menacingly toward the viewer.
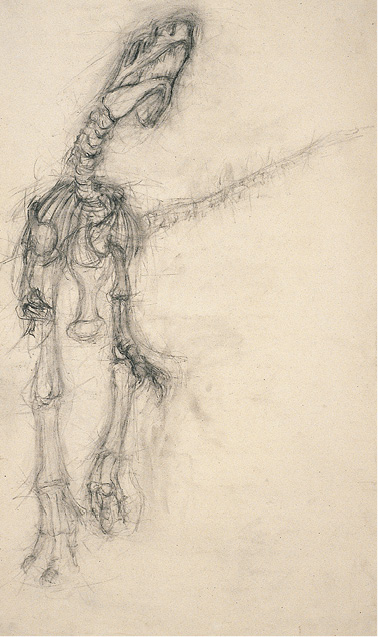
FIGURE 8
The drawing successfully addresses two difficult drawing challenges: scaling the immense skeleton to a 36” x 24” sheet of paper and the foreshortening resulting from this all-but-frontal vantage point, which made it necessary for the author to choose a perspective from beneath and through the ribcage and to observe the neck and skull from underneath. Momentum gathers in an abrupt curve starting at the open-jawed skull and moves along the spine, which diminishes in scale and focus into the illusory distance. In the underdrawing’s tracery of light marking, changes in measurement are noted. The drawing’s darker, more focused lines bring the forepaws, neck, and skull dramatically forward.
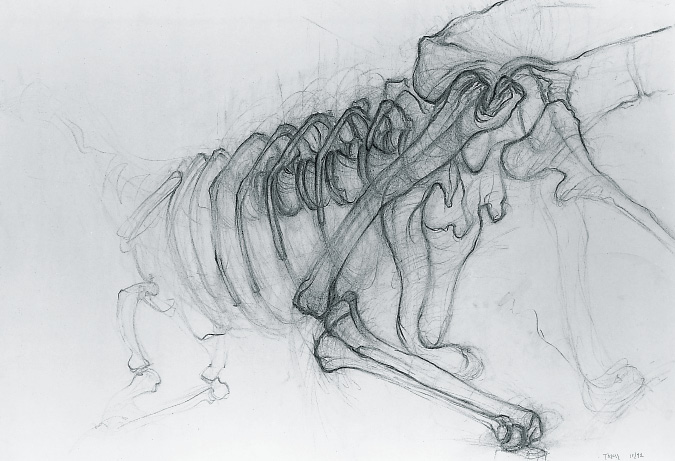
FIGURE 9
A number of essential drawing strategies are illustrated. The work states a hierarchy of parts and their relationship to a larger form. The light but precise circular handwriting of the underdrawing establishes the relationship of spine to ribcage to pelvic girdle to limbs. Portions of the ribcage, the hind limb, and several spinal discs are brought sharply into focus with a heavier overdrawing. The still-evident underdrawing shows quite visibly through the more-detailed left hind limb, rendering the upper portion of that limb simultaneously solid and transparent. The hinging at the leg joint, the articulation at the pelvis, and the fusion of the ribs to the spinal column are models of intense observation.
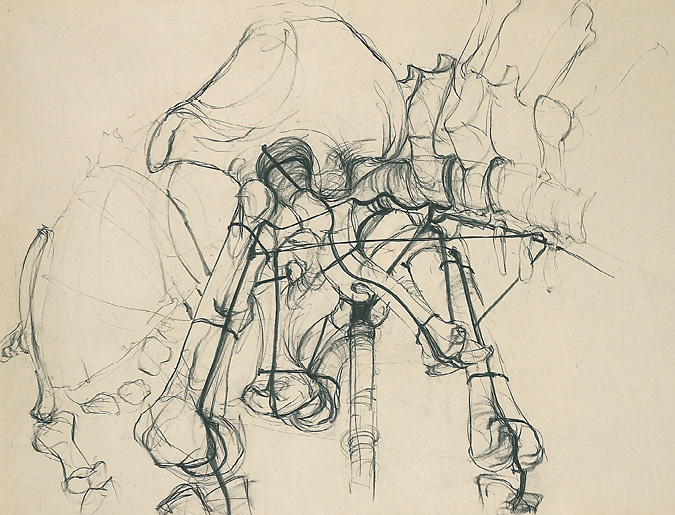
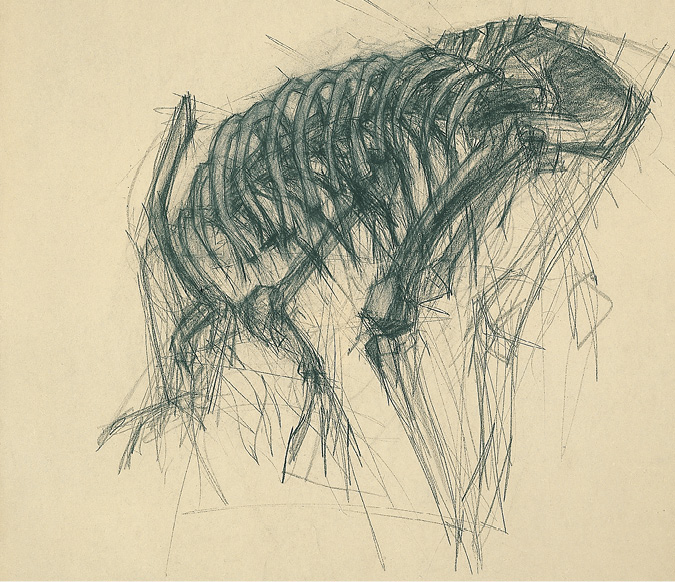
FIGURES 10 and 11
The two drawings focus on the dinosaur’s pelvis and ribcage, describing each area’s attachment to the spine, and also carefully consider the joints of the limbs. Figure 10 employs more decisive and singular lines to bring the pelvis into focus, while figure 11 uses the density of multiple lines and erasures (extracting the white of the ribs) to dramatize the view through the ribcage. The former incorporates the armature supporting the skeleton’s structure as well as the hardware and wires that sustain the creature’s posture, while the latter dismisses the hardware. This, together with the manner in which the darker lines graduate into the light underdrawing of the unfinished extremities, suspends the motion of the dinosaur in figure 11 in a cushion of space.