From the very first life-drawing session, there is a human skeleton in the studio as a visual reference so that the class is aware that the selfsame structure exists within the figure they are drawing. The 206—on average—bones that constitute the human skeleton are otherwise not paid much heed by students as they begin to draw from the live model. Indeed, if they were asked to give an accounting—disc by disc and rib for rib—the task would be daunting and discouraging. The actual act of drawing from the skeleton does not take place for several weeks. For the student of architecture, awareness of the skeleton is critical to the development of an analytic eye that sees past the curtain and mass of skin, sinew, and flesh to the bony framing—a structure that permits gesture and stance and provides the tools for locomotion and stability.
The skeleton in the studio hangs from the rotating arm of a wheeled stand so its position can be readily changed, albeit in its typical hanging posture. It can also be unhooked from the stand and placed and propped to correspond to the model’s given posture during side-by-side, comparative poses. These exercises are interspersed with previously described studio exercises and continued over the course of the year.
EXERCISES
Quick Skeleton Studies. Turn the drawing pad horizontally, so that several skeleton studies may be drawn across the page. Draw the entire skeleton all at once, not bone by bone, moving the charcoal rapidly. Although the skeleton is linear in nature, think of the spatial volumes the bony structures encompass. Consider the oval volume described by the rib cage, the bowl-like space contained by the pelvis, the intersecting ovals of the front of the skull underlying the face, and the portion of the skull that is housing for the brain. Observe the serpentine twist of the spine. Change the skeleton’s position every 5 minutes. (Later in the semester increase the time to between 10 and 15 minutes. At this point study portions of the skeleton more closely—skull to ribcage or pelvis to toe digits.) Vine charcoal. 24" x 36" newsprint (18" x 24" minimum).
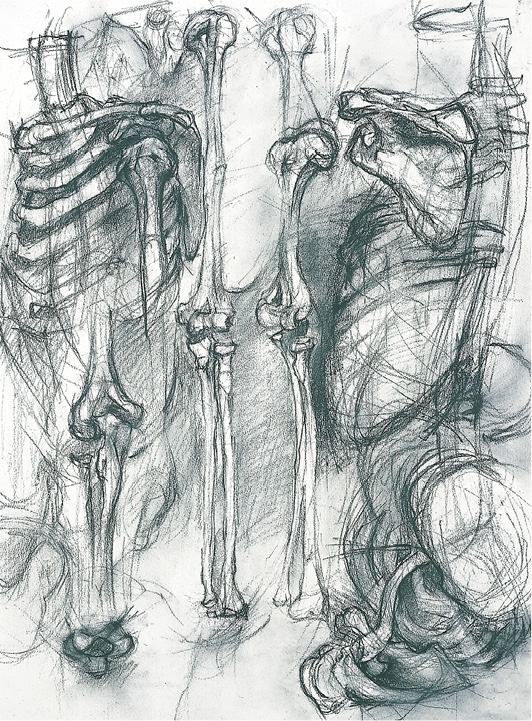
FIGURE 1
Quick Side-by-side Figure and Skeleton Studies. Follow the same instructions as above. Begin by allotting 10 minutes per pose. In a week or two, abbreviate poses to 5 minutes. Draw the figure and skeleton together—again, in an all-but-simultaneous manner—in drawing them together the eye will become accustomed to darting from one form to the other and measuring their relative positions spatially. Avoid the tendency to complete first one figure and then add the other.
Longer Side-by-side Studies. After some weeks, depending on class progress, lengthen the duration of the exercise to between 20 and 30 minutes. Examine portions of the model’s body and skeleton in greater detail, giving particular attention to articulation—knees, elbows, shoulder, etc. (Skeletal articulation is the configuration of two or more bones at a joint, which enable its motion.) It is good practice to draw such detailed areas within a larger context. Hence various studies might be made from skull through shoulder girdle and spine, from skull to ribcage, or from ribcage to pelvis, or from pelvis to toe digits, with the target area, such as the knee, being brought into sharper focus. Always keep the drawing hand moving from the live model to the skeleton and vice versa. Vine charcoal or charcoal pencil. 18" x 24" (or larger) newsprint.
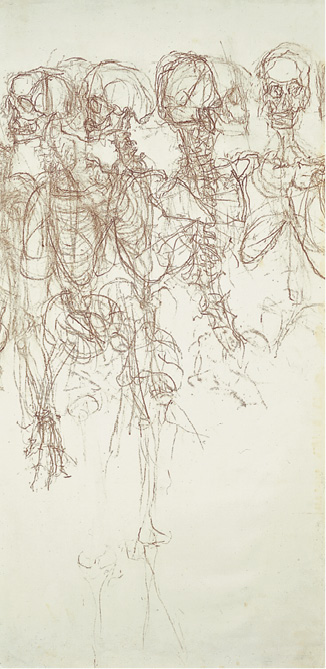
FIGURE 2
The skeleton was rotated and stopped in fixed positions. The overlapping study is of the upper portion of the skeleton—although a faintly drawn, suspended limb and the bones of an arm and hand to the right suggest axes around which the circulating skeletons turn. Several lightly sketched positions overlaid by darker studies add to the sense of rotation, depth, and transparency. In each of the overlaid studies, particular portions are brought into focus—in one the skull, in another the shoulder girdle, in yet another, the spine.
Blind-contour Drawing. Follow the method for blind contour previously described in the bell-pepper assignments (see pp. 21–23). Begin at any point on the skeleton and let the pencil travel wherever the eye leads. Relatively hard sharpened pencil—H to 2B—on white paper. About 1 hour. (In the next week’s exercise, start the blind-contour drawing at some other point on the skeleton.)
Blind-contour/Negative-space Drawing. Use the same drawing method and materials as above but with the following difference: examine the spaces between the bones rather that depicting the bones themselves. This is an especially useful tool in considering the interstitial spaces of the ribcage. These negative spaces between the ribs create a latticework in the drawing as ribs seen in the foreground visually cross over those that curve behind. Begin at any point and stop in an approximate hour. (Note that in blind-contour drawing proportion is not an issue. The result is frequently oddly disproportionate as the eye and hand slowly track one line at a time.)
The Skeleton Within the Figure. After two or three sessions of side-by-side drawings, view the live model’s posture next to a similarly positioned skeleton and place the drawing of the skeleton within the volumes of the figure being studied. Begin the session with 40 to 50 minutes of the more rapid exercises described above. Next pose model and skeleton in proximate, similar postures—there might even be some overlap of bone and limb. Draw them as they are spatially related to one another. Now, on a new page, draw the figure and skeleton overlaid. Do not draw the figure first and then insert the skeleton. The process should be simultaneous. Vine charcoal on 18" x 24" (or larger) newsprint. 1½ to 2 hours.
Note: After the above exercises have been practiced for some weeks, the skeleton becomes a regular additional form in the longer two-model poses. It is an intriguing subject on its own and a constant reminder of the fundamental human structure.
Figures 3 and 4 study the skeleton in relation to the fleshed out figure.
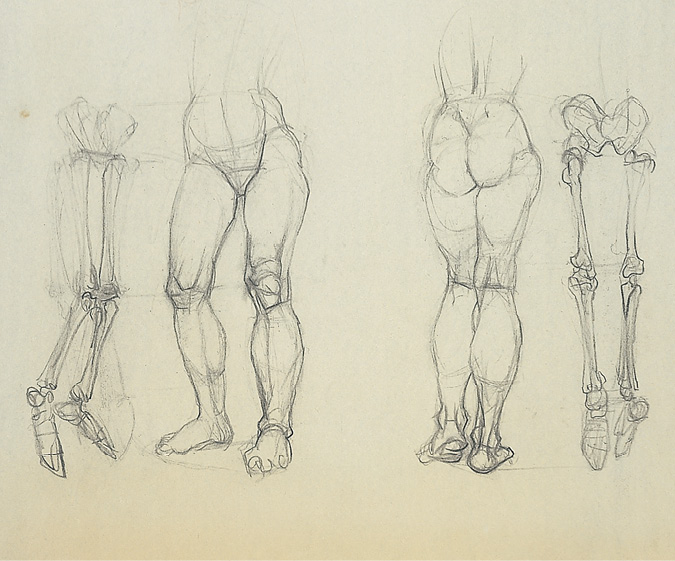
FIGURE 3
The drawing examines the lower portion of the skeleton and figure in like postures, noting the necessity and influence of the bony structure on the body’s stance. Prominences of bone become evident at pelvis, knees, ankles, and feet.
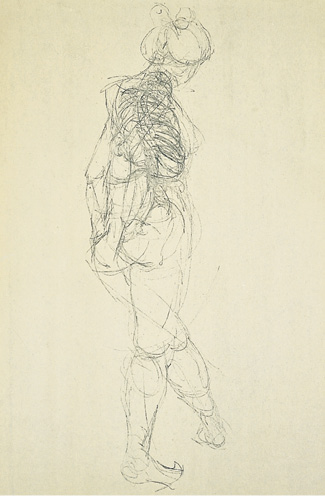
FIGURE 4
The drawing describes the ribcage within the contours of a fully fleshed-out figure. The light marking that sculpts the body aids the drawing’s see-through illusion; solid and void are discussed in the area of the ribcage. The space that the curving ribs encircle is visible, yet the drawing presents a solid volumetric body.
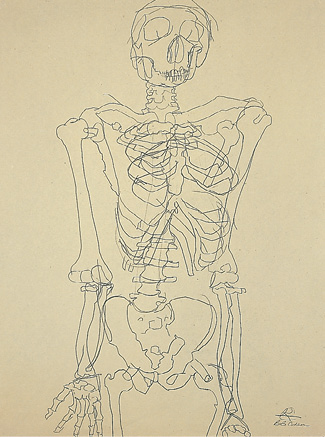
FIGURE 5
This classic blind-contour study displays the quirky distortions that result from maintaining the gaze chiefly on the object being drawn and only infrequently viewing the paper. Here the observant eye has tracked the stacking of spinal disc on disc, the variety of negative shapes created by the ribs’ complex curves, the articulation of the elbow joints, even the jagged diagonal fissures that indicate the hollows of the eye sockets.
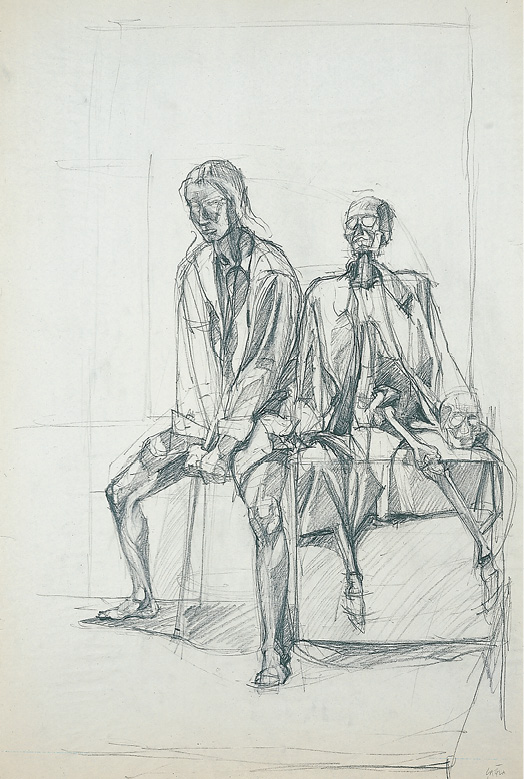
FIGURE 6
Model and skeleton share the model platform and seem to have traded roles. The model, doll-like, slumps forward; the skeleton sits pertly erect. These postural contrasts lend the drawing visual wit. Several layers of structural metaphor are represented: the platform supporting the two figures, the implicit skeleton supporting the model’s body (notice the bony prominences in the face, knees, ankles), the clothing falling in planar folds from the support of shoulders and rib cages. Design is structured: the page is parsed into a series of supporting rectangles—platform, cube on platform, panel of wall—a motif that continues through the drawing of the skeleton and model.