
This technique demonstrates how I most often begin a painting—applying random brushstrokes and marks without thinking about what I am doing. I stay unattached for as long as possible to what emerges, which means I do not judge what is happening on the canvas. I try not to be too precious about keeping what I like or too critical about any areas that I don’t like. I just keep going.
Surprise Gardens are paintings that reveal themselves to me through several layers of paint and mark making. Instead of having an idea in mind about what I want to paint, I wait for the painting to reveal itself. We are going to incorporate Jessica’s use of pattern, mark making and stamping with Este’s technique of masking off areas and cutting in over layers of paint to create forms. Let the flowers appear to you naturally. You can paint as many layers as you want. Keep painting until shapes begin to emerge that catch your eye. Play, have fun and let the magic unfold.
acrylic paint
warm and cool colors
Bubble Wrap
canvas board, 18" × 24" (46cm × 61cm)
foam brush
paintbrushes (optional)
scraping tools
stamps
stencils
stickers or tape
Sometimes you have to let go of something you like to create something you love.
If you create an element that you really like, repeat it somewhere else on the canvas to create unity and pattern through repetition.
Is there a spot that you don’t like on your painting? That might be the perfect place for a leaf. Is there an awkward edge where paint colors shift? Use a stem or leaf to separate the space.
There will always be flowers for those who want to see them.
—Henri Matisse

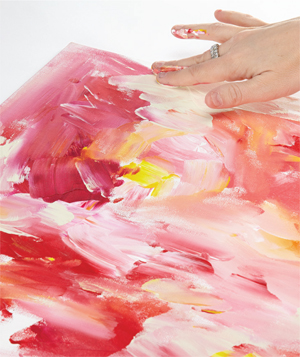
STEP 1: Randomly apply warm colors (reds, oranges and yellows) to cover your canvas.

STEP 2: Be playful and apply paint with abandon using your fingers or paintbrushes. Do not worry about what it looks like at this point. The messier and more chaotic, the better.
STEP 3: Enjoy experimenting with different design elements such as color, shape, contrast and form. Let the paint dry.

STEP 4: For your next layer, work with cool colors (greens, blues, purples). Leave sections of the first layer visible. Continue adding layers in this way until you begin to see images such as flowers emerge or intriguing sections that catch your eye.

STEP 5: Now it is time to play with our tools. One option is to randomly and firmly place stickers or tape on the painting to preserve what is underneath as we create more layers. Paint over these as you continue to paint.
Scrape into the paint with a sharp object such as an embossing stylus, palette knife, edge of a paper clip or shish kebab stick.

STEP 6: Press on a variety of stamps to add fun marks to your painting. Some of these designs will get covered up as you continue to layer. Repeat the stamp throughout the painting to create continuity and repetition.

STEP 7: Paint directly on a piece of Bubble Wrap with a foam brush and stamp directly on the painting in a few areas.

STEP 8: Loosely paint through a few stencils.

STEP 9: You’ll create great texture regardless of how clean your application is.
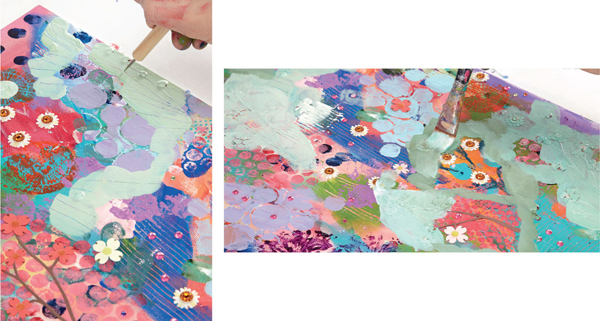
STEP 10: Now it is time to bring it all together into a cohesive painting. I use a mixture of teal, green and white paint to outline the flowers, stems and leaves around sections I want to keep. I call this “cutting in” or “simplifying.” These shapes can be as realistic or abstract as you like. By creating a contrast of quiet spaces, you are able to highlight the beautiful designs you have created with your layers of paint.
While cutting in, continue to scrape designs with a pointed-edge tool into the wet paint to reveal the dry layers underneath.

STEP 11: Press a few buds onto the surface with end of your finger.

STEP 12: If needed, add more flowers by repeating the elements that you love. Here I add some small pink and red flowers with a brush and some smaller buds with my fingers—both with various mixtures of magenta and white.

STEP 13: Remove the stickers using your fingers, tweezers or any sharp scraping tool. You might also choose to leave the painted stickers on the painting permanently if you like the textural effect they give the painting.

STEP 14: Continue adding stems and leaves, as well as other elements to complete the painting.

Dreamscape
16" × 20" (41cm × 51cm)
I was able to let go, remain unattached to the many layers and stay playful with this piece for a long time. I especially like how scraping into the flowers with a paper clip added interesting line and texture. It turned out to be one of my favorite Surprise Gardens because I was able to add richness and depth that come from staying loose, being willing to cover up sections of paint and experimenting with color and form.