
Tools and techniques
You don’t need to use tools to have fun in the wild. While many of the activities in this book require you to use them, there are limitless other things to do out there without tools.
However, if you do like using tools to construct and create, the outdoors is a wonderful place to do it. I love working with green wood and hand tools. Wood is a very special material to work with, as you lose yourself in each piece’s unique personality, its twists and turns.
The hand tools in these pages are incredibly satisfying to use. I have also included tips on how to use and look after them. As with the equipment in the previous section, this is not intended as an exhaustive list but more of a personal selection of the tools I use most often.
When working with sharp tools, many people choose to wear a glove on their helping hand (the hand that is not holding the tool). However, it is unwise to wear a glove on your tool hand as it can compromise your control.
A note on working with children and tools
Young people gain much from making things with their hands. For those who take the time to help children safely develop their skills in this area, the social, physical, intellectual, emotional and spiritual benefits are clear to see. But remember, young people working with sharp tools should always be supervised by an adult and encouraged to rest and take breaks.


Knife
Your knife is your most important and useful tool, which you will use for a wide range of tasks from whittling to cutting cord and preparing food.
Don’t forget that the penalties for carrying knives outside of your home can be serious. Check your local laws for guidance on this.
Here are some useful knife techniques:

Free carving
Hold your knife firmly in the hand that you use to write with, and the length of wood in the other. Keep the cutting edge of your blade facing away from you and make long, sweeping cuts down the grain of the wood. I can spend hours whittling like this, surrounding myself in a sea of fine wood shavings.

Pull stroke
Also known as a paring cut, this one is just like cutting an apple. Use the thumb of your knife hand to steady the wood while supporting it with your helping hand. Then draw the blade towards yourself, taking care to keep your thumb out of the path of the blade. Some whittlers choose to wear thumb guards to protect themselves when using this cut.


Thumb push stroke
The push stroke gives power and control in your carving of awkward angles by pushing the top of the blade with the thumb of your helping hand (the one that is not holding the tool).

Top cut
This technique is for when you need to make a vertical cut into the wood. It is often used with the thumb push stroke to make notches.
Place the rod on your chopping block on its side. Apply downward pressure with your knife and use your other hand to gently rock the length of wood, and you will feel the blade sink into it.

Batoning
The batoning technique is for splitting or cleaving wood. I use this for crafts and making kindling.
Place your length of wood on its end onto a solid chopping block. Place the knife on the end of the wood and tap with a piece of wood or mallet to safely split the wood. For bigger pieces of wood, other tools such as a billhook or froe will be more suitable.

Bow saw
A big bow saw (with a 61cm/24in) blade) can be used to cut through larger pieces of wood and can be used with a partner holding the opposite side of the handle.
These blades do break and blunt so keep a spare blade handy just in case.

Folding saw
A smaller folding pruning saw is incredibly useful and will fit comfortably in a small pack or even your pocket.
Mine goes everywhere with me. If I could only take three tools out with me, I would take this one, along with my axe and knife.

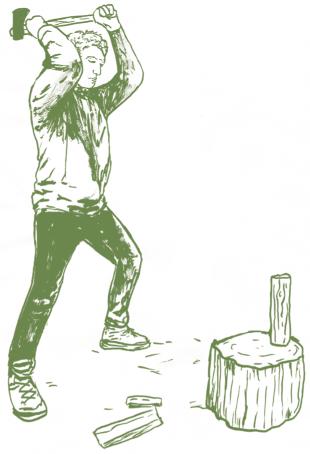
Axe
Using an axe to carve or split wood is incredibly empowering and a lot of fun. I love showing people that proficiency with an axe is about technique, not strength; many of the most capable axe users I know are small in stature.
To avoid the danger of the axe hitting your legs should you miss the chopping block, a good option is to kneel down while using the axe so your body stays out of the way. It may seem strange but try it!
A note on safety
Always wear closed-toed shoes or boots when using an axe, and never use it after dark or when you are tired.
Here are a few of my favourite techniques:
Classic swing
1. Place your length of wood on the far side of the chopping block so that your axe will bury itself in the block, should you miss the piece of wood.
2. If standing, keep your legs apart and knees bent. Keep one hand stationary at the base of the axe with the other hand near the head.
As you swing, slide the hand from the head to the base of the handle and dip your knees at the point of contact with the wood. This will help you to generate speed and power.
3. If kneeling, hold both hands at the base of the handle for your swing.


Simultaneous swing
This is a safe, accurate and controlled way to split your wood. Place the cutting edge of the axe on the wood at the point at which you would like to split it and hold the axe and wood from the base.

Bring the axe and wood down onto the block simultaneously and then twist the axe to split the wood. This one works well while kneeling as recommended above.

Carving
Carving with an axe takes practice but feels good. You can also get a lot more done in a short time carving with an axe compared to a knife.

The more control you need, the closer to the axe head you should put your hands. Maintain control by making small ‘relief’ cuts with your axe into the wood, then shaving off those cuts with longer strokes. Keep your cutting edge nice and sharp if you are using your axe for carving.

Billhook
This is a lovely tool to use. It is a traditional English version of curved machetes seen across the globe. I use it for stripping small branches, clearing, coppicing, cleaving and carving wood.
To carve with the billhook, use the method explained above for the axe. For cleaving or splitting wood, follow the instructions for the batoning technique with the knife on, but use a larger wooden mallet.

Scotch-eyed auger
Also known as a barrel-eyed auger, this is one of my absolute favourite tools. It’s basically a really big drill bit with a hole in the end for the handle. I have a range of them from 1.25–5cm (½–2in) in diameter.
By using a length of wood as a T-bar handle and twisting, you can use the auger to bore a hole into a length of wood. No electricity needed. This hole can then be used as a socket for crude ‘mortice and tenon’ joints for furniture, crafts and all kinds of wonderful creations!

Multitool
A single tool containing straight-edged and serrated blades, scissors, can openers, files, screwdrivers, pliers and more!

Tool maintenance
The saying goes, ‘you are only as sharp as your knife’ and it is true. Look after your tools by wiping them clean after use with a cloth before storing in their sheaths or covers. Combine this with regular oiling and sharpening and you will have a set of happy tools.