 Dry the grip in the sun.
 Dry the grip in the sun.
If the grip is wet, or if there is a lot of moisture in the air, leave the club in the hot sun for as long as possible so the moisture will evaporate. Place the club on a hard surface like rock or concrete, which retains more heat than grass and will expedite the drying process.
 Wear gloves.
Golf gloves provide added grip (and reduce chafing and blisters). If no golf gloves are available, thoroughly wet a pair of thin cotton gloves and wear them.
 Rub dry dirt, chalk (magnesium carbonate), talcum powder, cornstarch, dry crumbs, or a powdery stick antiperspirant on sweaty hands or the grip.
These items will absorb excess moisture.
 Rub a slippery grip on sandpaper or concrete to scuff the grip.
 Smear tree sap on the grip to make it sticky.
Sugar maples are good sources of sap in the spring and early summer, when it may run down the sides of the tree. You will be able to find sap from pines or other conifers (spruce, fir) any time of year, and can use it either dried or weeping. Sap can also be found on needles and cones. Note that sap is extremely sticky, and removing it from the skin and other objects will require the use of mineral spirits.
 Use a towel.
Wrap a handkerchief or a thin towel around the grip of your club when hitting. This is perfectly legal, according to the rules.
1 Listen for the shout “Fore!”
Whether the call comes in your direction or not, do not hesitate to react.
2 Do not look for the ball.
Looking up may expose your face and head. Do not attempt to dodge an incoming ball.
3 Turn away from the source of the call.
4 Drop your clubs or stop your cart.
5 Cover your head with your hands and arms.
Put your hands on the back of your head. Bend your arms around the top and sides of your head and tuck it into your chest.
6 Crouch, squat, or drop to the ground.
Roll yourself into a tight ball. If you cannot get to the ground, fold your upper body into itself and bend over.
Be Aware
If you and your group are standing on or near the green and the group behind you is hitting up, do one of the following:
• Shield your eyes from the sun so you can easily watch their shots.
• Cover your head and crouch if you lose sight of the ball.
• Get behind your cart, golf bag, caddie, or another nearby object.
“Goolies” is a Scottish term, used at St. Andrews and elsewhere, that refers to the “privates,” or the groin area.
1 Lie down immediately.
Do not walk around. Cover your private parts to shield the area from further injury (and embarrassment). Clutching yourself will probably be your natural reaction to being hit by a club head or ball.
2 Apply a cold pack to the injured area to reduce swelling.
Use ice in a bag or cloth, or a cold can of soda or beer. This will help reduce the swelling and the pain.
3 Do not apply too much pressure.
Extreme pressure may cause more pain.
4 If the pain is significant and does not subside within a few minutes, inspect the injury.
Remove your pants to get a better look at the swelling and check for any irregularities.
5 If the pain lasts more than an hour, or if the area is significantly bruised, seek medical attention.
Use the “fireman’s carry” to bring the golfer to safety.
1 Face the injured person.
2 Prop the victim upright in a sitting or partly standing position.
Bend down so your shoulder is level with her waist.
3 Lean into her body.
Have the injured golfer bend forward over your shoulder so her head and arms are behind you and her legs are in front of you.
4 Put your arms around her legs and stand up.
The victim should be bent at the waist over your shoulder, head behind, with legs in front of you.
5 Walk the victim to the clubhouse.
You should be able to walk a fair distance like this, as weight distribution is over your back and legs instead of your arms.
Use the “deadlift carry” when you have the aid of another person.
1 Lay the injured golfer on his back.
Alternatively, the injured golfer could be sitting upright on the ground.
2 Stand behind the injured golfer.
Your carrying partner should be facing you on the other side of the victim, near his legs.
3 Kneel down.
4 Slide your arms under the victim’s arms and wrap them around his chest.
5 Instruct your partner to kneel between the victim’s legs.
Your partner should place her arms under the victim’s knees, as if she were lifting the handles of a wheel-barrow to push it.
6 Stand up.
You and your carrying partner should rise at the same time. You will have about two-thirds of the victim’s weight and your partner will have the rest.
7 Walk to get help.
This position is difficult to maintain for long distances. If you get tired, it is easier to sit the injured golfer down and pick him up again using this method than with the one-person fireman’s carry.
1 Sit or lie down immediately.
Do not put any weight on the ankle.
2 Make a cold compress.
Cold will constrict blood vessels and reduce swelling. Place ice in a plastic bag or wrap it in a shirt. Do not apply the compress directly to the skin; add a layer of clothing or plastic to prevent freezing of tissue. Applying cold cans may also reduce swelling.
3 Elevate the ankle.
Sit down and raise the ankle at least 18 inches above the ground by putting a log, golf bag, or other object under the calf.
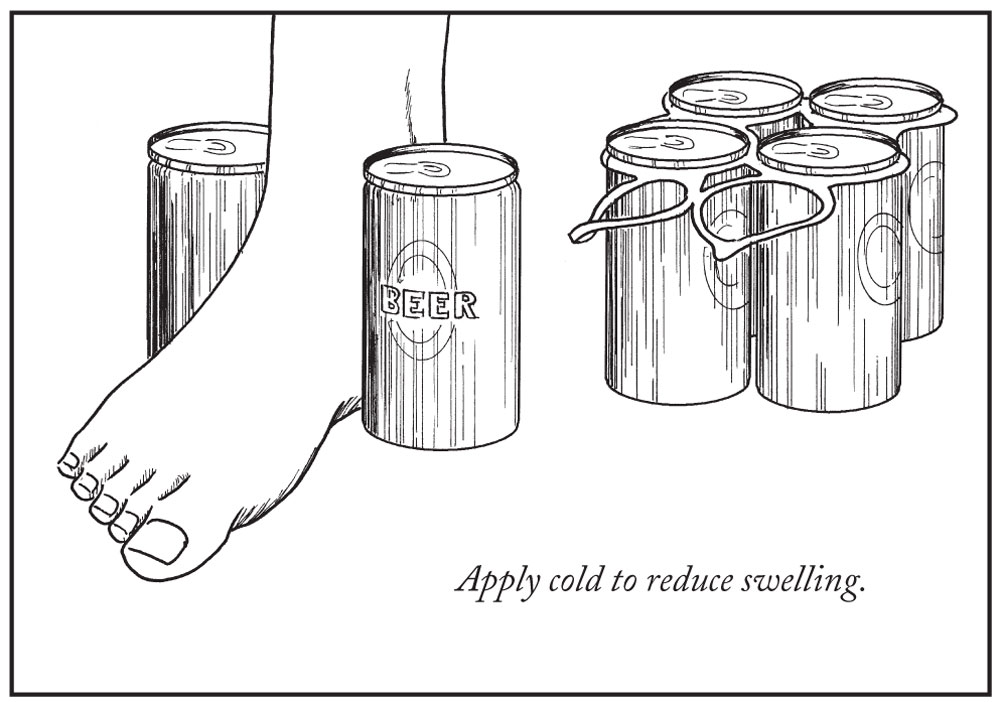
4 Apply the compress for 30 minutes, then remove.
If the sprain is particularly bad and swelling is rapid and severe, leave the compress on for 15 additional minutes.
5 Make a pressure bandage.
If no emergency bandage is available, cut or tear cloth into long, four-inch-wide strips. Two three-foot strips should be sufficient. If available, use an elastic wrap.
6 Wrap the ankle.
Put one end of the bandage in the middle of the foot and use a figure-eight pattern to wrap up and over the ankle and back around the foot. Make sure the bandage is snug and the ankle immobile. Use tape, rubber bands, string, or shoelaces to secure the end of the bandage to the leg.
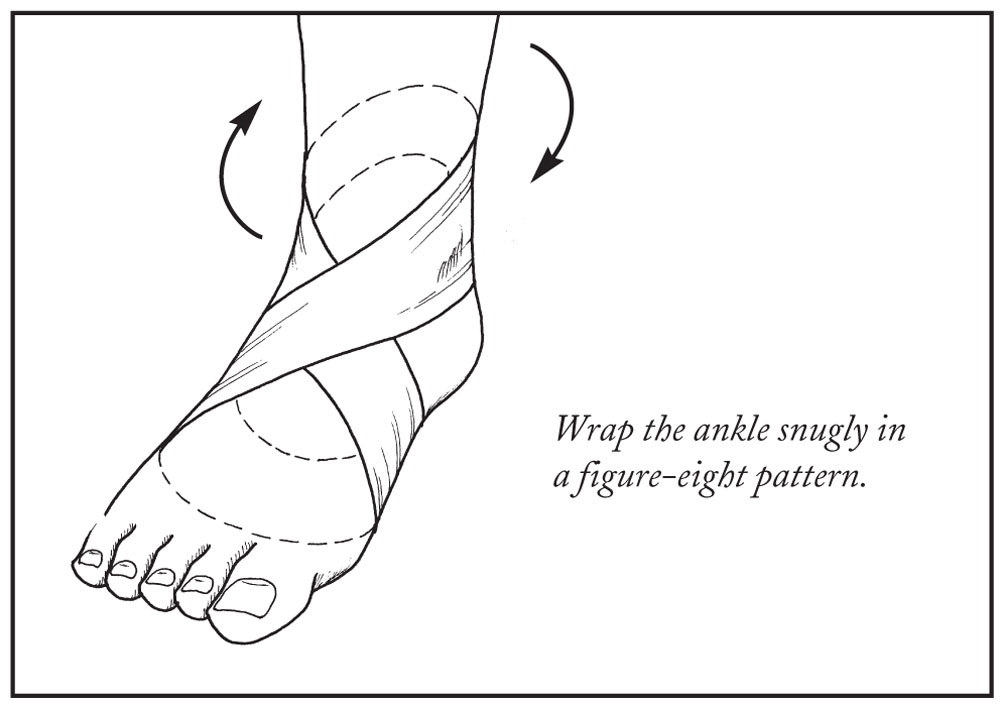
7 Reapply the cold compress for another 30 minutes.
8 Leave the course.
Use a golf cart to reach the clubhouse. If no cart is available, use an umbrella, ball retriever, sturdy tree branch, or sand wedge as a cane for support.
9 Take ibuprofen to reduce the swelling and relieve pain.
If ibuprofen is not available, take acetaminophen, which will relieve pain but not swelling. Avoid aspirin, which can thin the blood.
10 Seek medical attention immediately to ensure that the ankle hasn’t been broken or fractured.
Be Aware
Sprains are generally a result of tissue damage to the front outside ligaments of the ankle. X-rays are usually not needed for sprained ankles but should be obtained if you are unable to bear weight for more than six steps; if you feel pain in the back of either of the bones that normally protrude from the sides of the ankle; or if you have pain anywhere along the line from your ankle to your smallest toe.
1 Cover the blister with a bandage.
If you do not have a bandage with you, you can fashion one with a tissue and a piece of adhesive tape or grip tape: fold the tissue until it is just big enough to cover the blister, then tape it. Small blisters (less than three-quarters of an inch) do not usually need any further care.
2 If the blister is large and swollen, prepare to pop it.
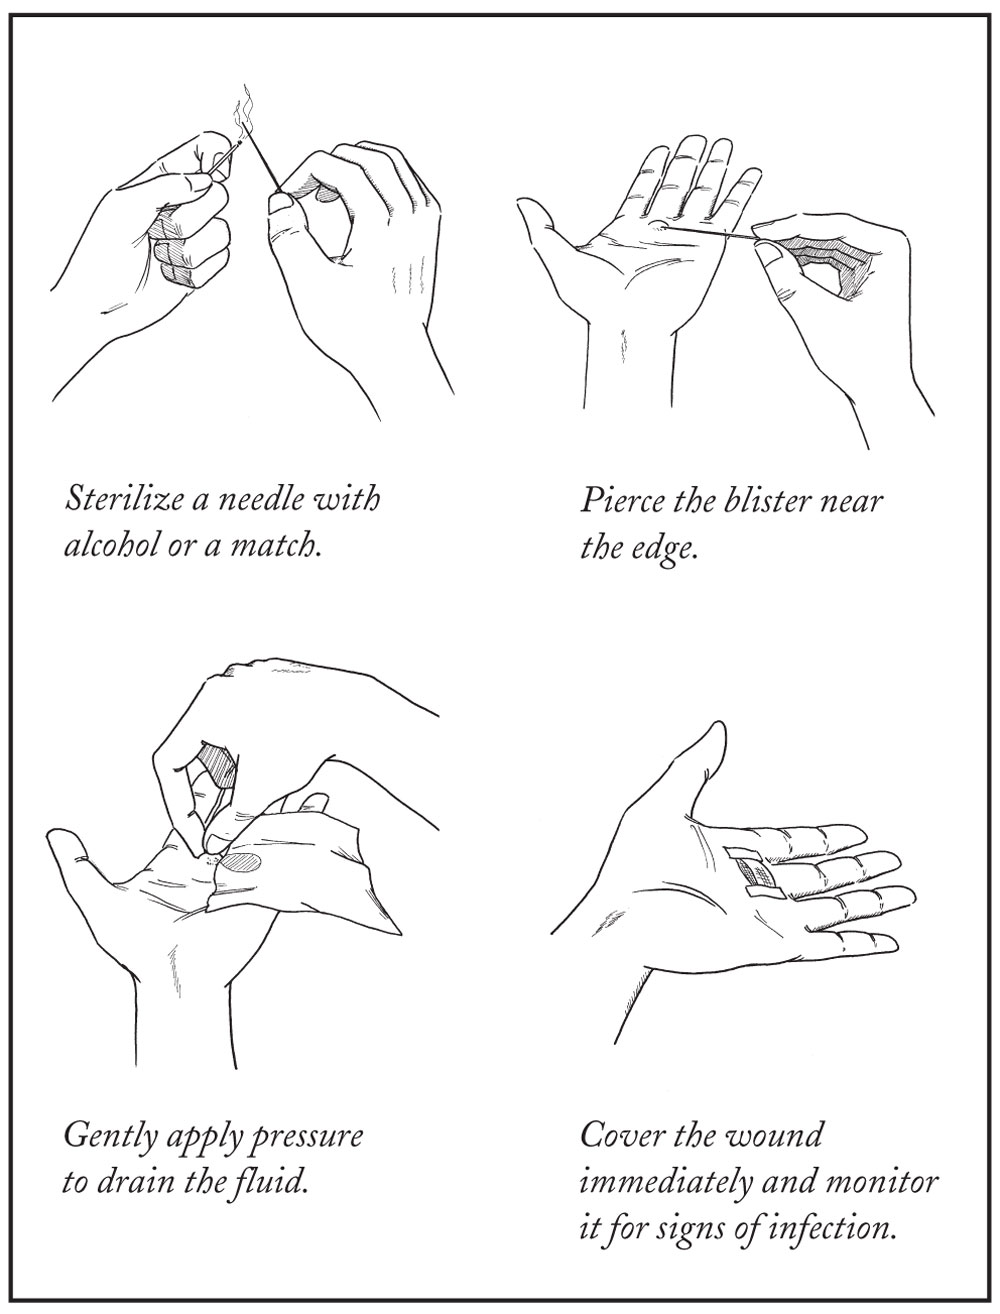
Use alcohol (brandy or whiskey from a flask will do the trick) or the flame from a match or lighter to sterilize a needle. Hold the needle in the flame for at least ten seconds.
3 Pierce the blister with the needle.
Hold the needle parallel to the surface of the skin. Puncture the blister near the edge to make draining easier.
4 Drain the fluid.
Gently apply pressure to squeeze out the fluid. Dispose of the needle in a sturdy plastic or metal box so that it does not accidentally prick anyone else.
5 Cover the sore immediately with a bandage.
See step 1. If you have antibiotic cream, use it.
6 Watch for signs of infection.
These include redness, swelling, pain, discharge, and fever. If you have these symptoms, get to a health-care professional.
1 Wash the exposed area of skin.
Immediately wash the contaminated area with large amounts of running water.
2 Wash shoes, socks, pants, gloves, and clubs immediately.
Urushiol oil, which causes the rash, can stay active on objects for up to a year. Dilute the oil by washing equipment with lots of water. Slosh rubbing alcohol over exposed skin (except on the face) and rinse with water. (Carry a jar containing rubbing alcohol and a small cloth.) Rubbing alcohol neutralizes the oil.
3 Do not scratch the rash.
A rash usually develops a few hours to a few days after exposure. It will start with an itch accompanied by a light rash that continually becomes more intense and eventually blisters. Excessive and continual scratching can lead to neural dermatitis (persistent itch) that can continue even after the reaction has stopped. The total reaction usually lasts two weeks or less. If the itch is intolerable, seek medical assistance.
4 To reduce itching, run hot water over the rash or blister area.
Gradually increase the temperature of the water (be careful not to burn yourself). Let the water run hot until you feel bursts of relief from the area, which may take five minutes or more. Hot water helps to release histamines from the skin. This method can relieve itching for eight hours or more. Warm or cold packs and calamine lotion can also reduce itching. Prescription cortisone cream is many times the strength of over-the-counter cortisone cream and can be used for severe itching.
Be Aware
• Poison ivy and oak thrive in disturbed ground, such as land molded and shaped for golf courses; be sure to ask if it is present on the course before beginning your round. Size and appearance of poison ivy and oak varies with habitat. Poison sumac is fairly rare and limited to deep swamps. Its leaflets can be from two to eight inches long, and the plants can be six inches high, or can vine to the top of a 20-foot-tall tree. All three plants contain urushiol.
• Poison ivy and poison oak grow in all areas of the United States except for southwestern deserts and mountain elevations above 4,000 feet.
• Even when leaves are not present, the stems, berries, and roots of the plants still contain the oil and should be avoided.
• To prevent exposure, wear shoes and socks and long pants, not shorts.
• Do not rub other plants or leaves on an affected area to treat or prevent a rash. There are no plant juices known to neutralize urushiol, and juices spread on the body in small quantities are likely to spread the oil and increase the rash.
• Even if you have not previously reacted to poison ivy, oak, or sumac, do not assume you are immune. After the first exposure, and especially after repeated exposures, 85 percent of people will have an allergic reaction.
• A golf ball that rolls through any of these poisonous plants, or that has come to rest among the leaves or vines of the plants, may be contaminated with urushiol oil. Carefully pick up your ball with a towel or while wearing your glove and wash the ball immediately. Wash the towel or glove before using it again.
1 Get out of the sun immediately.
2 Do not apply suntan lotion, oil, petroleum jelly, ointment, or butter to the burn.
These will make the symptoms worse and prevent the skin from cooling in the air.
3 Apply a cool compress.
Take off your shirt and soak it in cold water. Dunk it in a water hazard if no other source of water is available. Wear the shirt or hold it on the burned area. (Continue to apply the cool compress once you are at home, or take a cool bath.)
4 Drink water.
Drinking 32 to 64 ounces of water will prevent dehydration and promote sweating.
5 Use a soothing gel or lotion on the skin to cool the burned area.
Aloe works best. If aloe plants grow nearby, break off a leaf and squeeze the gel out directly.
6 Seek medical attention immediately if you experience serious symptoms.
Side effects to watch for include faintness; dizziness; a fast pulse or fast breathing; pale, clammy, or cold skin; sensitivity to light; rash; fever; nausea; or chills.
• Avoid sun exposure between 10:00 A.M. and 2:00 P.M. standard time because the sun is at its hottest during these hours. Remember that the sun’s rays are stronger at high altitude and close to the equator.
• Use a sunscreen with an SPF (sun protection factor) of at least 15, and apply it at least 30 minutes prior to exposure.
• If the burn is mild, a hot shower immediately after the burn can cause peeling and actually relieve itchiness more quickly.
• Prolonged exposure to sun and heat can also cause heat exhaustion and/or heatstroke. Heat exhaustion is usually a mild illness brought on by exposure to heat, but heatstroke, which develops beyond the point of heat exhaustion, can be fatal. Symptoms of both include fever and sweating, but an important difference is the presence of mental confusion. If the victim is confused, the illness is no longer heat exhaustion—it is heatstroke.
1 Immediately immerse the victim in cold water.
The core body parts (chest and abdomen) are the most important to cool. Body temperature must be reduced immediately. Heatstroke is usually fatal if not treated rapidly.
2 Remove the victim’s clothing and spray the skin with cool misted water while fanning the skin.
Use this method, known as evaporative cooling, only if immersion is impossible. Do not use cold wraps with wet towels, alcohol, or ice cubes; these are not effective cooling measures.
3 Stop the cooling when the body temperature falls below 102° F.
Hypothermia may result if the victim becomes too chilled. In most cases, you will not have access to a thermometer, so continue cooling measures until safe temperatures are confirmed by a health-care professional.
4 Do not administer acetaminophen or aspirin.
Both of these drugs may worsen heatstroke: acetaminophen by damaging the liver, and aspirin by increasing core temperature.
5 Get the victim to a health professional as soon as possible.
• Wear a light-colored cotton shirt.
• Wet your shirt in cool water to enhance cooling through evaporation.
• Spray misted water on your face, arms, and legs to promote cooling.
• Drink plenty of cold fluids.
• Take frequent shade breaks.
1 Get out of the sun.
Dehydration (actually, volume or fluid depletion) can be caused by excessive perspiration from strenuous activity in hot conditions. Rest frequently in a cool area out of the heat of the sun.
2 Drink water and eat salty foods.
Alternate drinking plain water and consuming salty crackers, pretzels, or water that contains sodium, potassium, and bicarbonate. Water alone will not replace lost electrolytes and should not be taken in excess if thirst is due to exertion or sweating.
3 Make an oral rehydration drink.
If salty snacks are not available to take with plain water, you can make an oral rehydration drink that is superior to any of the available sports drinks. In a quart of water, add one quarter-teaspoon of table salt, one quarter-teaspoon of baking soda, and two tablespoons of sugar. If baking soda is not available, use another quarter-teaspoon of salt instead. If available, add half a cup of citrus juice, coconut water, or a mashed ripe banana. (These contain recommended potassium.) Drink this until your thirst is quenched.
4 Eat sweet snacks high in carbohydrates.
Cookies and other sweet bread products will increase energy. Consume sweet drinks such as orange juice if no snacks are available.
5 Avoid alcohol.
Alcohol may worsen symptoms of volume depletion and should be avoided during excessive sweating.
Be Aware
• Some people will not realize they are fluid depleted until they are nearly unconscious. Drink balanced fluids regularly in hot weather and pay attention to thirst, headaches, dizziness, loss of appetite, darker urine, and fatigue, all signs of volume depletion.
• Severe volume depletion, which can include lethargy or loss of consciousness, may require treatment with specialized sodium-potassium-glucose drinks (oral rehydration therapy) or intravenous fluids.
1 Abandon your golf clubs.
Metal and graphite clubs conduct electricity and should not be held or carried.
2 Seek shelter immediately.
A sturdy building offers the best protection. Avoid sheds, isolated trees, and convertible cars. These will not protect you from lightning. Also avoid water and hilltops, as these can increase your chances of being struck by lightning.
3 If no building is nearby, get inside a hard-top automobile.
Roll up all windows and do not make contact with any metal inside the car. Do not get in a golf cart; it does not offer lightning protection.
4 If you are stuck out on the course, find a low spot on the ground away from trees, fences, and poles.
If you are in the woods, take shelter under short trees.
5 Make yourself the smallest target possible.
If you feel your skin start to tingle or your hair stand up on end, squat on the balls of your feet, place your hands over your ears, and lower your head between your knees.
6 Do not lie down.
Stay on the balls of your feet to minimize contact with the ground. Do not crouch with your hands on the ground.
Be Aware
• Stay away from rivers and creek beds during a thunderstorm; more people are killed each year from flash floods than from lightning or any other storm-related phenomenon. If you hear a loud, sustained roar, notice hail, or see the sky become greenish, run for shelter immediately. (See “How to Survive a Tornado” on the following page.)
• Do not use any electrical appliances for the duration of the storm. Use a wired telephone only in an emergency.
1 Find shelter.
The worst place to be during a tornado is out in the open—as on a golf course. If you cannot get inside a sturdy building, find a ditch and lie flat, covering your head with your hands. A sand trap or bunker is a good spot. Do not attempt to outrun or use a golf cart to out-race a tornado.
2 If inside, go to the basement, storm cellar, or the lowest level of the building.
If you are in a building with no basement, go to a first-floor inner hallway or a small inner room without windows, such as a bathroom or closet. Avoid buildings—including clubhouses—that have eaves. High winds can get under the eaves and blow the roof off.
3 Stay low to the floor.
Very few “missiles” (wind-driven debris) penetrate walls below three feet above ground level.
4 Stay away from windows.
High winds and flying debris can shatter glass. Do not open windows.
5 Move to the center of the room.
Corners attract debris during high winds.
6 Get under a piece of sturdy furniture.
Find a workbench or a heavy table or desk and hold on to it. If you are in a bathroom, lie down in a bathtub.
Be Aware
• Tornadoes are not always easy to spot. They can be nearly invisible, marked only by swirling debris at the base of the funnel. An approaching cloud of debris can mark the location of a tornado even if a funnel is not visible. Some tornadoes are composed of several mini-funnels.
• A dark, often greenish sky, large hail, or a loud roar can indicate that a tornado is imminent.
• Before a tornado hits, the wind may die down and the air may become still.
• Tornadoes generally occur near the trailing edge of a thunderstorm.
• Tornadoes can occur at any time of the year. In the southern United States, peak tornado season is March through May, while peak season in the northern United States is May through August.
• Tornadoes are most likely to occur between 3:00 and 9:00 P.M. but can occur at any hour.
Brush fires can be started in many ways, but on golf courses, cigars pose a significant risk.
1 Stomp out the fire if it is small enough.
Flames that are larger than your shoe will not be safe to stomp out.
2 Immediately throw water or any other nonflammable liquid on the fire.
Use water from a thermos or cooler, a sports drink, or beer (which has a high water content). Do not use hard liquor, which may only increase the fire’s strength.
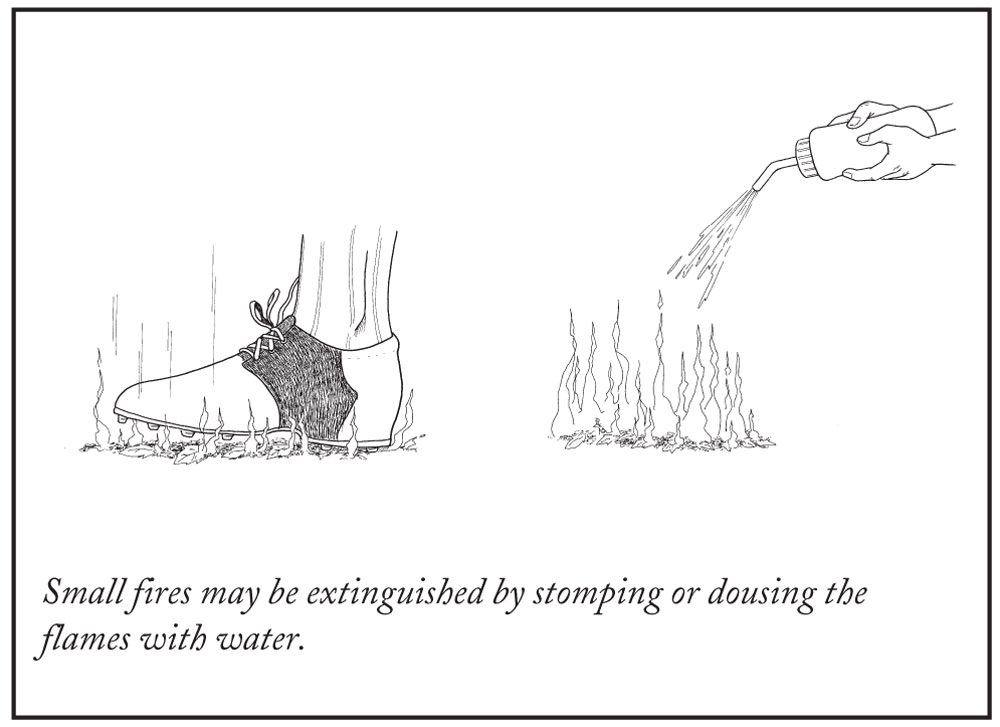
3 Throw dirt or sand on any remaining flames.
4 Cover the fire and embers completely with a non-flammable blanket or jacket.
Suffocate a fire that is just beginning—but be careful not to fan the flames or feed easily flammable material to the fire.
5 Once the fire appears to be out, stomp on the embers to make certain they are no longer burning.
6 If the fire is still burning, use a cell phone to call the fire department directly—not the clubhouse.
If you have been unable to douse the flames and you do not have a cell phone, head immediately to the clubhouse or an emergency phone to call for help.
1 Always carry a cup or bottle of water if you are smoking on the course.
You can use this to quickly extinguish any embers or fires before they get out of control.
2 Never puff on a cigar or cigarette while riding in a golf cart.
The ember, carried by the breeze, may blow into leaves or dried grass, or onto flammable clothing.
3 After lighting a cigar or cigarette, make certain that the match is cold, not just out.
Hold it until it is cold, then break it so that you hold the charred portion before throwing it away.
4 When you are finished smoking, grind out your cigar in the dirt or sand, or drown the cigar in water.
Cover the butt with dirt. Never put out your cigar or cigarette by rubbing it against a stump, log, or other flammable object.
1 Examine your behavior.
A golf addict is a person whose life is controlled by golf. You may think you have a problem with golf, but still not think that you are an addict. Ask yourself these questions. The total number of questions that you answer “yes” to is not as important as how you honestly feel about yourself as you answer these questions:
• Do you golf regularly? Do you feel empty inside if you cannot golf at your usual time?
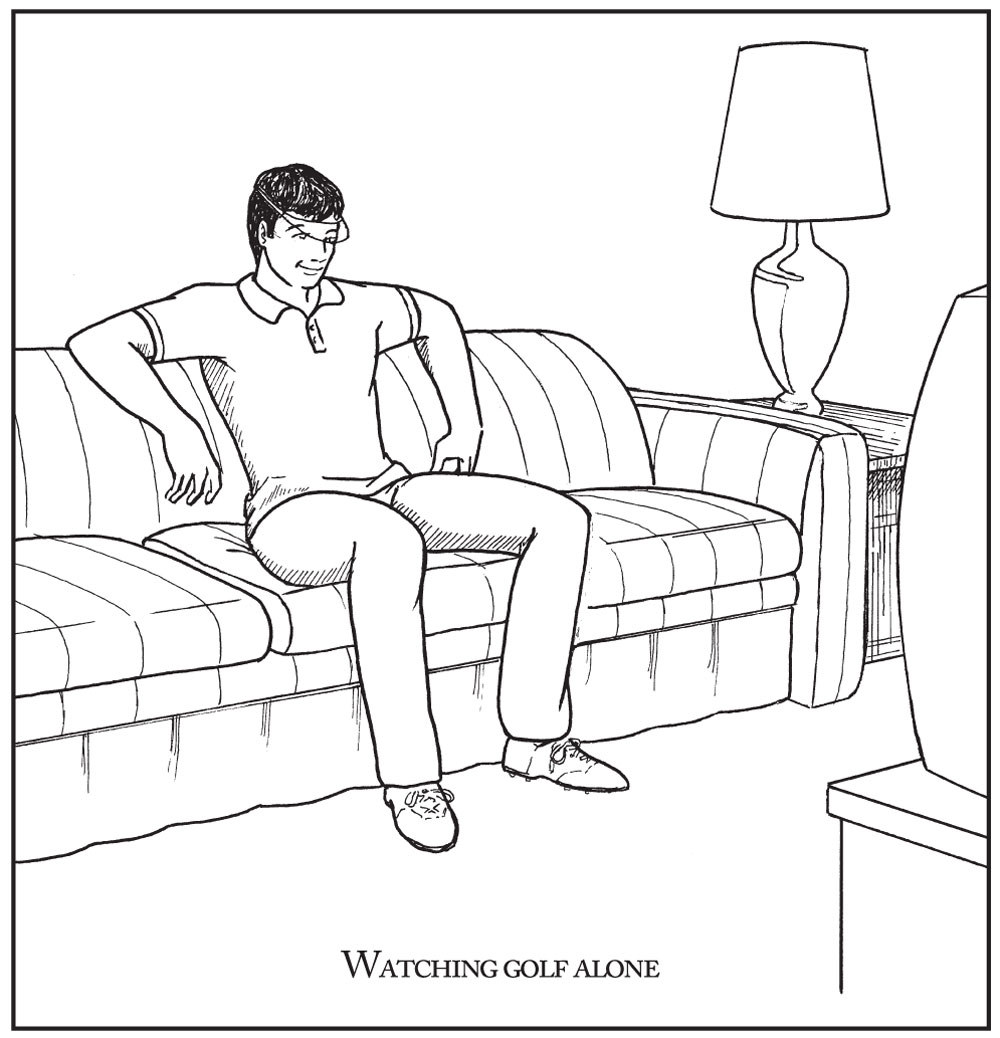
• Do you ever golf alone, or watch golf alone?
• Have you ever substituted one club for another, thinking that one particular club was the problem?
• Have you ever cheated to obtain a better score?
• Have you ever lied to get into a golf course of which you were not a member?
• Has your job, family life, or school performance ever suffered from the effects of golf?
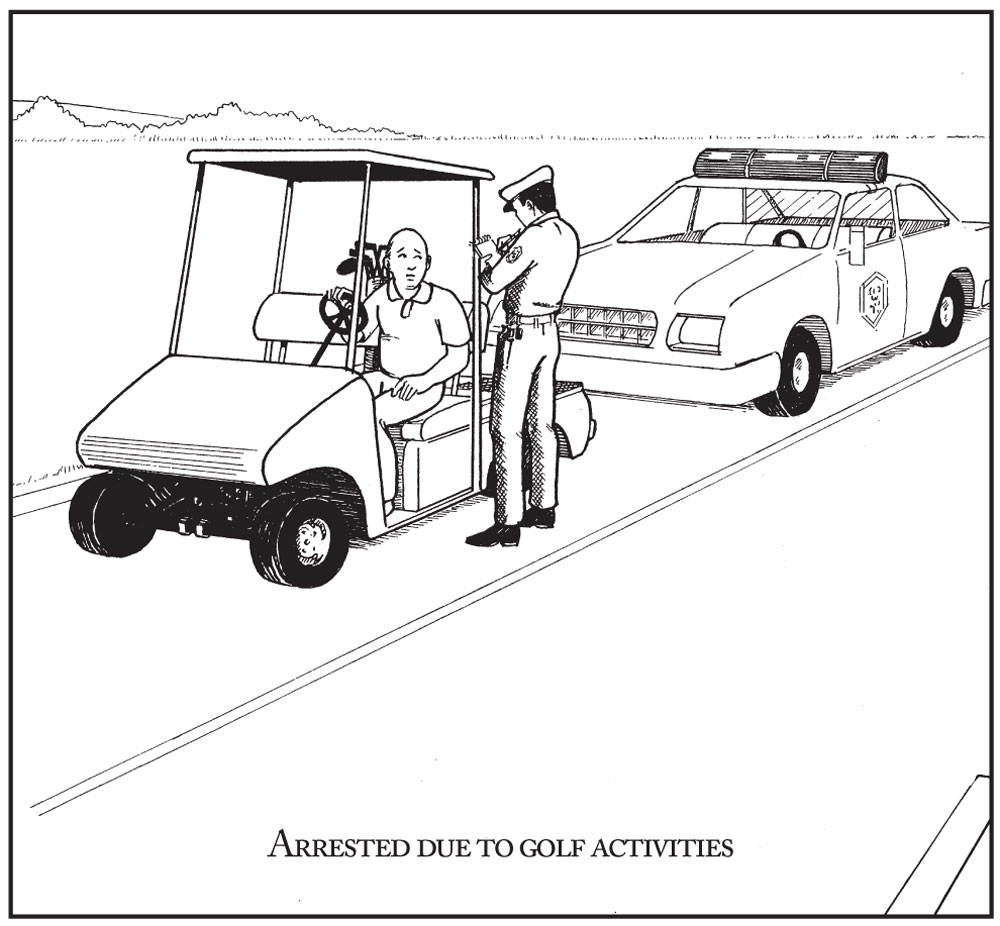
• Have you ever been arrested as a result of golf?
• Have you ever lied about the fact that you are playing, or about how much you play?
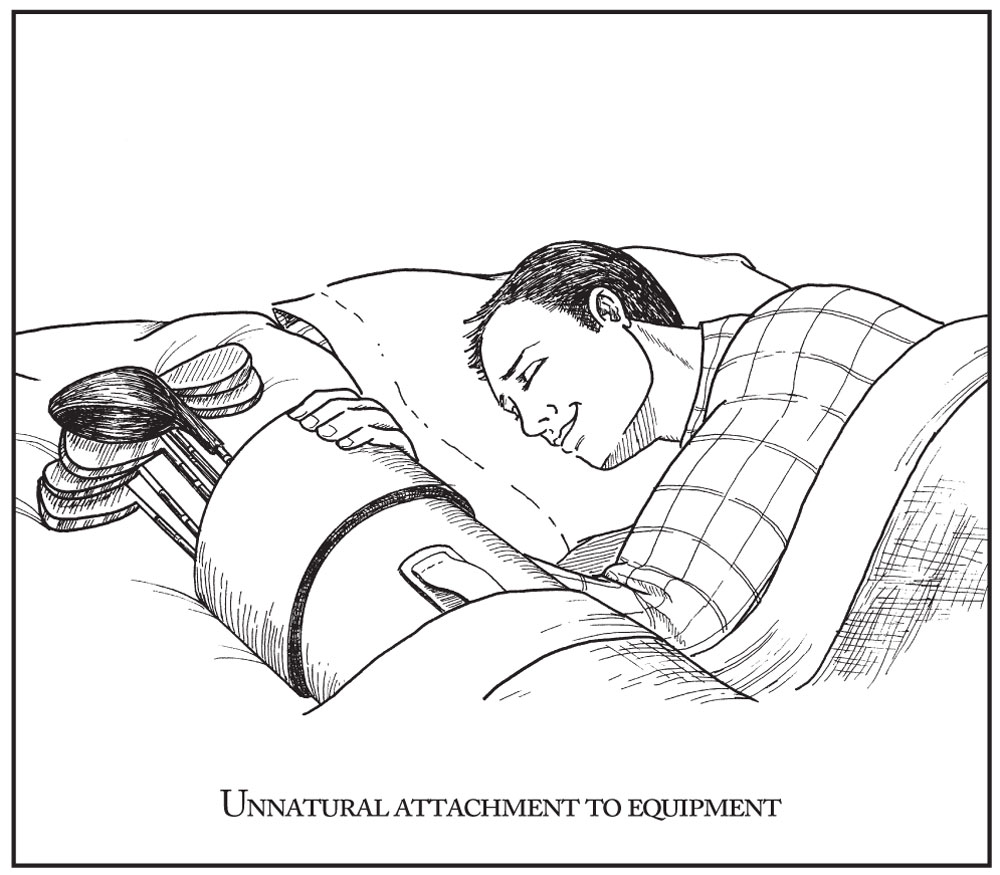
• Do you put the purchase of golf equipment ahead of your other financial responsibilities?
• Have you ever suffered a golf-related injury?
• Do you continue to golf despite the fact that you are never satisfied with your performance?
• Does golf interfere with your sleeping or eating?
• Does the thought of not being able to play golf terrify you?
• Do you feel it is impossible for you to live without golf?
2 Admit that you have a problem, and that you need help.
You are not responsible for your disease—but you are responsible for your recovery. You can no longer blame people, places, and courses for your addiction.
3 Admit to one other person that you have a problem.
This person will help you wean yourself off the game. This person should not be a regular in your foursome.
4 Reduce the amount of golf you play.
Going cold turkey may be difficult—first, reduce by half the number of times you play a week. Then cut that amount in half the following week, and so on. Replace golf with other activities to take your mind off the withdrawal you may experience. Make it a point to play other sports, go to the movies with your family, and watch alternate programming on Sunday afternoons.
5 Make direct amends to everyone you have harmed physically or emotionally as a result of your addiction.
This will help you to “own” your disease, and also allow others to help you when you need it.
6 Watch yourself carefully—and be willing to forgive a relapse.
Many addicts relapse at some point during recovery. If you fall back into your old ways, admit it to yourself first, then to others who can assist you in finding your way again.
7 Do not be afraid to ask for help when you need it.
Your golf pro may be able to direct you to others who have been through what you are dealing with. Form a support group. Therapists may also give you perspective. (Note: Sports therapy is physical therapy, not mental therapy.)
8 Remember that no one is perfect.
Seek the ability to change the things you can, and to accept the things you cannot change. Realize that you may never be able to play golf again without risk of a relapse. There is more to life than golf. But then again, relapses can always be cured.