Chapter 3
Loading and Reading
In This Chapter
![]() Choosing EPUB or PDF file formats
Choosing EPUB or PDF file formats
![]() Using the reading tools
Using the reading tools
![]() Putting books, magazines, and newspapers on your tablet
Putting books, magazines, and newspapers on your tablet
I suppose the teacher and writer Marshall McLuhan had it mostly right when he said, “The medium is the message.” It’s not that the content doesn’t matter, but as technologies advance and change, the delivery system — the medium — becomes linked with the message it carries. Enough of the philosophical discourse. Forget for a moment about the technology: The NOOK Tablet is merely another way to read the printed word and absorb its content into our souls.
This chapter looks at the NOOK Tablet as an eReader for books, newspapers, magazines, and most other electronic documents. You discover how to locate, open, read, bookmark, and reshelve documents. Then I tell you how to stock the shelves with purchases from the Barnes & Noble bookstore and with free downloads from other sources, and how to move books, documents, and other files from your personal computer to your tablet.
Knowing Your PDF from Your EPUB
Before you start worrying about file format, here’s the deal: If you purchase or download a book or other publication from the Barnes & Noble online store, it will work on your NOOK Tablet. And the same should apply to any major third-party online bookseller or free source (like Google Books).
 Remember: I’m talking about books here. Your NOOK Tablet can also display word processing, spreadsheet, presentation, and other files. And I show you how to create your own EPUB and PDF files as well. But not in this chapter; that happens in Chapter 4.
Both EPUB and PDF file types come in two types: protected and unprotected. A protected book has digital rights management (DRM) restrictions. Basically, there’s some limit on whether (or how often) you can make copies, lend, or transfer the title to another. Nearly every professional author and publisher supports the concept of DRM. Please don’t attempt to pick a fight with me about this: Authors need to pay their mortgage and put food on the table, just like you.
EPUB
 If you have a choice, go for EPUB so that you have the widest variety of customization and special features. If you can’t get an EPUB, PDF may be acceptable to most readers. Here are some details:
EPUBs are free and open (meaning that anyone can produce and distribute a file using this standard). That doesn’t mean you can release a document based on copyrighted material that belongs to someone else. An EPUB file is reflowable, meaning you can change font, font size, and other things.
These files can be created in either of two rather different forms. More advanced PDFs can include fonts and images, and will let you enlarge pages. However, some PDFs are scans (think of them as snapshots), like the one shown in Figure 3-1. They may look fine on your NOOK Tablet, or you may need to adjust the zoom and move around on each individual page to read the text. And these most primitive of eBooks don’t allow you to change font or size and don’t link to the web.
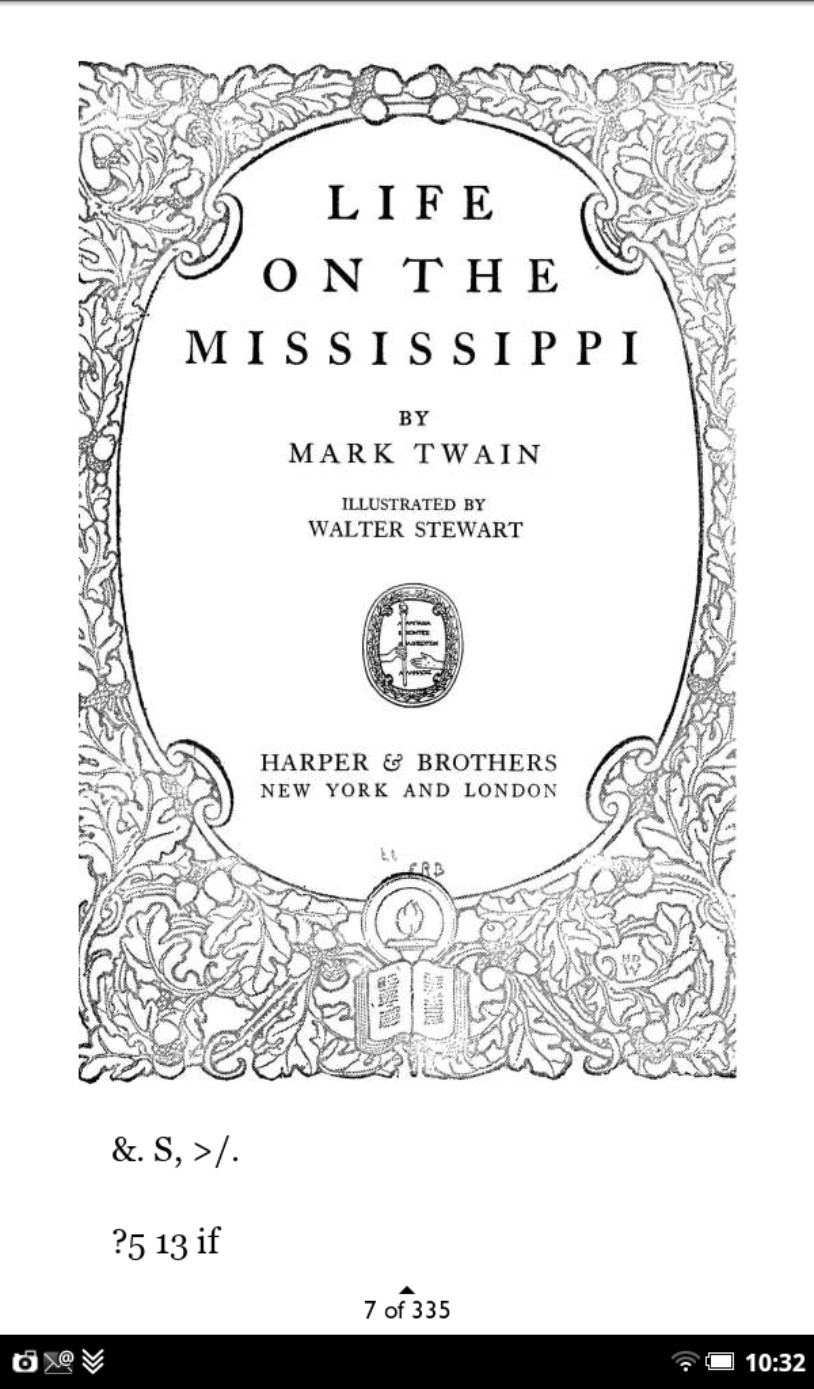
Figure 3-1: A PDF scan of a printed book gives you a set of pictures of pages rather than reflowable, searchable text.
Taking a Crack at Reading Tools
The pathway to the bells and whistles lies in the Reading Tools menu. Here is where you can move quickly through a book, search for something in particular, share your knowledge, or change the way the page looks. See Figure 3-2.
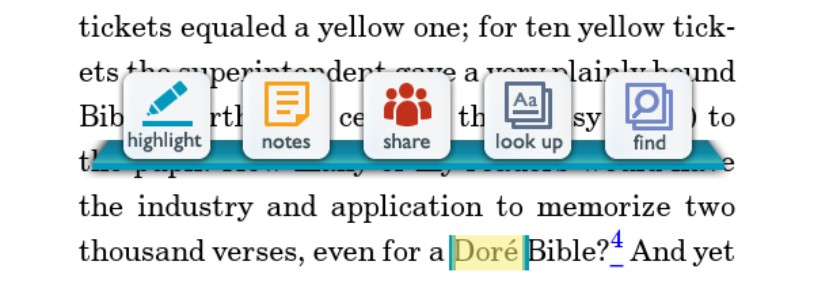
Figure 3-2: Reading tools let you highlight or make notes, look up words, and search the document.
To display the reading tools, tap near the center of the page.
Above these basic tools is a slider; it’s a gray line with a blue dot somewhere along its path. The location of the dot shows where you are in the book. To move forward or backward quickly, touch and drag the slider right or left. If you’re reading a book that someone has loaned you, a button at the right end of the slider lets you buy your own copy. And then, if the book publisher has included this feature, you may see a small blue flag all the way to the right end of the slider. Tap that flag to see special options related to that book; you may see recommendations for similar books or content that’s included just with the eBook.
To quickly jump to a particular page, tap the Go to Page button (between the reading tools and the slider). A numeric keypad will appear and you can enter a specific page number; keep in mind that page numbering is relative. If you have changed the typeface or its size, the book will reflow and page numbers will change.
Content
Select this to open up a menu with three tabs, including — as advertised — Contents. Here are the purposes of the three tabs:
 Contents. A list of chapter titles, sometimes with subsections. The current chapter is highlighted by a gray bar. In most books you can jump immediately to a section by tapping the title or subsection name.
Notes & Highlights. A list of passages that you’ve highlighted or written notes about in the current book. Again, you can jump to any of them by tapping the item.
Bookmarks. A list of all bookmarks you’ve set in the current title. Jump to any of the pages by tapping its notation.
Find
Use the computer’s power to find a particular word or phrase anywhere in the book.
1. Tap Search.
A keyboard appears onscreen.
2. Type a word or phrase you want to search for in the book.
3. Tap the Search button in the lower-right corner of the screen.
Share
Got something you’d like to tell others about? This tool links to social networking sites like Twitter or to e-mail, and from there to your friends, family, and business associates. A submenu offers these choices:
Recommend. Praise a book to friends and acquaintances by sending e-mail, posting a recommendation on your Facebook wall (or that of a friend who granted you that permission), or tweeting through your Twitter account.
Post Reading Status. You can tell others how far you’ve gotten in the current book by posting a message on Facebook or Twitter. Why? I’m really not sure, but someone must be interested in such matters.
Rate and Review. Send your comments and a 1–5 rating for display on BN.com, or post your review on Facebook or Twitter.
Like on Facebook. Proclaim to the world (or at least those who read your Facebook news feed) that you really, really like this book.
Before you can use e-mail or social network services, you have to link your NOOK Tablet to your Facebook or Twitter accounts (see Figure 3-3) or add e-mail accounts to the Contacts application.
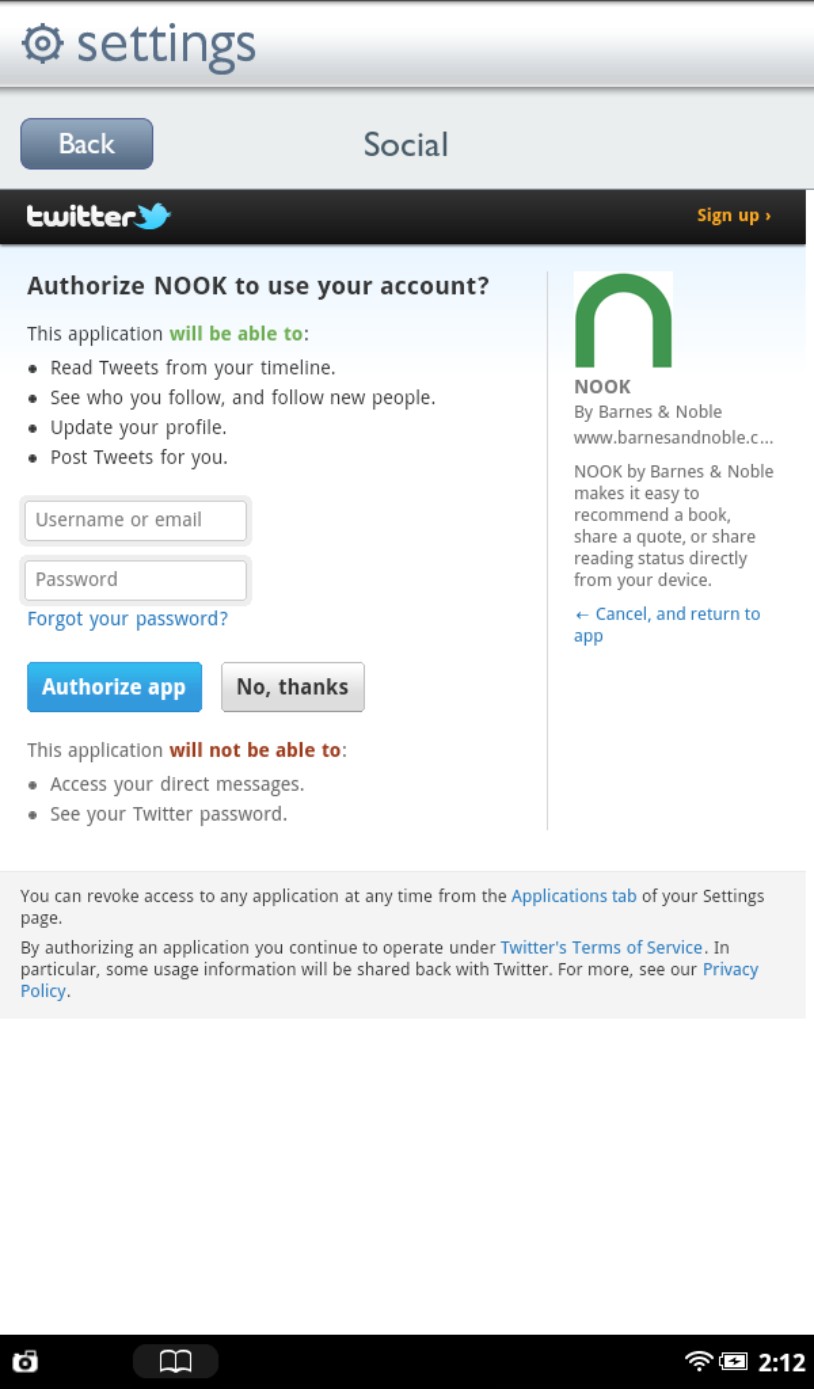
Figure 3-3: If you don’t already have a Twitter account, you can sign up for one from the tablet.
Text
Gutenberg could never have imagined this. This menu, for reasons known only to the designers at B&N, has a different look and feel than most of the other options screens in the tablet. Never mind, though; it’s pretty easy to use. See Figure 3-4, which shows the boxes.
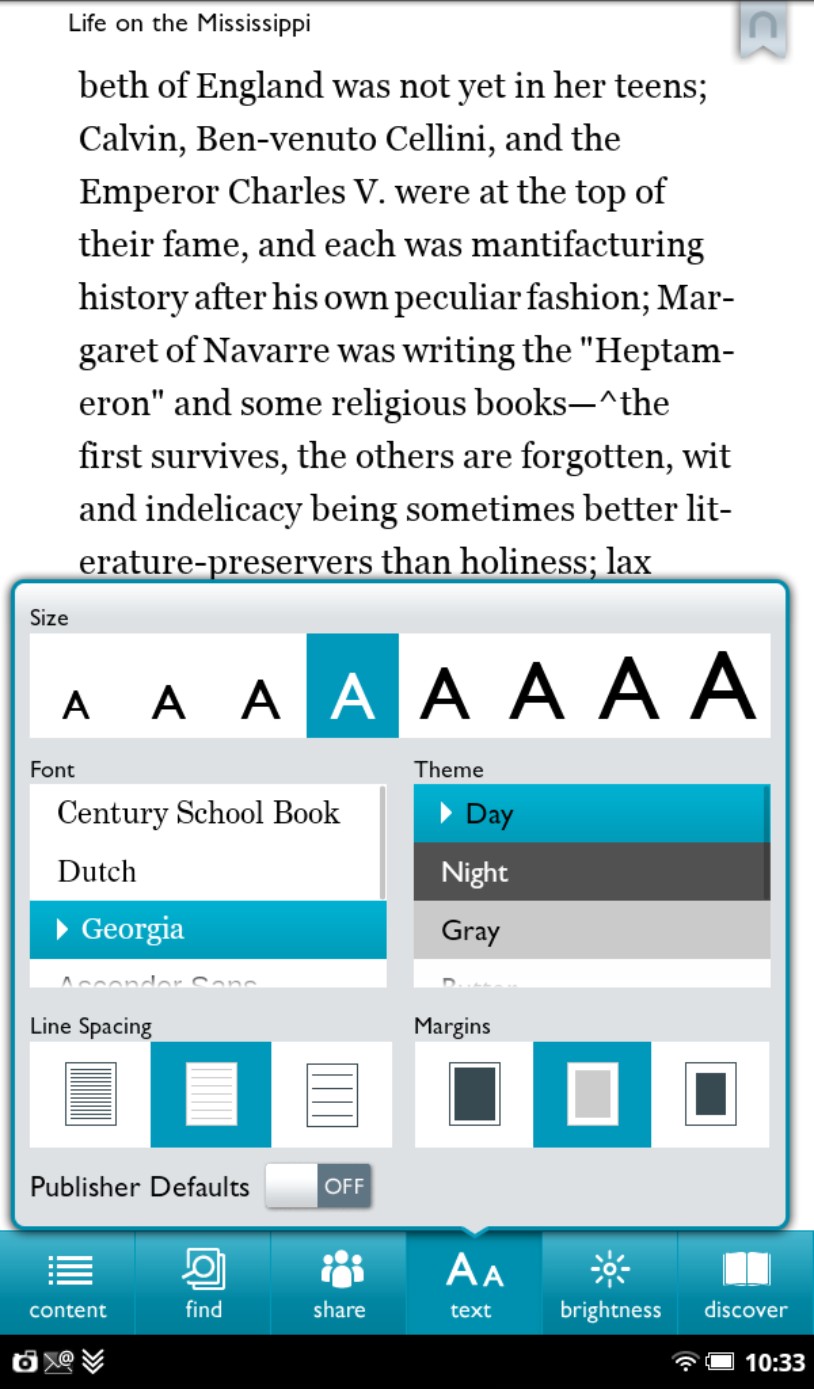
Figure 3-4: Text settings include size, font, line spacing, margins, text color, and background color.
Size
In most EPUB books, and in many PDFs, you can choose from eight type sizes. You just see eight A characters. Start out at the fifth or sixth largest for a good balance between readability and number of words that fit on the page. Feel free to experiment, though; touching any of the A’s will instantly change the size of the type that still shows above the menu.
Font
The NOOK Tablet comes with six different type styles. (Some book publishers may limit the options, though.) The first three typefaces are serif style, like the face used in most newspapers and magazines; many of the characters have extra little straight or curved marks that many readers find to be easier to read. The last three styles are sans serifs fonts, which means “without serifs.”
Theme
With an advanced eReader and a color LCD, you can choose the “paper” and the lighting:
Day. This is your basic black text against white background.
Night. You guessed this: white type against a black or gray background. This may be useful for reading at night or in other dark environments where you don’t want to light up the room with your book.
Gray. Black text on a light gray background. It isn’t a bad occasional choice to rest your weary eyes.
Butter. A slight variation on day, using dark brown text against a pale yellow page.
Mocha. White text against a light brown backdrop.
Sepia. Black text against a yellow-brown page.
Line Spacing
You can adjust the amount of space between lines of text: single spacing, 1.5-line spacing, and double spacing, shown from left to right onscreen.
Margins
Experiment here between narrow, medium, and wide margins for the text. The more white space there is around the text, the fewer words will fit on each line.
Publisher Defaults
Maybe you want to leave all of the decisionmaking to a professional graphic designer. Drag the switch to On to use the formatting recommended by the publisher; you’ll see the selections on the menu, but all other options will be grayed out and unavailable.
Brightness
I’m talking here about the illumination of the LCD screen, not the intelligence of the author. Tap the Brightness button and then drag the slider to the right to increase the light level; drag it to the left to decrease it.
A less-bright screen may be more comfortable on your eyes in certain conditions, and a dimmer illumination will use less battery power. Tap outside of the brightness slider to close the menu.
Discover
Here’s where your web connection can show off its mind-reading ability. See Figure 3-5. When you tap the Discover button, you’ll see three shelves of recommendations that are related to the book you’re currently reading:
Next in Series. Other books in the same series by the publisher. For example, choosing a book by Mark Twain published as part of a group of great 19th century literature might also show you titles by Charlotte Bronte and Nathaniel Hawthorne.
More by Author. A listing of other books by the same author as the tome you are currently reading.
Customers Who Bought This Also Bought. And so might you, B&N hopes.
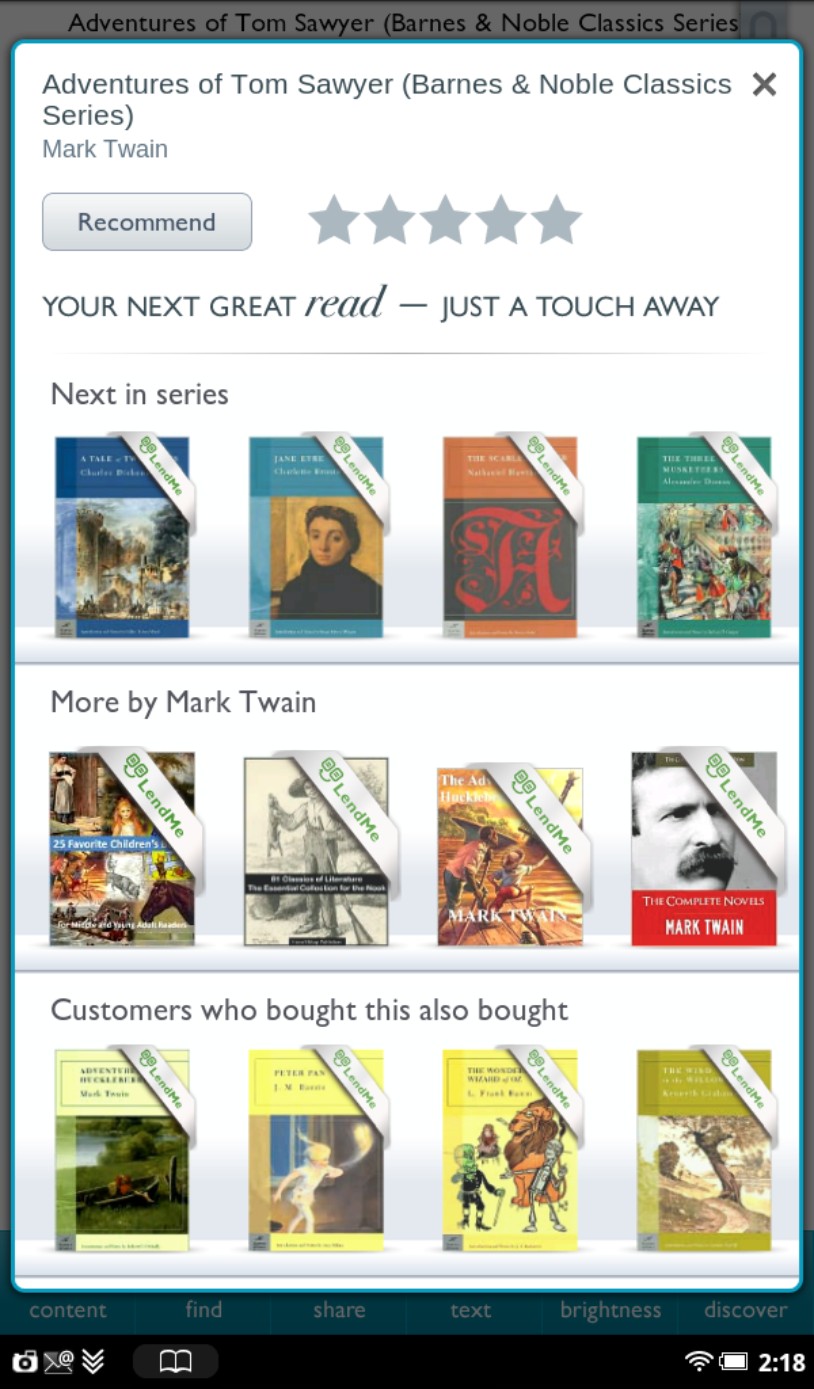
Figure 3-5: B&N would like to suggest more things for you to purchase, in the Discover display.
Reading Books, Magazines, and Newspapers
I’m going way out on a limb here and guess that you’d actually like to do some reading: books, magazines, and newspapers. Good news! That’s just about as easy as tapping your finger. But wait, there’s more: You can also make notes about what you’re reading. You can highlight favorite passages. You can place multiple bookmarks within the book. And you can share your literary criticism or recommendations with friends using websites like Facebook.
Here are the very basics:
Tap any icon that looks like a document (the Home screen, the Library, or file folders) to open the file and let it fill the screen.
Tap or swipe to turn pages. (I explain the details in a moment.)
The books you read most recently are in the I’m Reading section, but even if they’re off that list and back to your Library, you can return to the exact page you last read when you reopen a book.
Opening a book
In Chapter 4 I explain a bit about the book-buying process. But for now, I’m going to make the not-foolish assumption that you have already purchased or downloaded a few titles.
Naturally enough, you begin reading by opening a book. To do that, try any one of these methods:
Go to the Home screen and tap any cover on any of the top three panels. Not all books are displayed here, though — just the ones you put on this version of the desktop.
Go to the Keep Reading section (on the lower third of the Home screen) to reopen a something you were previously reading.
Go to the Library to open the folder (and there you can find books you have purchased or obtained from the Barnes & Noble website, from other online sources, or those that have been brought over to the device from a personal computer or laptop).
Turning the pages
Don’t lick your finger and attempt to turn the page; that’s unsanitary and will streak the glass. Instead, as shown in Figure 3-6, here’s how to move within an electronic book:
To turn to the next page, tap anywhere along the right edge of the page.
To turn to the next page, swipe to the left; think of this as flicking a page from the right side of an opened book to flip it over. To go forward one page, place your finger on the right side of the page and keep it in contact as you slide it to the left.
To turn back to the previous page, tap anywhere along the left edge of the page. Swipe to the right to go to previous pages. To swipe right, place your finger on the left side of the page and slide it to the right (flicking a page, in an electronic way).
Use one of the advanced tools. What are they? Read on.
Understanding page numbering
You may see a page number on the screen that corresponds to the printed version of the book (and it could be the hardcover or the paperback). In any case, because the type may be larger than what’s in the printed edition, and the screen is smaller than the paper, a single page on your NOOK Tablet may spread across several screens or digital pages. In some designs, you may “turn” page 47 three times before it moves to page 48.
Here’s the trick to comparing notes between two eReaders, or between an electronic and a printed copy: Ask for the wording of a particular passage and then find that same passage on your NOOK Tablet by using the Search (also called Find) function.

Figure 3-6: Tap or swipe to move forward of backward through the pages of a book.
Adding a bookmark
An electronic bookmark works just like a piece of cardboard between pages: It allows you to quickly open to a particular page. You can set as many bookmarks as you like in each book. See Figure 3-7.
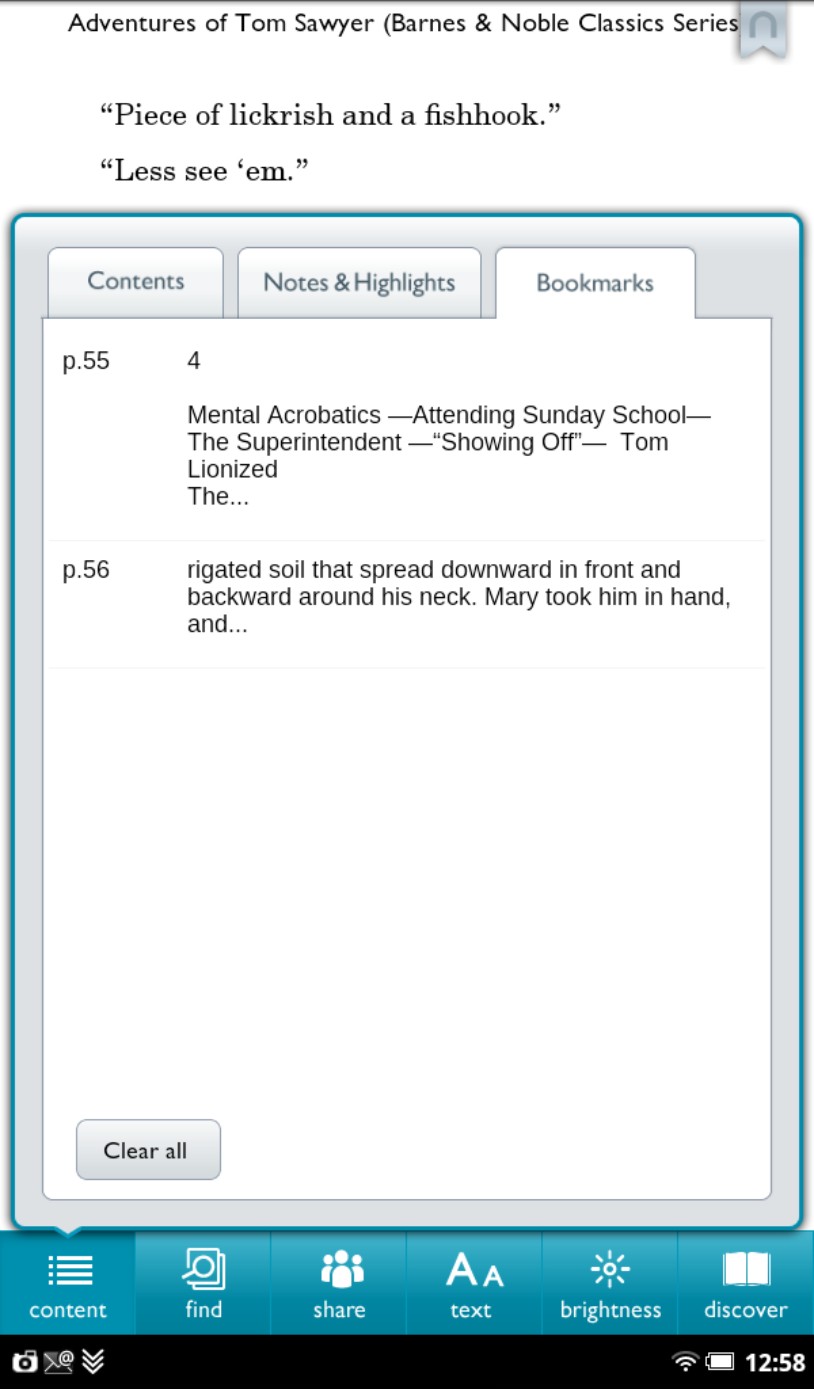
Figure 3-7: The bookmarks let you enter a few notes to help remind you of what caught your attention.
Here’s how to handle bookmarks:
Set a bookmark on the page you’re currently reading. Tap in the upper-right corner of the page. A small aqua blue ribbon will appear in the corner of the page.
List all the bookmarks in a book. Follow these steps:
1. Tap the center of the page to open the reading tools.
2. Tap the Content icon.
3. Tap the Bookmarks tab (in the Content pane). The tablet will list all the bookmarks in the book.
Tap a bookmark in the list to jump directly to the passage or page.
Close the bookmark list without visiting a bookmark. Tap anywhere on the book page outside the list of bookmarks.
Remove a bookmark on the current page. Tap the blue ribbon in the upper-right corner of the page to make it go away.
Clear all the bookmarks in a book:
1. Tap the Content icon in the reading tools.
2. Tap the Bookmarks tab.
3. Tap the Clear All button.
4. Tap OK.
Selecting text for sharing or definition
What exactly is a battologist? I mean, really, what exactly is a battologist? If you come across a weird word, look it up in the built-in copy of the Merriam-Webster’s Collegiate Dictionary, Eleventh Edition. But if that dictionary can’t help you answer the question, “What exactly is a battologist?” then go out on the web to consult other resources. See Figure 3-8. The answer to “What exactly is a battologist?” by the way, is: someone who unnecessarily repeats something.
You can share a word (like you-know-what), or pick up a short passage and send it by e-mail (or Twitter or in a Facebook post). The NOOK Tablet is ready, willing, and able to assist.
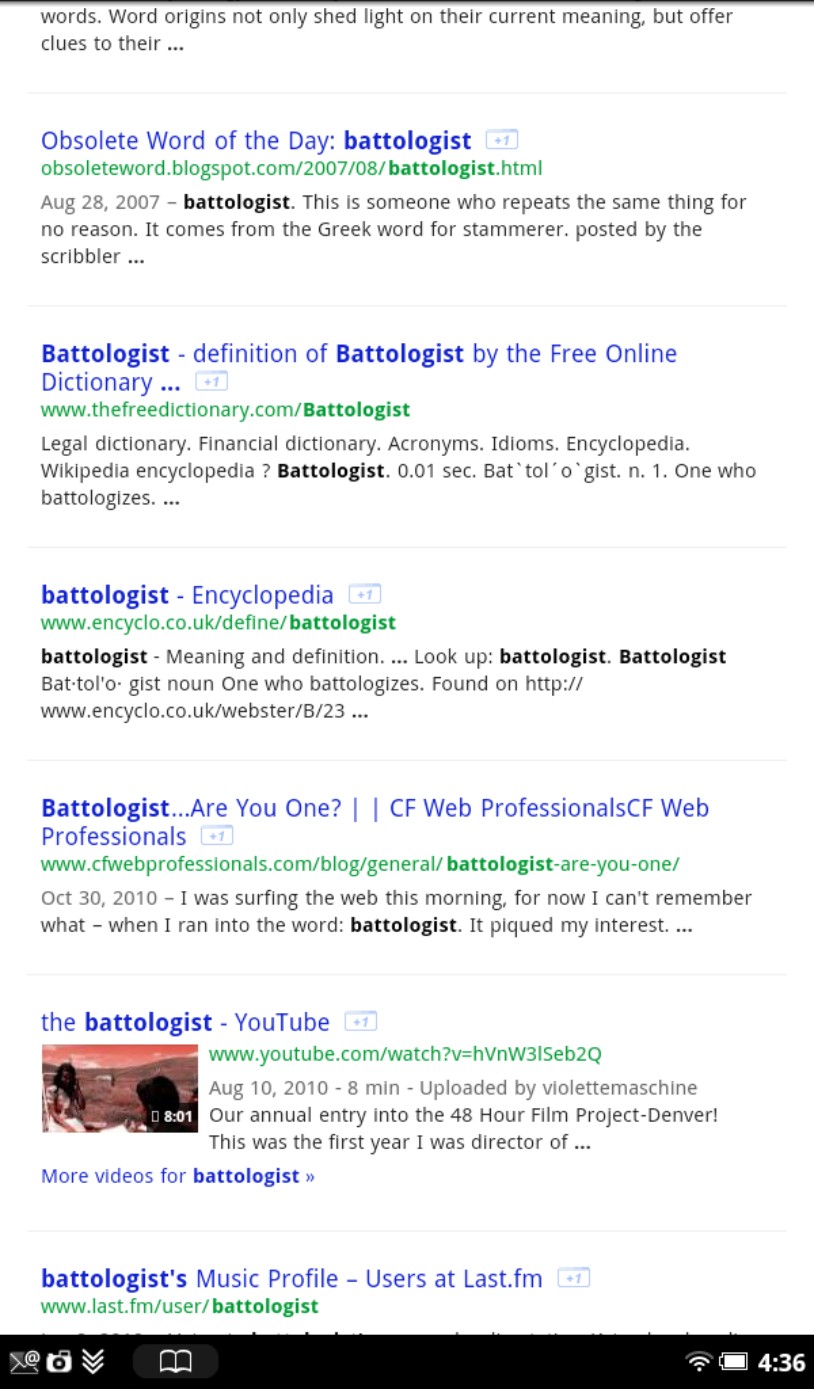
Figure 3-8: You can jump out of the book’s virtual pages and conduct a Google search for more information.
To select a word, press and hold on a word and then lift your finger. The word will be highlighted in a yellow block, and you’ll see a blue vertical bar on either side of it. (Unless, of course, you have chosen a different color theme for the page, in which case other colors will be applied.)
To expand the highlight from a single word to a passage, tap and then drag one of the vertical bars. When you lift your finger or fingers (you can use your thumb and pointing finger to cover more area), the Text Selection toolbar appears.
You can’t directly print a passage from your NOOK Tablet (at least not in the initial release), but here’s what you can do: Select a passage and send it to yourself by e-mail. Then use a computer and printer to make a hard copy.
 Be sure you understand the proper use of citations if you are using part of a copyrighted book in an academic paper or a publication of your own.
Picking the Text Selection Toolbar
The Text Selection Toolbar has these options:
Highlight. Mark a single word or a passage in a block of color.
Notes. Insert a comment (up to 512 characters) about the highlighted word or phrase; the date and time are included. A small icon, like a sticky note, will appear along the margin and you can search for what’s in your note later on. You can view and change notes any time. You can also make them invisible. Why? Perhaps you want to share a selection or loan a book to someone but keep your comments private. See Figure 3-9.
• View All Notes. Tap the page to display the reading tools. Tap Content. Tap the Notes & Highlights tab.
• Edit a Note. Tap the Note icon you want to edit; it appears onscreen. Choose Edit and use the keyboard to make changes. Tap the Post button.
• Remove a Note. Tap the highlighted word or phrase. Tap Remove Note.
• Make Notes Visible or Invisible. Tap the page to display Reading Tools. Tap the Content icon. Tap the Notes & Highlights tab. Slide the On/Off switch labeled Notes & Highlights to the setting you want.
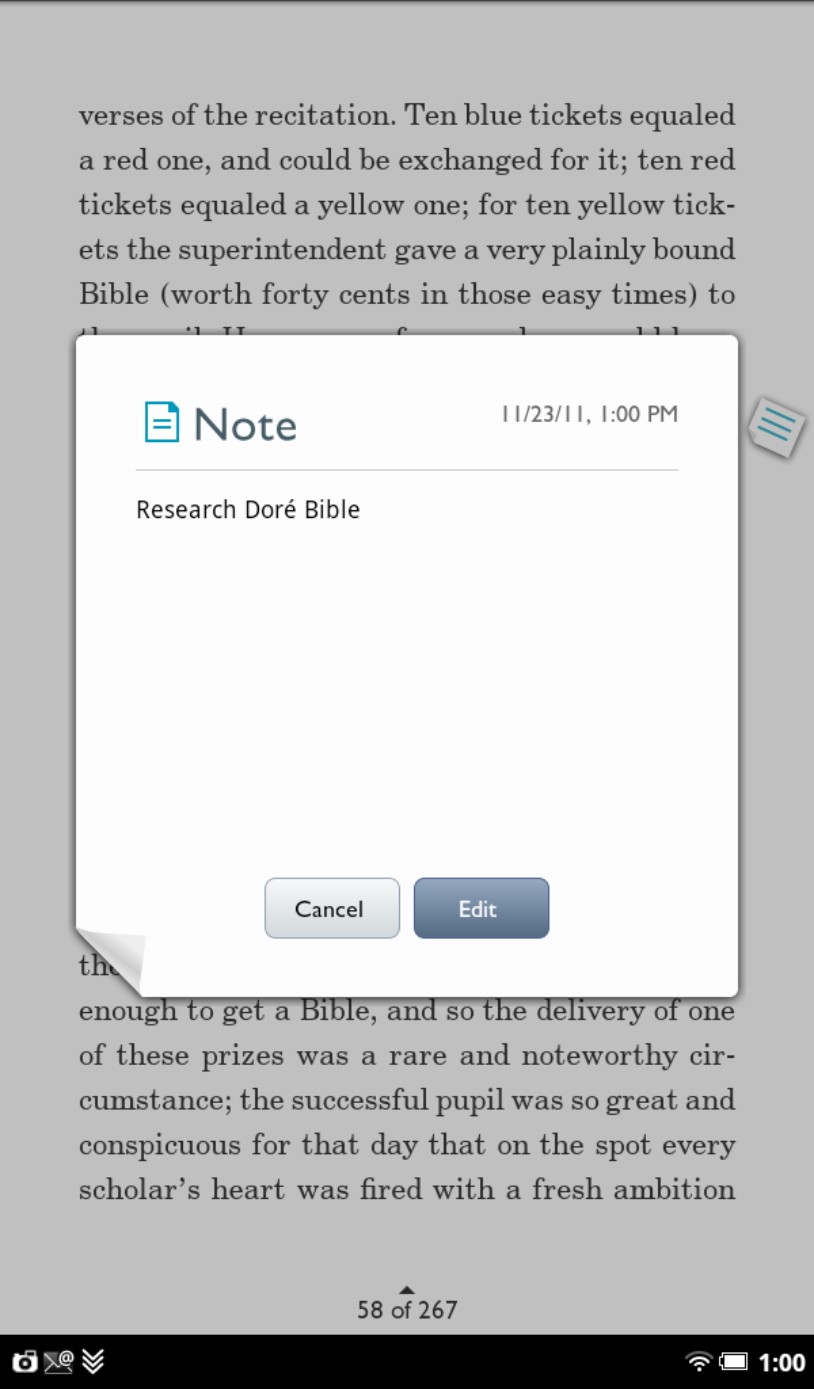
Figure 3-9: Create a book note as a reminder of something important or a task you want to perform.
• Change the Highlighting Color for a Note. Tap the highlighted word or phrase in the passage associated with a note. Tap the highlighting color you want to use.
Share. When you tap the Share icon, a submenu offers you the choice to pass along your insights or the words you’ve selected. The quotes are limited to about 350 characters. Here’s how to share:
• Contacts. Choose one or more e-mail contacts to send the material to. If you haven’t set up contacts or need to expand the listing, tap the Add Contacts button to fill in a form with a name and e-mail address.
• On Facebook. Post a quote and a short message on your own Facebook wall or on a Facebook friend’s wall.
• Via Twitter. Post a short quote (limited to <140 characters) using your pre-established Twitter account. At the lower right, a number tells you how many characters you have left; a negative number means you’re over 140.
Look Up. Search for a word’s meaning. To use Wikipedia or Google search, you need a working WiFi Internet connection.
• In the Dictionary. Tap the Look Up icon and a pop-up window will display the meaning, if one is available. To close the window, tap anywhere outside the window.
• In Wikipedia or in a Google search. Tap the Look Up icon; the pop-up window appears with a dictionary definition (if available). Tap the Google icon to search, or tap the golfball-like Wikipedia icon to look there.
Find. Tap the Find button to search the entire book or document. All instances of the word or phrase are highlighted and displayed in a box; jump to any of them by touching their entry. You may be reading an unsearchable PDF.
Searching in a book
In most eBooks you can search for a particular word or phrase. However, if you’re using a public domain file that is just a picture of pages (rather than the actual text), searching is impossible.
The Find function, shown in Figure 3-10, can hunt through the text of a publication for a word or phrase. Here’s how to search:
1. In the Reading Tools menu, tap the Find button.
2. Tap a previous query or type a new search.
3. Tap Done.
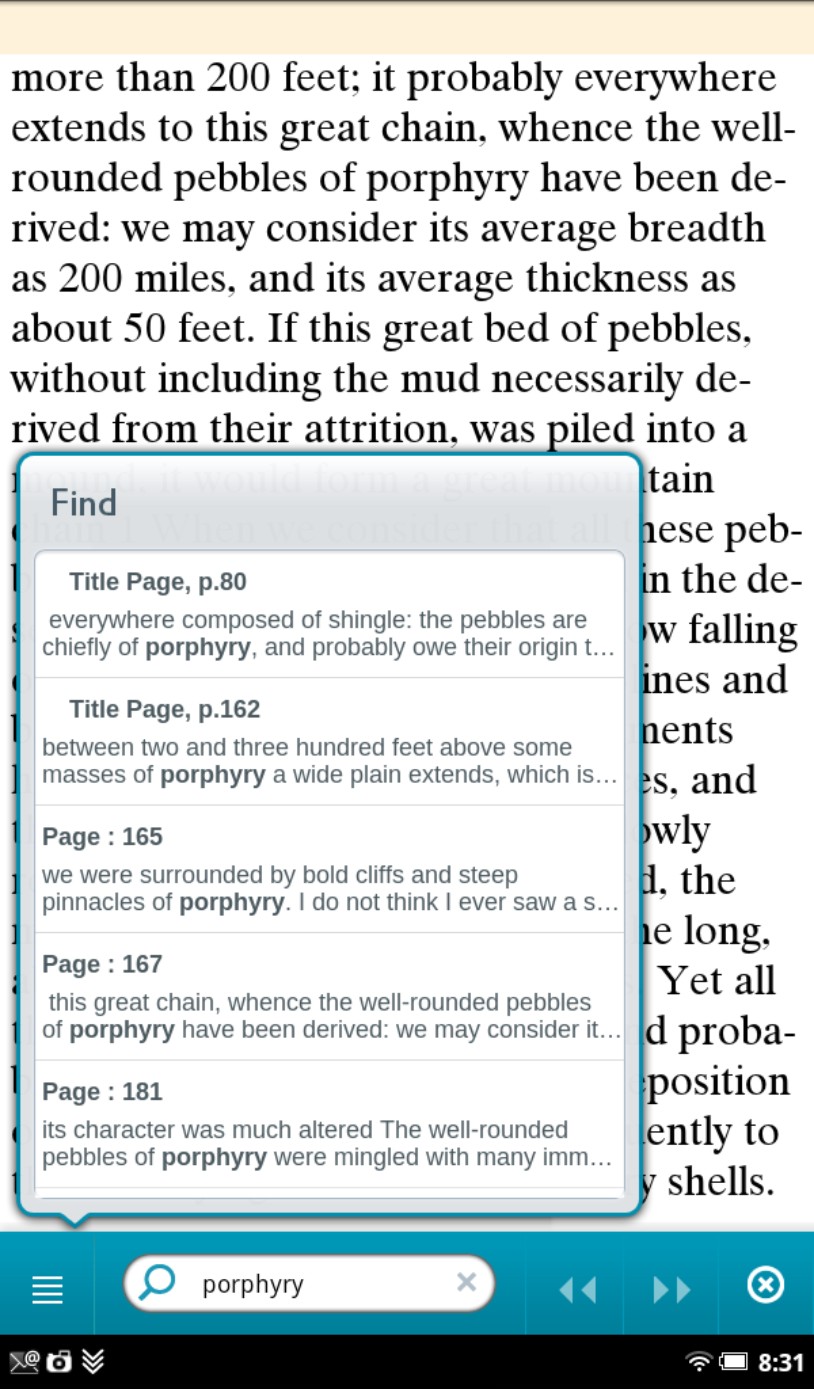
Figure 3-10: Entering a word or phrase into the Find box allows the tablet to hunt through the current document.
Customizing the Search tool
You can broaden or narrow your searches. You can individually select most of the places to look for a file. And you can also clear your history of recent searches (another way to protect your privacy on some level). When you use it from the quick nav bar, the Search tool always looks in your NOOK Tablet Library; if you’re connected by WiFi to www.BN.com, it also looks for titles in the online shop. You can include or exclude other areas.
To change the places your NOOK Tablet will look, go to the Searchable Items screen shown in Figure 3-11:
1. Press the  button to display the quick nav bar.
2. Tap the Settings button.
3. On the Settings screen, tap Search (in the App Settings section).
The Search Settings screen is displayed.
4. Tap Searchable Items.
A check box shows up by all the areas you can search; the Library and Shop are grayed out because you can’t remove them from searches.
Reading a magazine
Magazines come in all shapes, sizes, and special designs. Digital formats vary greatly; the way you see pages from a periodical using the NOOK Tablet may be different from one magazine to another and some may have interactive features.
Most magazines comes in two views. You get to choose:
Page view shows the entire page, including text and images.
Article view shows text only. See Figure 3-12.
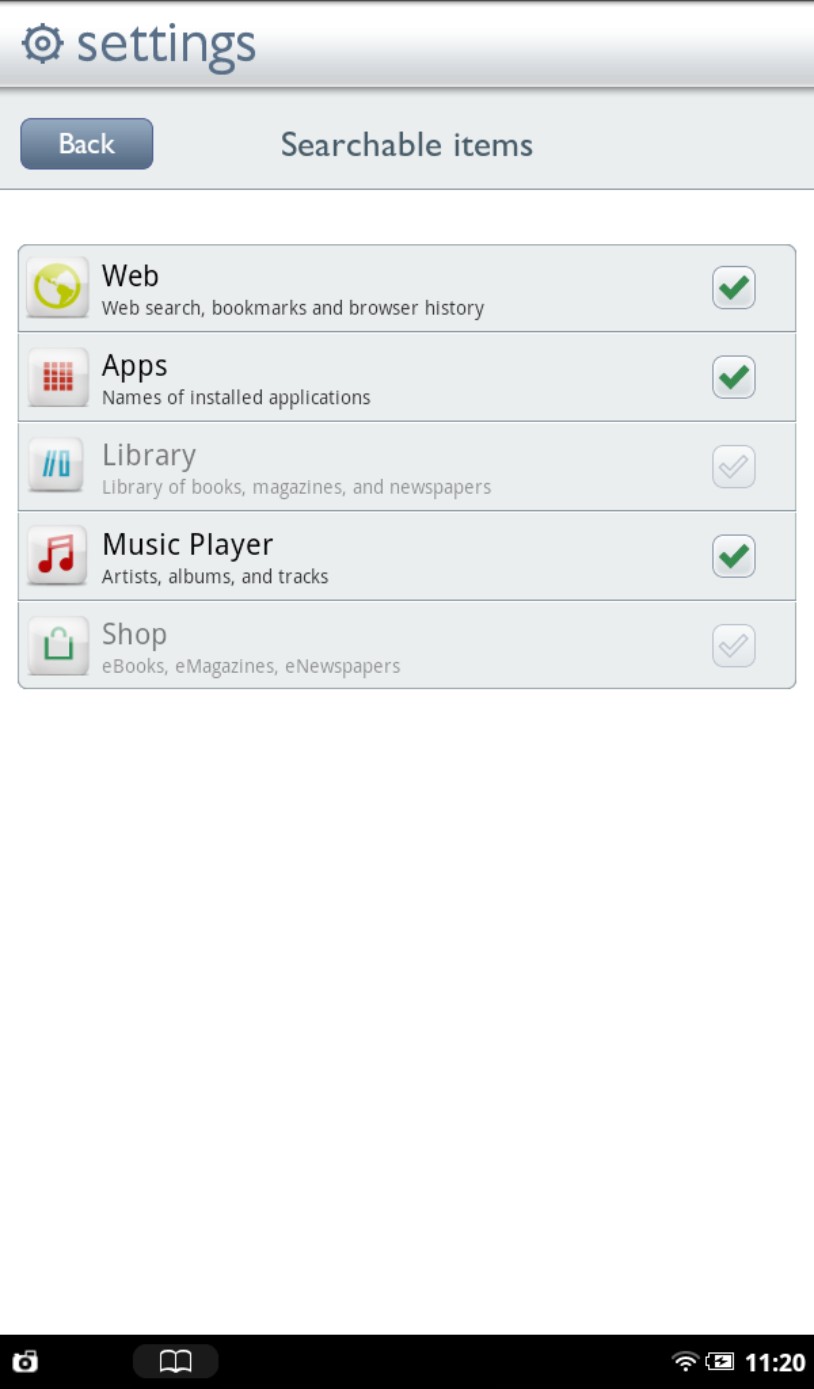
Figure 3-11: Your selections determine where the NOOK Tablet searches for a word or phrase.
Page view
This digital representation of the printed magazine has photographs, drawings, charts, and other elements. You’ll see small images in the lower half of the screen. Page view is available in both portrait and landscape modes.
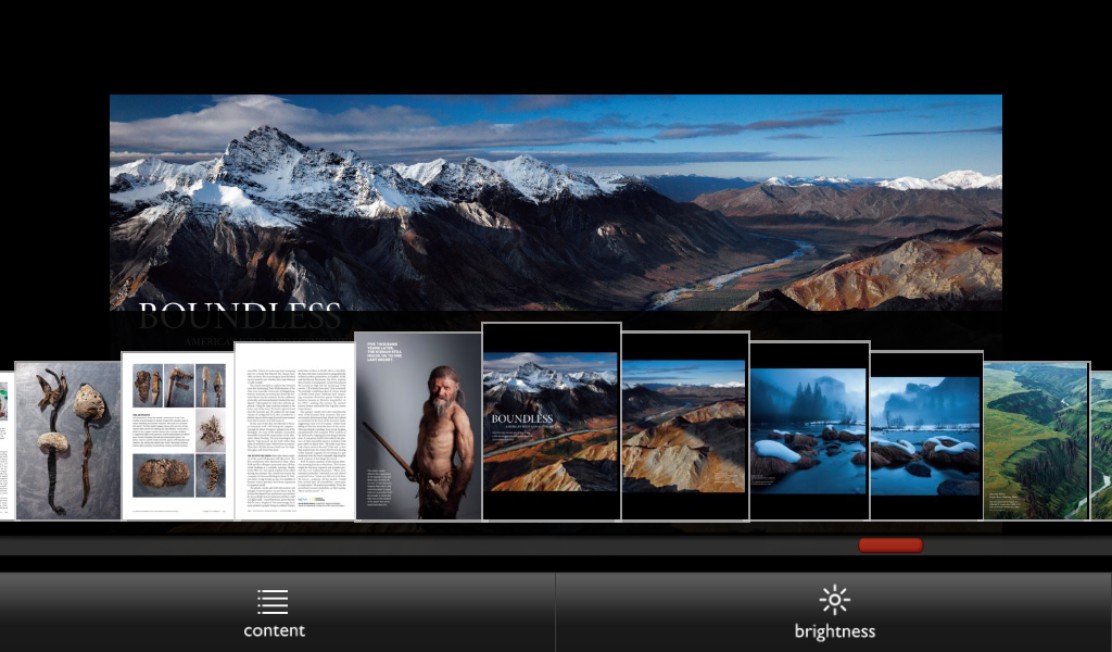
Figure 3-12: Try Page view in a spectacular magazine like National Geographic.
To move through the magazine, swipe your finger along the thumbnail images.
Tap a page to jump directly to it; a progress bar below the images shows where you are in the entire issue.
As you read a page, tap the right side of the screen to move to the next page; tap the left side to go back a page.
 Why is navigating a magazine different than navigating a book? Good question. Magazine publishers use a different electronic design than book publishers.
To make the thumbnail images reappear, tap in the middle of the screen.
Article view
This format shows articles with few (or no) illustrations or photos. You can scroll through the text as you would in a book. See Figure 3-13.

Figure 3-13: Article view emphasizes the text of a magazine piece; you can always go back to page view to enjoy photographs and illustrations.
Content navigation
You can also go directly from article to article:
1. Tap the center of the screen.
2. Tap the Content icon at the bottom of the page.
A window opens.
3. Tap the cover, table of contents, or specific article.
Reading a newspaper
Whether you’ve downloaded a single issue or you subscribe, newspapers are on your Daily Shelf and on the Newsstand page of your Library.
To open a newspaper, tap its front page. When it opens, the front page shows headlines and one or two paragraphs from the start of major articles.
To read an article in more depth, tap its headline or the introductory paragraphs.
To share parts of an article, tap in the middle of the page. From the reading tools, choose Share or Notes (if the publisher has allowed those features).
Bookmark a page by tapping in the upper-right corner of the page.
To turn to the next page of a newspaper, do any of the following:
• Tap along the right edge of the screen.
• Swipe your finger from right to left across the screen.
• Swipe your finger from low to high on the screen.
To go back a page in a newspaper, do one of these actions:
• Tap along the left edge of the screen.
• Swipe your finger from left to right across the screen.
• Swipe your finger from high to low on the screen.
Reading for Kids of All Ages
The NOOK Tablet offers some special features for young readers (and those of us who sit by their side as they discover the joys of reading) with special features that are part of the NOOK Kids picture books. Some children’s books have a bit of animation that you can set into motion by tapping the screen; others read aloud parts of the book. See Figure 3-14.
Children’s books open in landscape mode to better present the two-page spreads of most picture books. You may find the speaker tough to hear in noisy situations; one solution is to use two sets of earphones plugged into a simple splitter attached to the tablet’s audio output. Splitters are available at most electronics stores and shacks.
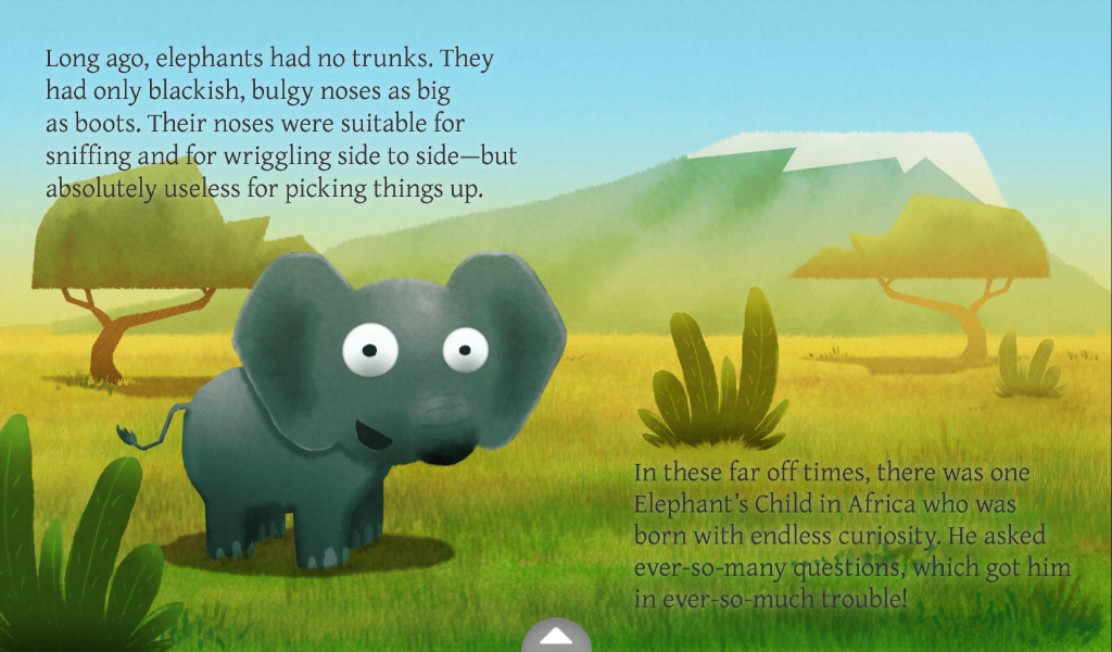
Figure 3-14: A book for kids of all ages.
Manipulate with these tips, too:
To make text bigger, double-tap it to enlarge it. Double-tap to return to the original size and position.
To make text bigger, zoom in by pinching in on the image and text.
Drag an image to move it around on the page.
Moving from page to page
Follow these steps:
Swipe to the left (drag your finger from right to left across the screen) to go forward.
Tap anywhere on the right edge of the screen.
To go backwards in the book, swipe to the right or tap the left side.
Skipping part of a children’s book
To go from one part of a kid’s book to another, follow these steps:
1. Tap the white arrow at the bottom of the screen.
Small pages from the book appear.
2. Slide your finger across the images.
3. Tap the small image of the page you want to read.
Choosing a reading style
Some children’s books can narrate. Others move. These special features appear only if the book includes them. See Figure 3-15.
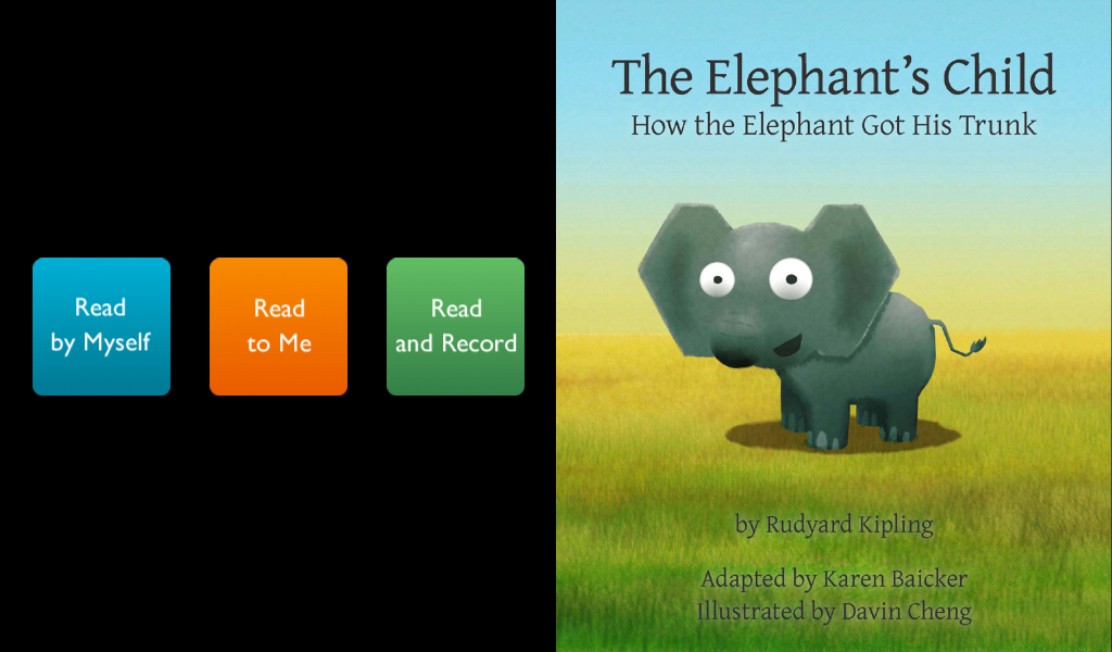
Figure 3-15: Some NOOK Kids books include prerecorded audio tracks, or you may be able to add your own.
Read by Myself
Just the words and pictures. Tap the blue button to open the book. Some special activities may be marked with a white star; tap the star to play. Better yet, let a kid tap the star.
Read to Me or Read and Play
Read and Play books have audio tracks, and interactive features, marked with a white star. Tap the orange Read to Me, or the purple Read and Play buttons to hear the author or an actor read aloud.
If you’re enjoying a Read and Play book, you can only turn the pages by tapping the onscreen arrows. The pages won’t turn if you tap them.
Read and Record
Daddy or Mommy (or a child!) can become the voice of a book. Here’s how:
1. Tap the cover of a kid’s book that has the Read and Record feature.
2. On the opening screen, tap the green Read and Record button.
The book opens to the first page.
3. Tap the green Read and Record button.
It will change to a Stop button. But don’t stop.
4. Start reading.
Here are some tips:
• The tiny hole on the right side of the NOOK Tablet is the microphone. Don’t cover it with your hand while you’re recording.
• Hold the tablet about 15 inches away from your mouth.
• Try to record in a quiet place without background noise.
5. When you’re done recording, tap the Stop button.
Keep these general recording tips in mind:
If you’d like to hear your recording right away, press the Play button. Press the Pause button when you’re done listening.
If you’re a perfectionist (or if someone dropped a pile of plates while the microphone was on), press the Re-record button to do it again.
To keep recording, swipe or tap to the next page and then tap the Record button.
To end a recording session at any time, tap the Done button in the lower left. A screen asks you to choose a picture as a symbol. Type a name for the recording.
To play a recording, open the book and tap the picture icon for the file you created.
To re-record, change the name, or delete the audio file, tap the Edit button next to the picture icon and then choose the option you want.
The recording you make is saved in the My Files folder; they aren’t part of the NOOK Kids book itself. When you connect your NOOK Tablet to a desktop or laptop computer, you can make a copy of the file there, or move it to the microSD/SDHC memory card you may have installed in the tablet.
Studying a NOOK Comics Book
Pow! Ooph! Wow! The NOOK Tablet can display specially formatted NOOK comics in portrait or landscape mode. Moving within a NOOK Comics book is very similar to the steps involved in NOOK Kids titles.
Tap the cover of a comic book to open it. See Figure 3-16.
Swipe left or right to go forward or back, or tap the right or left side of the page for the same effect.
Tap in the center of the screen to bring up the reader tools, including small versions of the entire document. Tap any image to go directly to a particular page.
To zoom in on text and images, double-tap or use the pinch-out gesture. Double-tap again to return the page to normal.
Bookmark a page by tapping the + icon in the upper right. Once you place a marker, tap the center of the page to display reader tools, tap the Content icon, and then tap the Bookmarks tab.
Jump directly to any bookmarked page by tapping the bookmark.

Figure 3-16: Betty and Veronica never looked so good as they do in NOOK comics.
Side-Loading Files
You can download this and that over the Internet via your WiFi connection from your NOOK Tablet to a wireless router. But you can bring files to a NOOK Tablet by side-loading, too. Side-loading means moving a copy of a file from your laptop or personal computer to your NOOK Tablet using the USB cable that comes with the device (or an identical replacement cable).
Use only the USB cable provided with your NOOK Tablet or an exact duplicate. There are many different types of USB cables and using the wrong one could damage the physical connector and cause tablet troubles.
What kind of files can you side-load onto a NOOK Tablet? There are two answers, so I’ll give you both:
You can store any compatible audio, video, picture, text, spreadsheet, presentation, or book file on your NOOK Tablet and use it to play them back. The NOOK Tablet can read the following file types:
• EPUB. The default format for books.
• PDF. Another format used for some books and publications, and for things like catalogs, instruction manuals, and documents.
• Word. Microsoft Office text files in doc, docx, docm, dot, dotx, and dotm formats.
• Excel. Microsoft Office spreadsheet files in xls, xlsx, xlsm, xlt, xltx, and xltm formats.
• PowerPoint. Microsoft Office presentation files in ppt, pptx, pptm, pps, ppsx, ppsm, pot, potx, and potm formats. (Special effects including animations, transitions, and multi-image slides will not show those features on the tablet.) See Figure 3-17.

Figure 3-17: You can work with basic PowerPoint functions; advanced animations and transitions aren’t yet supported.
• Plain text. Unformatted text from many sources, stored as a txt file.
• Web pages. Material stored using HTML, stored as htm, html, or xhtml files.
• Comic book archive. One great leap for man (and womankind): an advanced scheme for comic books, stored using the cbz format.
• Music, video, and image files. You know of what I speak.
• Music and audio. The NOOK Tablet can play files in any of these formats: aac, amr, mid, midi, mp3, m4a, ogg, or wav.
• Video. The tablet can play media files as large as 2GB, in any of these formats: Adobe Flash, 3gp, 3g2, mkv, mp4, or m4v.
• Images. The preferred format is jpg.
You can place any kind of electronic file — including formats that won’t work on the tablet— as if the tablet were an external hard drive. I sometimes do exactly that, storing files I may need on a business trip, with the expectation of side-loading them onto a desktop or laptop computer if I need to use them.
As delivered, the NOOK Table can open and display or play any of the file formats I have listed. The facility, though, is read-only; you can’t edit or change them. However, you can buy apps through www.BN.com that let you do some basic Microsoft Office editing.
Always keep backup copies of important files on your personal computer. That’s true even if you use your NOOK Tablet as a backup device for some of your files when you travel. For example, if you’re traveling to give a presentation, you can store copies of PowerPoint and Word files on the device as a second copy in case your laptop fails or disappears.
Moving files from a computer to your NOOK Tablet
To transfer files from your personal computer to your NOOK Tablet, do this:
1. Turn on your Windows-based or Macintosh personal computer.
Allow it to fully get ready.
2. Turn on your NOOK Tablet.
It’s faster to the starting line than a big computer, but then again, it’s not a big computer.
3. Connect the small end of the USB cable that came with your NOOK to the Tablet.
4. Connect the larger end of the USB cable to a USB port on your personal computer.
After a few moments, your computer should say it has detected a new disk drive. Depending on your computer, the drive may show up as MyNOOK, or it may just be an extra drive. There will be a second entry for the microSD/SDHC memory slot. If your computer has one internal hard drive plus a CD/DVD drive, the NOOK may show up as Removable Disk E: and Removable Drive F.
Some Windows computers may ask if you want to install a driver for a NOOK device. Click Cancel to close this dialog box.
5. On your computer, click the NOOK drive to open it.
6. Click My Files to open that subfolder.
7. Drag and drop files from the computer to the right subfolder.
Here are the folders on the NOOK Tablet:
• Books
• Documents
• Magazines
• Music
• My Downloads
• Newspapers
• NOOK Kids Recordings
• Pictures
• Videos
• Wallpapers
In most cases, it doesn’t matter where you place a particular type of file because the NOOK Tablet will sort it out for you. Files in picture format will appear in the gallery; videos will appear in the video player. But it does make your NOOK Tablet nicely organized. And one more thing: You can create your own folder on the tablet, using the Make Folder (or equivalent) command on your computer, and use it to store files of your choice.
Preparing files for the NOOK Tablet
What if you have files on your desktop or laptop computer that you want to use on your NOOK Tablet, but the files are stored in the wrong format? In most cases, you can use a program or utility on your computer to convert the files to a compatible format.
For example, any file you can open in Microsoft Office can be saved in one of the formats that the NOOK can display; just use the Save As command and select the proper format. The same process can be used to convert photos or drawings to JPG format, using a graphics program such as Adobe Photoshop, Adobe Photoshop Elements, or a Macintosh image editor.
When you process an image for the NOOK Tablet, consider resizing it. Set the image to about 4 x 6 inches. The resolution can be set at 72 or 96 dpi. Choose Save As, select JPG, and type a new name. That way you don’t lose the original larger, higher-resolution file.
Ejecting the NOOK Tablet from a computer
When you connect your NOOK to a laptop or desktop computer, the device becomes the equivalent of an extra hard disk drive — extra storage. To protect against damaging the files that you copy to the tablet, you should eject the device before you physically unplug the USB cable. (The official instructions say this is a “must do.” I classify it as a “should do.” In any case, I know I do do that old voodoo that I do so well, because a corrupted file is not pretty.)
You can eject the NOOK by
Clicking the Eject button. (You might see instructions onscreen.)
Using the operating system (described in the following sections).
Windows-based computer or laptop
Follow these steps:
1. Open the My Computer (or Computer) folder.
2. Click the icon for the Removable Drive for the NOOK Tablet.
Click it just once with the left mouse button.
3. Right-click the Removable Drive icon.
A submenu appears.
4. Click Eject.
5. If a microSDHC card is in your NOOK Tablet, repeat Steps 1–4.
6. Unplug the USB cable from the computer.
You can unplug the cable from the tablet or leave it attached if you’ll connect again to the computer soon. After the tablet is ejected and you remove the USB cable from the computer, the tablet tells you that it’s processing any new files. Give it a moment to put books and documents on the shelf.
Here is a second way to eject a NOOK Tablet from a Windows-based machine:
1. On the taskbar at the bottom of the Windows screen, click the Safely Remove Hardware icon.
You should see something like, “Safely remove USB mass storage device- Drive x.”
2. Choose based on your situation:
• If only one device is attached, then this is your NOOK Tablet. Go to Step 3.
• If more than one device is attached, choose the drive letter assigned to the NOOK Tablet.
3. Click the item in the pop-up notice.
The system should respond with “Safe to remove hardware.”
4. If a microSDHC card is in your NOOK Tablet, repeat Steps 1–3.
5. Unplug the USB cable from the computer.
You can also unplug the cable from the tablet or leave it attached if you intend to connect again to the computer soon.
Macintosh computer or laptop
Follow these steps:
1. Open the Finder and select the drive for the NOOK Tablet.
2. From the File menu, select Eject.
3. If a microSD or microSDHC card is in your NOOK Tablet, eject that memory card.
4. Unplug the USB cable from the computer.
You can also unplug the cable from the reader or leave it attached if you intend to connect again to the computer soon.
Traveling Abroad with a NOOK Tablet
Nothing prevents you from taking your NOOK Tablet outside of the United States, although some roadblocks keep you from buying something when you’re in another country. Why? Because most publisher-author contracts restrict selling a book in foreign countries (or indicate varying royalty rates).
Here’s a guide to the international lay of the land:
You can read anything that’s already on your NOOK Tablet as you travel anywhere in the world.
As of the end of 2011, NOOK Tablet devices are only being sold to people who have a billing address in the United States or one of its territories.
You can only buy content for your tablet if you have a billing address in the United States, U.S. territories, or Canada. You must make the purchase while you are (or your tablet is) physically within the United States, its territories, and Canada. (The device will identify its location through its WiFi router.)
You can download items you’ve already bought from anywhere in the world where you can obtain a WiFi signal.
You can lend and borrow eBooks from anywhere in the world.
Periodicals are automatically downloaded to your NOOK Tablet anywhere you can connect to a WiFi system.
It’s tough to get foreign and foreign-language eBooks for the NOOK Tablet. This restriction doesn’t apply to books in the public domain; check for titles there.
The NOOK Tablet can display several foreign languages, and other languages are possible if the typefaces are embedded in the eBook files.
Oh, and one more thing: The battery recharger for your NOOK Tablet has prongs that connect to wall outlets in the United States and Canada. It can work with power from about 110 to 240 volts. You need a plug adapter if you want to use the NOOK Tablet in a country that uses plugs of other shapes. You don’t need to convert or reduce the voltage — just change the shape of the plug.