
GRAPHICS AND ANIMATION
This chapter shows you how to create Angular applications with graphics and animation effects via HTML5 technologies and various open source toolkits. This graphics-related chapter is introduced early in this book because graphics provide an enjoyable approach to learning technologies. Even if you do not plan to use graphics and animation in your Angular applications, it’s worth skimming the contents of this chapter to familiarize yourself with visual effects that might be useful to you in the future.
As you will soon see, the code samples in this chapter use technologies that are unrelated to Angular, such as Scalable Vector Graphics (SVG), Data-Driven Documents (D3), GreenSock Animation Platform (GSAP), Cascading Style Sheets 3 (CSS3), and jQuery. In fact, one sample uses “pure” CSS3 to create animation effects in an Angular application, which is then adapted to a code sample that uses the Angular animations property to create animation effects. After reading the code in that example, you can create your own variations, perhaps by a combination of techniques from the other code samples in this chapter.
If you are a novice regarding graphics effects, this is probably the quickest path to follow to learn how to create graphics and animation effects with Angular. Thus, you benefit for two reasons: First, animation effects “the Angular way” have a decent amount of online documentation; second, you won’t need to spend a lot of extra time learning how to create animation effects in Angular with unrelated technologies.
The first section in this chapter discusses the Angular lifecycle, in part because one of the lifecycle methods is required in the GSAP-related code sample in this chapter.
The second section in this chapter shows you how to render graphics and create animation effects in SVG as well as D3. Although the examples in this section are very simple, they provide a starting point in case you need to create such effects in your Angular application.
The third section contains examples of D3-based graphics and animation effects. In case you don’t already know, D3 is an open source toolkit that is extremely popular and well-suited for data visualization (hence its inclusion in this chapter).
The fourth section contains an example of creating animation effects using “pure” CSS3, and a code sample that combines CSS3 with jQuery. Next you will learn how to handle mouse-related events in Angular applications. The final section briefly discusses the Angular module ng2-charts for creating charts and graphs.
An important caveat about the code samples in this chapter: They assume that you have a basic knowledge of SVG, D3, GSAP, CSS3, and jQuery. If you are unfamiliar with any of these technologies, you can read online tutorials that describe their basic features, or forge ahead in the code samples to identify the concepts that you need to learn from online sources. Even if you decide to skip the graphics samples, please read the first section of this chapter, which discusses the Angular lifecycle and provides useful information regarding Angular applications.
Various GitHub repositories are included that contain a plethora of swatch-like code samples that illustrate techniques for creating additional graphics and animation effects via SVG, D3, HTML5 Canvas, GSAP, and CSS3. As a side point (in case you are interested), it’s also possible to combine WebGL with Angular, an example of which is located here:
https://github.com/chliebel/angular2-3d-demo
There is one other point to keep in mind: Try to avoid Document Object Model (DOM) operations with native solutions, such as document.domMethod() or $('dom-element'), and use them sparingly (if at all). Angular enables you to perform DOM operations safely via ElementRef, Renderer and ViewContainer application programming interfaces (APIs). However, some code samples in this chapter do break the preceding recommendation to show you how to create a specific type of graphics effect.
NOTE

When you copy a project directory from the companion disc, if the node_modules directory is not present, then copy the top-level node_modules directory that has been soft-linked inside that project directory (which is true for most of the sample applications).
Before delving into the graphics-related code samples, let’s look at the Angular lifecycle methods.
Angular Lifecycle Methods
Angular applications have lifecycle methods where you can place custom code to handle various events (application start, run, and so forth). The Lifecycle Hook interfaces are defined in the @angular/core library, and they are listed here:
 OnInit
 OnDestroy
 DoCheck
 OnChanges
 AfterContentInit
 AfterContentChecked
 AfterViewInit
 AfterViewChecked
Each interface has a single method whose name is the interface name prefixed with ng. For example, the OnInit interface has a method named ngOnInit. Angular invokes these lifecycle methods in the following order:
 ngOnChanges: called when an input or output binding value changes
 ngOnInit: after the first ngOnChanges
 ngDoCheck: developer’s custom change detection
 ngAfterContentInit: after component content initialized
 ngAfterContentChecked: after every check of component content
 ngAfterViewInit: after component’s view(s) are initialized
 ngAfterViewChecked: after every check of a component’s view(s)
 ngOnDestroy: just before the directive is destroyed.
Because Angular invokes the constructor of a component when that component is created, the constructor is a convenient location to initialize the state for that component. However, child components must be initialized before accessing any properties or data that are defined in those child components. In this scenario, place custom code in the ngOnInit lifecycle method to access data from child components.
The complete set of Angular lifecycle events is located here:
https://angular.io/docs/ts/latest/guide/lifecycle-hooks.html
A Simple Example of Angular Lifecycle Methods

Copy the directory LifeCycle from the companion disc into a convenient location.
Listing 3.1 displays the contents of app.component.ts that shows you the sequence in which some Angular lifecycle methods are invoked.
LISTING 3.1: app.component.ts
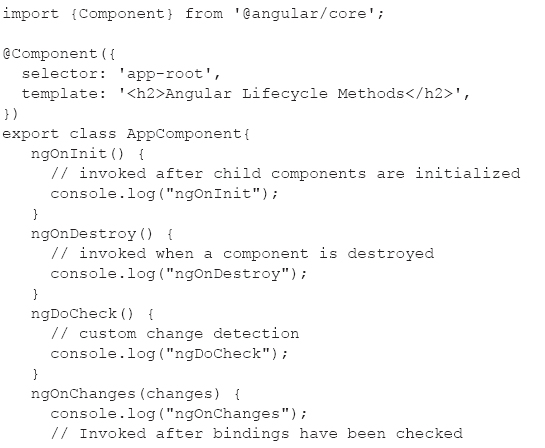
Listing 3.1 contains all the Angular lifecycle methods, where each method contains console.log() so that you can see the order in which the methods are executed.
Launch the application by navigating to the src subdirectory of the LifeCycle application, and invoke the following command:
ng serve
Navigate to localhost:4200 in a Chrome session, and then open Chrome Web Inspector and you will see the following output in the Console tab:
ngOnInit
ngDoCheck
ngAfterContentInit
ngAfterContentChecked
ngAfterViewInit
ngAfterViewChecked
ngDoCheck
ngAfterContentChecked
ngAfterViewChecked
The next section illustrates the usefulness of the ngAfterContentInit() method to apply animation effects after dynamically generating a set of SVG elements.
GSAP Animation and the ngAfterContentInit() Method

Copy the directory D3GSAP from the companion disc into a convenient location. This code sample involves updating (or creating) the following files:
package.json
main.ts
app.component.ts
app.module.ts
ArchTubeOvals1.ts
Now install the required gsap package in package.json as follows:
npm install gsap --save
Next, import gsap in main.ts, as shown in Listing 3.2.
LISTING 3.2: main.ts
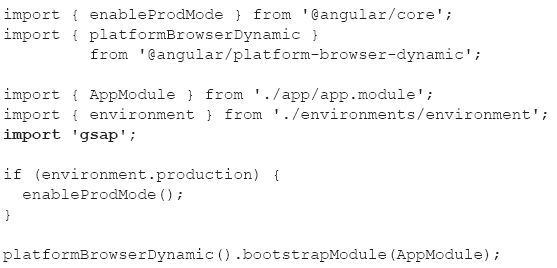
Except for the code snippet in bold, Listing 3.2 contains dynamically generated code.
Now let’s look at Listing 3.3, which displays the contents of app.component.ts that contains the lifecycle method ngAfterContentInit(). This method executes GSAP-based animation code to animate some dynamically generated SVG elements.
LISTING 3.3: app.component.ts
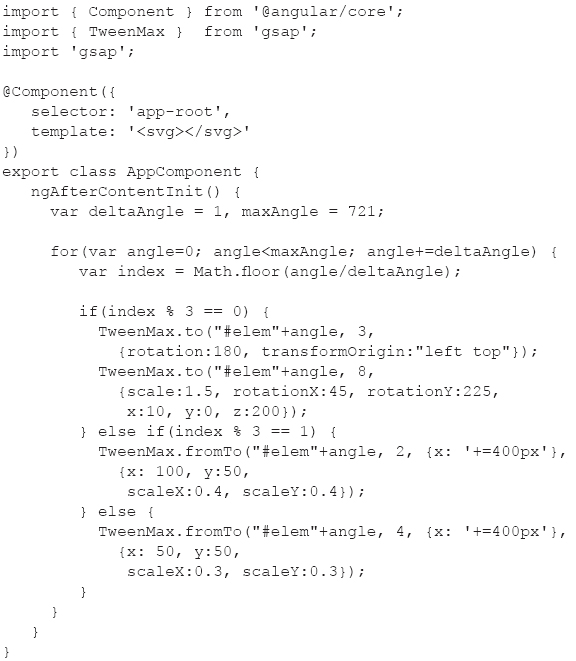
The ngAfterContentInit method in Listing 3.3 contains basic GSAP-based code for creating animation effects. These effects are applied to SVG elements based on the value of their id attribute, which is a concatenation of the string elem and an integer. Navigate to the GSAP home page and consult the online GSAP documentation for details regarding the GSAP APIs in Listing 3.3.
The ngAfterContentInit() method is useful when you need to execute a JavaScript function after a component has been loaded. In this code sample, the TypeScript file ArchTubeOvals1.ts defines a child component that dynamically generates a set of SVG elements, after which the code in mainArchOvals.ts executes a JavaScript function that adds GSAP-based animation effects. This execution sequence ensures that the animation effects are applied after the SVG elements have been created: otherwise the SVG elements do not exist yet and so there is no animation effect!
Listing 3.4 displays the contents of ArchTubeOvals1.ts (in the src/app subdirectory) that dynamically generates a set of SVG elements.
LISTING 3.4: ArchTubeOvals1.ts
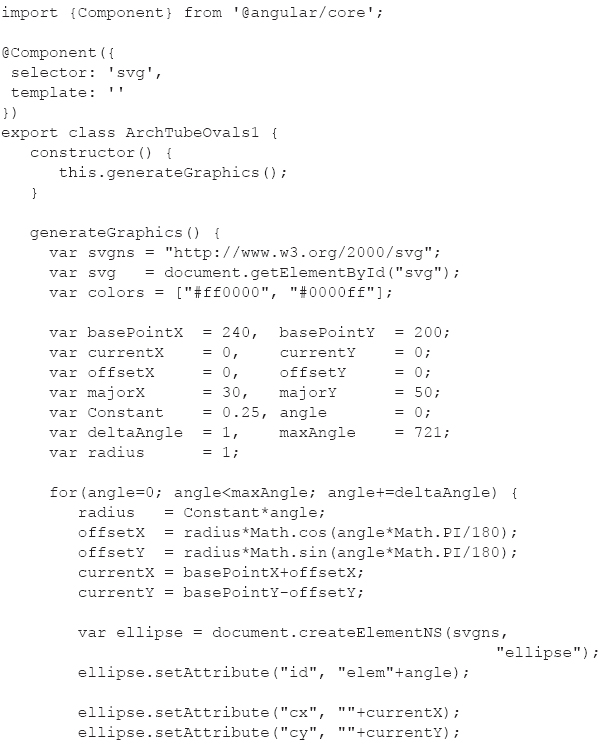
Listing 3.4 defines the ArchTubeOvals1 custom component whose constructor invokes the generateGraphics() method, which generates a set of SVG <ellipse> elements. The code in this method consists of a set of JavaScript variables followed by a loop that calculates positions on an Archimedean-like spiral. Each position is used to compute attributes for a dynamically generated SVG <ellipse> element that is rendered at that location.
Now update app.module.ts to include the necessary references to the TypeScript file ArchTubeOvals1.ts, as shown in bold in Listing 3.5.
LISTING 3.5: app.module.ts
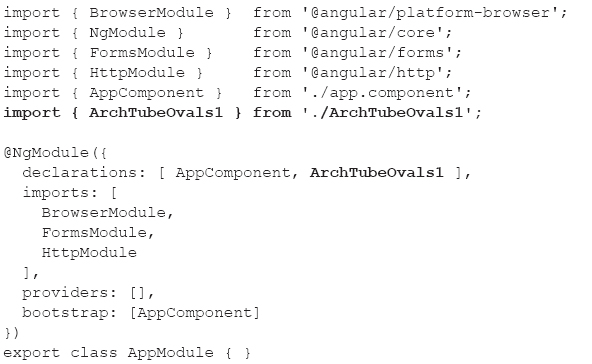
The code sample in this section is a simple illustration of the graphics effects that you can create by combining Angular with GSAP. Various samples involving SVG, GSAP, and Angular (but with beta-level Angular code) are located here:
https://github.com/ocampesato/react-svg-gsapi
The next section shows you how to add CSS3 animation effects in Angular applications.
CSS3 Animation Effects in Angular
The code sample in this section enhances the code sample in the previous section by adding a CSS3 animation effect.

Copy the directory SimpleCSS3Anim from the companion disc into a convenient location. Listing 3.6 displays the contents of app.component.ts that illustrates how to change the color of list items when users hover over each list item with their mouse.
LISTING 3.6: app.component.ts
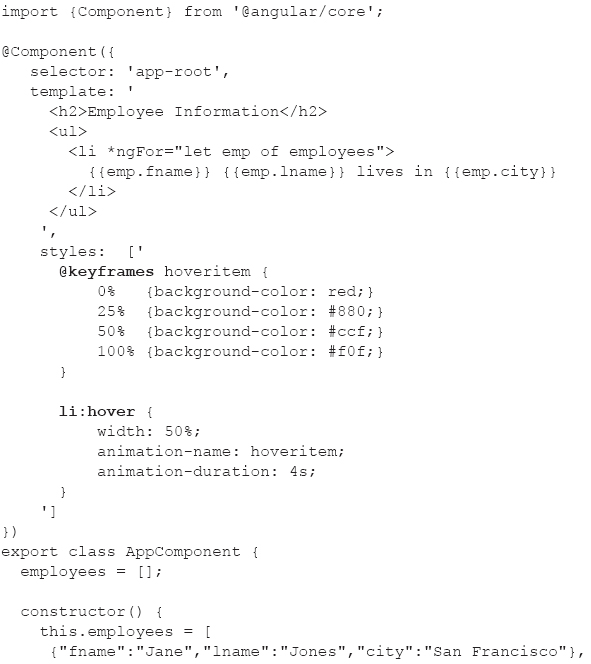
Listing 3.6 contains the styles property, which contains a @keyframes definition for creating an animation effect involving color changes. The styles property also contains an li:hover selector that references the @keyframes definition and specifies a time duration of 4 seconds for the animation effect. The colors that you see are specified in the @keyframes definition.
Launch the Angular application. When the list of names is displayed in a browser, move your mouse slowly over each name and watch how it changes color. Although this example is admittedly quite simple, you can modify its contents to achieve other CSS3-based animation effects.
Animation Effects via the “Angular Way”
The code sample in this section also creates an animation effect by adding some CSS3 selectors.

Copy the directory SimpleNG2Anim from the companion disc into a convenient location. Listing 3.7 displays the contents of app.component.ts that illustrates how to move the position of the <li> elements when users hover over them with their mouse. This code is based on modifications to the code in Listing 3.6 (as discussed later).
LISTING 3.7: app.component.ts

Listing 3.7 consists of five modifications to the code in Listing 3.6. Specifically, the section labeled “part #1” is a new import statement that replaces the original import statement. The section labeled “part #2” is the newly added Emp class, which holds data for each employee.
The section labeled “part #3” is the new transitions property, which defines the behavior when an animation event is triggered (this occurs during a mousemove event “over” an <li> element). The portion in bold (which is not labeled but is “part #4”) in the ngFor element essentially binds the mousemove event to the toggleState() method in the Emp class. Finally, the section labeled “part #5” is an array of Emp objects that replaces the original array in which each employee is represented as a JavaScript Object Notation (JSON) string.
A Basic SVG Example in Angular
The code sample in this section shows you how to specify a custom component that contains SVG code for displaying an SVG element. This example serves as the foundation for the code in the next section, which involves dynamically creating and appending an SVG element to the DOM.

Copy the directory SVGEllipse1 from the companion disc into a convenient location. Listing 3.8 displays the contents of app.component.ts that references an Angular custom component in order to render an SVG ellipse.
LISTING 3.8: app.component.ts
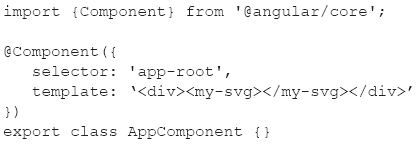
Listing 3.8 is very simple: the code defines a component whose template property contains a custom <my-svg> element inside a <div> element.
Listing 3.9 displays the contents of MyEllipse1.ts that contains the SVG code for an SVG ellipse.
LISTING 3.9: MyEllipse1.ts
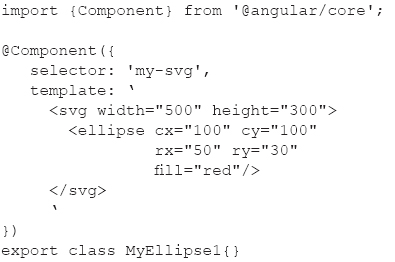
Listing 3.9 is straightforward: The template property contains an SVG <svg> element with width and height attributes, and a nested SVG <ellipse> element with hard-coded values for the required attributes cx, cy, rx, ry, and fill.
Listing 3.10 displays the contents of app.module.ts with the new contents shown in bold.
LISTING 3.10: app.module.ts
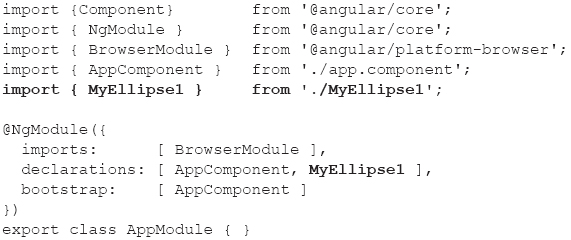
Listing 3.10 contains generic code that you are familiar with from Chapter 2, as well as a new import statement (shown in bold) involving the MyEllipse1 class. The other modification in Listing 3.10 is the inclusion of the MyEllipse1 class (shown in bold) in the declarations array.
Launch the Angular application and you will see a colored SVG ellipse.
Incidentally, the following links explain how to create SVG gradients and then how to create SVG Gradient Effects in Angular applications:
https://developer.mozilla.org/en-US/docs/Web/SVG/Tutorial/Gradients
Angular and Follow-the-Mouse in SVG

The code sample in this section creates a child component and uses mouse-related events to create dynamic graphics effects. Copy the directory SVGFollowMe from the companion disc into a convenient location.
Listing 3.11 displays the contents of app.component.ts that illustrates how to reference a custom Angular component that renders an SVG <ellipse> element at the current mouse position.
LISTING 3.11: app.component.ts

As you can see, the template property in Listing 3.11 specifies a <div> element that contains a custom <mouse-move> element.
Listing 3.12 displays the contents of MouseMove.ts that illustrates how to reference a custom Angular component that renders an SVG <ellipse> element at the current mouse position.
LISTING 3.12: MouseMove.ts

Listing 3.12 contains a template property that defines an SVG <svg> element. The (mousemove) event handler is executed whenever users move their mouse, which in turn executes the custom method mouseMove().
Notice that the mouseMove method accepts an event argument, which is an object that provides the coordinates of the location of each mousemove event. The coordinates are specified by event.clientX and event.clientY, which are the x-coordinate and the y-coordinate, respectively, of the current mouse position.
The next code block in the mouseMove method dynamically creates an SVG <ellipse> method, sets the values of the five required attributes (see the previous section for the details), and then appends the newly created SVG <ellipse> method to the DOM. This functionality creates a follow-the-mouse effect that you can see when you launch the Angular application code in this section.
Note that the final line of code in the mouseMove method appends an SVG <ellipse> element directly to the DOM; it is better to avoid this approach if it’s possible to do so.
Listing 3.13 displays the contents of app.module.ts with the new contents shown in bold.
LISTING 3.13: app.module.ts
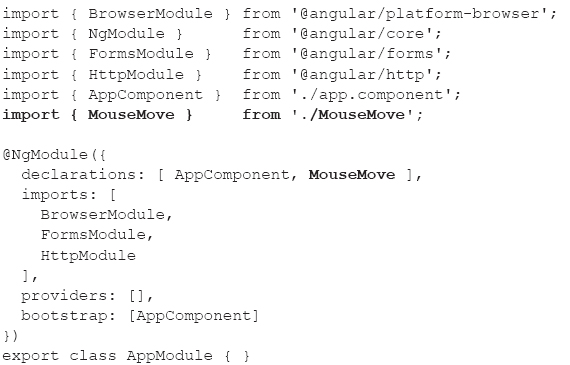
The code in Listing 3.13 follows a familiar pattern: Starting with the “baseline” code, add an import statement that references an exported TypeScript class (which is MouseMove in this example) and add that same TypeScript class to the declarations array.
Launch the Angular application. After a new browser session is launched, slowly move your mouse to see the different colored SVG ellipses rendered near your mouse. As an exercise, modify the code in MouseMove.ts so that new SVG ellipses are “centered” underneath your mouse.
D3 and Angular
The previous two sections showed you examples of Angular applications with SVG. This section shows you how to combine D3 with Angular. Note that the code sample in this section also appends SVG elements directly to the DOM.
In case you don’t already know, D3 is an open source toolkit that provides a JavaScript-based layer of abstraction over SVG. Fortunately, the attributes of every SVG element are the same attributes that you specify in D3 (so your work is cut in half).
Copy the directory D3Angular2 from the companion disc into a convenient location. Listing 3.14 displays the contents of app.component.ts that illustrates how to use D3 to render basic SVG graphics in an Angular application.
LISTING 3.14: app.component.ts
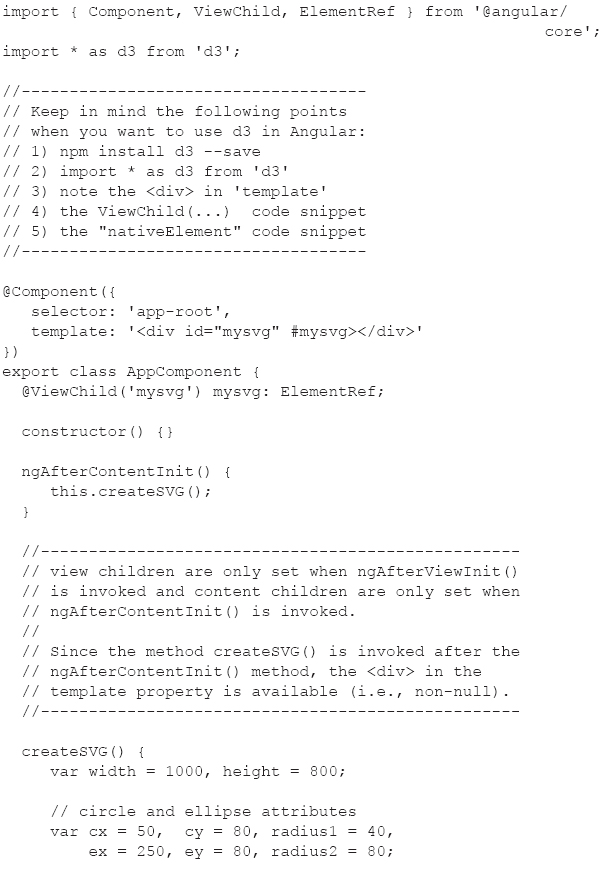
Listing 3.14 starts with two import statements, followed by a comment block that summarizes the key points for using D3.js in Angular applications. The template property contains a <div> element that is available in the ngAfterContentInit method, which in turn simply invokes the createSVG() method, which populates an SVG <svg> element with four shapes (a circle, an ellipse, a rectangle, and a line segment).
Note the @ViewChild decorator that defines the variable mysvg that has type ElementRef; this variable “links” the <div> element in the template property with the variable svgElement, which is defined in the createSVG() method:
let svgElement = this.mysvg.nativeElement;
Notice how the various SVG elements are dynamically created and how their mandatory attributes (which depend on the SVG element in question) are assigned values via the attr() method, as shown here (and in the preceding code block as well):
// append a circle
svg.append("circle")
.attr("cx", cx)
.attr("cy", cy)
.attr("r", radius1)
.attr("fill", colors[0]);
After you learn the mandatory attribute names for SVG elements, you can use the preceding syntax to create and append such elements to the DOM.
You can also find many similar code samples involving SVG and Angular (with beta-version Angular code) here:
D3 Animation and Angular
The following code block illustrates how to add D3-based animation effects to the SVG <circle> element in the D3Angular2 Angular application:

The code inside the preceding event handler is executed during each mousemove event, accompanied by the dynamic creation of an SVG <ellipse> element. The new functionality involves the transition() method, the duration() method, and setting the transform attribute, all of which are shown in bold in the preceding code block.
As you can see, the transform attribute is set to a scale() value, which sets the width and height to 50% of their initial value during an interval of 2 seconds (which equals 2000 milliseconds), thereby creating an animation effect.
Pure CSS3 3D Animation in Angular
The code sample in this section creates 3D graphics and animation effects without any SVG, D3, HTML5 Canvas code, or any other graphics-related toolkit.

Copy the directory PureCSS3Anim from the companion disc into a convenient location. Listing 3.15 displays the contents of index.html that references a CSS selector with 3D animation effects.
LISTING 3.15: index.html
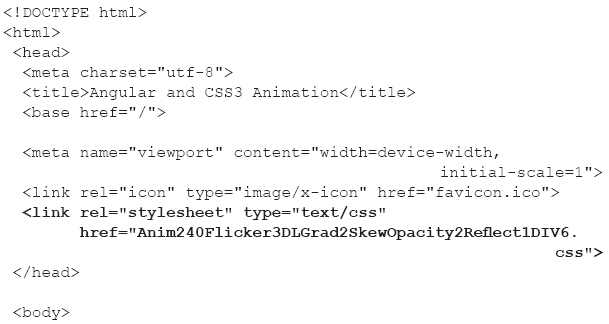
Listing 3.15 contains the usual Angular code, followed by a <body> element that contains a <div> with six nested <div> elements. Each of these <div> elements matches a CSS selector that creates an animation effect.
Listing 3.16 displays a small portion of the contents of the CSS stylesheet Anim240Flicker3DLGrad2SkewOpacity2Reflect1DIV6.css.
LISTING 3.16: Anim240Flicker3DLGrad2SkewOpacity2Reflect1DIV6.css

Listing 3.16 contains a small portion of the code in the CSS stylesheet called Anim240Flicker3DLGrad2SkewOpacity2Reflect1DIV6.css. Consult online documentation and tutorials that contain details regarding CSS3 @keyframes.
CSS3 and jQuery Animation Effects in Angular
The code sample in this section contains some CSS3 gradient effects whose details are beyond the scope of this sample. However, if you intend to create this type of gradient effect, you can find online tutorials that provide background details.

Copy the directory CSS3JQueryAnim from the companion disc into a convenient location. Listing 3.17 displays the contents of index.html that contains JavaScript code for creating graphics effects based on jQuery and CSS3.
LISTING 3.17: index.html
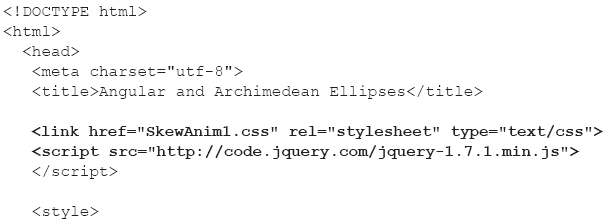
The <head> tag in Listing 3.17 contains a <link> tag that references the CSS stylesheet SkewAnim1.css, which contains the animation-related code. The next code snippet is a reference to jQuery code (which you can replace with a later version).
The remainder of the <head> tag is a <style> element that contains two selectors. The first selector matches an HTML element (in index.html) whose id attribute has the value outer. The second selector matches elements whose class attribute has the value radial6. Where are those elements? As you will soon see, they are programmatically generated (with some help from jQuery) in a loop in Listing 3.18.
Listing 3.18 displays the contents of app.component.ts that contains JavaScript code for creating graphics and animation effects based on jQuery and CSS3.
LISTING 3.18: app.component.ts
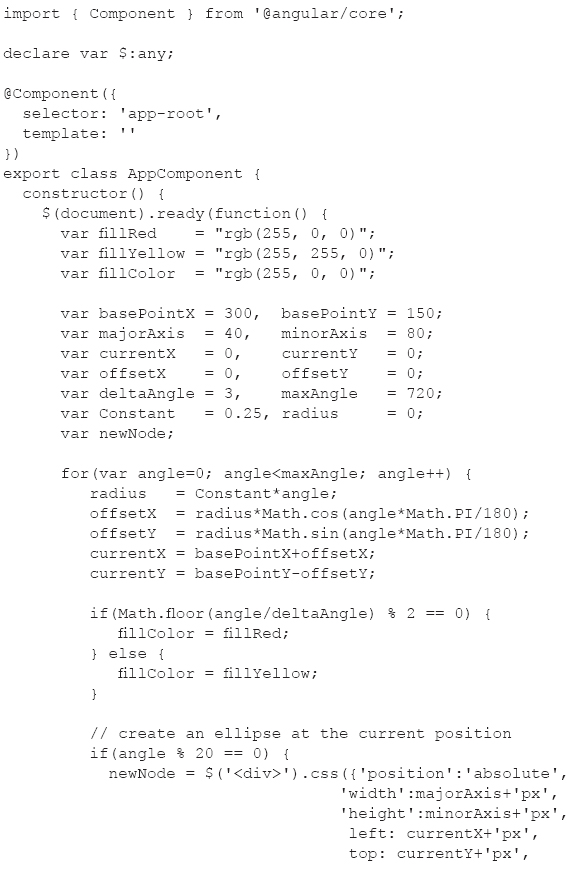
Listing 3.19 contains a standard import statement, followed by this code snippet:
declare var $: any;
The preceding snippet is necessary for TypeScript to “find” jQuery, which is loaded via a <script> element in index.html.
Listing 3.19 exports the TypeScript class AppComponent whose constructor contains all the code for dynamically generating HTML <div> elements and then appending them to the DOM.
The first part of the constructor starts by initializing some JavaScript variables for creating graphics. Next, a standard jQuery “ready” code snippet is included, which guarantees that the code inside this snippet is executed after the DOM has been loaded into memory. Specifically, there is a loop that calculates positions that approximately follow an Archimedean spiral, after which the jQuery css() method dynamically creates and appends <div> elements at those locations to the DOM. The loop contains simple if-else conditional logic to specify values for different properties. During each iteration, the following code snippet appends the newly created <div> element to the DOM element whose id attribute has the value outer:
$("#outer").append(newNode);
Listing 3.19 displays a portion of the contents of the CSS stylesheet SkewAnim.css that contains the CSS selectors for creating animation effects.
LISTING 3.19: SkewAnim1.css

Listing 3.19 contains a CSS3 @keyframes property (with vendor-specific prefixes) that creates a complex visual effect. An example of such a CSS selector containing a transform property that invokes the skew() function, the scale() function, and the rotate() function is shown here:

The preceding code block produces a transformation effect that involves skewing, scaling, and rotational transformations, along with shadow effects. The two lines shown in bold in the preceding code block “link”. the animation effects in animCube1 (defined elsewhere) to the selector skewAnim1, and specify that the duration of the animation effect is 10 seconds (10s).
Animation Effects “the Angular Way”
Now that you have seen Angular applications that create graphics and animation effects using various other technologies, this section contains a code sample with animation effects that involves CSS-based functionality and a small amount of Bootstrap code. If you are unfamiliar with Bootstrap, you can still follow the rest of the code and view the animation effects.

Copy the directory NgGraphicsAnimation from the companion disc into a convenient location. Listing 3.20 displays the contents of app.component.html that contains HTML markup for rendering two <div> elements and two <button> elements that trigger animation effects.
LISTING 3.20: app.component.html

Listing 3.20 contains three nested <div> elements with a Bootstrap container class, row class, and col-xs-12 class respectively. The innermost <div> element contains a <button> element that triggers the animation effects (shown in Listing 3.21) when users click the button. Clicking the button invokes the method onAnimate(), which updates the value of the variables state and currState.
The next portion of Listing 3.20 is a <div> element that is updated based on the value of the state property, which can be either normal or animated. Each of these two values has a corresponding entry in the animations property that you will see in Listing 3.21. This <div> element is displayed as an ellipse because the width and height properties are different and because of the border-radius property.
Notice that the second <div> element has a @currState property that is based on the value of currState, whereas the first <div> element is based on the value of state.
Listing 3.21 displays the contents of app.component.ts that contains the Angular animations property. This property contains code that transforms and animates <div> elements via CSS-based animation effects.
LISTING 3.21: app.component.ts

Listing 3.21 contains a lengthy block of code for the animations property, which consists of two trigger functions (both are shown in bold). The first trigger executes a block of code based on whether the value of divState is normal or animated. Similarly, the second trigger executes a block of code based on whether the value of currState is normal or animated.
In all four cases, a simple set of CSS properties are updated to set the background color and the transform method. In addition to the CSS transforms in this code sample, you can use many other CSS transforms, including rotate(), perspective(), matrix(), and other 3D CSS3 transforms.
The interesting transform value is in the second state of the first trigger, as shown here:
transform: 'rotate3d(50,50,50,-180deg) skew(-15deg,0) scale3d(1.25, 1.25, 1.25)'
The preceding transform is a combination of a 3D rotation, a 2D skew effect, and a 3D scale effect. If you need to create complex visual effects, be assured that CSS3 provides an incredibly powerful set of transforms for creating rich and aesthetically appealing visual effects. The choice of visual effects obviously depends on the target audience (e.g., corporate environment versus high school students).
Notice that the second trigger() function contains several transition() functions, which specify the behavior of the <div> elements. For example, the first transition() specifies a duration of 500 milliseconds when making the transition from normal to animated, whereas the opposite transition occurs during 1500 milliseconds. The third transition() specifies a duration of 500 milliseconds during the update of the background-color property and the borderRadius property.
Listing 3.22 displays the contents of app.module.ts, with the new contents shown in bold.
LISTING 3.22: app.module.ts
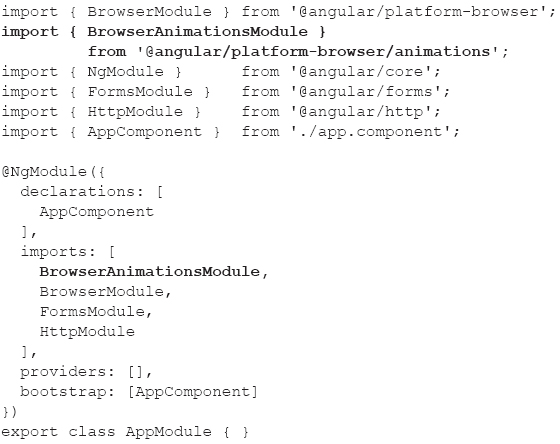
The code in Listing 3.22 contains code that is familiar to you, along with code that is shown in bold, which is necessary for the animation-related effects.
Chart Tools for Angular
There are several open source toolkits available that provide chart-related functionality. One of them is the Angular module ng2-charts for creating charts and graphs, and its home page is located here:
http://mean.expert/2016/09/17/angular-2-chart-component-revised/
Another option is the ng2d3 framework, which is an Angular2 + D3js composable reusable charting framework whose home page is located here:
https://github.com/swimlane/ng2d3
The ng2d3 framework uses Angular to render and animate the SVG elements, and D3 for the math functions, scales, axis and shape generators, and so forth. Note that Angular does the actual rendering. In addition, ng2d3 supports custom charts, and styles are customizable through CSS.
Check the supported features in these (and other) toolkits to determine which one best suits your needs.
Summary
This chapter showed you how to render SVG-based graphics in an Angular application. You learned how to create graphics and animation effects with D3 and GSAP, and in the latter case, you saw how to place custom code in one of the Angular lifecycle methods so that the animation effects are applied after the SVG elements have been generated. In addition, you learned how to use pure CSS3 graphics and animation effects in Angular.