
Since the inception of mobile phone cameras and apps (short for application), many mobile artists have emerged, creating stellar works in a variety of styles, always pushing the boundaries of what’s possible on a mobile device. They share their work via social media platforms like Instagram (IG), EyeEm, IPA (iPhoneArt), Flickr, AMPt Community, and We Are Juxt, to name a few. I myself have been an avid iPhoneographer for several years.
I began by using my iPhone to record everyday beauty around me; like a visual journal of sorts. I joined IG and quickly began to see that mobile photographers with particular styles were sharing their work on the platform—portraiture, still life, landscape, street photography, food photography, painterly digital works and more.
The quality of art produced with a tiny smartphone was mesmerizing to me. I was immensely attracted to the concept of using the iPhone in my back pocket as a tool to create art with. It was all right there in that little box: the camera and apps that I would need to manipulate with—a seamless, easy workflow. I could work anywhere: in line at the grocery store, in the middle of the woods under a pine tree, even in the shower with a waterproof case! (Not that I’ve done that, but it sounds intriguing.)
A style emerged in my iPhoneography that is edgier than the DSLR work you typically see on my blog. It is mostly portrait work that utilizes creative blur and textures to give a time-worn, soft, dreamlike effect. People often ask if I am the woman featured in my mobile work. Yes, but to me the photographs are not selfies. I am the model in my work for both creative as well as practical reasons (I live in a remote area in the woods; not many other folks to call upon in these parts).
I dress up in costume and enact scenes in the woods outside my door or in the makeshift studio in my bedroom composed of a clothesline, sheets, north-facing natural light and reflectors to bounce the light where needed. I enjoy the whole process of making iPhone art, and I especially like that I can use my hands and fingertips to “sculpt” my works to life on the screen.
You may have noticed I’ve made an effort to use the terms ‘mobile photography,’ ‘mobile art’ and ‘smartphone’ throughout this book. That’s because I want to be all-inclusive, whether you have an iPhone device like an iPhone, iPod Touch or iPad, or an Android smartphone like a Samsung Galaxy. But, that being said, the truth of the matter is that at this time there are more apps available for iPhone devices. Most of the apps listed in this book will only work on an iPhone device. I include an extensive resource list of apps available at www.createmixedmedia.com/artofeveryday photography, and I tried to present information for all phone types/devices. Keep in mind that technology changes at a very fast pace, so by time this book is published there will be new versions of phones, updated operating systems, brand new apps, and newer versions of the apps I mention.


Susan’s Favorite Go-To Apps
Camera+, VSCO Cam, VintageFX, PicFX, ScratchCam, FocalLab, Mextures, Snapseed and Filterstorm
Although I like using my own fingertips to manipulate my photos on my iPhone, some folks prefer to use a stylus, especially if they are adding layers that require drawing and painting. There is a plethora of them out on the market, made for the various devices. Some of my mobile photography friends like the Jot Pro, Sensu Stylus, TruGlide, the Wacom Bamboo Stylus and even the $7 stylus made by and available at Walgreens.
The term app-stacking refers to manipulating a single mobile photo with the use of multiple apps to achieve the final result. I myself will run my photos through an average of five or more apps a piece before achieving a finished product. I’ve given you a list of my most favorite ‘go-to’ apps, and now I’ll walk you through an example of mobile photo manipulation via app-stacking.
Fire up your smartphone. Here’s an example of iPhone photo manipulation from start to finish.

Step1: Take a photo or pull one from your phone’s camera roll. This original photo was taken using the Camera+ app. I cropped it into a square using this same app (keep in mind IG only accepts a square format). Camera+ also has numerous effects filters that will alter the tones of your photo—choose from various black and white options, toy camera, pinhole and more. You can apply multiple filters, decrease their strengths, add a border if you wish and adjust white balance.
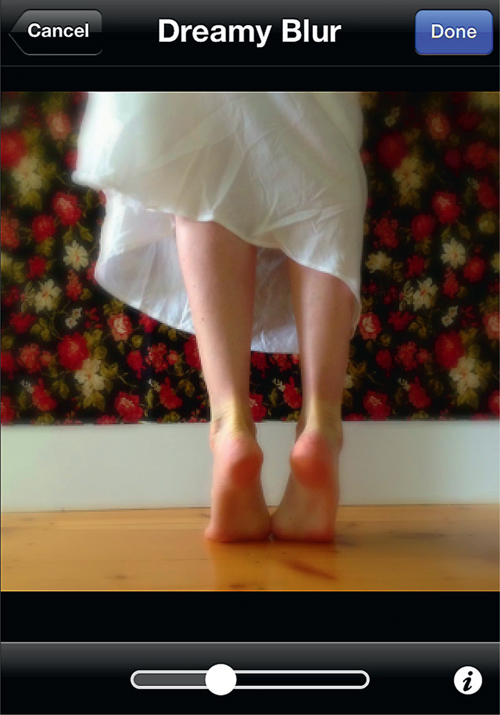
FocalLab

Step 2: Add dreamy blur with FocalLab. FocalLab is my favorite app when it comes to applying blur. I used its ‘dreamy blur’ filter to soften my photo and reduced its strength for a more subtle appearance. This app also offers ‘motion blur’ and ‘zoom blur’ effects.

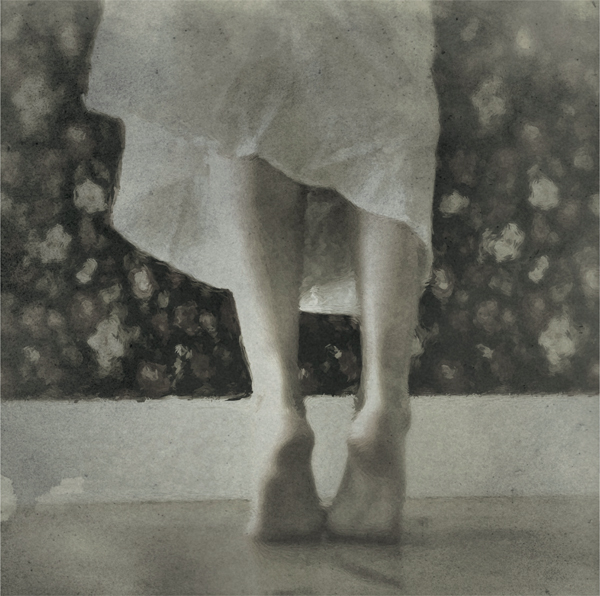
Glaze

Step 3: Apply a painterly filter with Glaze. Glaze offers a wide variety of filters that give your photos painterly styles. Some of the filters are more subtle than others, and you’ve probably gathered by now that I am a fan of the subtle when it comes to adding texture to my photos. I did just that in this example.

VintageFX
Step 4: Give it a timeworn look with VintageFX. This is one of my most favorite apps and I tend to use it on nearly all of my iPhone photos. You can choose from a variety of styles, include a border if you wish and completely customize the application via multiple sliders to suit the needs of your photo. Tip: This app, along with other apps created by Jixi Pix, are now available for Photoshop CS, Photoshop Elements and Lightroom. Yippee!
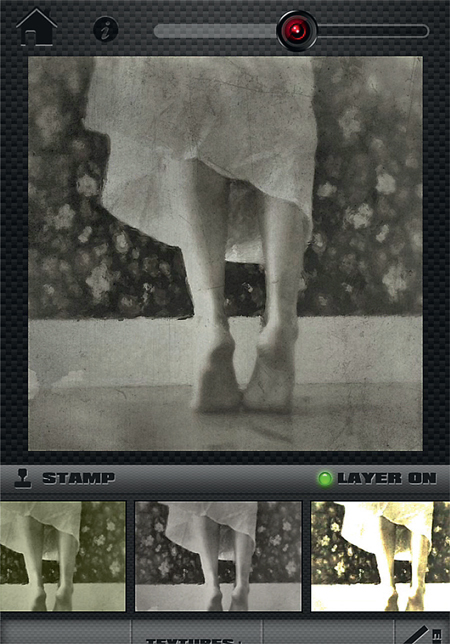
ScratchCam

Step 5: Apply further texture with ScratchCam. One of my favorite ways to manipulate a photo with this app is to use the ‘randomize’ feature to see what the app can come up with for my photo. When the app creates something that makes my heart leap, I then go into ‘edit’ mode and further tweak the application to better suit my photo by adjusting color, border and texture. The app applied a texture and color change to this example that I loved, so I went with it, and reduced the strength of the texture because I am a fan of the subtle.

VSCOcam

Step 6: Throw in another app for the sake of adventure. I decided to run the piece through VSCOcam and experiment with its filters to see if I could find a toning that appealed to me even more than the one applied in ScratchCam. As you can see there is sometimes no rhyme or reason to the direction I take with my manipulations. Maybe I have a general idea in the beginning, but for me, it’s really more about experimentation, letting go, being open to serendipity and embracing the unexpected. It’s kind of like walking through the woods and deciding which direction will hold the best adventure.