Chapter 4: Actors and Their Attributes
In This Chapter You Will Learn:
•How to customize actors in your game
•The difference between a prototype and an instance actor
•What actor attributes are and how to use some of them
In this chapter, you’ll learn more details about actors in Gamesalad. You’ll learn how to begin customizing actors with your own images (sprites). Then you will go hands-on with learning the difference between a prototype and an instance actor. Finally, you will learn about the extensive list of attributes each actor is given and learn how to add your own custom attributes as well.
Actors in Detail
In the last chapter, you learned a little bit about actors. In this hour, you’ll keep going and learn more details about actors and why they are so important to your games. As mentioned in the last chapter, any item placed on the stage in Gamesalad is called an actor–these can be static (non-animated) sprites, animated sprites, sounds, and even text. As you have seen, Gamesalad’s default actor is a white square, which is not the most exciting element to work with in the world! But the great thing is you can endlessly customize this basic actor to meet all your game creation needs.
Importing Images
The easiest way to customize your actor is to replace the basic white square with an exciting and beautiful image. Gamesalad supports the PNG image file format. This format allows you to have full-color images with an alpha channel for transparency. In a later chapter, we will take an in-depth look at image formats and requirements.
––––––––––––––––––––––––––––––––––––––––––
Exercise 2: Importing an Image to Customize the Actor.
In this exercise, you will import your own image for use as an actor in Gamesalad.
1Create a new iPhone 5 Landscape Project in Gamesalad. Make sure you have checked the Resolution Independence option on the Project Info tab.
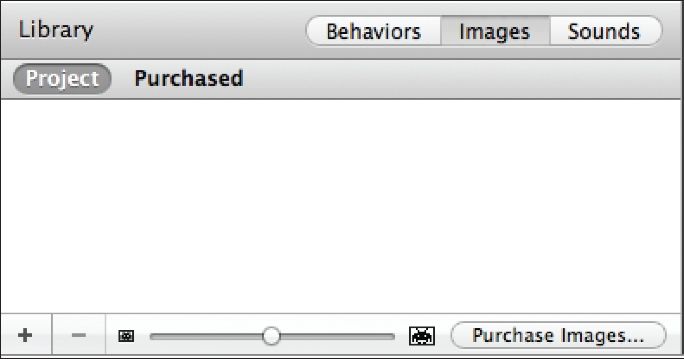
2Navigate to the empty Initial Scene and Click the Images tab in the Library Palette (see Figure 4.1).
3Click the Plus (+) button, in the lower left corner of this tab, and use the Open Dialog Box that appears to locate the file named “Ball.png” provided for you in the Chapter 4 folder of the book asset files.
4Once the Ball.png file has been added to the project, you’ll see an icon and the file name now listed in the Images tab.
5Next, make sure the Actors tab is active in the Inspector Palette above the Library Palette and Click the Plus (+) button to add a new, empty Actor to the project.
6Finally, Drag the ball image from the Images tab and drop it onto Actor 1.
7Actor 1 will highlight (see Figure 4.2) when the ball image is touching it. When you release the Mouse button, Actor 1 will now look like a ball!
8Save this project for use later in this chapter.
––––––––––––––––––––––––––––––––––––––––––
Figure 4.1: The Images Tab in the Library Palette

Figure 4.2: Actor 1 highlights to indicate the image will be applied when the mouse button is released.
NOTE–Other Ways to Make an Actor: Once you have imported an image, there are a couple “quick” ways to turn it into an actor. You can drag the image directly from the images tab and drop it in the actors tab or onto the stage (Gamesalad will automatically create a new actor using the same name as the image).
The Gamesalad Marketplace
If you can’t draw to save your life, and you don’t have any artist friends, you may find the Gamesalad Marketplace helpful. In the bottom right corner of the images tab, there is a button labeled “Purchase Images.” Pressing this button will direct you to the Gamesalad Marketplace in your systems default browser. From here, you are able to purchase images, sounds, animations, and full game templates. This can be a valuable resource for those who are artistically or time challenged.
Actor Types: Prototype and Instance
There are two types of actors in Gamesalad: prototype and instance. When an actor is first created in the actors tab, it is created as a prototype actor. You can confirm this by double-clicking the actor to open its actor editor. Double-Click the new ball actor “Actor 1” you created in the previous exercise. At the top of the window, next to the actor’s name it says “Prototype” (see Figure 4.3). A prototype actor is a “master” actor. Any changes made to a prototype actor are applied to all other actors of that type in the game.
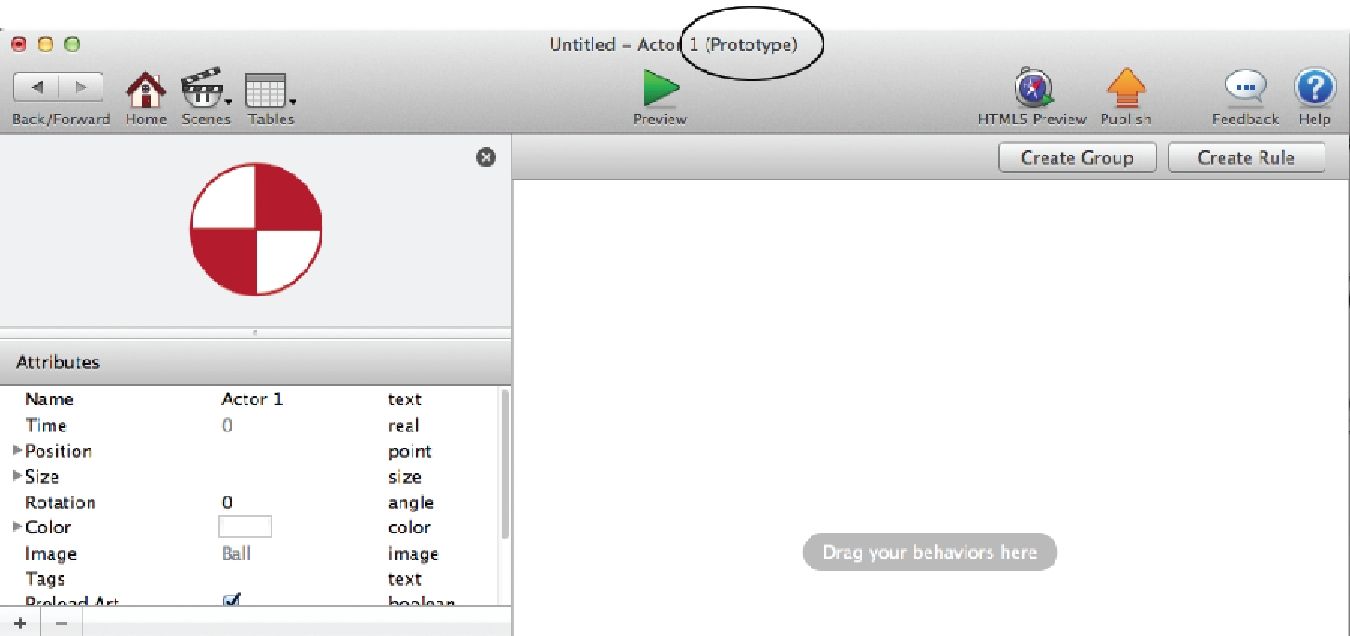
Figure 4.3: The title of the Actor Editor indicating that this actor is a Prototype Actor.
To create an instance of an actor, drag the ball actor “Actor 1” onto the Stage and Double-Click it. The Actor Editor will open up, but this time there is a large padlock icon on-screen that says “Click the lock to edit the behaviors of this actor” (see Figure 4.4). When the padlock icon is clicked it will disappear and there will be an active button in the top left area of the screen that says “Revert to Prototype.” This button indicates you are looking at the actor editor of an instance actor.

Figure 4.4: The padlock icon of an Instance Actor.
Let’s take a look at the differences between a prototype and instance of the same actor.
––––––––––––––––––––––––––––––––––––––––––
Exercise 3: Using Prototype and Instance Actors
If you were going to use the ball actor to make an 8-Ball Pool game, you would need 15 balls in the game. While all of the balls in a pool game should be the same size, they should all be different colors. Let’s see how you can accomplish this with just one actor.
1Using the “ball” project you have been working on, return to the Stage and delete any elements currently on it.
2Single Click on the name of Actor 1 and change the name to “Ball”.
3Drag two copies of the ball actor onto the Stage; place one on the left and one on the right so they don’t overlap each other (see Figure 4.5).
4To reduce the size of both balls at once, Double-Click the Prototype actor of the ball (in the Actors tab of the Inspector palette).
5In the Attributes section of this screen, Click the arrow next to the Size Attribute. This will expose the Width and Height Attributes.
6Reduce the current value of 128 to 64 for both Width and Height (see Figure 4.6).
7Click the Back button to return to the Stage and you’ll see that the size of BOTH ball actors has been changed.
8Next, to change the color of only the ball on the right, Double-Click it and Click the Lock icon to unlock the instance.
9Again, in the Attributes section of this actor, Click the white rectangle next to the Color option (see Figure 4.7).
10From the standard color wheel that pops up on-screen, choose a nice, bright yellow color.
11Return to the Stage and you’ll see that ONLY the actor on the right has changed color!
––––––––––––––––––––––––––––––––––––––––––
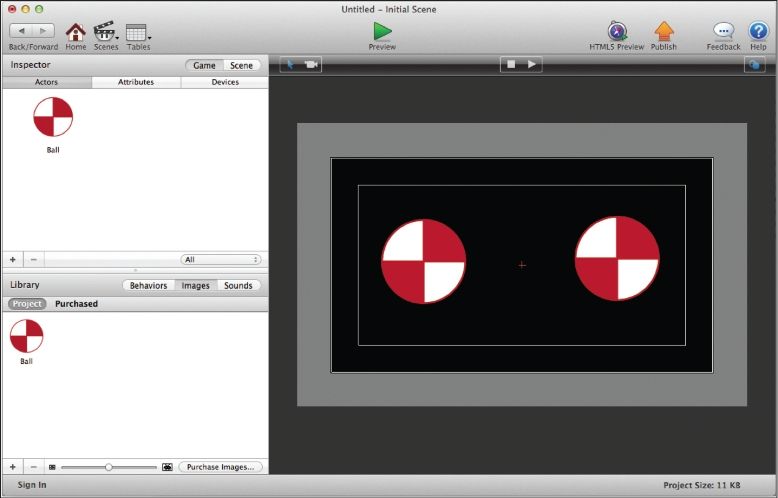
Figure 4.5: Two copies of the ball actor placed on the stage.

Figure 4.6: The actors size settings in the Attributes tab.
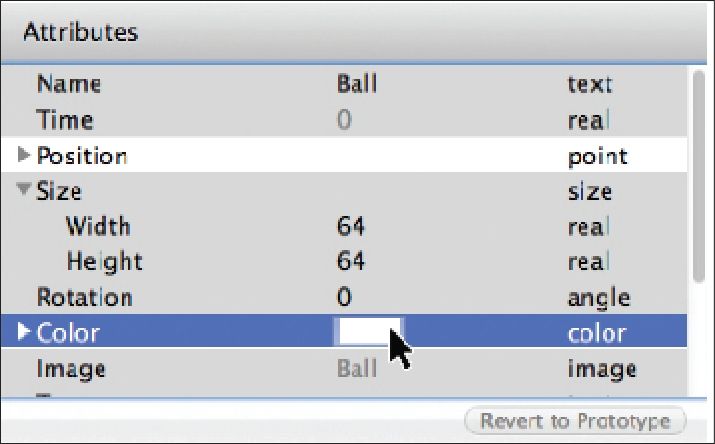
Figure 4.7: The actors Color choice in the Attributes tab.
As you can see, edits made to a prototype actor affect all actors of that type while edits made to the instance of an actor only affect that individual instance.
Actor Attributes
Every actor in Gamesalad starts with an extensive list of attributes that can be used to control everything from its appearance, to its position on the stage, and even its physical properties within a game (see Figure 4.8). The list may look long and daunting, but by the end of this chapter, you’ll have a good understanding of it.

Figure 4.8: A portion of an actors Attributes tab.
The actor attributes tab is separated into three columns: the first column is the name of the attribute, the second column is the attribute’s initial value, and the third column is the attribute’s type. Later in this book, we’ll spend another hour looking at attributes in detail. In that chapter, you’ll learn the differences between the six attribute types (boolean, text, integer, real, angle, and index).
Starting from the top of the list, let’s examine some of the most typically used actor attributes:
•Position X: This is the actor’s position on the x- (horizontal) axis. Positions are expressed in pixels.
•Position Y: This is the actor’s position on the y- (vertical) axis. Positions are expressed in pixels.
•Size-Width: This is the width of the actor on the stage. This is expressed in pixels.
•Size-Height: This is the height of the actor on the stage. This is expressed in pixels.
•Rotation: This is the rotation of the actor. It is expressed in degrees and can vary from 0° to 359°.
•Color: You can choose a color from the standard system color picker by clicking the rectangular color box or you can manually set the values by adjusting the red, green, blue, and alpha values of the color. The numeric values for the color attributes can vary between 0 and 1.
•Tags: Tags are used to “group” actors into sets so actions can be performed on them all at once. You’ll explore this more in a future chapter. Tags are entered as a text value.
•Graphics-Visible: If this box is checked (active), the actor will be visible when placed on the stage. An unchecked setting means the actor will not be visible.
•Graphics-Horizontal and Vertical Wrap: These Attributes affect your actor when it is re-sized. There are three options in the drop-down menus:
•Stretch: This will scale the actor’s image up or down as the actor is scaled.
•Fixed: This will keep the actor’s image sized to its real pixel dimensions, even as the actor is scaled.
•Tile: This will repeat the actor’s image as needed when the actors size is increased on stage. This option is great for making repeating textures, tiles or shapes.
Let’s look at the three graphics wrapping settings in action. In Figures 4.9A-C below, the “original” actor is always on the left and the actor that has been scaled is on the right. In Figure 4.9A, the ball’s image has stretched to fill the new actor’s size completely. In Figure 4.9B, the ball’s image has remained at the source images size, even while the actor itself has increased (note the actor’s control/guide lines around the small ball). And in Figure 4.9C, the ball has repeated to fill the larger actor’s size.
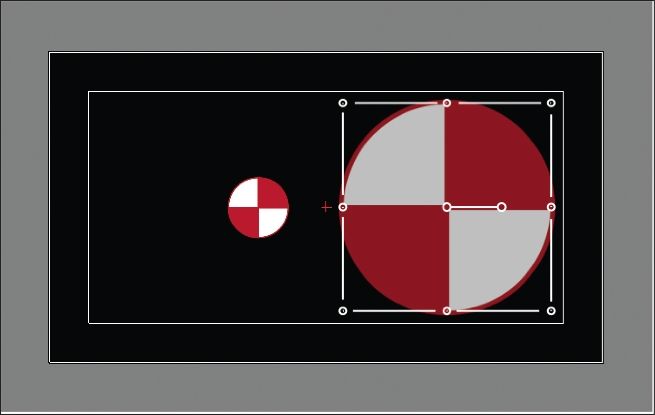
Figure 4.9A: The actor on the right has been enlarged using the Stretch option of the Horizontal/Verticle Wrap menu.

Figure 4.9B: The actor on the right has been enlarged using the Fixed option of the Horizontal/Verticle Wrap menu.
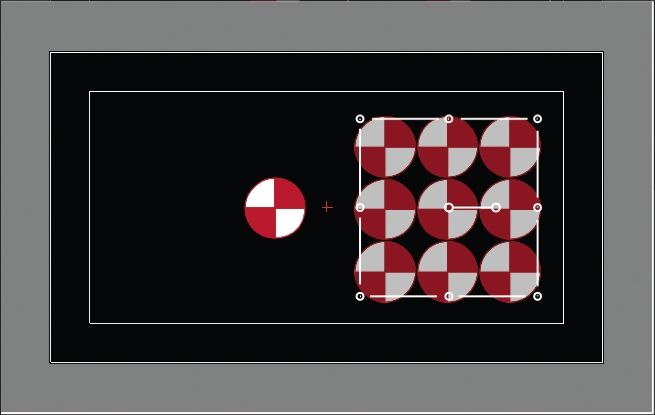
Figure 4.9C: The actor on the right has been enlarged using the Tile option of the Horizontal/Verticle Wrap menu.
Graphics-Flip Horizontally and Flip Vertically: These attributes will flip an actor’s image along its x- or y-axis. These are extremely helpful when animating an actor. Using these setting you can create an animation for one direction and flip it when you need your actor to move in the opposite direction instead of creating two full sets of animated images.
NOTE–Alpha: I have mentioned the term “Alpha” several times during the first four chapters. Alpha (also know as alpha channel) represents the level of transparency of an image. Usually, it is expressed as a number value from 0 (fully transparent) to 1 (opaque/solid). It can also be expressed as values of black in an image-processing program like Adobe Photoshop where black is transparent and white is opaque.
There are many more actor attributes that you have access to, including a whole host of physics settings that we will take a look at in a future chapter. These may seem like a lot to take in, but once you’ve become more familiar with actors and their attributes, you’ll be surprised by how quickly you become familiar with them all.
In addition to the built-in list of actor attributes, you are able to add your own custom attributes as well. You can add and delete your own attributes to and from the list by using the plus (+) and minus (-) buttons in the lower left corner of the actors attributes tab. We’ll discuss how and why you’d want to add your own attributes in a later hour.
Summary
In this chapter, you learned how to begin to customize the actors in a game by adding custom images to them. You learned the important difference between a prototype and instance actors and how and when to create each type. Finally, you learned about some of the many attributes each actor has and what those attributes can be used for.