
Chapter 12: Audio
In This Chapter You Will Learn:
•What audio file formats Gamesalad supports
•How to add music to a game
•How to add sound effects to a game
In this chapter, you will learn about using audio in Gamesalad projects. You will learn what audio formats Gamesalad supports and how to add audio files to your projects. Next, you will learn about the audio specific behaviors you have access to when building games. Finally, you will experiment with audio in a working project.
Game Audio
As you can probably tell after completing the space shooter game from the previous chapter, audio adds a lot to the video game experience. Since there was no audio in that game, it really seemed to be lacking. Imagine how the sounds of lasers blasting and explosions going off could enhance the game. On top of that, add in a sound track of sci-fi techno music and the experience would seem so much richer and exciting. After completing this chapter, you’ll have an understanding of how to use audio in your games
to create that experience.
Audio Styles
Audio can be used for two general purposes in Gamesalad: music and sound effects. When importing a new audio file, you will be prompted to choose a style for how that audio will be used in the game.
•Music Style: This is best used for audio files that will play longer than 30 seconds. A good use for music style audio would be a background soundtrack to a game.
•Sound Effect Style: This is best used for short audio files that will be played repeatedly. A good use for sound effect style audio would be a “jump” sound that is played every time the player jumps.
Importing Audio
Importing audio into a Gamesalad project is done through the sounds tab in the library palette. To import an audio file located on your computer, press the plus (+) button in the lower left corner of the window (see Figure 12.1).
Figure 12.1: The Sounds Tab of the Library Palette.
In addition to importing audio files located on your computer, you can use the “purchase sounds...” button (in the lower right corner of the palette) to visit the Gamesalad Marketplace and purchase audio files.
Gamesalad supports the following audio formats:
•Audio Interchange File Format (.aiff)
•MPEG-1 Layer-3 Format (.mp3)
•Ogg Format (.ogg)
•Waveform Audio File Format (.wav)
When importing a new sound, you will be presented with the import sound dialog box (see Figure 12.2). Choose the sound’s style here and the audio file will be added to this list of available options.

Figure 12.2: The import sounds dialog box.
Note–Audio Formats: Audio files can take up a lot of memory in a game, memory that might be better spent on graphics or animations. Typically, MP3 files are the smallest file format and are best for use in games.
After importing an audio file, you can easily test it in the sounds tab by clicking the play button that is added to the sounds icon. Press this play button to hear the sound. If the sound is long and you want to stop it from playing, press the stop button that replaces the play button while the sound is playing.
While this palette is very similar to the images palette, sounds from this tab will never be dragged into the actors tab of the inspector palette like images are. Audio is added to actors and events only through behaviors.
Audio Behaviors
Music
•Play Music. When using the play music behavior, you will be presented with a drop-down menu of music files that have been added to the project. Choose which piece of music to play from this list. There is also a check box to enable/disable looping of the music.
•Pause Music. There are no options with the pause music behavior. When it is triggered, any music currently playing will be paused. To restart the music, trigger a play music behavior and choose “Resume Current Music” from the top of the drop-down list of available music files.
––––––––––––––––––––––––––––––––––––––––––
Exercise 13: Playing Music
Imagine for a moment that you have just completed a fantastic game and now all you have to do is add background music to finish the project. To add music to a game:
1Create a new project and navigate to the empty Initial Scene. The platform can be anything you choose.
2Click the Plus (+) button to add a new sound to the Sounds Tab in the Library Palette.
3Add the file named “Music.mp3” from the asset files for Chapter 12 folder.
4Choose “Import As Music” from the Import Dialog Box.
5Next, create a new actor in the Actors Tab and name it “Play Music”.
6Open this new actors editor and Drag a Play Music Behavior into its Behaviors list.
7Choose “music” from the Sound drop-down menu and check the Loop option (Figure 12.3).
8Finally, drag this actor onto the pasteboard, the light grey area, of the scene. Resize the actor as needed to keep it only on the pasteboard.
––––––––––––––––––––––––––––––––––––––––––
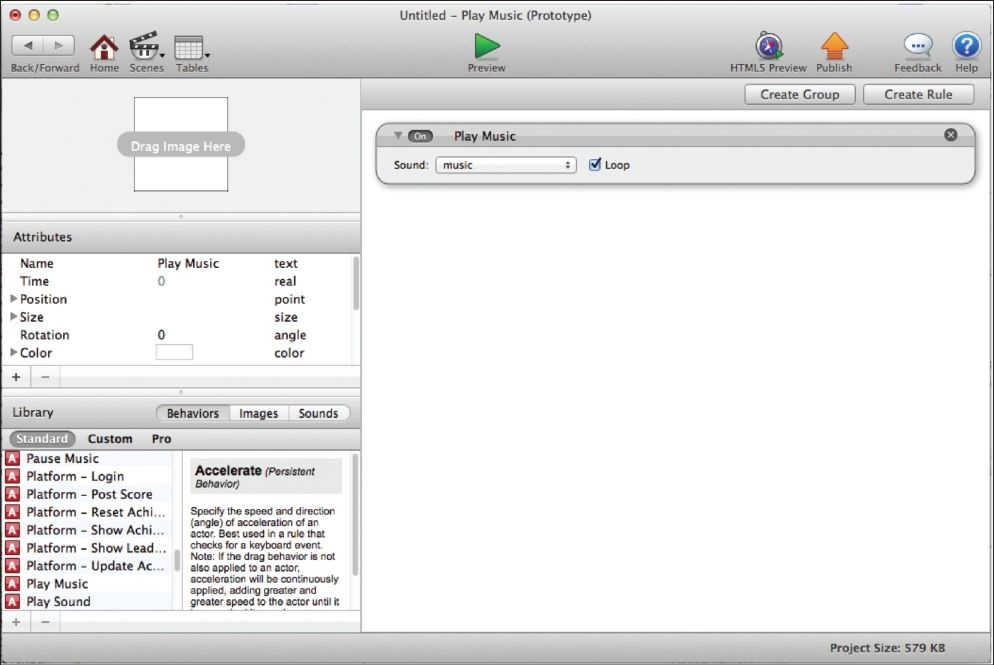
Figure 12.3: The Play Music Behavior added to the actor.
Preview the scene and you should hear the music play, but not see the actor. Since the actor is on the pasteboard, its behaviors function in the scene, but you won’t see it because it is beyond the bounds of the live area of the scene.
Tip–Adding Behaviors: To quickly add any behavior to an actor, you can drag the behavior on top of the actor in the actors tab of the inspector palette. When you open the actors editor, you’ll see the behavior already listed on its behavior list.
Sounds
•Play Sound. The play sound behavior offers more options than the play music behavior.
•Sound: Choose the sound to play from this drop-down menu.
•Loop: Enable the loop option to continually play the sound effect once it has been triggered.
•Run to completion: Enabling this option will force the entire sound effect to play from start to finish. There are instances when a sound effect will be nested in a timer or a rule that will try to “turn off” a sound effect before it has completed. Checking the “run to completion” option will force the entire sound effect to play regardless of what else is going on.
•Volume: Use the slider or enter a value to adjust the volume of the sound effect. A setting of 0 is no volume and a setting of 1 is full volume.
•Pitch: Use the slider or enter a value to adjust the Pitch of the sound effect. The sound’s pitch can be adjusted with values of 0 – 10.
Tip–Pitch: Adjusting the pitch of a sound effect essentially speeds up or slows down the rate at which the sound plays, making it sound “higher” or “lower.”
•Positional Sounds: This option will automatically adjust the volume of a sound based on the actor’s location in the scene in relation to the camera. For example, if the sound emitting actor is placed on the right side of the stage, its sound will be louder from the right speaker and less loud from the left speaker.
•Velocity Shift: This will automatically adjust a sound’s pitch based on its speed and direction. This option is only available when Positional Sound has been enabled.
Note–Volume: When playtesting a game, don’t forget that the device determines the maximum volume level of the audio. If a sounds volume seems low, make sure the volume control on the device is turned up.
––––––––––––––––––––––––––––––––––––––––––
Exercise 14: Playing Sound Effects
In this exercise, you’ll use three different sound effects to create a custom “wacky” keyboard.
1First, create a new project and navigate to the Initial Scene. Again, this can be for any platform you choose.
2Add to the Sounds Tab the three sound effect files; Coin.mp3, Keyboard.mp3, and Shot.mp3. These sounds are located in the asset files for Chapter 12 folder.
3Choose “Import as Sound” in the Import Dialog Box. If you choose to import all three sounds at once, Click the “Apply to all” check box so this window only displays once.
4Add an actor to the Actors Tab. Name it “Key 1” and open this actor’s editor.
5Add a Rule to the editor and create a condition that reads: Actor receives event » touch » is » pressed
6Drag the Coin sound directly into this rule’s Behaviors window. Gamesalad automatically nests a Play Sound Behavior for you and has the correct sound preselected in the drop-down menu.
7Return to the Actors Tab and make two copies of they Key 1 actor, naming them “Key 2” and “Key 3.”
8Update the Play Sound Behavior of Key 2 by choosing Keyboard for the sound from the drop-down menu.
9Update the Play Sound Behavior of Key 3 by choosing Shot for the sound from the drop-down menu.
10Finally, add these three actors to the scene (see Figure 12.4).
––––––––––––––––––––––––––––––––––––––––––
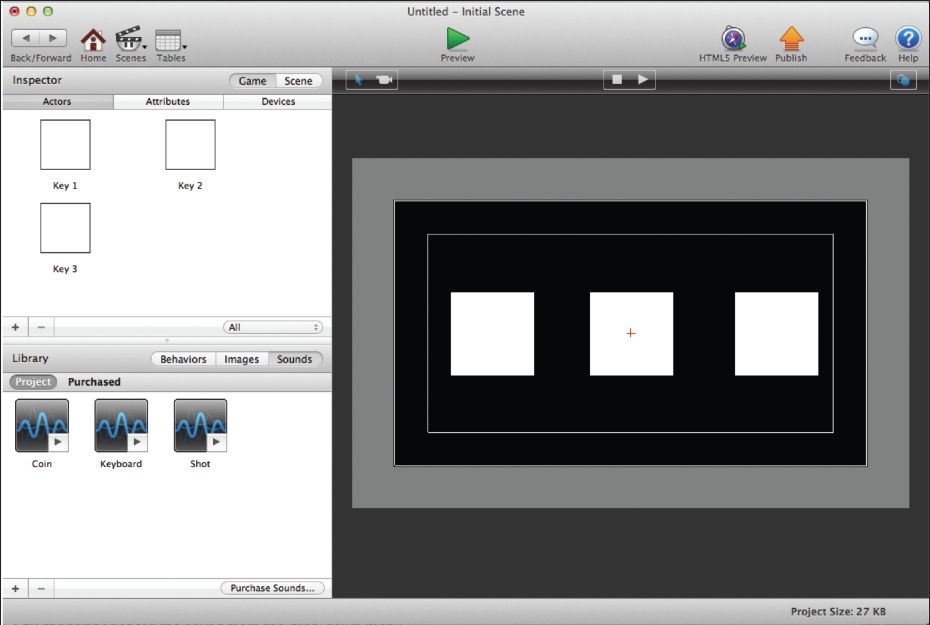
Figure 12.4: The sounds and ‘keyboard’ actors added to the stage.
Preview the scene and play the keys like they are keys on a piano. As you click each one, they will play their individual sounds.
Summary
In this chapter, you learned all about using audio in Gamesalad. You learned what audio formats can be imported for use as music and sound effects. Next, you learned what behaviors are used to play and pause music in a game and created a sample music project. You learned all about adding sound effects to a project as well as how to control the sound effects volume, pitch, and other settings. Finally, you created a sound effect keyboard using “wacky” sounds.