 Foods must have a ‘best-before’ date stamped on the package if they have a shelf-life of less than 2 years. After this date they will start to lose quality and nutritional value, but they may still be safe to eat.
One of the keys for losing weight is to take control of your food consumption. One of the best ways to be in control is to select and cook your own food. You will have much more control over your and your family‘s diet if you know exactly what has been bought rather than relying on highly processed or takeaway foods. There are a few things to keep in mind before cooking food, one of which is the safe selection of foods.
SELECTING AND KEEPING FOOD SAFE
In Australia, our love of eating outdoors, the hot weather, and our use of convenience foods increases the risk of food poisoning. The food-safety tips provided here will help you keep your food safe. This issue is so important that in the Biggest Loser House, contestants are taken through this guide when they first arrive.
WHAT ARE ‘BEST-BEFORE’ AND ‘USE-BY’ DATES?
Foods must have a ‘best-before’ date stamped on the package if they have a shelf-life of less than 2 years. After this date they will start to lose quality and nutritional value, but they may still be safe to eat.
 If correctly stored at the supermarket and at home these foods will stay fresh and good quality, right up until the ‘best-before’ date. These foods may need to be kept at specific temperatures in the fridge or freezer to maintain their quality.
 Frozen and canned products usually maintain their quality for a reasonable length of time after the ‘best-before’ date. However, extra care needs to be taken with any chilled products. Select these just before you head to the supermarket checkout and store them in an esky in the car as they could spoil before the ‘best before’ date if not kept cold enough. Put these items away as soon as you get home.
 A ‘use-by‘ date means that foods should not be consumed after this date. An exception is bread with a shelf-life of less than 7 days, which can instead have a ‘baked-on’ or ‘baked-for’ date.
 Always check the food packaging to make sure it is not damaged and that products have been stored appropriately before you purchase them.
HOW DO YOU KEEP FOOD SAFE?
The most common reason food poisoning occurs is that food has not been cooked for long enough or at a high enough temperature to kill bacteria. Some foods naturally carry more bacteria on them than others and so extra care needs to be taken to make sure they are cooked thoroughly and handled carefully. These foods include meat, poultry, eggs, dairy products, processed meats, such as salami and ham, seafood, cooked rice and pasta, and pre-prepared salads.
For meat, most food-poisoning bacteria are on the outer surface, so it‘s important never to return cooked meat to a tray that had raw meat on it or you risk transferring bacteria from the tray to the cooked meat.
The danger zone for food poisoning is in the temperature zone between the range 5 degrees Celsius and 70 degrees Celsius. The shorter the time food spends in this zone, the lower the risk of food poisoning. There are some easy food practices to follow to minimise the time food spends in the danger zone. Serve cold food straight from the fridge. Hot food should be hot enough that you can see steam rising from it. Once cooked, foods should be eaten promptly. If they can’t be, then keep them hot; otherwise cool them until the steam stops rising, then cover them and store in the fridge or freezer. Hot food will cool faster if you put it into shallow containers or divide into smaller portions first.
You can keep cooked foods in the fridge for up to a few days, but if you want to keep it longer than this then put it into the freezer as soon as it has cooled.
In the fridge, take care to ensure cooked foods are kept on the top shelves and anything raw is stored on the bottom shelves to avoid any condensation from raw food falling on cooked food and contaminating it. When defrosting foods, place them in the fridge to keep them below 5 degrees Celsius and out of the food danger zone. Never leave it on a benchtop at room temperature because this is the food poisoning temperature zone.
When food is re-heated, it needs to be steaming hot. If you are using a microwave to cook or reheat foods, then stop the microwave and stir foods periodically during cooking to ensure all parts are adequately cooked or re-heated. Cut foods into even-sized pieces and ensure lids fit well so the steam stays trapped in the dish and helps the foods to cook well. Let the foods stand for the recommended time after the microwave stops because they keep cooking due to the trapped steam. If food gets left out and has been in the temperature danger zone, then throw it out rather than risk food poisoning.
When eating outdoors, take care to make sure foods do not get contaminated from insects, pests and animals by keeping them covered. When cooking on a barbecue, transfer cooked items to a clean plate and never re-use the same plate or container that held raw foods. Minimise the time foods spend in the danger temperature zone by leaving meats in the fridge until you are ready to cook them and, once cooked, keeping them warm or serving. Keep salads cool by leaving them in the fridge or cool esky until ready to serve. Then, as soon as people are finished serving themselves, cover and return to the fridge or esky as soon as is practical. Some people have a lower level of immunity to food poisoning bacteria and are at greater risk than others. This includes young children, pregnant women, the elderly and anyone with a chronic illness. This means extra care must be taken with their food preparation. Never give people in this group raw egg because it can harbour large amounts of bacteria and needs to be cooked thoroughly.
GETTING READY TO COOK
Make it easier to cook healthy meals by ensuring you have healthy basics in your kitchen. This means that you will be less tempted to call for home delivery or to get takeaway because you will be able to whip up a tasty healthy treat faster than the delivery driver can get to your place.
Have three easy meals that you can prepare in under 20 minutes and permanently add their ingredients to your weekly shopping list. See for a sample shopping list that you can photocopy.
PANTRY, FRIDGE, FREEZER BASICS
Keep the following items in your kitchen.
 Diet soft drink
 Diet yoghurt
 Fish and seafood
 Fresh and canned fruit
 Fresh and frozen vegetables
 Healthy snack foods, such as air-popped popcorn
 Lean meat, poultry and eggs
 Low-joule jelly
 Low-joule salad dressing
 Pasta, rice and other grains
 Reduced-fat cheese
 Reduced-fat margarine
 Skim or low-fat milk
 Wholegrain bread
KITCHEN ESSENTIALS
The following kitchen tools and appliances make healthy cooking easier.
 Air popcorn maker
 Chopping boards
 Grater
 Greaseproof baking paper
 Hand-held blender
 Insulated lunchbox
 Juicer (non-electric)
 Kitchen scales
 Lettuce crisper
 Measuring cups, spoons and jugs
 Microwave
 Microwave dishes
 Mixing bowls
 Non-stick frying pan
 Small dinner plates
 Small food containers
 Soda stream
 Sharp knives
 Steamer
 Tall, narrow glasses
 Vegetable peeler
 Water bottles (refillable)
 Whisk
Whisk
 Wok
Wok
KITCHEN DEVILS
Throw out the following kitchen appliances.
 Deep-fryer
 Ice-cream maker
 Pancake maker
 Pie maker
 Waffle maker
KIDS IN THE KITCHEN
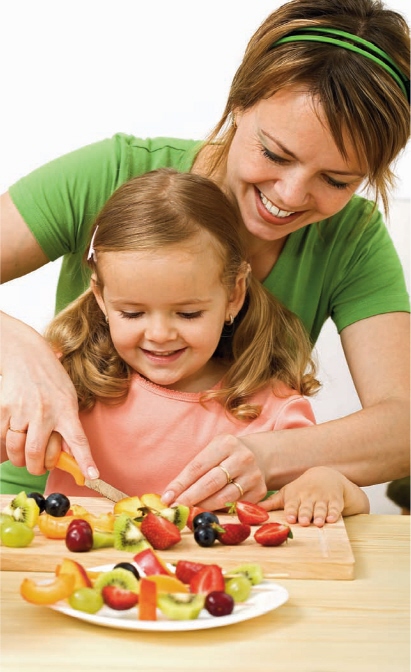
Exposing your child to cooking skills will not only help them develop an interest in food and set them up for later in life, but it will make them more aware of the origins of food and what they put in their mouth.
Praise your child’s efforts to help in the kitchen. Focus on effort and enjoyment, not results. As your child’s confidence grows, gradually increase the level of responsibility you give them in the kitchen.
| AGE | SKILLS | COOKING ACTIVITIES |
| 2–4 years | Thinks cooking is playing. Develops ability to manipulate small objects. |  Cutting herbs with toddler scissors.
Podding peas.
Rolling and kneading dough.
Pouring cold liquids.
Mashing potatoes.
Mixing.
Washing vegetables. Cutting herbs with toddler scissors.
Podding peas.
Rolling and kneading dough.
Pouring cold liquids.
Mashing potatoes.
Mixing.
Washing vegetables.
|
| 5–7 years | Has more control when manipulating small items. | Beating ingredients.
Cracking eggs.
Grating.
Peeling vegetables.
Sifting flour.
Squeezing juice.
Stirring.
|
| 8+ years | Hand–eye co-ordination is improving rapidly. | Chopping and cutting.
Choosing recipes.
Reading and following recipe instructions.
Weighing and measuring ingredients.
Writing the grocery list and locating ingredients within a supermarket.
|
TEACH CHILDREN THE ORIGINS OF FOOD
You can introduce children to the origins of food by visiting a farmers‘ market or, even better, a farm, to buy fresh produce such as eggs, fruit and vegetables. Another easy way to pique a child‘s interest in fresh ingredients is to plant a herb garden, grow some cherry tomatoes or strawberries or plant a lemon tree. Ask grandparents or neighbours to help set up a communal vegetable garden. Children love being able to pick their own fresh produce and will usually try what they have grown.
KEEPING KIDS SAFE IN THE KITCHEN
Kitchens can be dangerous for children, particularly due to the hazards present from heat, sharp objects, electricity and potentially dangerous appliances. Children need to be supervised and taught how to use kitchen equipment safely and to recognise the dangers. Where possible, use child-safe equipment and match their age and stage of development to the kitchen tasks that you involve them in.
 Establish safety rules for the kitchen.
 Keep a first-aid kit in the kitchen.
 Teach cutting skills using plastic knives or bread and butter knives.
 Pick knives up by the handle and do not leave them lying around. Store them with the blade facing down.
 From the age of 10 years, children have the fine motor skills to start using sharper knives, but this is variable depending on the child. They need supervision until they are competent.
 Keep young hands away from electric beaters, blenders and food processors. Let them start with hand-held whisks and beaters.
 Teach your child what to do in case of a fire and have a fire blanket or fire extinguisher in the kitchen. Make sure your smoke alarms are working.
 Fat can catch fire easily, so do not let children fry foods; take care with roasts where fat can spatter out and spark a flame.
 Install an Earth Leakage Circuit Breaker (ELCB) in the fuse box. This cuts off the electricity supply if there is an electrical fault.
 Make sure all power cords are kept out of the way and ensure unused power points are fitted with child-safe covers.
 Switch off appliances before unplugging and when not is use.
 Always dry your hands before touching electrical appliances and make sure children know to never put their hands or utensils into them, especially toasters.
 Teach children that ovens (and barbecues) can stay hot for a long time after cooking and that they should never touch them unless an adult is present.
 Keep saucepan handles facing in and not out over stove edges. For young children, use a stove-top or hot-plate guard.
 Hot water is dangerous for children and can cause severe burns and scalds. Never let them carry saucepans or cups full of hot liquids.
 Use good-quality oven gloves to handle anything hot.
 Take care with steam. Remove lids off saucepans and cooking dishes away from you so the steam shoots away from you. Keep your face away from the oven door when opening.
 Ensure kitchen equipment is safe and suitable for children. Take care to carefully supervise all kitchen activities, particularly those that involve hot water, sharp knives or electricity.
 For young children, avoid foods that can cause choking, such as nuts, large chunks of hard meat, cheese or fruits that can be hard to chew.
LOW-FAT COOKING TECHNIQUES
Mastering low-fat cooking techniques means you will be able to eat delicious, healthy food every day at home, saving you both time and money. It is something the whole family can learn so you can share the cooking and the fun you will have in creating healthy meals. Time spent in the kitchen needs to be seen as an investment in your family’s wellbeing as well as their health.
USE THESE COOKING STYLES
1 Stir-frying
2 Grilling
3 Microwaving
4 Roasting or baking without fat
5 Steaming
6 Sautéing
1 STIR-FRYING
Before you start, take the time to measure and chop all the ingredients so you can quickly toss them into the wok as needed – stir-frying is a quick cooking method and once you‘ve started, there‘s no time to stop.
Preheat the oven to warm so you can keep batches of ingredients at the right temperature once cooked. Heat a non-stick or electric wok over high heat and use an oil spray to lightly grease the wok. Add the ingredients that are the thickest, or take the longest to cook, first and the fast-cooking ones last. So cook meats first, stirring and tossing around the wok, then remove from the wok, transfer to a plate and keep warm in the own. Stir-fry any hard vegetables, such as carrots and corn first, then add firm vegetables, such as capsicum. Last, add leafy vegetables, such as baby spinach. Once all the batches are cooked, return the meat to the wok, add any additional spices or sauce, and toss together. Serve immediately.
2 GRILLING
The first step is to trim the meat of any visible fat and skin. Use a mallet or a rolling pin, covered in a couple of layers of plastic wrap, to flatten out any thicker parts of the meat, or ask your butcher to do this when you buy it.
Preheat the grill and then place the meat under it and grill on one side. Squeeze lemon or lime juice over the meat to keep it moist or brush with a salt-reduced stock. Once the meat is cooked on one side, turn it over and cook for a few minutes more on the other side until cooked through. If you‘re not ready to serve straight away, cover with foil and keep warm in the oven.
3 MICROWAVING
To cook vegetables, cut into even-sized pieces, place in a microwave-safe dish and place the lid on top or cover with plastic wrap and microwave for 2–4 minutes, or until cooked. You do not need any water because some of the water from the vegetables will be released.
For cooking whole dishes or recipes, use a cookbook specifically for microwaves.
Microwaves can speed up the time it takes to defrost items. Place frozen items on a plate in the microwave and remove from any metal or foil trays. Use the defrost function and stop halfway through and adjust the food on the plate to move the inside portion to the outer edge and vice versa to ensure it defrosts evenly.
4 ROASTING OR BAKING WITHOUT FAT
For roast vegetables, spray the base of a roasting tray with oil spray. Preheat the oven to 180°C. You will get a crispier result if you par-cook vegetables in the microwave first. Put the vegetables in the tray and cook until tender.
For roast meat, place a rack in the base of a roasting pan and add some water to the base of the pan. Preheat the oven to 170°C. Put the meat on the rack and cover with foil and roast until clear juices run out when the meat is pierced with a roasting fork.
For crumbed but not fried items, such as chicken strips dipped in egg and breadcrumbs, line a baking tray with baking paper and spray well with oil spray. Preheat the oven to 180°C. Place the food pieces on the tray and spray again, then bake until cooked through.
5 STEAMING
Choose any steaming appliance – this can be as simple as a metal steamer insert placed inside a regular saucepan, to a bamboo steamer placed over a wok or saucepan, to a steaming oven. Note that if you are using a bamboo steamer, it will need to be soaked in water for 15 minutes before the first use, to remove the smell.
Half-fill the saucepan or wok with water, place over the heat and bring to the boil. Vegetables can be placed in the steamer without wrapping but fish, chicken or thin pieces of meat should be wrapped in foil with any flavourings, such as herbs. Lay the vegetables or foil package on the base of the steaming dish, making sure the water level is below that of the steamer. Put the lid on and turn down the heat so the water is just boiling. Check regularly to make sure items are not overcooked.
6 SAUTÉING
Heat a large non-stick frying pan over medium heat. Spray with an oil spray. Add chopped vegetables, such as onions, capsicum and celery and sauté (turn quickly and constantly) for 5 minutes, or until cooked, stirring regularly to ensure the ingredients do not stick to the pan. Using a large spoon, transfer the cooked vegetables to a serving dish to keep warm until you are ready to serve. Alternatively, you can use this as a base for a casserole.