
Growing Vegetables
Five Things You Can Do Now
- Determine what kind of growing options you have.
- Gather information at your local cooperative extension service about growing your own vegetables, fruit trees, berries, grapes, etc.
- Investigate growing vegetables in containers and give it a try
- Build a grow box and plant a few herbs and vegetables.
- Stockpile several packages of seeds and vacuum pack them to place in storage.
No matter how much food you store, it’s eventually going to run out if a crisis lasts long enough. Being able to grow your own food will allow you to not only replace the storage food but also to supplement it and make it last longer. This chapter discusses the preparation needed for growing vegetables. The next chapters discuss being prepared to grow fruits, field crops, microgreens, and sprouts.
However, as important as it is to grow your own fruits and vegetables, it does not take the place of your food storage. Living organisms, including plants, are too vulnerable to be your only food source. They require a lengthy period of suitable weather before producing food and are vulnerable to drought, disease, pests, and vandals.
Growing fruits and vegetables is a broad, encompassing process, covering many subtopics. The details of that process will not be covered, this chapter will offer general guidance for gardening, present essential items you should stockpile now, and suggest resources for more information.
Many resources are available to help you navigate the challenge of growing your own fruits and vegetables. One of the best sources of information is your county’s cooperative extension service. It works closely with the state land-grant university and offers research-based home-garden information and advice. The information is usually free and will be specific to your area. Other resources about gardening can be found in the resource section.
Vegetable Gardening
Successful vegetable gardening comes from learning skills and gaining experience with your unique combination of climate, seasons, soil, water, insects, and disease conditions. Experience also helps you know your personal and family preferences.
Becoming an effective gardener does not happen overnight as many of the processes and techniques cannot be accomplished quickly. So, no matter what your circumstances, it is best if you begin to acquire the necessary knowledge and skills now.
For beginning gardeners, this chapter will give basic information and the hope that gardening is something you can manage and even embrace. Many things can be grown when you know a few basic gardening practices.
If you are already a skilled gardener, this chapter will help you evaluate your level of gardening preparedness. It may also give you another point of view to consider.
Start Small
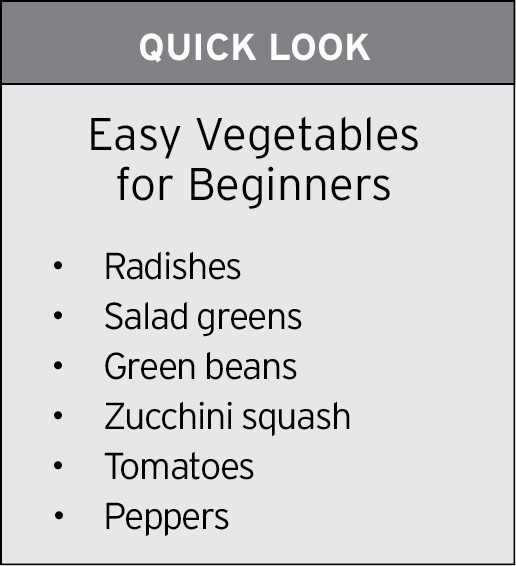
If you are new to gardening, begin small. An easy way to get started is to dedicate a small space in your yard to gardening. You also might consider building a grow box. Try some easy-to-grow things like lettuce, beans, or a few tomato plants. You can also try growing a few herbs or vegetables in a window box or patio pots. Like-minded neighbors may want to join you in creating a small community garden. With time, your practical knowledge will increase and your skills will be refined. Besides consulting many and varied gardening books, you can also gain knowledge from extension pamphlets or university online materials.
At whatever gardening stage you find yourself, you’ll want to stockpile important gardening necessities.
Stockpiling Seeds
During a prolonged food shortage, seeds will be worth their weight in gold.
In a prolonged food shortage, having a good supply of seeds is invaluable. A small amount of seeds represents a large amount of potential food. Seeds will also be valuable for bartering. For best results, purchase seeds from reliable sources, then experiment with various varieties to determine what you like and what works best in your growing environment.
Open-Pollinated Seeds
Seeds can be saved from the present year’s crop to be used in future crops if they are from standard, open-pollinated (nonhybrid) plants. Although hybrid plants provide excellent vegetables, the seeds from hybrid plants are unreliable and produce plants that are unlike the parent plant and usually inferior. Be aware that, hybrid or not, some plants will crossbreed and may not produce seeds suitable for saving.
Heirloom Seeds
Heirloom seeds are open-pollinated, nonhybrid seeds that have been passed down from generation to generation. They are most often those used prior to World War II. They represent people’s desire to get back to the basics and to avoid high-tech, genetically modified seeds. Some believe they are more flavorful and nutritious than modern hybrids. Heirloom seeds are particularly important in a survival setting because they are usually nonhybrid and the seeds can be collected and replanted from year to year.
On the other hand, many hybrid seeds are developed to improve plant yield, make plants disease resistant, and produce higher-quality, uniform fruits. They may also be bred for improved taste—new varieties of sweet corn are good examples of hybrids with improved taste.
Seed Selection
Heirloom seeds are important in a survival setting because the seeds can be collected and replanted from year to year.
Ideally, you’ll store and rotate the seeds for plants you like that have the characteristics you desire. However, for long-term storage, it’s a good idea to store a selection of seeds that are of the open-pollinated, heirloom-type variety. Consider these “seed insurance” and replace them about every five years.
Select seeds that grow well in your soil and climate. Consult your county’s cooperative extension service for recommended varieties in your area. Choose those your family likes and that will provide balanced nutrition, particularly vitamins A and C. Table 21.1 lists factors to consider as you select seeds.
Table 21.1
|
|
|
How quickly will they produce a crop?
|
How resistant are they to temperature extremes, drought, and disease?
|
|
How much do they yield for the space?
|
What are some crops that have an extended season?
|
|
How well can they be stored or canned?
|
Will they add variety, preventing menu boredom?
|
Personally Speaking
Your choice of seeds for storage will be based on your experience and vegetable preferences. It will also depend on your growing season. Many of my family’s favorites are hybrids, which works for us because we are constantly using them up and purchasing new. We also like some of the old open-pollinated standbys.
My garden favorites start with tomatoes, including several varieties for canning, a couple of Italian-paste varieties, and one or two cherry tomatoes. Next comes squash. I could live on summer squash—costata romanesco zucchini, regular zucchini, yellow crookneck, and yellow-patty pan. My favorite winter squash is Waltham butternut, which will last until March if stored in a cool place. We also grow sweet corn and have learned that the best varieties for freezing are the tender sweet (se) varieties. We grow Anaheim, jalapeño, and sweet peppers in a variety of colors. We round out our garden with green beans, onions, melons, cucumbers, tomatillos, carrots, beets, and sometimes snow peas if we can get them planted early enough.
A couple of years ago, my husband made three raised beds we fill with a raised-bed planter mix made up of three parts—sand, compost, and peat moss. My favorite things to grow in them are a variety of lettuces, Swiss chard, spinach, cilantro, sweet basil, and a new favorite—arugula.
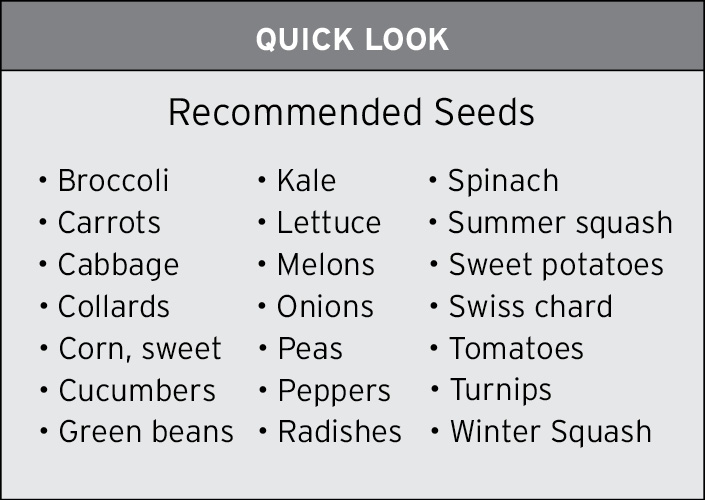
Recommended Seeds
A good start includes the vegetables listed in “Quick Look—Recommended Seeds.” Choose vegetables that your family enjoys and that grow well in your climate and growing conditions. Also include seeds for an herb garden.
Storing Seeds
Table 21.2Seeds Needed for One Year for a Family of Four |
|
|
Bush/pole beans |
8 oz. |
|
Beets |
1/2 oz. |
|
Cabbage |
1/4 oz. |
|
Carrots |
1/2 oz. |
|
Corn, sweet |
8 oz. |
|
Cucumber |
1 oz. |
|
Lettuce |
1/4 oz. |
|
Onion |
1/4 oz. |
|
Peas |
12 oz. |
|
Pepper |
1/4 oz. |
|
Radish |
1/2 oz. |
|
Spinach |
1 oz. |
|
Squash |
1/4 oz. |
|
Tomato |
1/4 oz. |
|
Turnips |
1/4 oz. |
You should store at least a one-year supply of garden seeds; however, storing two years’ worth of seeds will give you one to use in the present year, and one to save and use the following year. Constantly replenish seeds so you have a fresh supply. Table 21.2 shows how many seeds are needed for a family of four for one year.
Do not expect any stored seeds to have a shelf life longer than five years.
Table 21.3
|
|
|
2 Years |
Field corn, onions, parsnips, soybeans |
|
3 Years |
Asparagus, green beans, carrots, sweet corn, leeks, lettuce, parsley, peas, peppers, hybrid tomatoes |
|
4 Years |
Beets, cabbage, cauliflower, chard, okra, pumpkin, radish, spinach, squash |
|
5+ Years |
Broccoli, Brussels sprouts, celery, collard, cress, cucumbers, endive, kohlrabi, melons, nonhybrid tomatoes, turnips |
Look for seeds stored in resealable triple Mylar packages for a longer storage life. Once the packages are opened, the storage life is no different from other packaging. Store all packages of seeds in large, resealable plastic bags or airtight containers with oxygen absorbers in cool, dry conditions. Shelf life varies with the type of seed and exact conditions. Table 21.3 gives a general idea of the shelf life of various seeds. Consider storing additional seeds to use for bartering.
Commercially Packaged Storage Seeds
Although limited in choices and amounts, one good way to store seeds long-term is by having the selections specially prepared and sealed in cans. It will increase the shelf life substantially. Be sure to purchase from a seed specialty company that stands behind their seeds. Mountain Valley Seed Company, a part of True Leaf Market in Salt Lake City, Utah, offers excellent storage seeds.
Survival preparedness companies also market seeds packaged in cans or storage buckets for survival use. Be careful when selecting seeds from promoters who encourage you to purchase and not worry about it again. Carefully examine the actual contents and calculate the cost you are paying per package of seeds.
Packaging Your Own Seeds for Storage
You may want to select your own seeds from a reputable seed producer and then store them with oxygen absorbers in a Mylar bag, sealed Mason glass jar, or vacuum-packed bag. If you have access to a dry-pack canner, you may also use it to can your garden seeds. Careful storage of seeds will increase their storage life, and by handling them yourself, you will know exactly which seeds you have stored.
Even if you store seeds in vacuum-packed containers, you should rotate them regularly to keep them as fresh as possible.
Improving the Soil
The addition of organic material to any soil makes it better.
Good soil is the single-most-important factor in successful gardening. Plants require nutrients to grow well. Nutrients may be added to the soil with commercial fertilizer, but the most significant benefit comes from adding organic material. This includes leaves, grass clippings, plant materials, and composted manures. Adding compost to your soil will benefit it in other ways besides providing nutrients: it will improve drainage, aeration, soil structure, pH balance, and beneficial microorganisms, making your soil viable and healthy.
Have Your Soil Tested
If you are concerned about the quality of your soil, take the time to find out its basic characteristics. The important things you need to know are the texture, the pH, the percent of organic matter, and the basic content of macronutrients, like phosphorus and potassium. Nitrogen levels vary widely and are usually not tested for. Contact your county’s cooperative extension service, a land-grant university, or a commercial testing service for information about soil testing and recommendations for improving your soil.
Amend Your Soil
Once you know the basic characteristics of your soil, you’ll understand what soil amendments and fertilizer you need to add. You can purchase organic or inorganic fertilizer to respond to your specific soil. Purchase enough fertilizer for at least a year.
While a compost pile, pit, or barrel can be used to produce nutrient-rich organic matter, composted animal manure is an even better source of nutrients. Crops like legumes, ryegrass, and buckwheat can be used to increase the nitrogen and organic material in your soil.
Personally Speaking
If you have reasonably good topsoil, the most important thing you can do is take care of it. Almost every year, we add another layer of organic compost to our vegetable garden, and every spring, we broadcast a balanced fertilizer over the garden to replace depleted nutrients. We have found that to get the best quality corn, we need to side-dress it when it’s about a foot high.
Controlling Garden Pests
Controlling Insects
In a prolonged crisis where we may need to rely on the crops we’ve raised, it’s important we not allow pests and diseases to reduce our harvest. Keeping a selection of pesticides in your storage can help. The EPA-approved list of pesticides changes frequently, so check with your county’s cooperative extension service to see which ones you should store. It’s best to store them locked in a ventilated area in a garage or storage shed away from the living areas in your home.
You may also want to grow your own organic pesticide by storing seeds for the chrysanthemum cinerariifolium flower. The dried flower contains the botanical poison pyrethrum and can be ground up and used as a dust. Sprays made from garlic, onions, and other pungent plants also work as repellents.
Learn about beneficial insects and how to protect and encourage them, and practice good horticulture habits to cut down on the need for pesticides. Keep your garden area clean and weed free. Eliminate places for pests to breed and live by promptly and properly disposing of garden refuse. Proper crop rotation will not only reduce the buildup of damaging insects and diseases but also balance the use of different soil nutrients.
Controlling Weeds
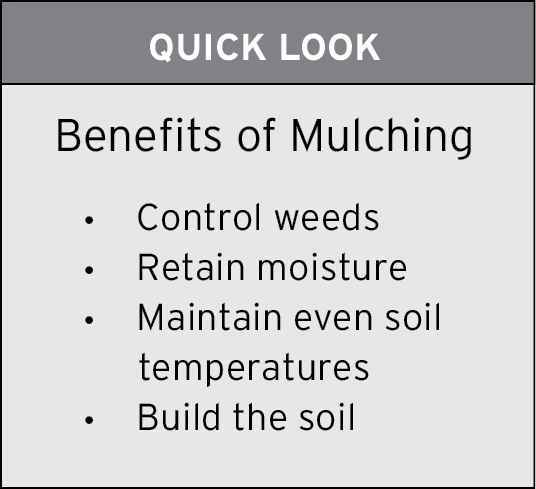
Weeds can be the biggest pests because they crowd plants and steal nutrients. Weed early while the weeds are small, and continue to monitor weeds and eliminate them throughout the growing season. This is especially important later in the season when plants go to seed. You can also use a preemergent herbicide after all garden plants are established. Mulching also helps keep weeds down.
Protect your garden with fencing and other precautions. An entire year’s harvest can be destroyed in a few minutes by animals or vandals.
Personally Speaking
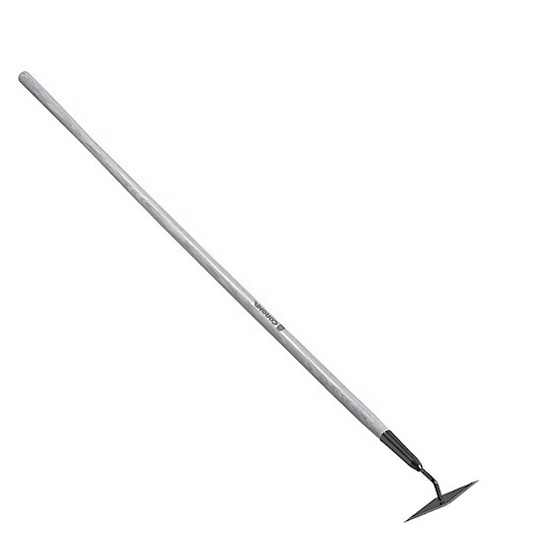
The tool pictured is a Corona Clipper Diamond Hoe. It is my favorite garden tool! I love it for getting rid of the small weeds that germinate shortly after planting. It is nice because it has four cutting blades that eliminate weeds as you move it back and forth just below the surface. With a little care, you can maneuver the pointed ends to get in close to corn stalks and tomato vines.
Gardening Tools and Supplies
Table 21.4
|
|
|
|
It’s a good idea to at least acquire the basic gardening tools listed in table 21.4. Buy quality tools and maintain them properly, cleaning them after use and storing them where they won’t rust or warp.
Rotary tillers are handy for larger gardens, but remember, they need fuel. Clean up the garden and prepare the soil in the fall so you can plant in the spring without cultivating.
Getting the Most from Your Garden
Location
A garden site must receive at least four to six hours of direct sunlight daily. Fruit-bearing vegetables need the most light, while leafy vegetables need less, and afternoon sun is better than morning sun. The soil should drain well, and the top six to eight inches should have a loose, crumbly texture. Poor soil can be gradually improved by adding compost, but it can take years. You will also need a source of water, especially in arid climates.
The amount of space you’ll need will depend on the climate, soil, and seed varieties you choose. Your gardening skills and methods will also impact yield.
In general, however, you can provide a year’s supply of vegetables from a couple of hundred square feet per person with efficient gardening techniques. Although some sources offer tables of projected yields, experience is your best guide.
Planning
The first step in planning a garden is to plan it on paper. Where will you plant crops so they’re not in the shade of buildings or other plants? Perennials and fall-bearing crops should be planted in separate plots or at the edges of the garden so they won’t be disturbed when the rest is turned under. Make the most of your space by allowing for climbing vegetables, like tomatoes, beans, and even cucumbers and cantaloupe, to grow upward on stakes and trellises.
There are several gardening methods that will produce up to five times as much yield while using less water and allowing for better weed control. For maximum production, you may want to research the following methods as you plan your garden. Resources about gardening methods can be found in the resource section.
It’s also wise to consider gardening methods specific to your geographic area. Again, your county’s cooperative extension service is a great resource. Try container gardening, vertical gardening, hydroponics, or square-foot gardening as viable alternatives when you do not have a lot of space.
Wide-Row or Plot Gardening
Wide-row gardening means that seeds are broadcast in a wide band rather than in single rows. The bands usually consist of two- to four-foot-wide rows or plots that are indented or raised. They often have a six-inch dike around them with one- to two-foot paths in between. Besides utilizing space efficiently, this method conserves moisture and provides a “living mulch” to help with weed control. Leafy crops and small-plant crops, such as beans, carrots, and beets, do well in this arrangement.
Biodynamic or French Intensive Gardening
This gardening method focuses on sustainability and organic-gardening practices and uses well-prepared raised beds or wide rows to more closely space plants, with careful attention to companion and succession planting. The yield may be four times as great as traditional gardening methods.
Raised-Bed or Grow-Boxes
Grow boxes are enclosed structures designed for raising vegetables and other plants. The width of the row should be what you can easily reach from either side, or about three feet. Raised beds allow easy access and offer some of the same benefits as wide-row planting.
Jacob Mittleider developed this gardening method to increase yields. Although the method is somewhat controversial, it deserves consideration if your goal is to grow a high-yielding garden. (See page 429 in resource section.)
Square-Foot Gardening
This gardening method also intends to increase yields within a small space using small grow boxes divided into one-foot squares to minimize watering and fertilizing needs. A drip-irrigation system can also drastically reduce the amount of water needed. Watering deeply two to three times per week helps plants develop a healthy root system, which makes them more drought resistant. Certain varieties are naturally more resistant to drought and, with mulching, they tend to thrive. (See page 429 in resource section.)
Companion Gardening
When you plant crops together for their mutual benefit, you can increase yields, better use nutrients, and lessen care requirements. For example, some plants help shade others, reducing water required and preventing sunburn. Or some plants improve the soil nutrients that benefit other plants. Certain plants, such as marigolds and aromatic herbs, also help deter insects.
Extend the Season
To get the maximum benefit from your garden, learn and use various techniques to lengthen the season. Use succession planting. Replace an early maturing crop with a later one to increase your yield.
Start plants inside in a sunny window or under grow lights for later transplanting. Protect tender plants from frost with hot caps, hotbeds, and cold frames to give them more growing time. Use a greenhouse for year-round gardening.
Investigate hydroponics, which allows year-round gardening in a completely enclosed space without soil. Most important to hydroponic gardening is a suitable light source.
Keep Records
No matter how or where you garden, be sure to keep a detailed record of the varieties planted, how much was planted, when it was planted, and how it was cared for. Note weeding and water and fertilizer used. Include insect and disease problems, time of harvest, and yield. These records will become a valuable planning tool for following years.