
Growing Sprouts
Five Things You Can Do Now
- Gather recipes and ideas for using sprouts.
- Decide on the sprouts you would like to try and purchase the seeds.
- Purchase sprouting jar lids for a Mason jar or a seed sprouter of your choice.
- Learn more about sprouting from one of the resources listed at the end of the book.
- Experiment with sprouting.
Fresh vegetables may be scarce during a prolonged crisis, particularly if it’s not harvest time, and thus, storing a supply of seeds to sprout can help fill that void. Sprouting is a simple process that can be done year-round and provides delicious sprouts in a few days, even in complete darkness. Sprouts supply important nutrients and give variety to a sparse survival diet. Raw or cooked, they add crispness to salads, soups, sandwiches, omelets, and casseroles. or can be eaten by themselves.
Sprouts are the germinated seeds of vegetables, grains, legumes, and nuts. Almost any whole seed can be used, with the notable exception of tomatoes and potatoes—their sprouts are poisonous. Many seeds can be sprouted in combinations.
Nutritious grasses can also be grown by sprouting wheat, rye, or other grains in one inch of soil or on a grow mat and then cutting it when it grows to seven or eight inches.
The Food Value of Sprouts
Sprouts are a nutritious and reliable source of vitamin C and the B vitamins, particularly riboflavin and niacin. Sprouts should be exposed to light for at least a few hours prior to harvesting.
The Whole Grains Council explains that when grains are sprouted, it “is the best way to release all of the vital nutrients stored in whole grains” and that sprouting will “unlock this dormant food energy and maximize nutrition and flavor.” Sprouting increases vitamins, minerals, enzymes, and antioxidants, which makes them more digestible.
Bean sprouts contain the protein-binding substances common to all legumes. Cooking the sprouts for at least two minutes inactivates these substances and makes the protein available. This can be done by blanching in boiling water or by stir-frying. Sprouts produce less intestinal gas and discomfort because soaking and rinsing them leaches out the complex carbohydrates that produce gas.
Sprouting Seeds
The Seeds
Sprouting seeds should be certified for sprouting. That means they are untreated, pesticide-free, E. coli free, and are likely organic. You can sprout many varieties of seeds. Some popular sprouting seeds you may want to try are alfalfa, broccoli, clover, mung bean, wheat, radish, soybean, mustard, green lentil, and chickpea.
Amount of Sprouting Seeds to Store
Store ten pounds of sprouting seeds per person to provide about a one-half cup serving per day but for sure, store anywhere from five to forty pounds. Twenty-five pounds would provide enough vitamin C to prevent scurvy if no other sources of this vitamin were available.
Sprouting Seed Sources
Seeds can be purchased from either local health food stores or internet sources. You will find sprouting seeds at small companies dedicated to sprouting, regular seed companies, and companies specializing in preparedness products. They should be raw, clean of foreign matter, sorted to insure few broken seeds, and certified safe for sprouting. Often, they will be certified organic and non-GMO. (See page 426 in the resource section for sprouting seed sources.)
Seeds for planting may have been treated for planting with fungicides or pesticides. Treated seeds are required to be so labeled by law and are usually dyed to contrast with their normal color to identify them. Do not use them for sprouting.
Storing Seeds
Store seeds where it is dry, cool, and dark. The number of seeds that will sprout diminishes as seeds grow older, but most have a shelf life of three years or more.
Equipment for Sprouting Seeds
A variety of equipment and tools are sold for sprouting. Some are convenient, but nothing special is necessary. Seeds simply need moisture, warmth, and ventilation to sprout.
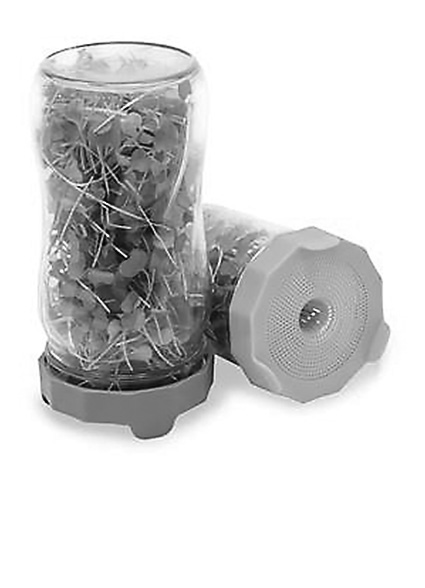
You may want to invest in some inexpensive sprouting lids. They may be plastic or metal and often come in sets of three different-sized screens. They screw onto a wide-mouth Mason jar and cost less than five dollars. You can also purchase sprouting jars that come with the lids. The lids pictured are Masontops Bean Screens.
You can also successfully sprout using pans, trays, bowls, strainers, colanders, racks, screen frames, and damp towels.
Growing Sprouts
Following the steps in table 25.1 will get you started growing your own sprouts. See page 430 for resources about sprouting.
Table 25.1
|
|
|
Step 1 |
Place one to two tablespoons of whole seeds in a wide-mouth jar. |
|
Step 2 |
Add two to four tablespoons of lukewarm water to the seeds. |
|
Step 3 |
Soak overnight. |
|
Step 4 |
Cover the jar with any porous material that has small enough holes the seeds cannot go through, such as nylon mesh, netting gauze, cheesecloth, or specialty lids. |
|
Step 5 |
Secure the covering with a canning ring, strong rubber band, or string. |
|
Step 6 |
Pour off the soaking water, rinse thoroughly, and then drain completely. |
|
Step 7 |
Shake the jar to evenly distribute the seeds and lay it on its side in a location away from direct sunlight. A 65°–80° F (18°–27° C) temperature is best for most seeds. Cress, pea, and rye seeds like it cooler. |
|
Step 8 |
Rinse and drain with lukewarm water two to six times each day to keep seeds moist and prevent mold. |
Safe Sprouting
Sprouted seeds have been blamed for a small number of outbreaks of E. coli and salmonella poisoning. The source of the contamination seems to be the seeds themselves. A sprouting chamber is essentially an incubator, and the same environment that promotes sprouting also is conducive to bacterial growth, so it’s important to take steps to minimize potential contamination. Also, be sure to use sprouts within a few days.
The most important thing you can do for safe sprouting it to buy certified pathogen-free seeds. The sprouting industry is intent on making sure that sprouting is safe. According to the Sprout People, a group advocating for sprouting, “Organic sprouting seed has never been blamed for an outbreak of food-borne illness.”
Treating Seeds for Sprouting
If concerned about the safety of sprouting, you may want to sanitize your sprouting seeds. Publication 8151 by University of California at Davis, Division of Agriculture and Natural Resources, explains this process.
They suggest you treat seeds by immersing them for five minutes in a solution of 3 percent hydrogen peroxide heated to 140° F (60° C), and then rinse the seeds under running tap water for one minute.