Do you have any missing shirt buttons, pants that need a patch or socks that could do with being darned? Long considered a craft, sewing is a skill that everyone should acquire. It’s easy to learn and will help extend the life of your clothing.
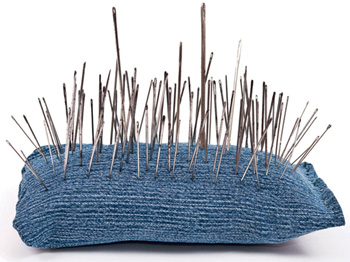
KEEP HANDY sewing and darning NEEDLES IN A PINCUSHION.
You don’t need a large, well-stocked basket for simple clothes mending. Basic sewing items will even fit into a shoebox or cookie tin. Here’s what you will need.
• Keep sewing and darning needles of various sizes in a pincushion or piece of soap. Soap coats needles, helping them to pass easily through thick fabrics.
• Try using a magnet as a pincushion; you can also use it to gather up lost needles and spilled pins.
• Store pins and safety pins in small matchboxes.
• Keep a selection of sewing threads, plus darning and strong button threads, in common colors, as well as some yarn for thick fabrics.
• Add a thimble, darning mushroom, seam ripper, tape measure, scissors and perhaps a needle threader to complete the sewing kit.
• String buttons together by color and size to save time and prevent them from collecting at the bottom of the sewing basket. Store extra ones for specific articles of clothing in transparent, labelled bags.
Elbows, knees and the crotch area are usually the first parts of clothing to require a repair. Here are a few things to consider when sewing on patches.
• Hand stitch iron-on patches along the edges when patching stretchy fabrics.
• Sew together holes in knitted items before applying a patch to be sure they don’t get larger.
• Sew on a patch backing made from previously discarded denim when patching a favorite pair of well-worn jeans.
• Use a sewing machine to attach patches to tough fabrics such as denim.
• Before you lose a loose button and have to find a matching replacement, sew the original on properly.
• Avoid damaging a favorite blouse when cutting off buttons by inserting a comb between the fabric and the button before snipping the threads.
• Stiffen thread by rubbing it with candle wax, which makes it easier to pass through a needle.
• Sew on a button with four holes in a crisscross shape so that if one thread breaks, the second keeps the button in place.
• Use a matchstick as a spacer between button and fabric. Once you’ve fastened the button, remove the matchstick. Then wind the thread firmly around the stitches several times to reinforce and finish with a couple of extra stitches on the back of your fabric.
• Avoid tearing out fabric on the button facing, especially on coats, by sewing an additional smaller flat button on the inside when sewing on a button.
• Sew a frayed or oversized buttonhole with a couple of horizontal stitches at the upper and lower edges of the hole so that the head of the button just fits. Finish the ends of the thread on the wrong side.
This is how to repair a small gap in a seam, working from the right side of the garment:
1 Press the seam open, align the folded edges and pin.
2 Sew the folded edges together by taking a small stitch along one folded edge and then along the other.
3 Keep the stitches right on the folded edges so they are barely visible as the edges are drawn together.
4 Avoid pulling the stitches too tight. This will keep the seam flexible and protect it from splitting again.
5 Use an iron and damp cloth to steam the seam.
Iron-on hem tape is quite stiff and may prevent pants or a skirt from hanging properly. In order to protect hems, sew on seam binding as follows:
1 Wearing your regular shoes to try on the skirt or pants, mark the line of the new hem with chalk or pins. Fold up the hem and lightly iron in place.
2 Lay the seam binding along the raw edge of the hem so about 1/16 inch (1 mm) protrudes beyond the edge. Machine sew the binding to the raw edge.
3 Hand sew the top edge of the binding to the wrong side of the pants or skirt.
• Spray the end of thread with hairspray so it passes through the eye of the needle easily.
• Stop runs in knitted fabric by adding a little clear nail polish or glue. But bear in mind that you won’t be able to sew them later, so use this technique only when you have no other option.
• Rub zippers that stick with beeswax.
• Replace elastic in waistbands or elsewhere by fastening the new elastic to the old with a safety pin. As you pull the old one out, the new one is pulled in.
• Rub thread with beeswax to make it more durable.
• If you don’t have the same color of thread, choose a shade darker than the original, never lighter.
• Use new shoelaces to make loops for hanging heavy jackets. Cut them to the appropriate length and attach them with strong thread inside the collar.
How to darn
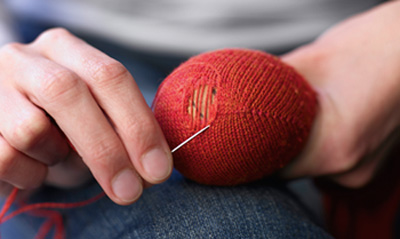
1 Stitch over then under the hole in the first undamaged row to form parallel threads lengthwise.