Chapter 1: Office Basics
Start and Exit Office Applications
Before you can begin working with a Microsoft Office application, also called a program, you must open the application.
There are a few ways to start an application. One is to launch it from the Start menu, as described in this task. Another is to double-click the program’s shortcut icon on the desktop. (You learn how to create a shortcut icon for a program in the tip at the end of this section.)
When you finish your work, you can close the program. If applicable, you can save your work before exiting a program completely.
Start and Exit Office Applications
Start an Office Application
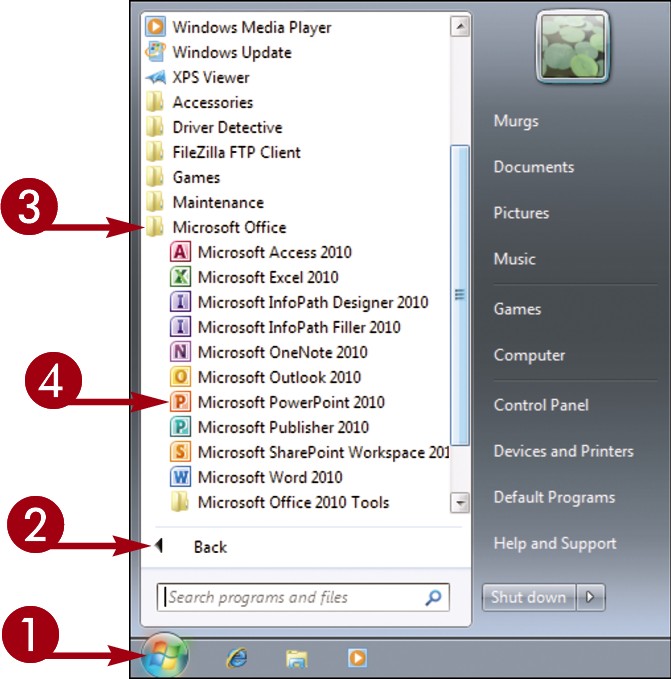
 Click Start.
 Click All Programs. The All Programs menu option changes to a Back menu option.
 Click Microsoft Office.
 Click the name of the program that you want to open.

• The program that you selected opens in a new window.
Note: See the next section to learn how to identify different areas of the program window.
Exit an Office Application
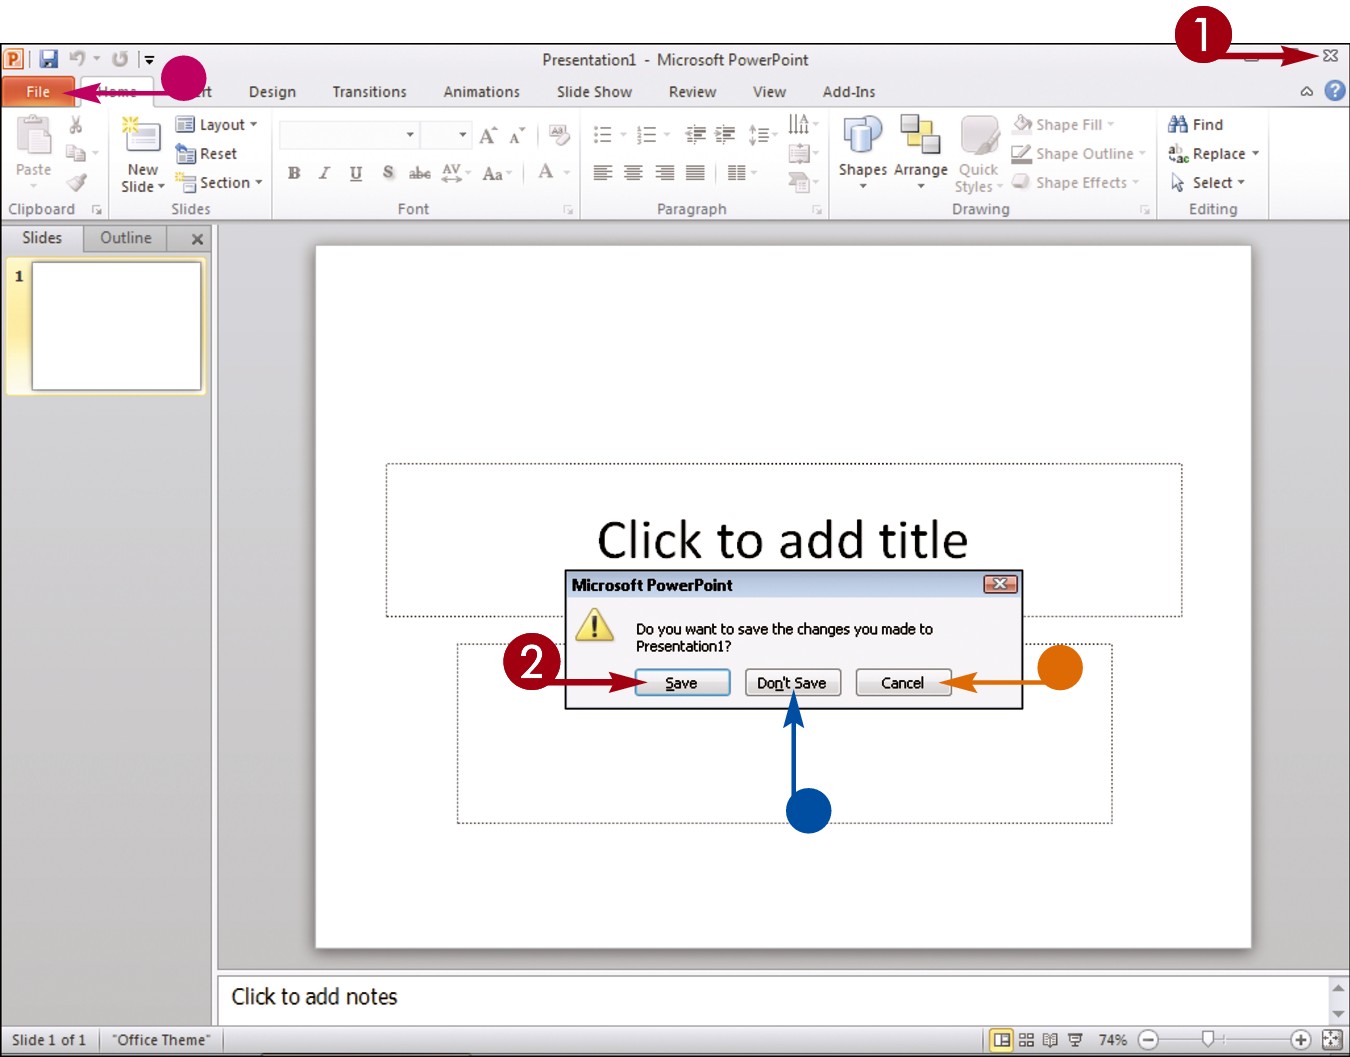
Click the Close button ( ).
).
• You can also click the File tab and then click Exit.
If you have not yet saved your work, the program prompts you to do so before exiting.
Click Save.
The program window closes.
• If you click Don’t Save, the program closes without saving your data.
• If you click Cancel, the program window remains open.
Simplify It
How do I create a shortcut icon for an Office application?
To create a shortcut icon that appears on the Windows desktop, follow these steps:
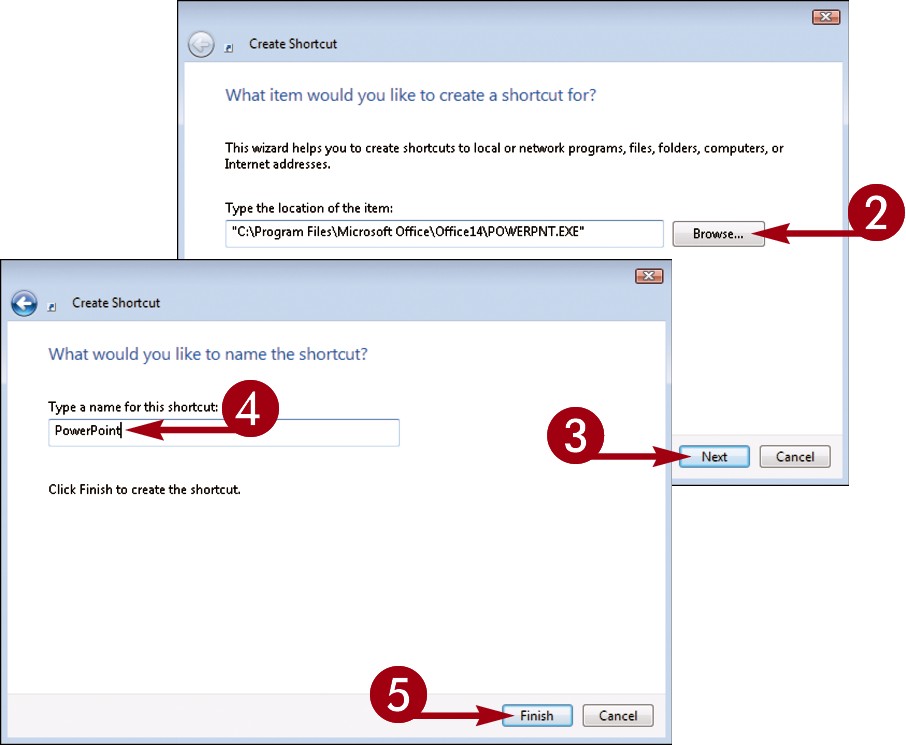
Right-click a blank area of the desktop and click New and then Shortcut.
The Create Shortcut dialog box appears.
Click Browse, navigate to the Office program, click the filename, and click OK.
Click Next.
Type a name for the shortcut.
 Click Finish.
The new shortcut icon appears on the desktop.
Navigate the Program Windows
All Office programs share a common appearance and many of the same features. These features include a Ribbon, which appears instead of the menus and toolbars found in previous versions of Microsoft Office; a Quick Launch toolbar, which features a customizable set of frequently used commands; and scroll bars, which you can use to navigate an open file in a program window. When you learn how to navigate one Office program, you can use the same skills to navigate the others. If you are new to Office, you should take a moment to familiarize yourself with the suite’s various on-screen elements.
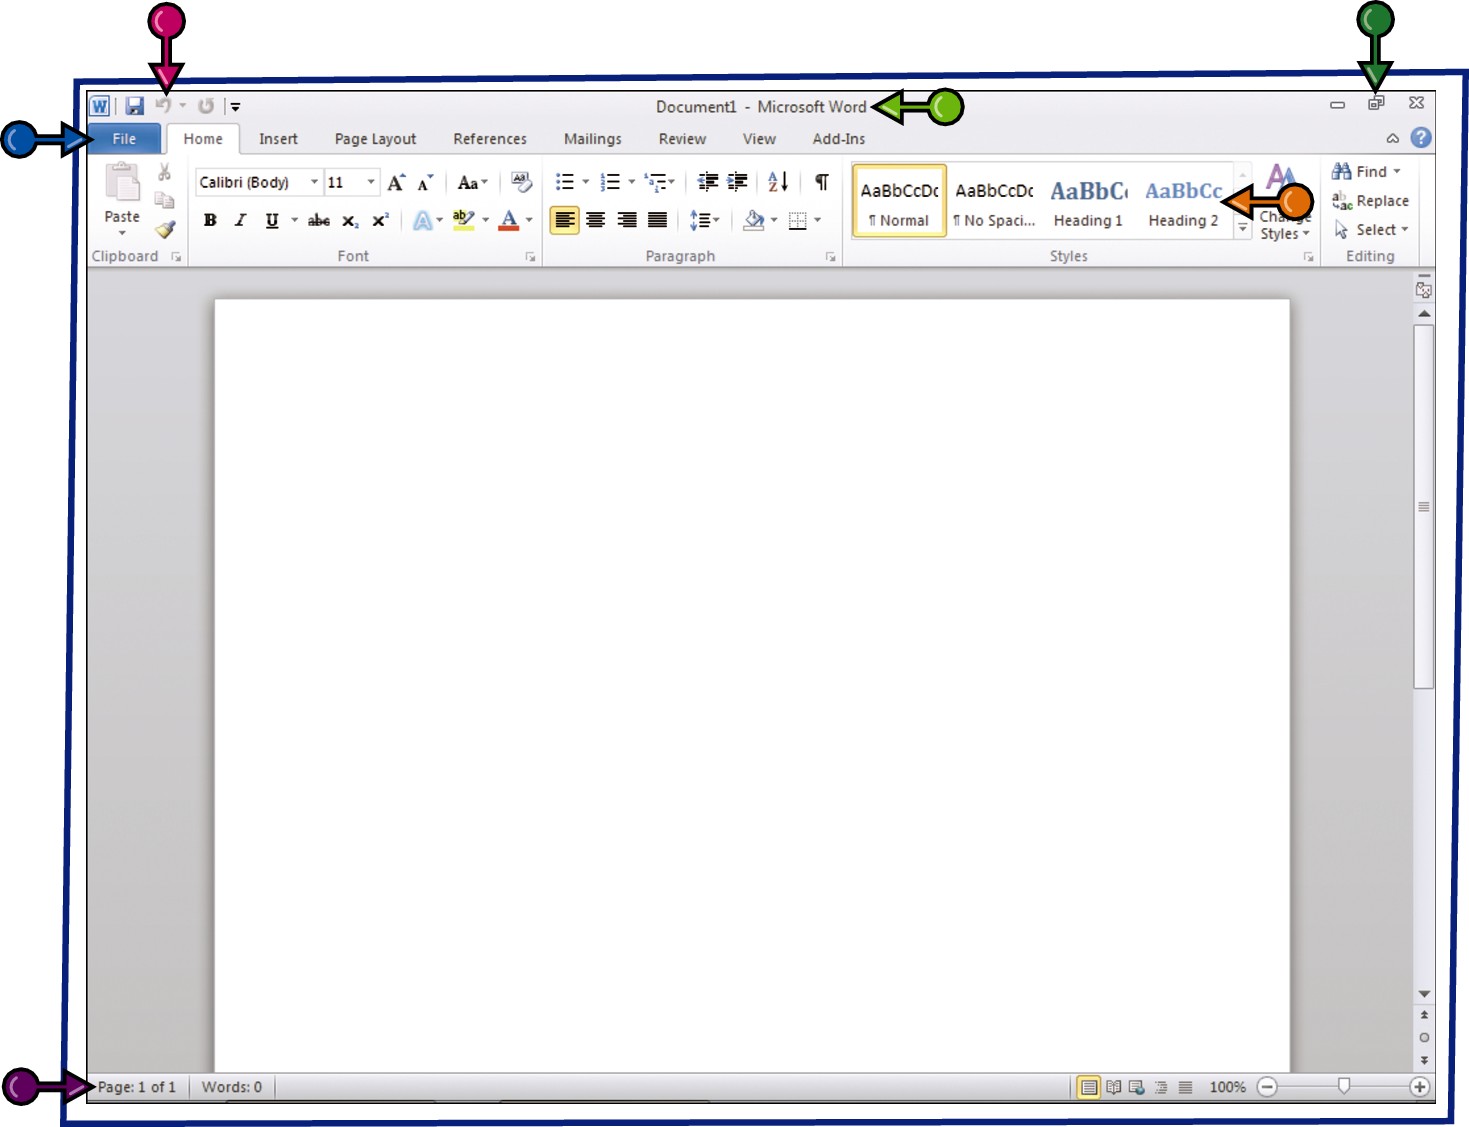
Title Bar
Displays the name of the open file and the Office program.
Quick Access Toolbar
Displays quick access buttons to the Save, Undo, and Redo commands.
File Tab Menu
Click to display a menu of file commands, such as New and Open.
Ribbon
Displays groups of related commands in tabs. Each tab offers buttons for performing common tasks.
Status Bar
Displays information about the current worksheet or file.
Program Window Controls
Use these buttons to minimize the program window, restore the window to full size, or close the window.
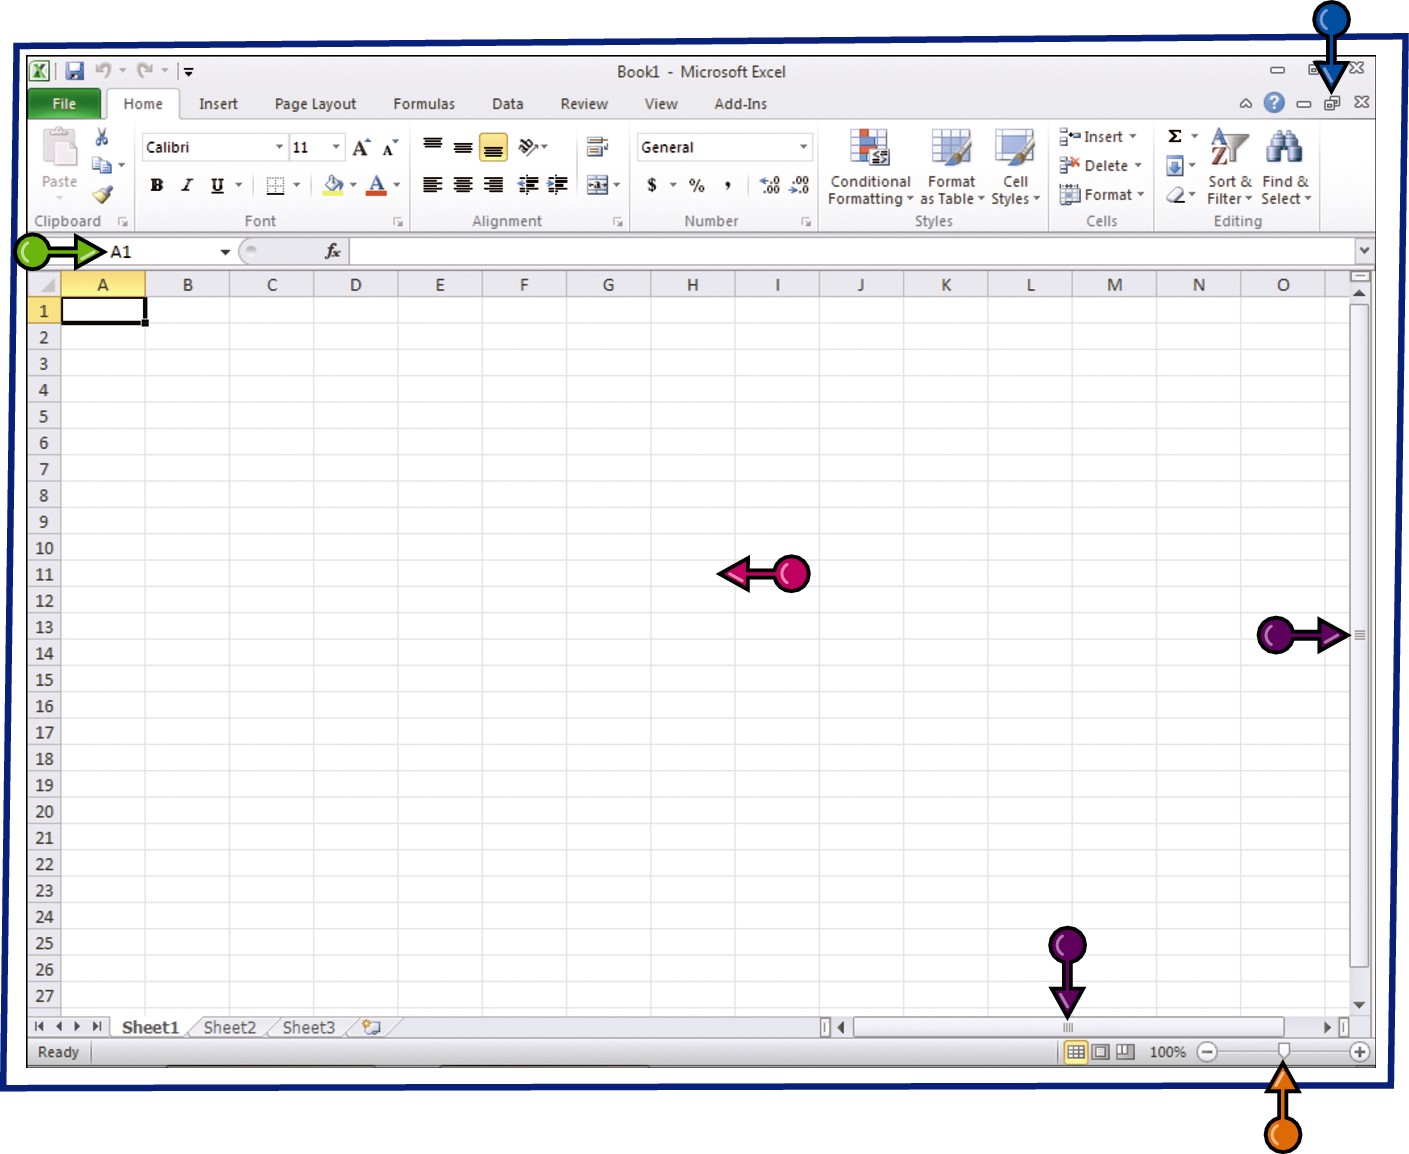
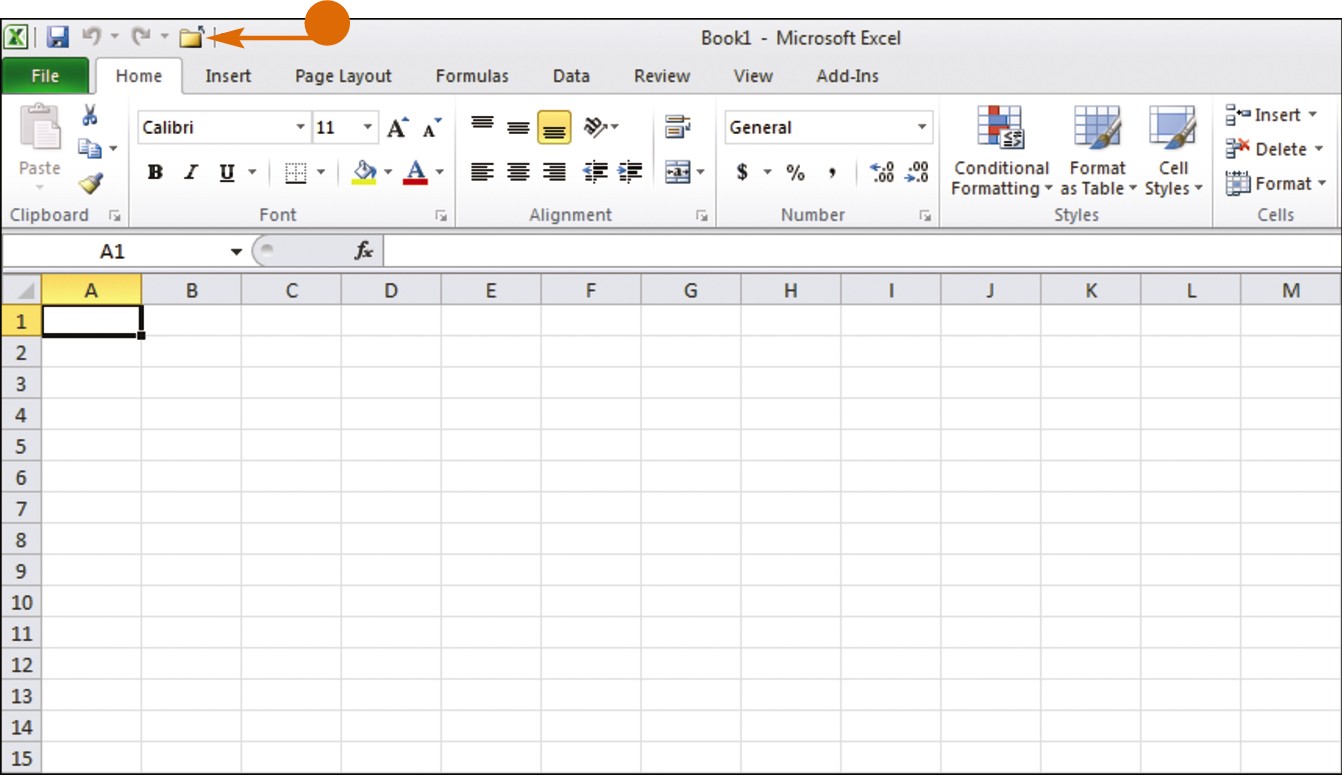
Formula Bar
This appears only in Excel. Use this bar to type and edit formulas and perform calculations on your worksheet data.
Work Area
The area where you add and work with data in a program. Depending on the Office program, the work area may be a document, a worksheet, or a slide.
Document Window Controls
Use these buttons to minimize or restore the current document within the program window.
Zoom Controls
Use this feature to zoom your view of a document.
Scroll Bars
Use the vertical and horizontal scroll bars to scroll through the item shown in the work area, such as a document or worksheet.
Work with the Ribbon
Instead of the menus and toolbars found in earlier versions of Office, Office 2010 features the Ribbon, which offers an intuitive way to locate and execute commands.
The Ribbon is grouped into tabs, each containing groups of related commands. For example, the Home tab in Microsoft Word contains commands for changing the font, setting text alignment, indenting text, and so on. Some tabs appear only when needed, such as when you are working with a table or picture in a document.
The Ribbon is maximized by default, but you can minimize it to view more of your program window.
Work with the Ribbon
Use the Ribbon

Click a tab.
The tab organizes related tasks and commands into logical groups.
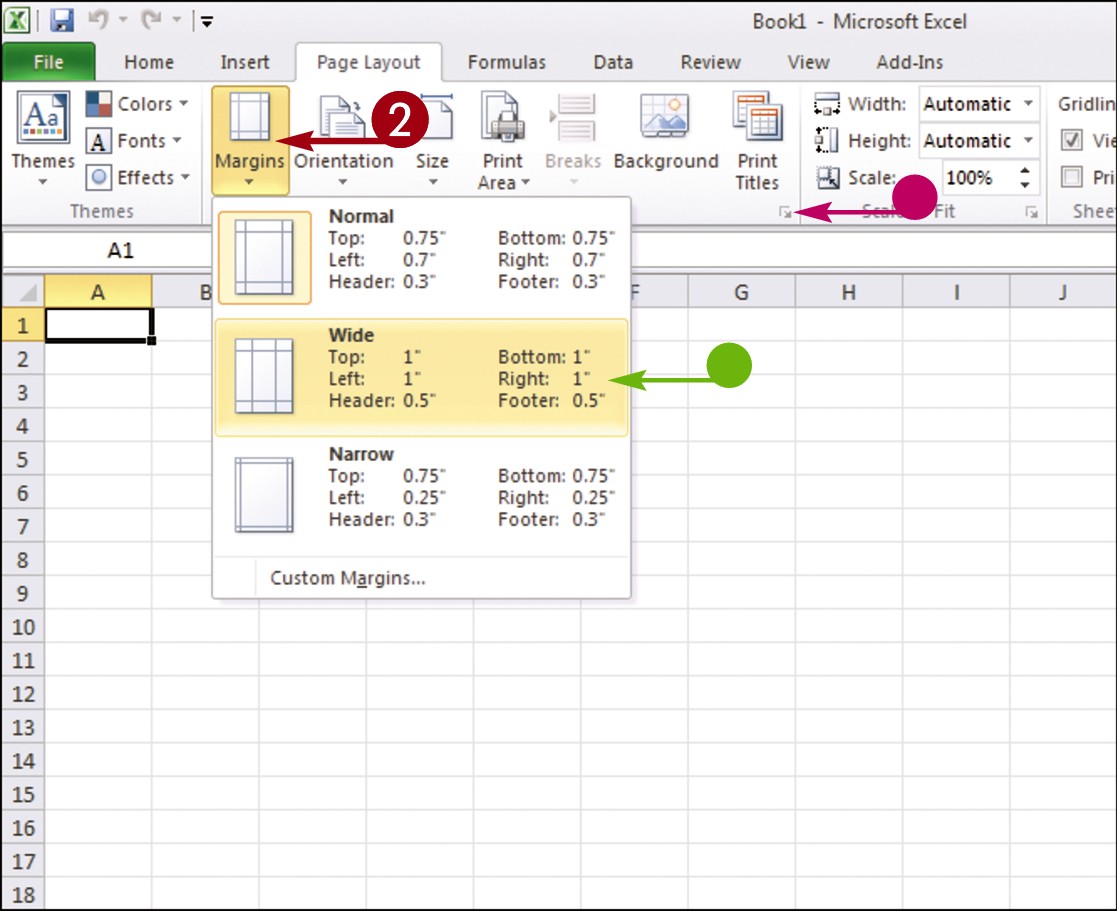
Click a button to activate a command or feature.
• Buttons with arrows display additional commands.
• With some groups of commands, you can click the corner group button ( ) to display a dialog box of additional settings.
When you position the mouse pointer over Live Preview options on the Ribbon, you see the results in the document before applying the command.
Minimize the Ribbon
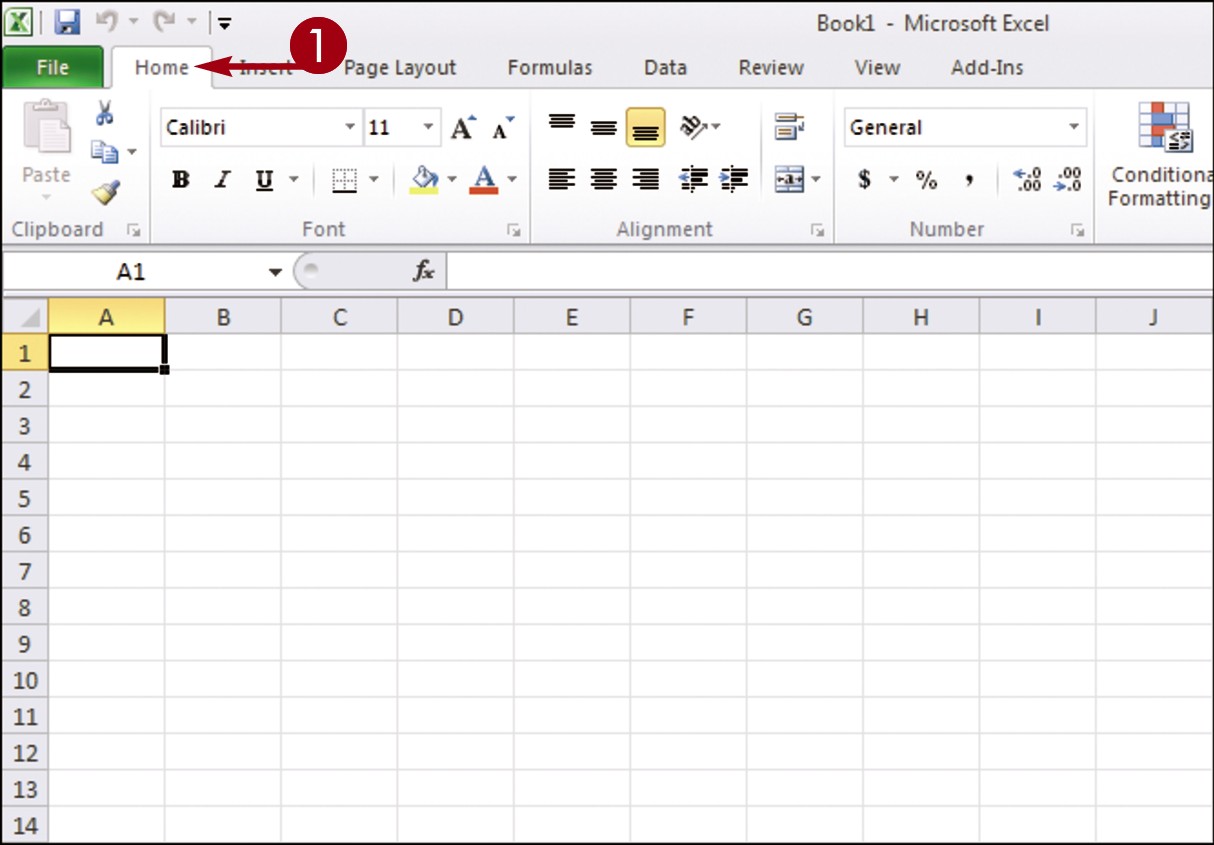
Double-click a tab name.
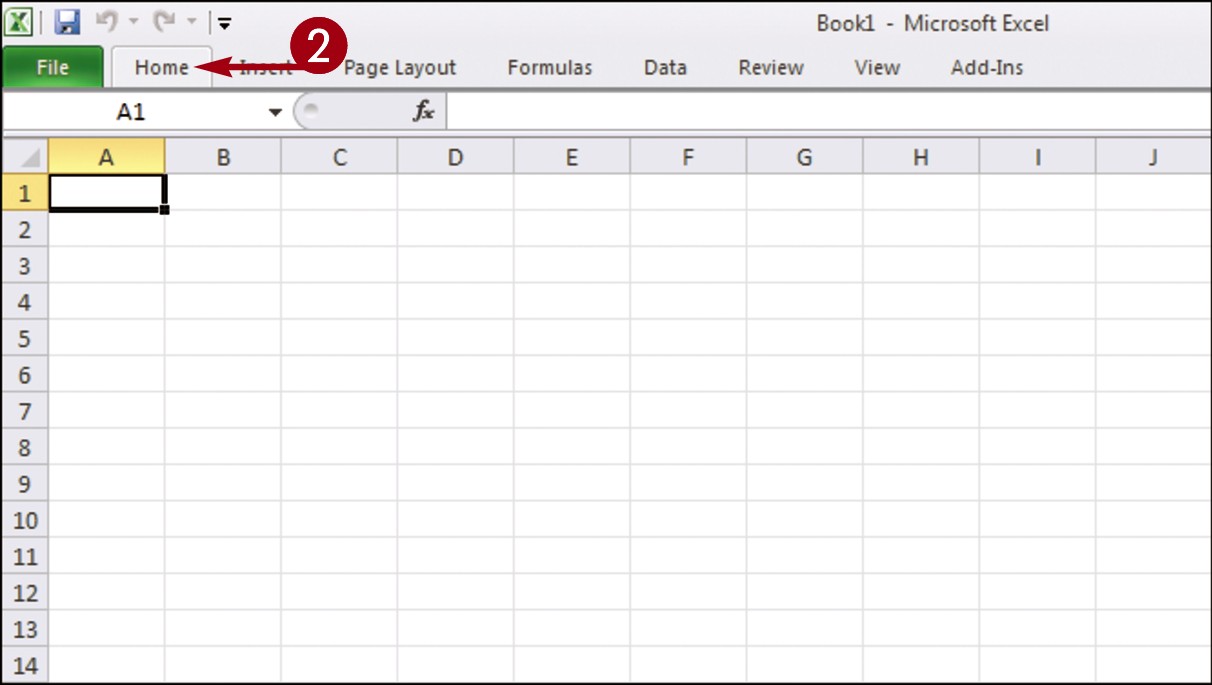
The Ribbon is minimized.
Double-click the tab name again to maximize the Ribbon.
Simplify It
Can I keep the Ribbon minimized?
Yes. To keep the Ribbon minimized, follow these steps:
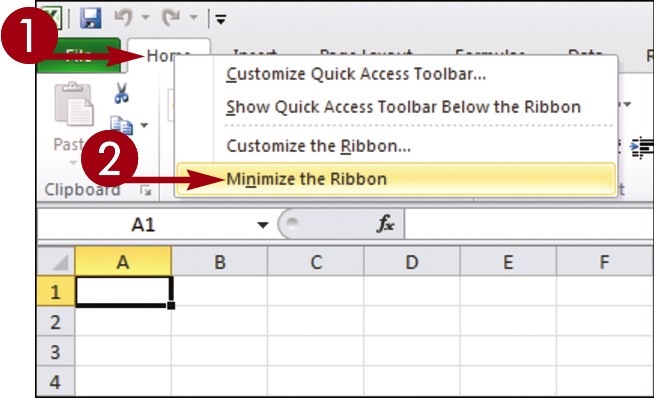
Right-click a tab on the Ribbon.
Click Minimize the Ribbon.
The program’s Ribbon is minimized at the top of the screen.
To use a Ribbon while it is minimized, simply click the tab containing the tools that you want to access to reveal it.
Customize the Quick Access Toolbar
The Quick Access toolbar, which appears on-screen regardless of what tab is currently shown in the Ribbon, offers quick access to the Save, Undo, and Redo commands.
You can customize this toolbar to include other commands, such as the Quick Print command or another command you use often. Alternatively, you might customize the toolbar to omit those commands that appear by default.
By default, the Quick Access toolbar appears in the top left corner of the program window, above the Ribbon. You can choose to display the toolbar below the Ribbon instead.
Customize the Quick Access Toolbar
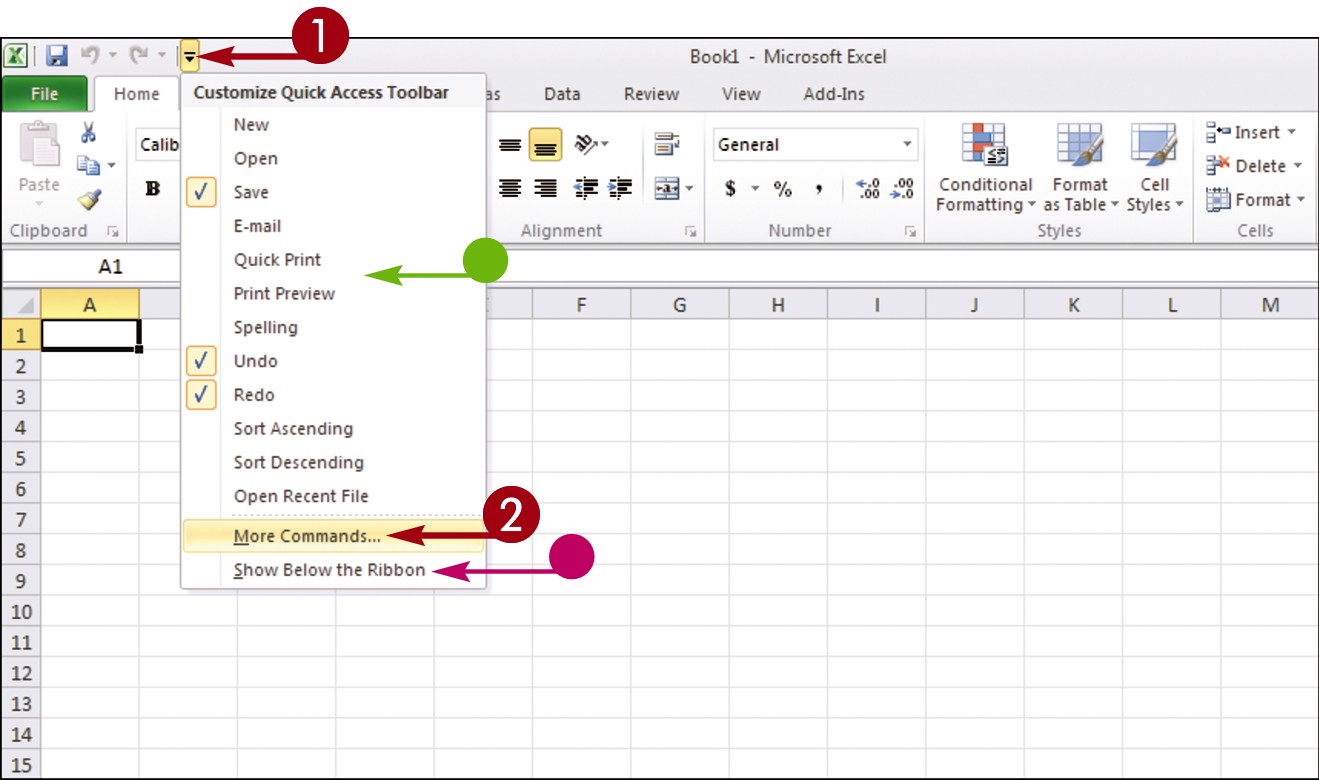
Click the Customize Quick Access Toolbar button ( ).
).
Click More Commands.
• You can click any of the common commands to add them to the toolbar.
• You can click Show Below the Ribbon if you want to display the toolbar below the Ribbon.
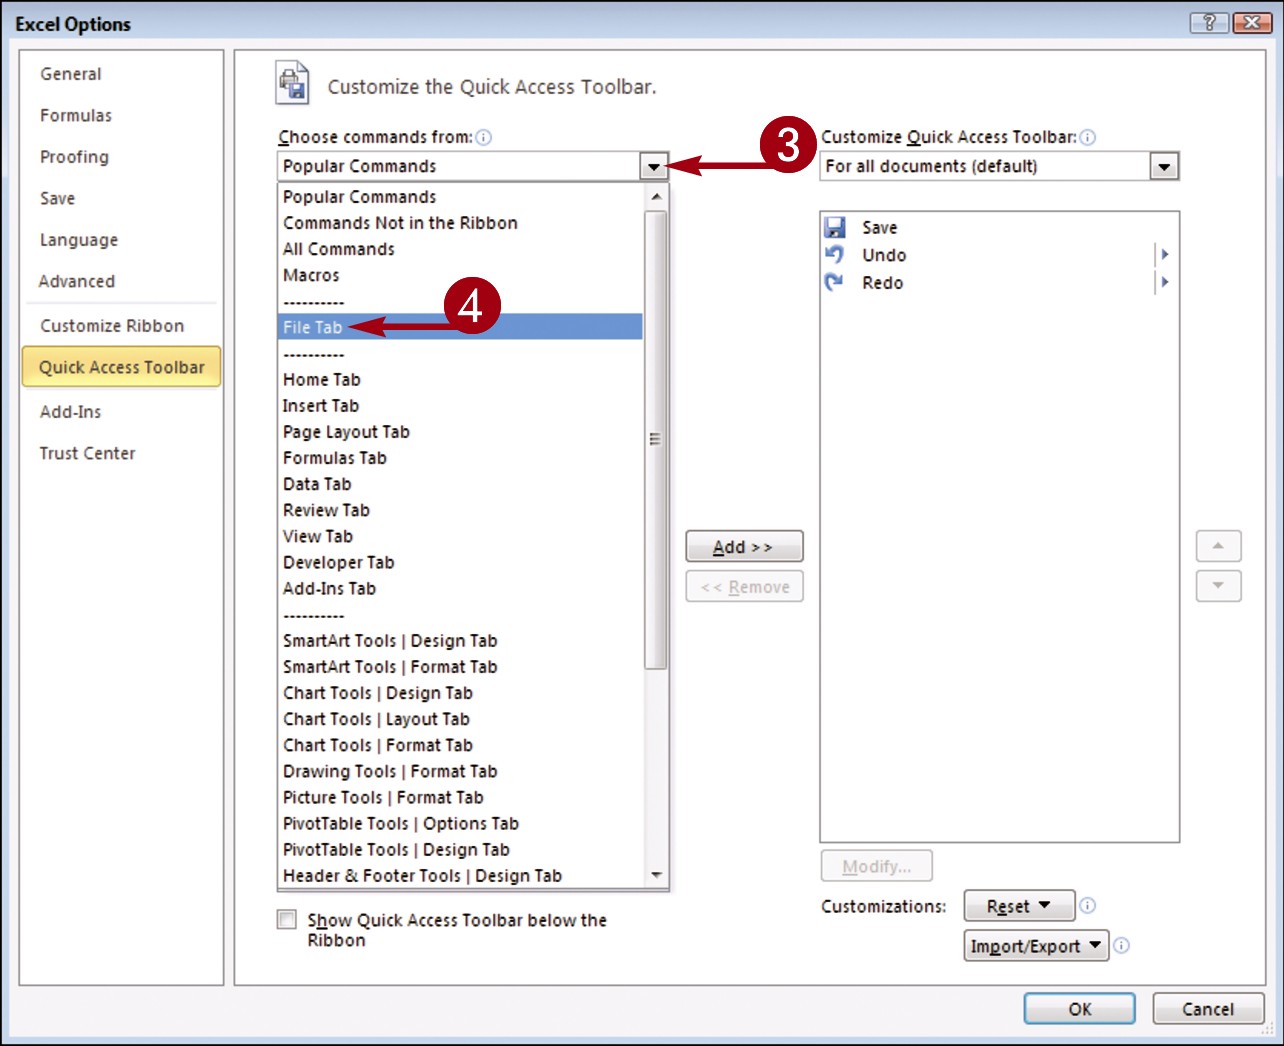
The Options dialog box opens with the Customize options shown.
Click the Choose commands from  .
.
Click a command group.
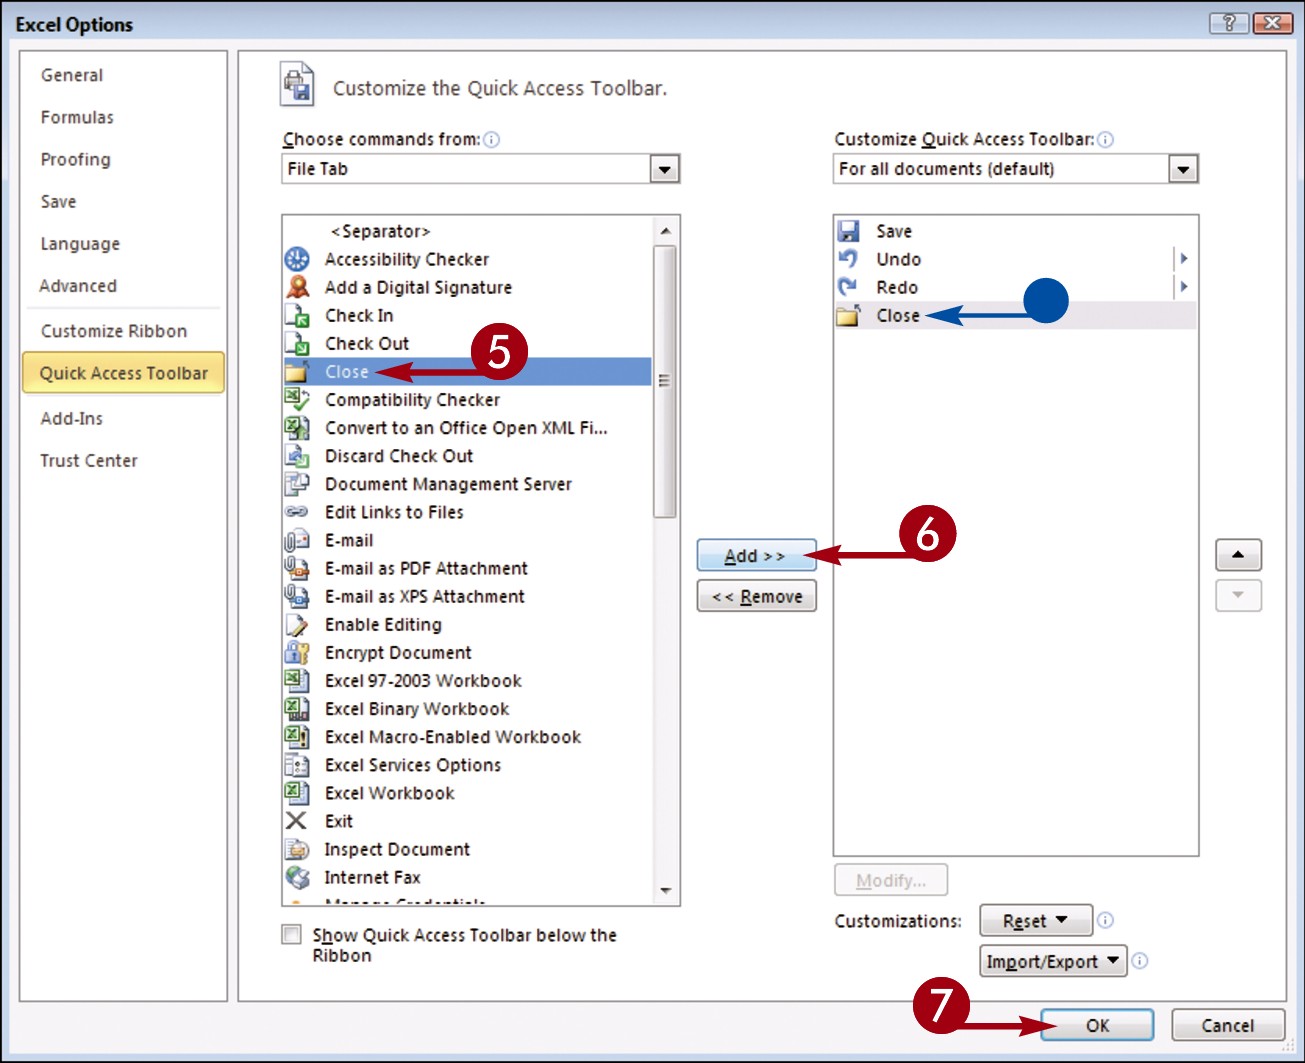
Click the command that you want to add to the toolbar.
 Click the Add button.
• Office adds the command.
You can repeat Steps 3 to 6 to move additional buttons to the toolbar.
 Click OK.
• The new command appears on the Quick Access toolbar.
Find Help with Office
You can use Office Help to assist you when you run into a problem or need more information about how to complete a particular task.
The Help window offers tools that enable you to search for topics that you want to learn more about. For example, if you want to learn how to print an Office document, you can type Print in the Help window to locate articles on that topic. Alternatively, you can browse for articles by category.
If you are connected to the Internet, you can access Microsoft’s online help files for even more comprehensive information.
Find Help with Office
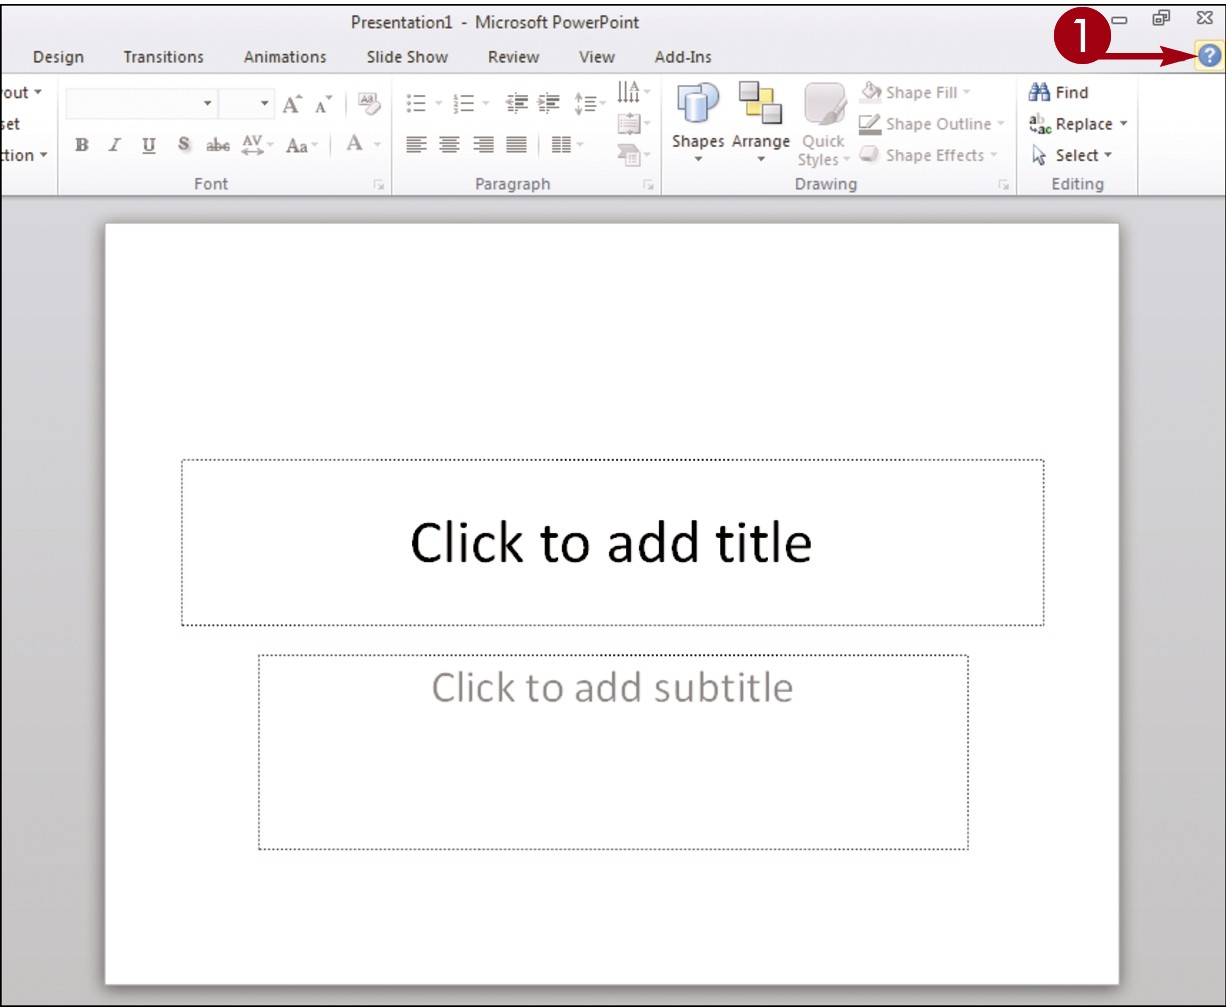
Click the Help button ( ).
).
The Help window opens.
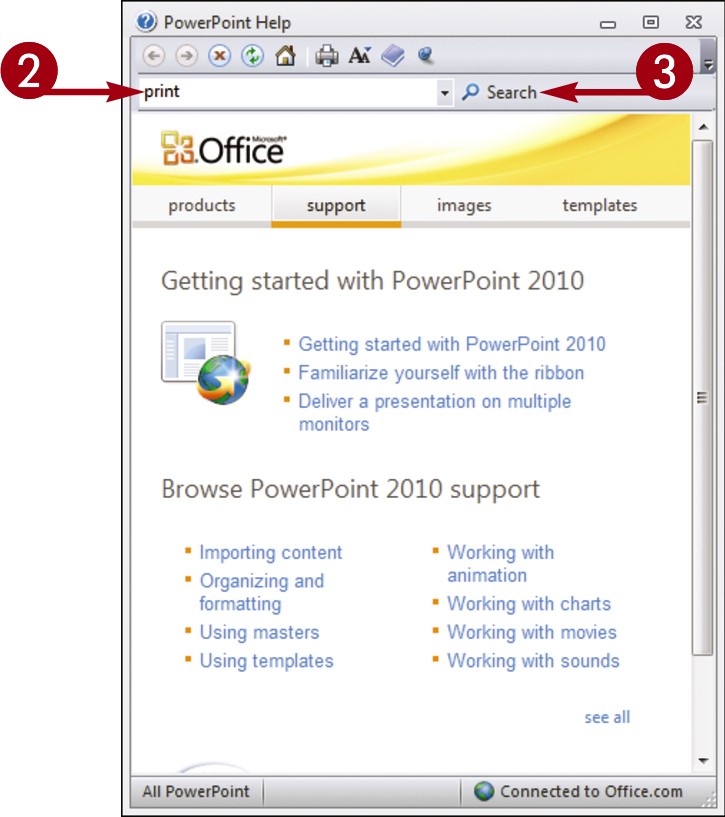
Type a word or phrase that you want to learn more about.
Click the Search button.
You can also press  to start the search.
Note: You must be connected to the Internet to access Microsoft’s online help files.
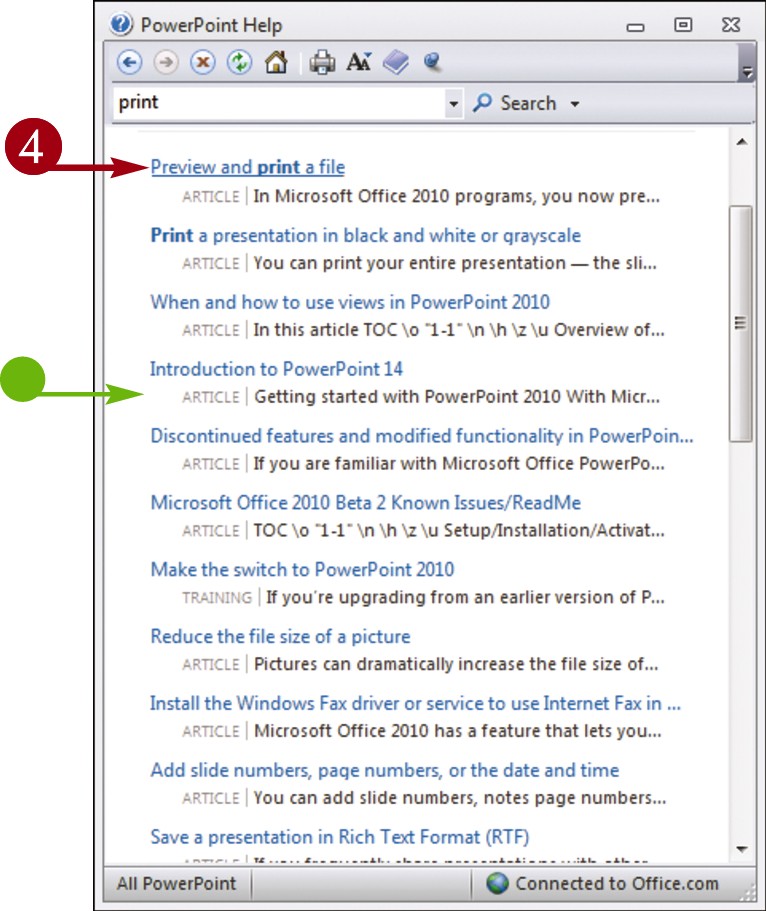
• The results window displays a list of possible matches.
Click a link to learn more about a topic.
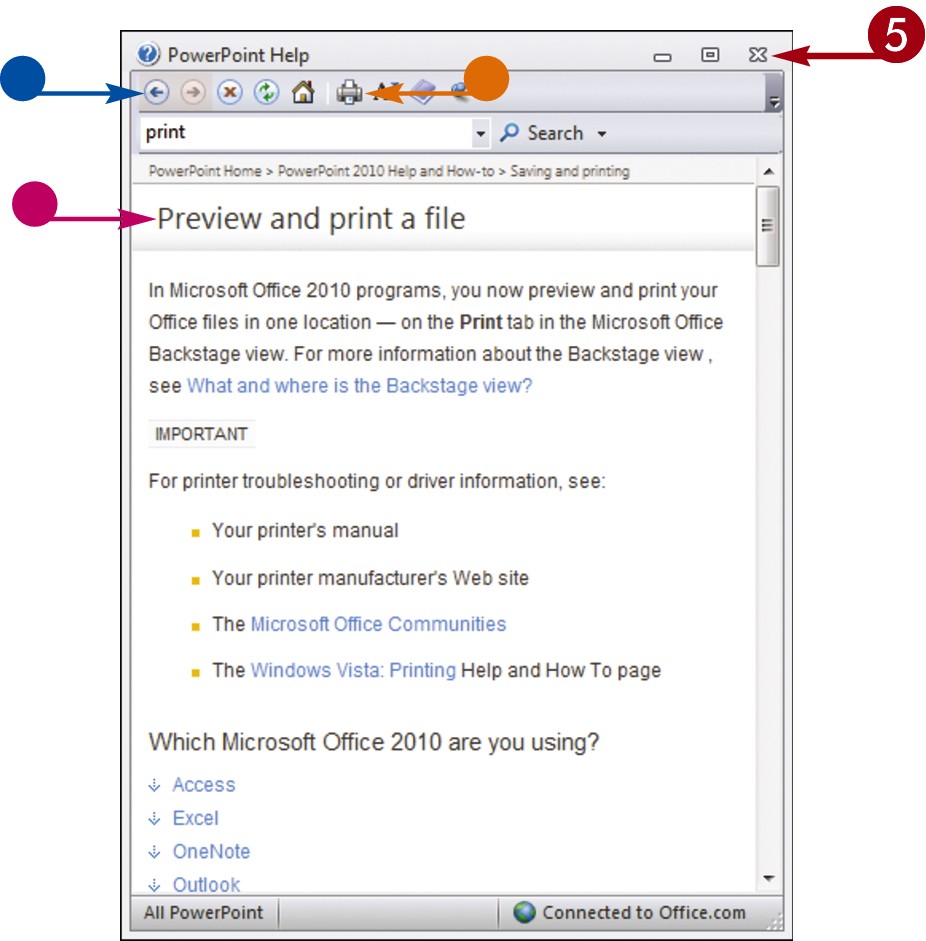
• The Help window displays the article, enabling you to read more about the topic.
• You can use the Back and Forward buttons ( and
and  ) to move back and forth between help topics.
• You can click the Print button ( ) to print the information.
Click to close the window.
Simplify It
Can I use the Help feature if I am offline?
Yes. You can still access the help files that are installed with Office. However, the online resources offer you more help topics, as well as links to demos and other help tools.
How do I browse help files?
Click the Home button ( ) on the Help window’s toolbar to display a table of contents for the help files for the Office program that you are using. Click a help category to display subtopics of help information. Click an article to view more about a topic. Many articles include links to related articles.