Chapter 3: Office Graphics Tools
Insert Clip Art
You can add interest to your Office files by inserting clip art images in them. Clip art is simply premade artwork or other types of media. Word, Excel, PowerPoint, Publisher, and Outlook install with the Office clip art collection.
You insert clip art using the Office 2010 Clip Art pane. This pane enables you to search the clip art that comes preinstalled with Office 2010 to locate images and other media that suit your purposes. In addition, you can use the Clip Art pane to look for more clip art on the Web using the Clip Art task pane.
Insert Clip Art

 Click where you want to add clip art.
You can move the clip art to a different location after you insert the art.
 Click the Insert tab.
 In the Illustrations group, click Clip Art.

The Clip Art task pane opens.
 To search for a particular category of clip art, type a keyword or phrase in the Search for field.
• To specify what type of item you need — illustration, photograph, video, or audio — click the Results should be  and click the type of item.
• You can also search for clip art on the Office Web site by clicking to select the Include Office.com content check box.
 Click Go.
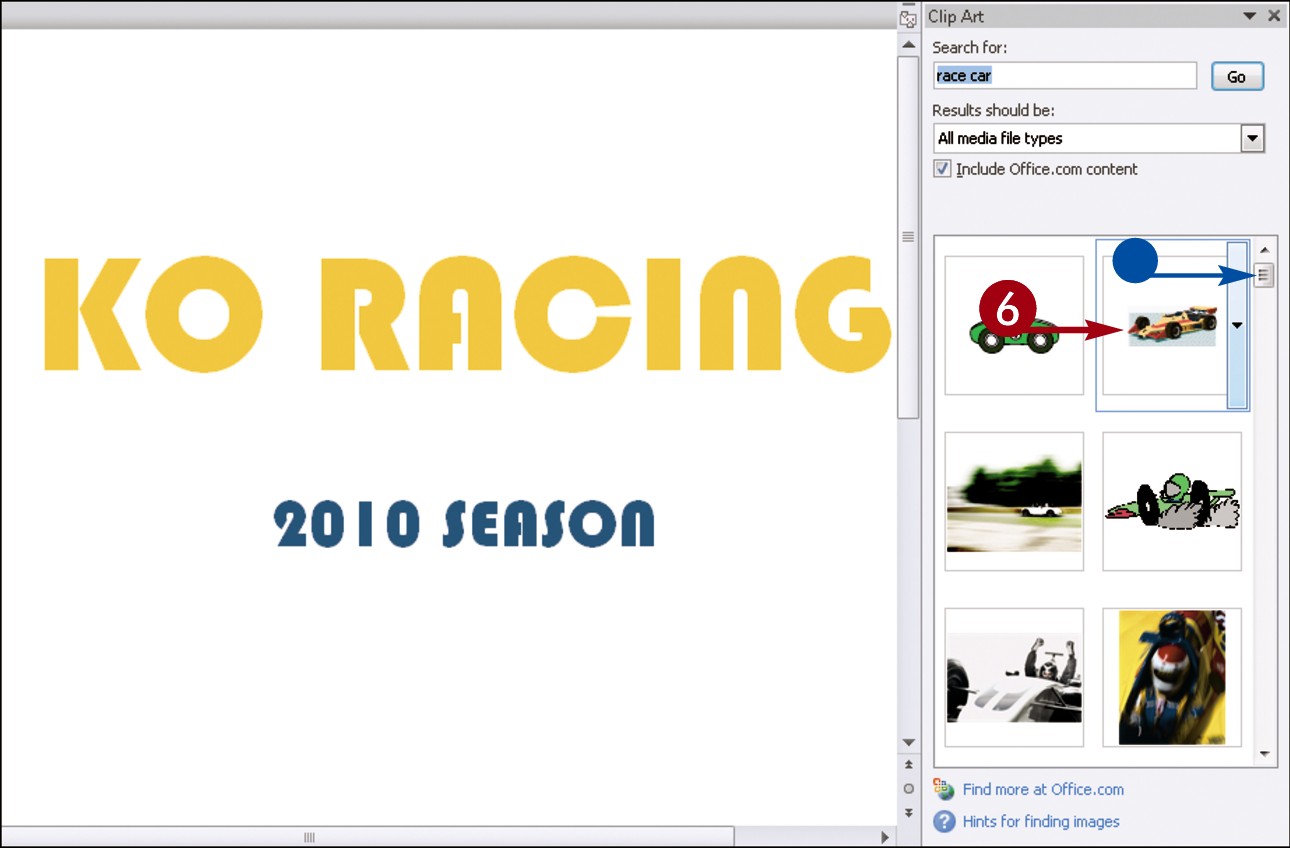
The Clip Art task pane displays any matches for the keyword or phrase that you typed.
• You can use the scroll bar to move through the list of matches.
 To add a clip art image, click the image.
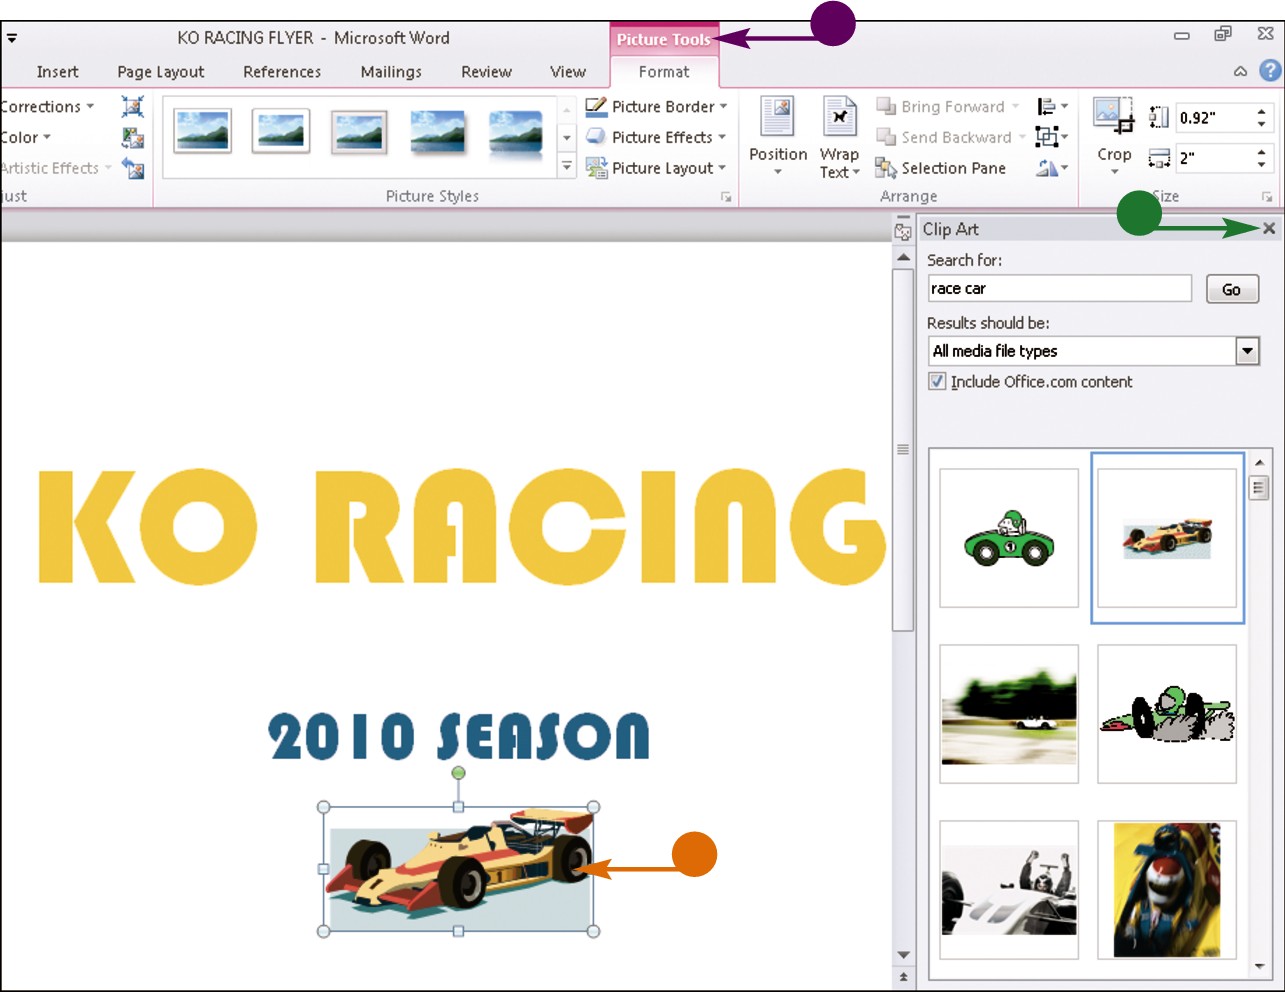
• The clip art is inserted into the file.
• The Picture tools appear on the Format tab.
You can resize or move the clip art.
Note: See the “Resize and Move Objects” section, later in this chapter, to learn more.
To deselect the clip art, you can click anywhere else in the work area.
• You can click  to close the pane.
Simplify It
Can I search for a particular type of media?
Yes. To search for, say, a photo or sound file, click the Results should be and select from the list of media types that appears. Alternatively, leave All media file types selected to search for a match among all available media formats.
How do I find details about the clip art?
To find out more about a piece of clip art, position the  over it in the Clip Art task pane, click the , and then click Preview/Properties. The Preview/Properties dialog box opens, displaying the file’s size, name, type, creation date, and more.
Insert a Picture
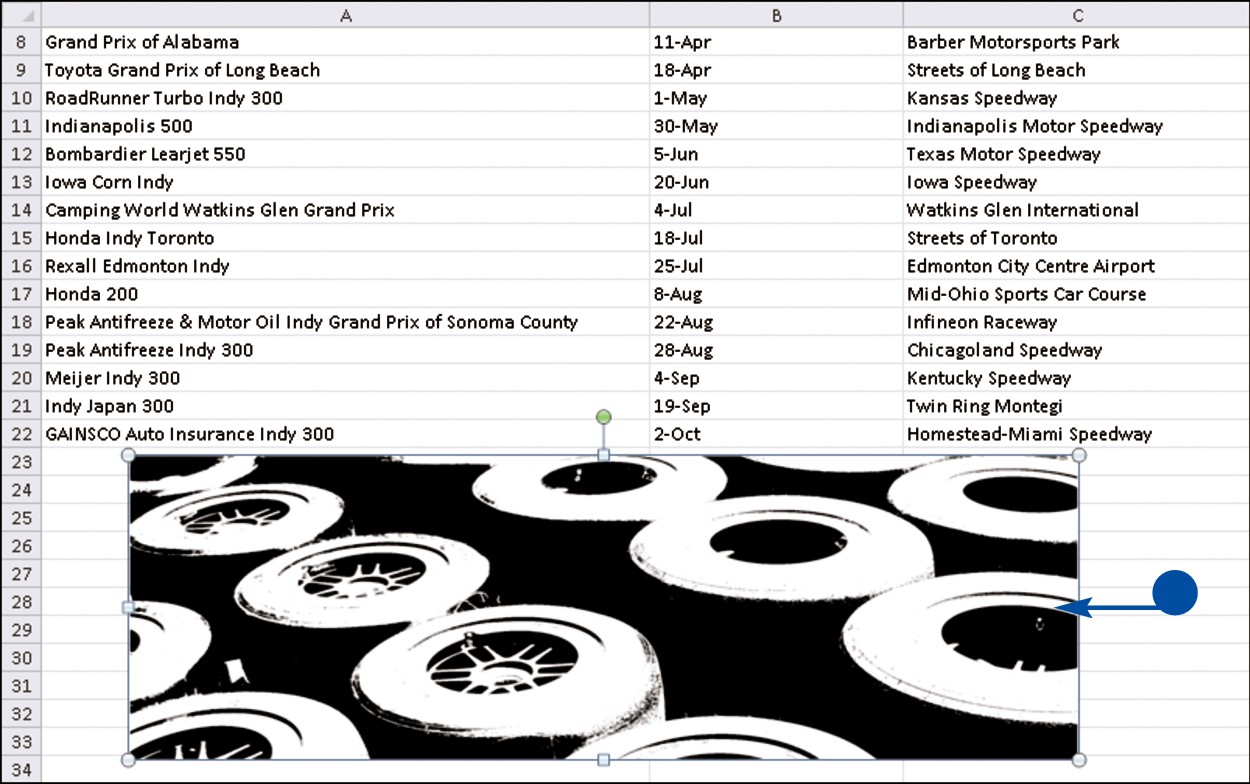
In addition to using clip art to add punch to your Office files, you can illustrate your files with images that you store on your computer. For example, if you have a photo or graphic file that relates to your Excel data, you can insert it onto the worksheet. After you insert an image, you can resize, reposition, rotate, and flip it. You can also perform other types of edits on the image, such as cropping, image correction, color correction, and more. Office 2010 also includes several tools, sometimes called filters, for applying artistic effects to images you insert in files.
Insert a Picture
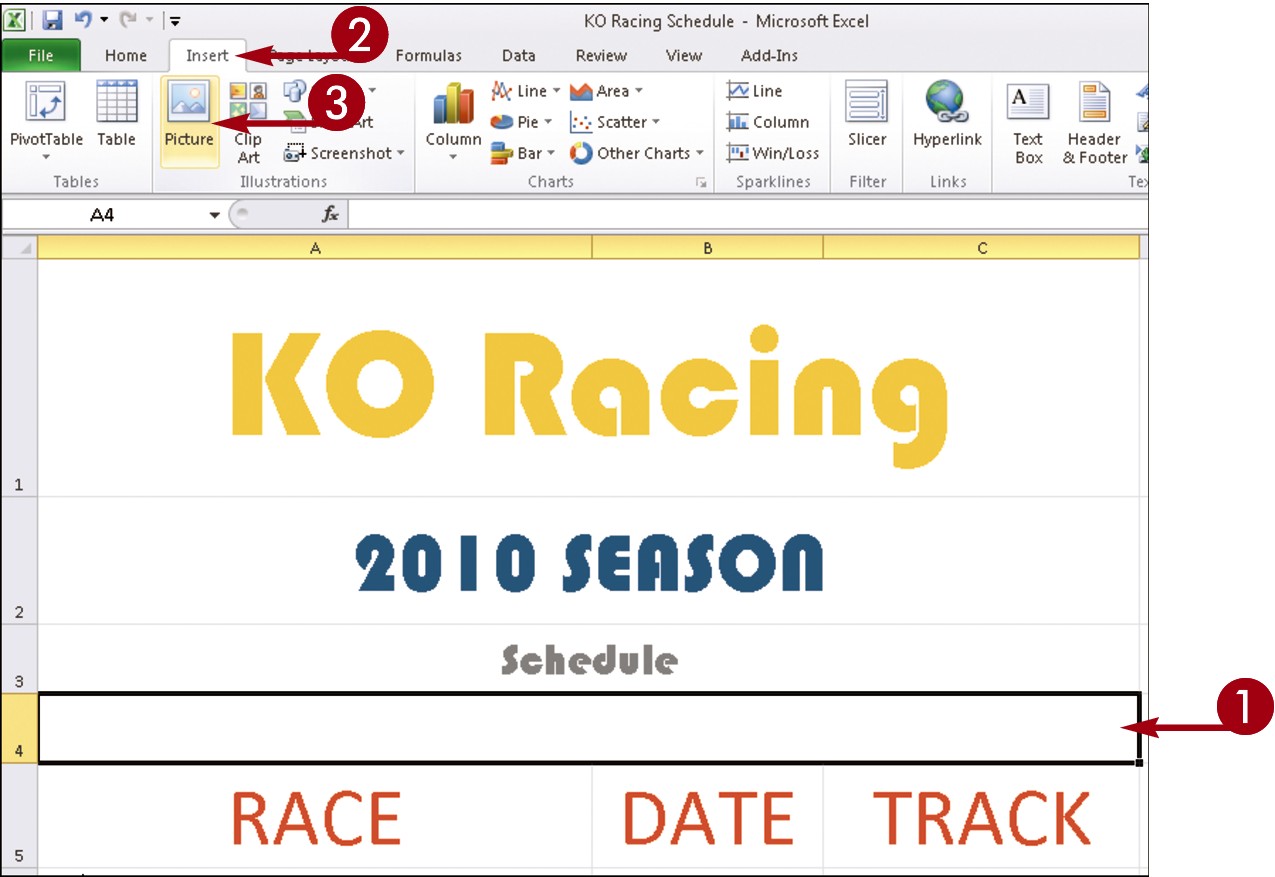
Click the area where you want to add a picture.
You can move the image to a different location after inserting it onto the page.
Click the Insert tab.
In the Illustrations group, click Picture.
The Insert Picture dialog box appears.
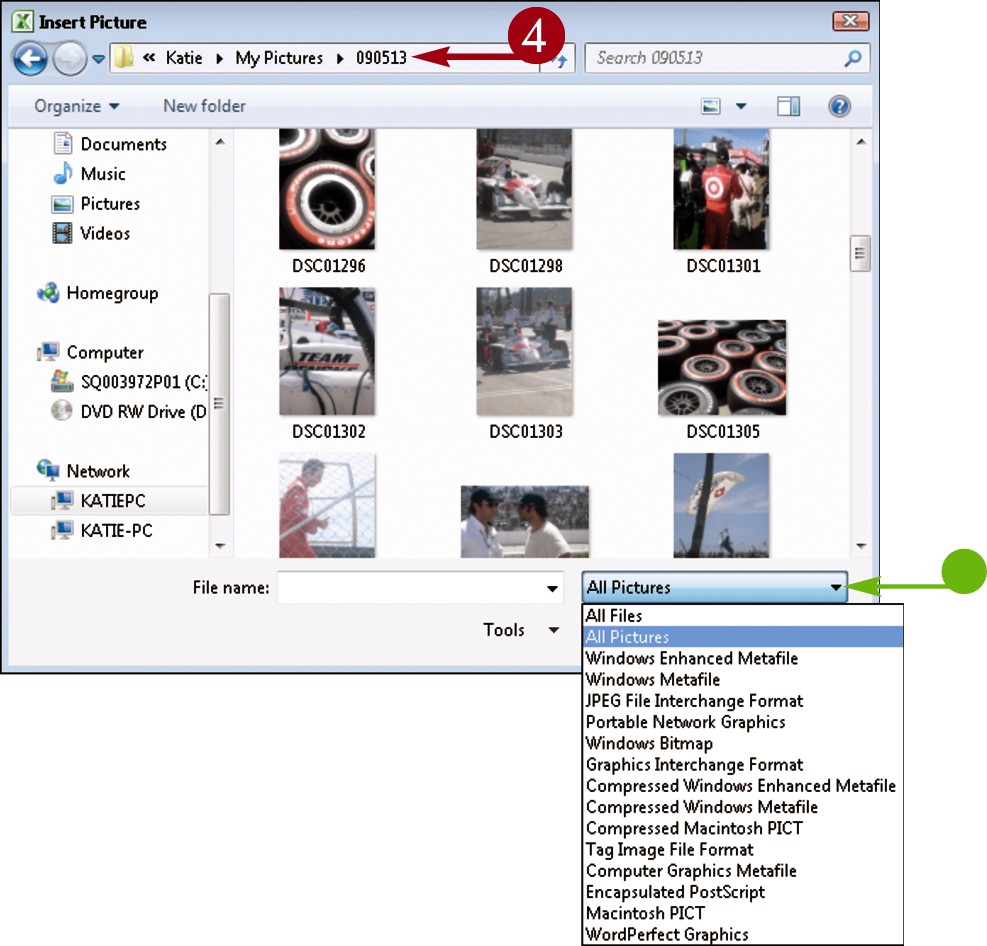
Navigate to the folder or drive containing the image file that you want to use.
• To browse for a particular file type, you can click the and choose a file format.
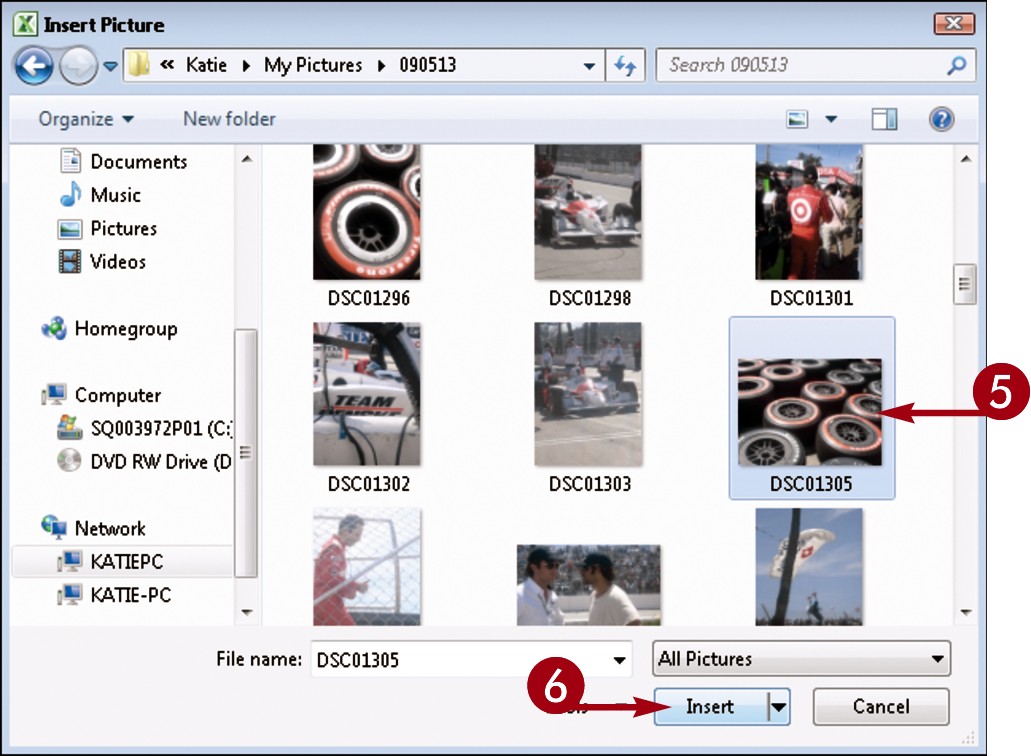
Click the file you want to add.
Click Insert.
Note: Image files, also called objects, come in a variety of file formats, including GIF, JPEG, and PNG.
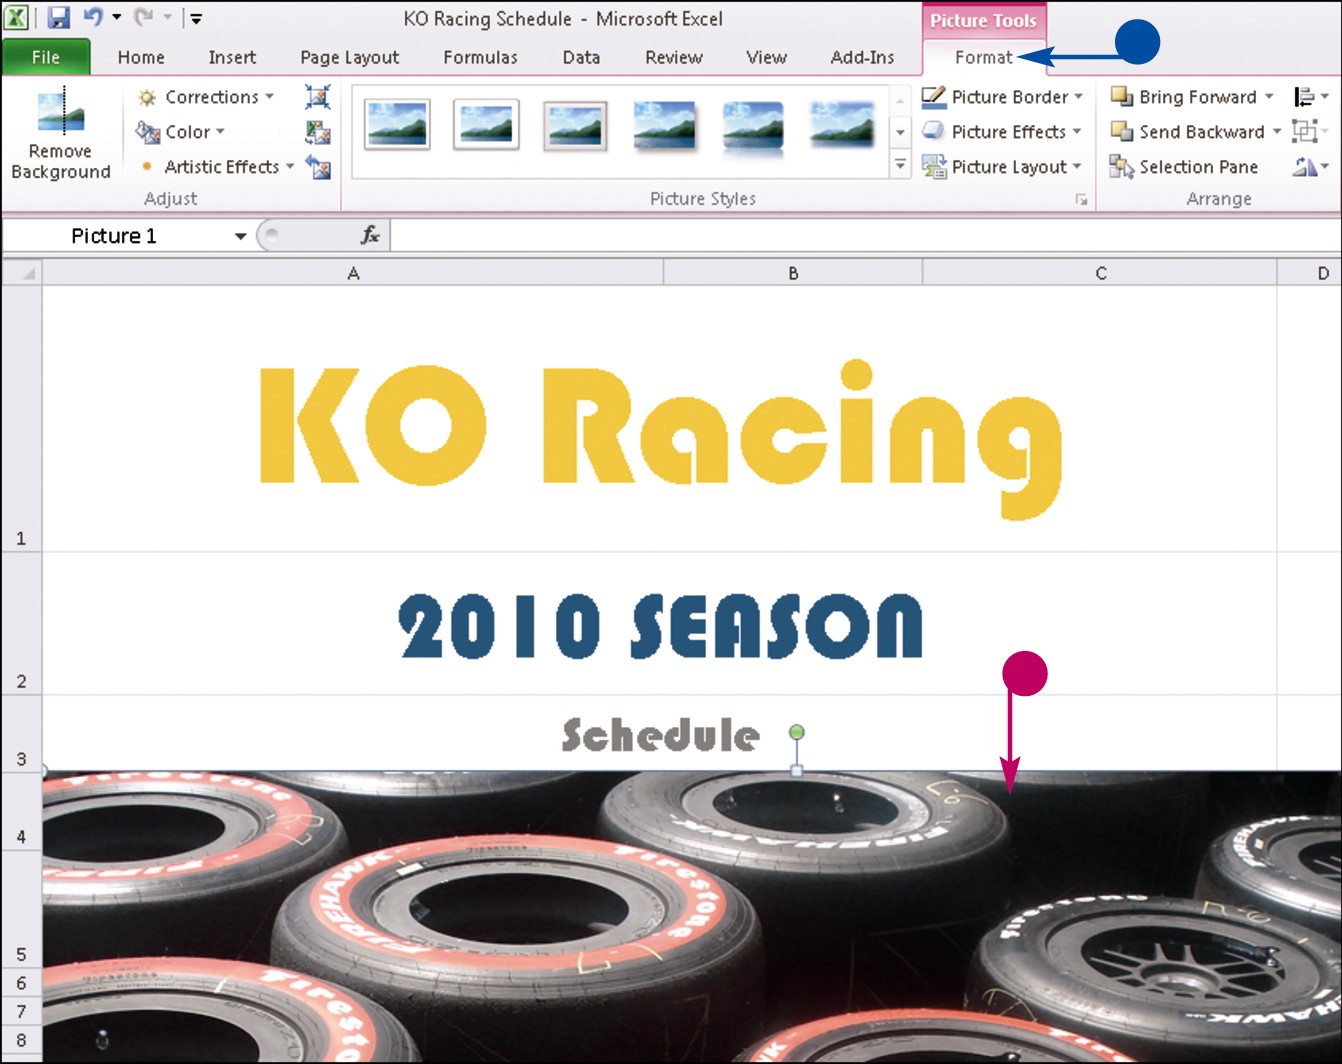
• The picture is added to the file.
• The Picture tools appear on the Format tab.
You may need to resize or reposition the picture to fit the space.
Note: See the “Resize and Move Objects” section to learn more.
To remove a picture that you no longer want, you can click the picture and press  .
.
Simplify It
Can I compress images to save space?
Yes. To compress an image that you add to an Office file, click the image, click the Format tab on the Ribbon, and click the Compress Pictures button ( ) in the Adjust group. Adjust settings as needed in the Compress Pictures dialog box and click OK.
Can I undo changes to my picture?
Yes. Click the Reset Picture button ( ), located in the Adjust group on the Format tab, to restore the selected picture to its original state. (Note that activating this command does not restore the image to its original size.)
Resize and Move Objects
Clip art and other types of images, such as smart art and word art (discussed later in this chapter), are called objects. When you insert an object, such as an image, into an Office file, you may find that you need to make it larger or smaller in order to achieve the desired effect. Fortunately, doing so is easy. When you select an object in an Office file, handles appear around that object; you can use these handles to make the object larger or smaller. You can also move objects that you place in a file.
Resize and Move Objects
Resize an Object
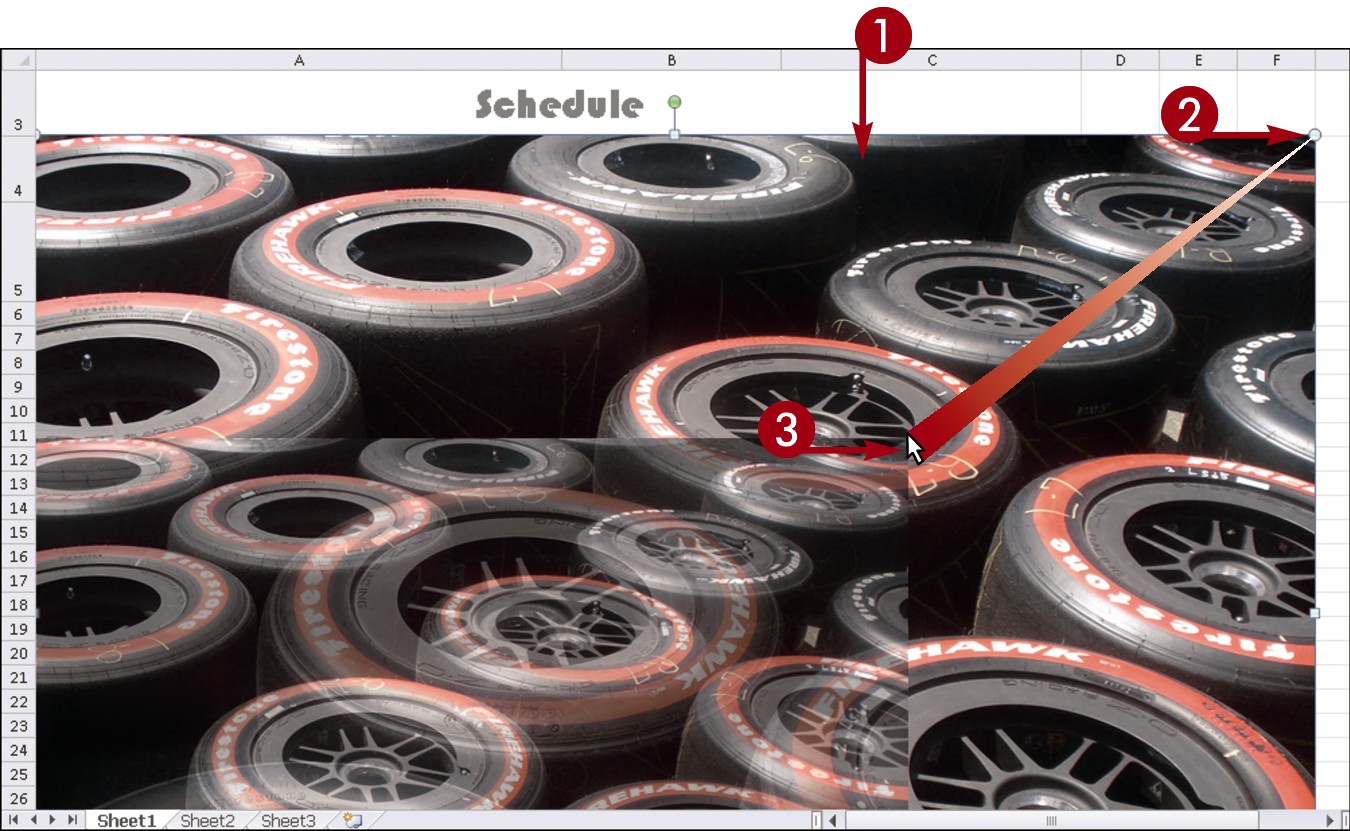
Click the object that you want to resize.
Click a selection handle.
Drag inward or outward to resize the object.
Note: To maintain an object’s height-to-width ratio when resizing, drag one of the corner handles.

• When you release the mouse button, the object is resized.
Move an Object
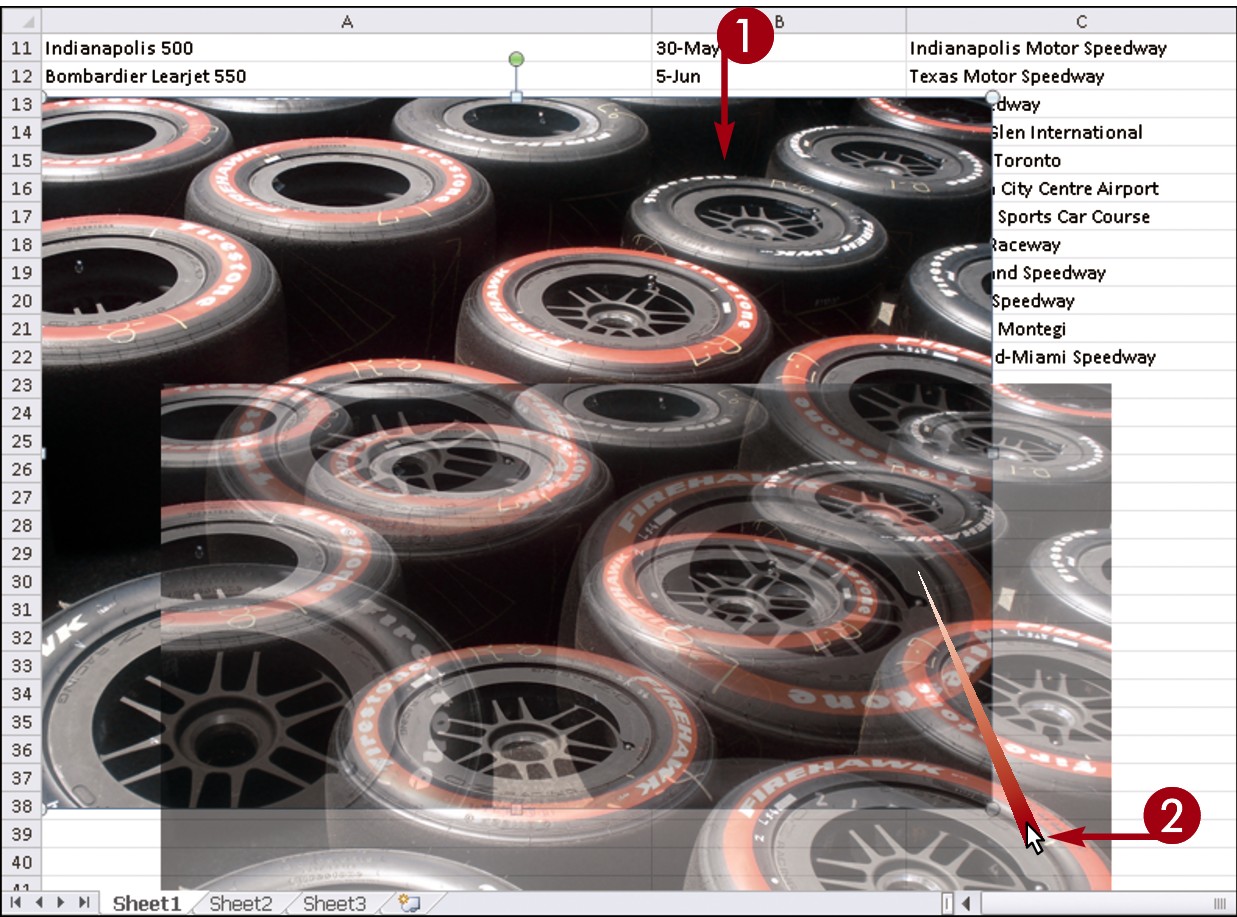
Click the object that you want to move.
Drag the object to a new location on the worksheet.
• When you release the mouse button, the object moves to the new location.
Note: You can also move an object by cutting it from its current location and pasting it in the desired spot. For help, refer to the section “Cut, Copy, and Paste Data” in Chapter 2.
Simplify It
How can I wrap text around an object?
If you insert an object into a Word or Publisher file, you can control how text in the file wraps around the object. For example, you may want the text to wrap tightly around a clip art graphic; alternatively, you might prefer for the text to overlap an image. Regardless of your preferences, you can establish text-wrapping settings by clicking the object, clicking the Text Wrapping button in the Format tab, and choosing a wrap style (•).
Rotate and Flip Objects
After you insert an object such as a piece of clip art or a photo from your hard drive into a Word document, an Excel worksheet, a PowerPoint slide, or a Publisher brochure, you may find that the object appears upside down or inverted. To rectify this, you can rotate or flip the object. For example, you might flip a clip art image to face another direction, or rotate an arrow object to point elsewhere on the page. Alternatively, you might rotate or flip an object that you place in an Office 2010 file simply to change the appearance of that object.
Rotate and Flip Objects
Rotate an Object
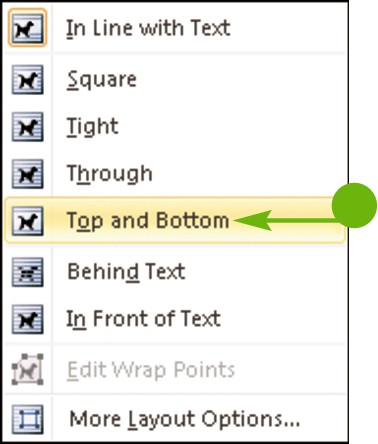
Click the object that you want to rotate.
• A rotation handle appears on the selected object.
Click and drag the handle to rotate the object.

• When you release the mouse, the object rotates.
Note: You can also use the Rotate button ( ) on the Format tab on the Ribbon to rotate an object 90 degrees left or right.
Flip an Object
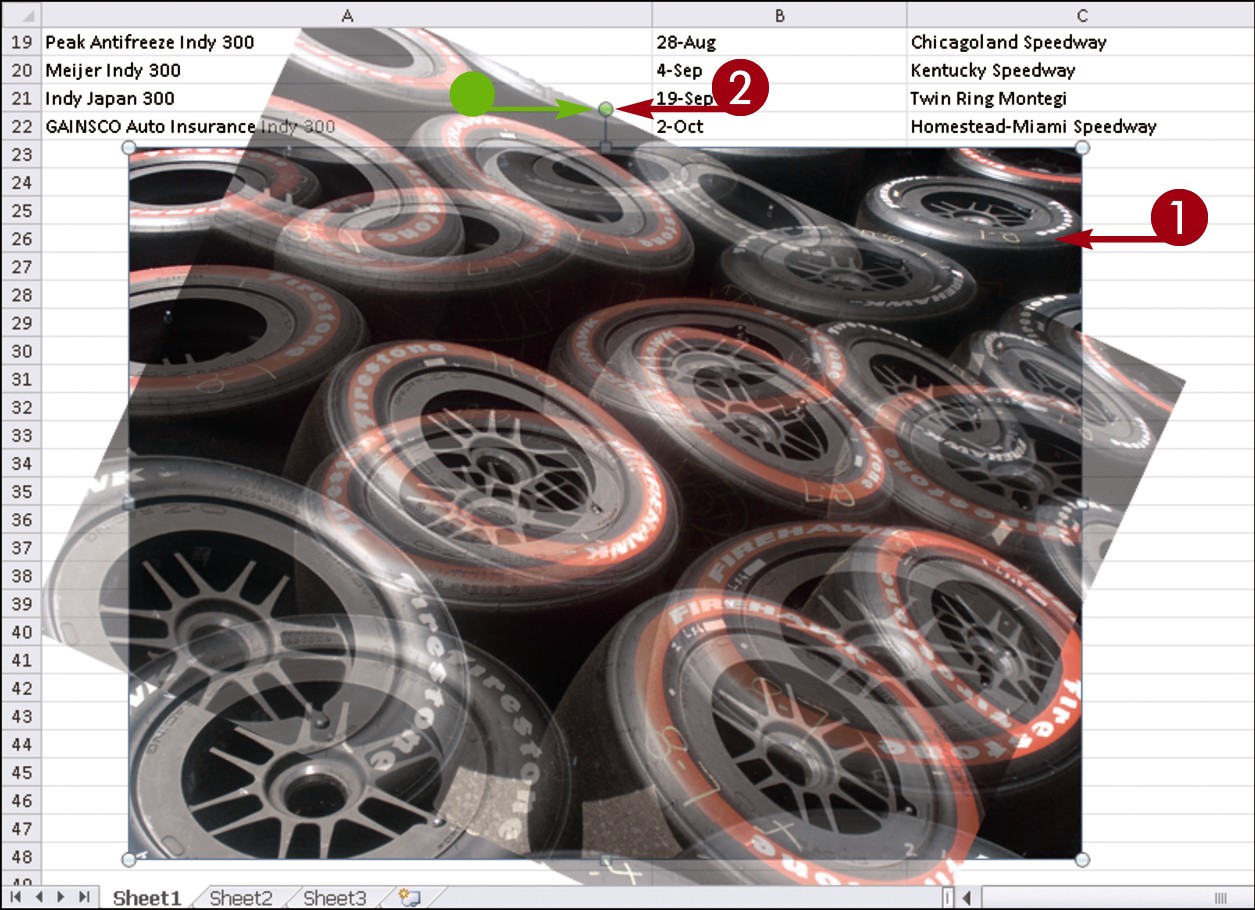
Click the object that you want to flip.
The Format tab opens and displays the Picture tools.
Click the Rotate button () on the Format tab.
Click Flip Vertical or Flip Horizontal.

• The object flips.
Simplify It
How do I rotate text?
The easiest way to rotate text is to first insert the text as a WordArt object (see the upcoming section “Create a WordArt Object” for details). After the text has been inserted as a WordArt object, you can rotate it as you would any other object.
Can I constrain the rotation?
Yes. To constrain the rotation to 15-degree increments, press and hold  while using the rotation handle to rotate the object. Alternatively, rotate the object in 90-degree increments by clicking the Rotate button () on the Format tab and choosing Rotate Right 90° or Rotate Left 90°.
Crop a Picture
In addition to resizing an Office object, such as a clip art image or a photo you have stored on your computer’s hard drive, you can use the Crop tool to crop it. When you crop an object, you remove vertical and/or horizontal edges from the object. For example, you might use the Crop tool to create a better fit, to omit a portion of the image, or to focus the viewer on an important area of the image. The Crop tool is located on the Format tab on the Ribbon, which appears when you click the object you want to crop.
Crop a Picture
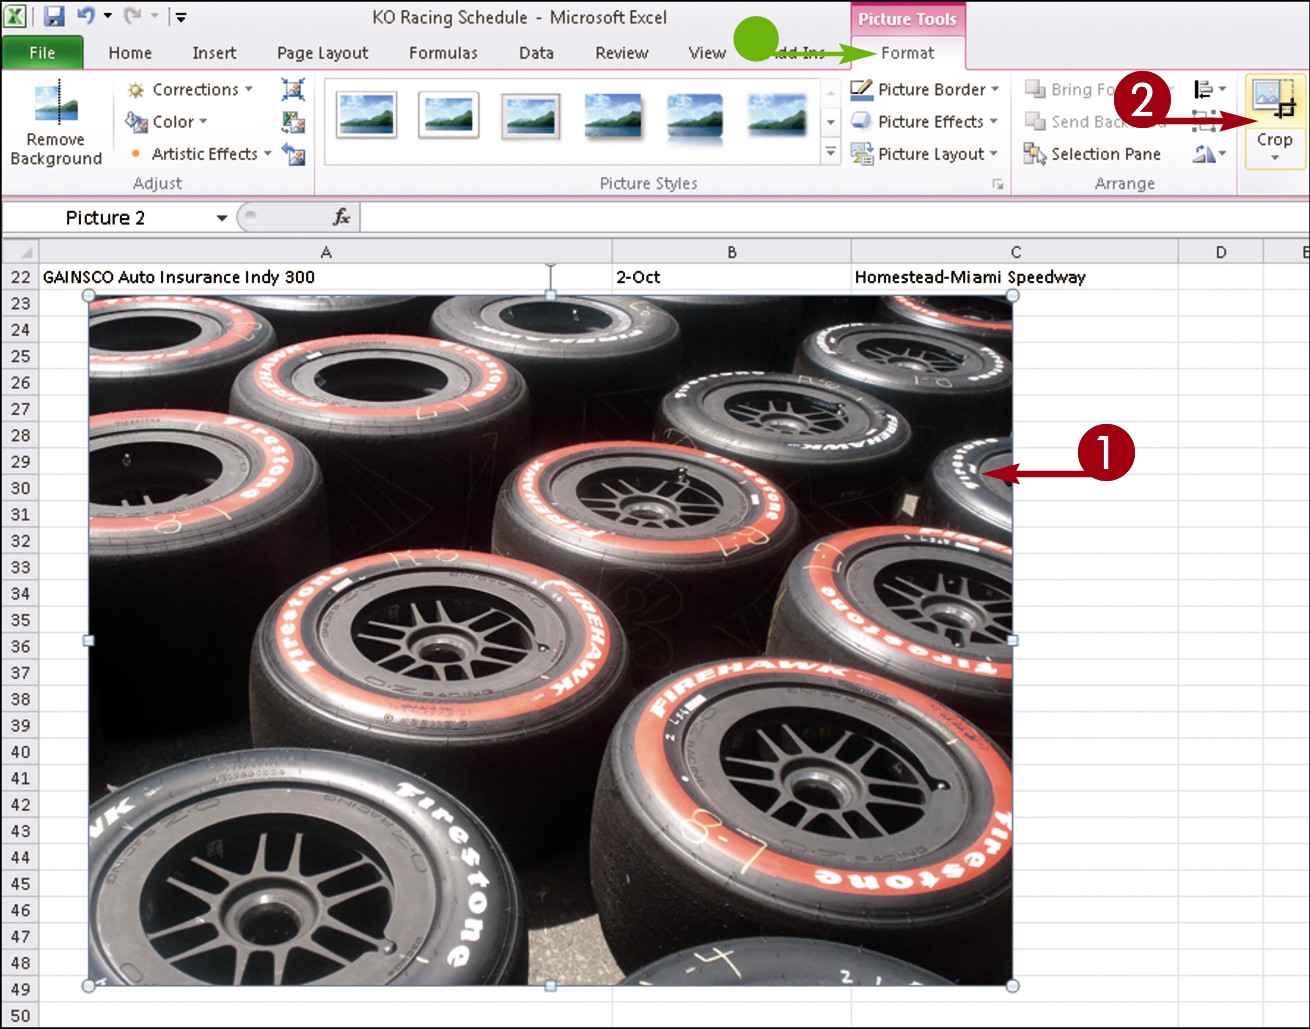
Click the image that you want to edit.
• The Format tab opens and displays the Picture tools.
Click the Crop button.
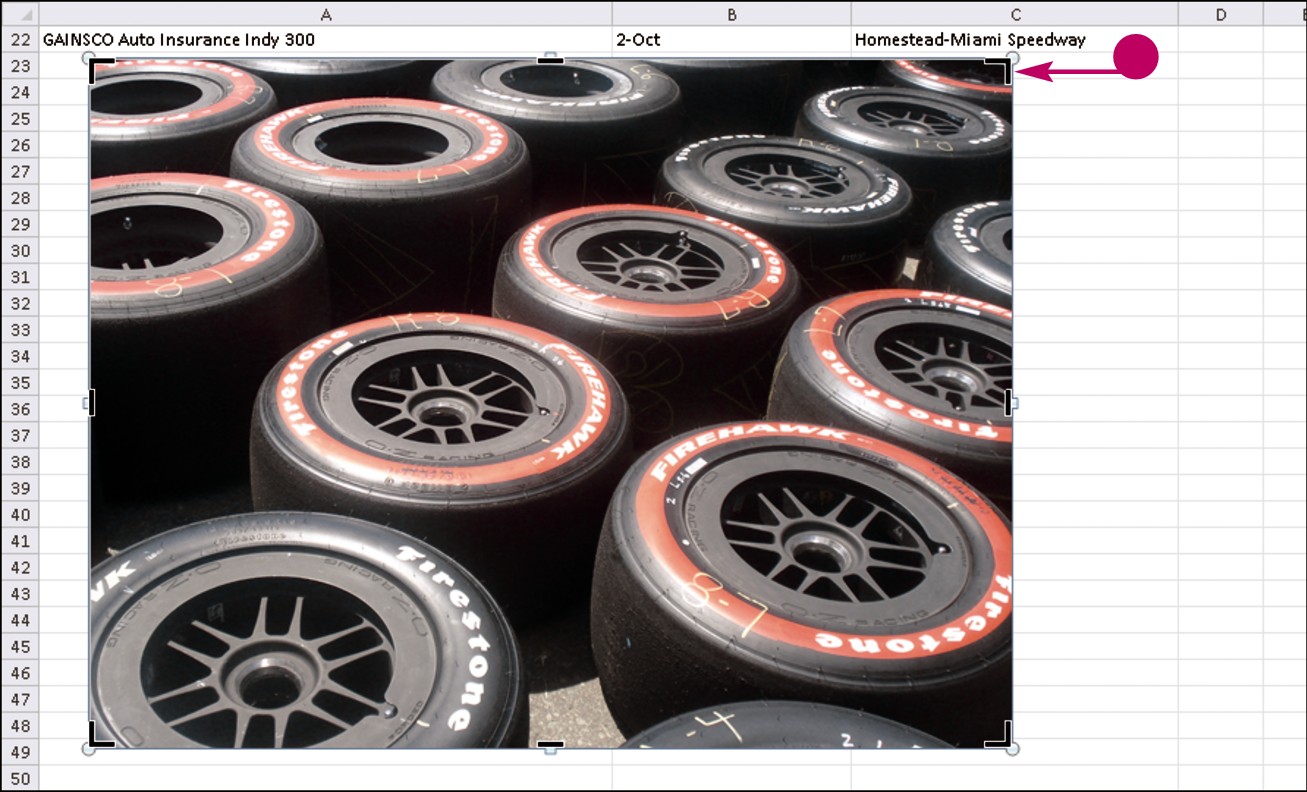
• Crop handles surround the image.
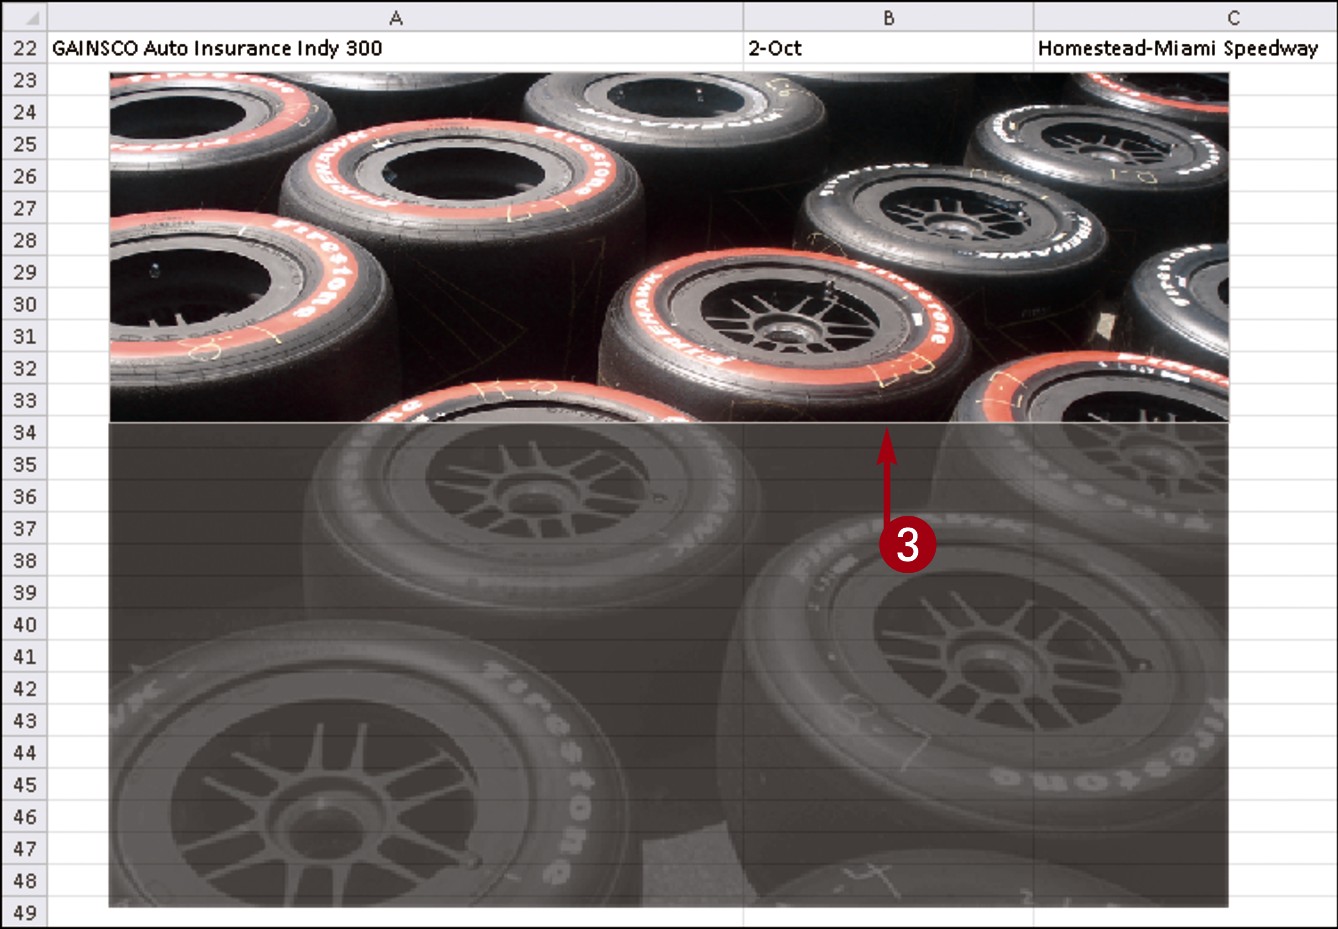
Click and drag a crop handle to crop out an area of the image.
When you release the mouse button, the image is cropped.
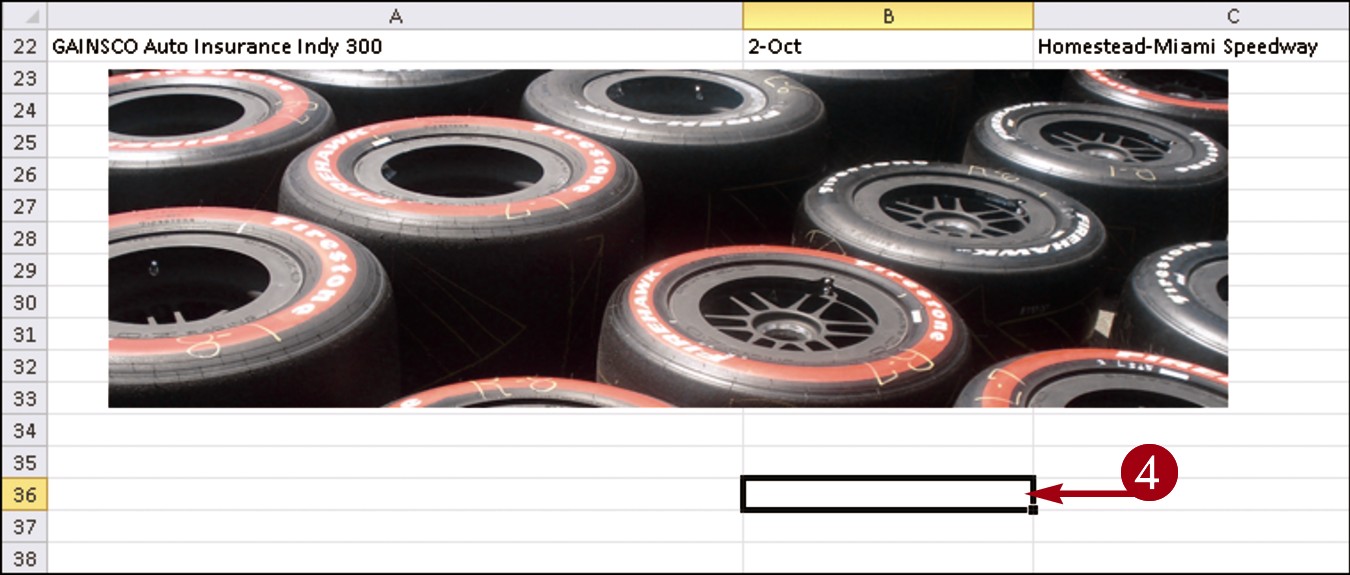
Click outside the image to finalize the crop operation.
Note: See the “Resize and Move Objects” section, earlier in this chapter, to learn how to resize an image.
Simplify It
Are there other cropping options?
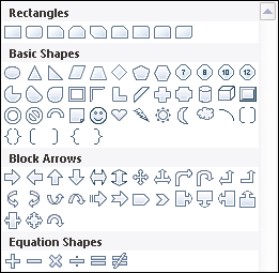
In addition to cropping your objects into square or rectangular shapes, you can crop your objects using one of any number of predefined shapes. These predefined shapes include ovals, triangles, hearts, moons, arrows, and more. To access these additional cropping options, click the object you want to crop to select it, click the Format tab that appears on the Ribbon, click the down arrow under the Crop button, click Crop to Shape, and choose the desired shape from the menu that appears.
Add a Picture Effect
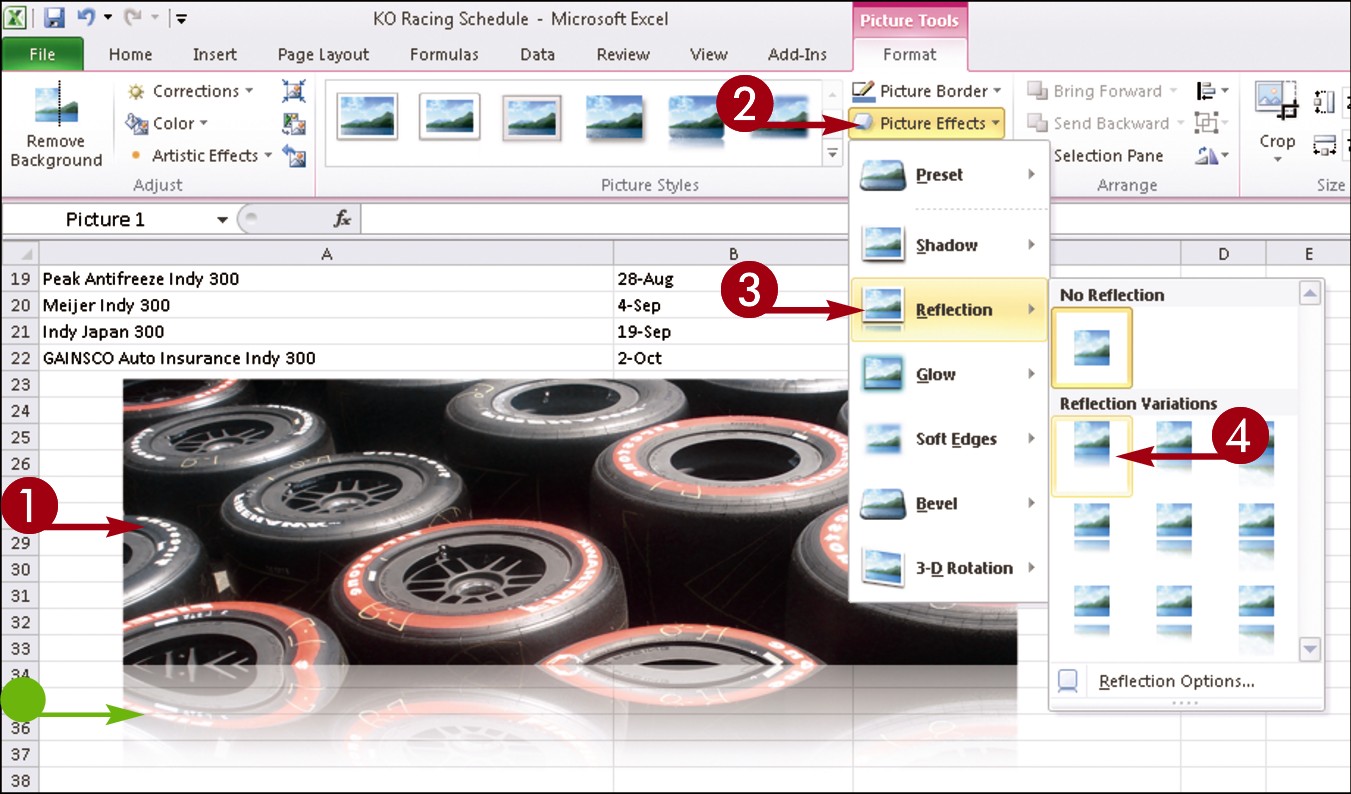
You can use the Picture Effect tool included with many Office 2010 programs to assign unique and interesting special effects to your objects. For example, you can apply a shadow effect, create a mirrored reflection, apply a glow effect, soften the object’s edges, make a bevel effect, or generate a 3D rotation effect. You access the Picture Effects tools from the Format tab on the Ribbon; this tab appears when you click to select the object to which you want to apply the effect. (Note that that the Picture Effects tool is not available in Publisher.)
Add a Picture Effect
Click the picture that you want to edit.
The Format tab appears on the Ribbon with the Picture tools shown.
In the Picture Styles group, click the Picture Effects button.
Click an effect category.
Click an effect style.
• As you drag over each effect in the menu, the picture displays what the effect looks like when you apply it.
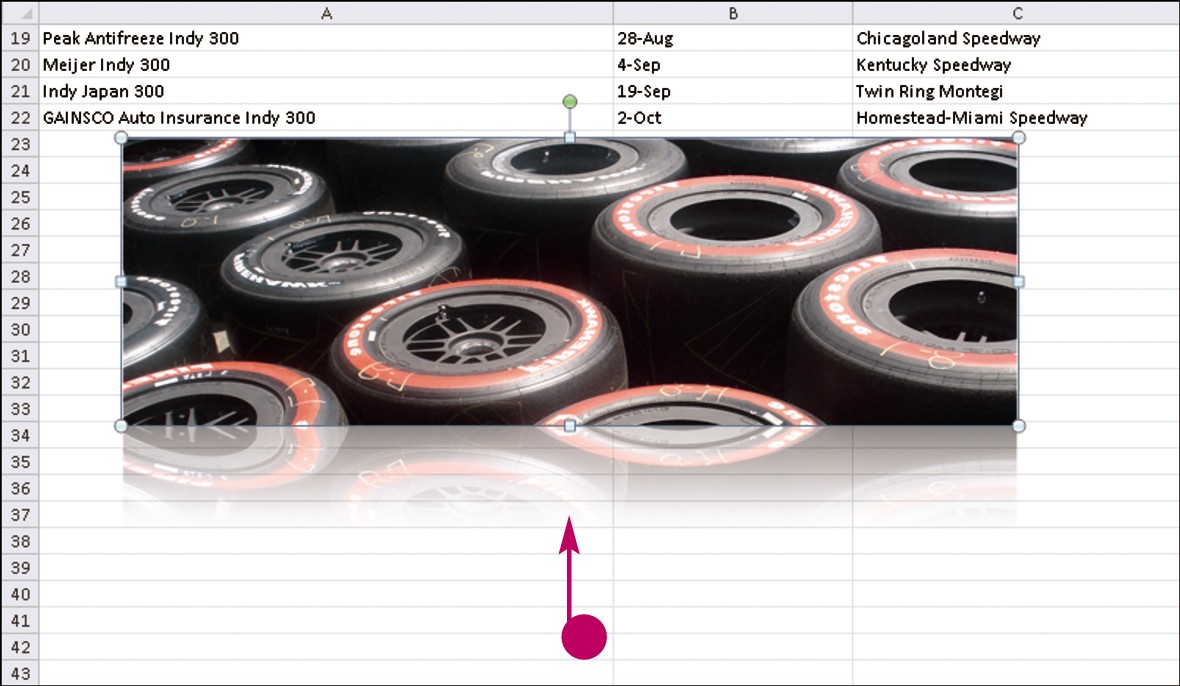
• The new effect is applied to the picture.
Note: To cancel any picture effect, display the Picture Effects menu again and the style that you applied, and then select the No option at the top of the category palette to remove the effect.
Make Image Corrections
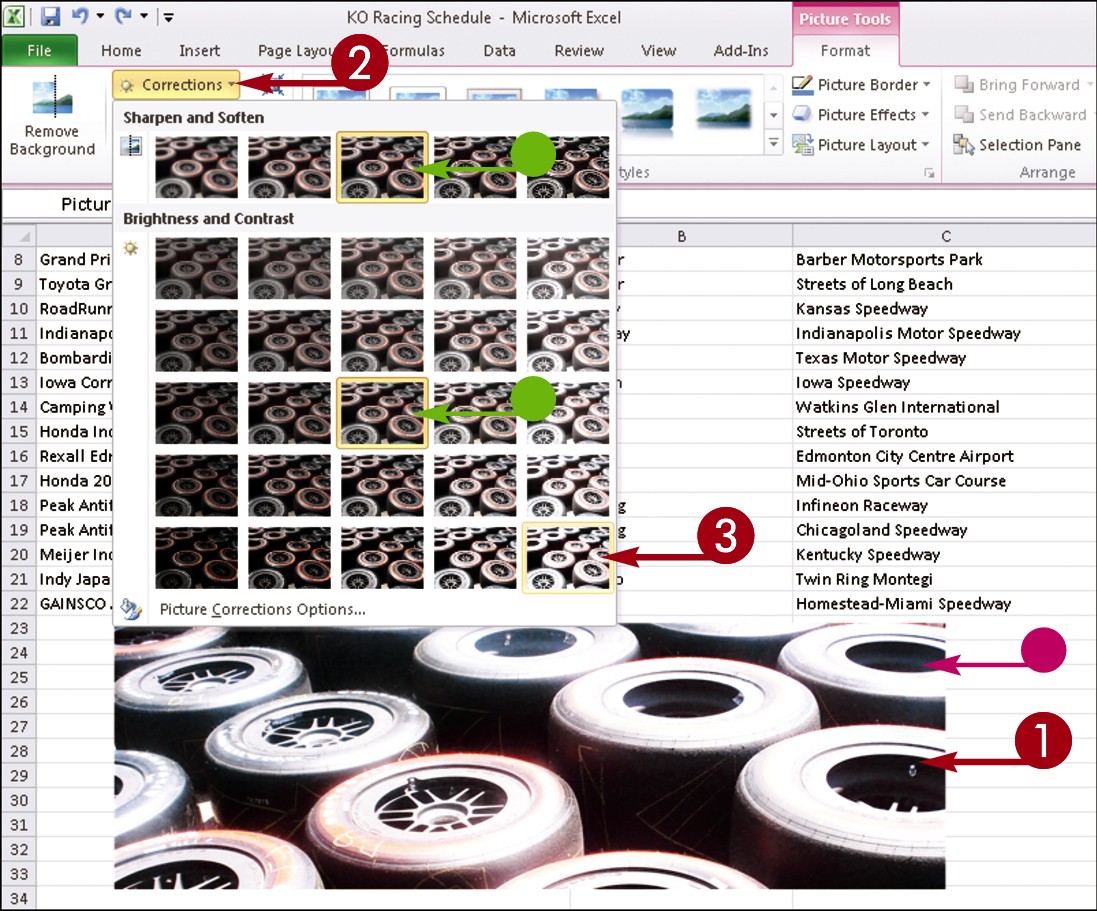
Suppose the image object you have inserted in your Word, Excel, or PowerPoint file is less than perfect. Perhaps it is slightly blurry, or lacks contrast. Fortunately, Office 2010 offers tools that enable you to make corrections to clip art and images even after they have been inserted into your file. For example, you can sharpen and soften images, as well as adjust their brightness and contrast. You access the image-correction tools from the Format tab on the Ribbon; this tab appears when you click to select the object to which you want to apply the effect.
Make Image Corrections
Click the picture that you want to edit.
The Format tab appears on the Ribbon with the Picture tools shown.
In the Adjust group, click the Corrections button.
• Office highlights the image’s current correction settings.
• As you drag over each setting in the menu, the picture displays what the setting looks like when you apply it.
Click a correction setting.

• The new setting is applied to the picture.
Make Color Adjustments
If you find that the color in an image you insert in an Office 2010 file seems off, you can adjust it using the Office 2010 Color Saturation, Color Tone, and Recolor tools. The Color Saturation tool enables you to make the color in your image more or less intense; the Color Tone tool enables you to make the colors in your image appear warmer or cooler; and the Recolor tool enables you to apply a color cast to your image. You can also use these tools to apply artistic effects to an image, such as converting a color image to black and white.
Make Color Adjustments

Click the picture that you want to edit.
The Format tab appears on the Ribbon with the Picture tools shown.
In the Adjust group, click the Color button.
• Office highlights the image’s current color settings.
• As you drag over each setting in the menu, the picture displays what the setting looks like when you apply it.
Click a color setting.
• The new setting is applied to the picture.
Apply Artistic Effects
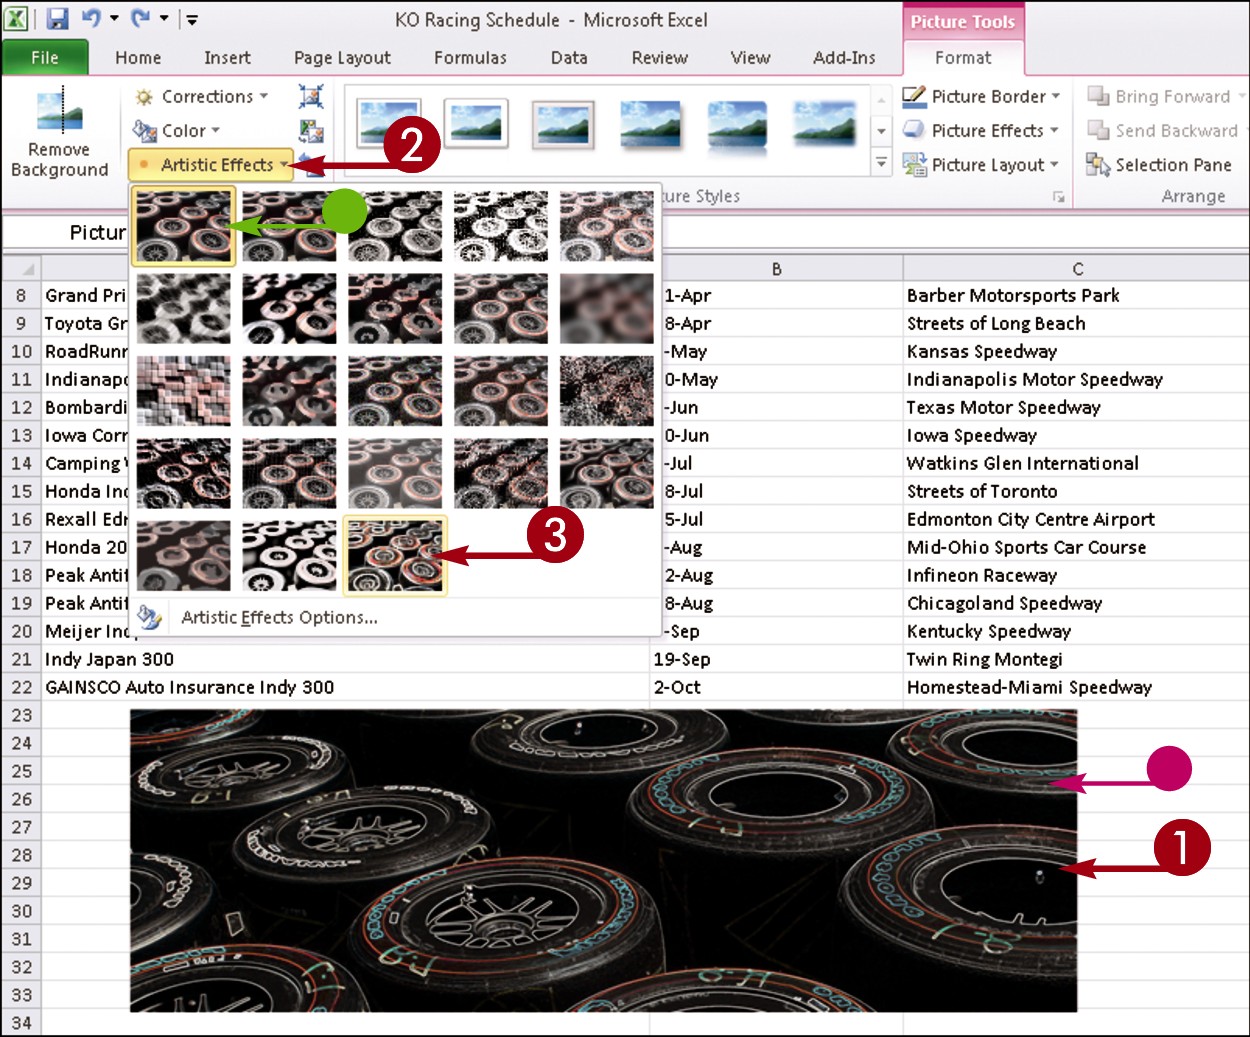
Office 2010 includes several tools, sometimes referred to as filters, for applying artistic effects to images and clip art in order to liven them up. For example, you can apply an artistic effect to an image to make that image appear as though it was rendered in marker, pencil, chalk, or paint. Applying certain other filters creates an effect reminiscent of mosaics, film grain, or glass. You access these artistic effects from the Format tab on the Ribbon; this tab appears when you click to select the object to which you want to apply the effect.
Apply Artistic Effects
Click the picture that you want to edit.
The Format tab appears on the Ribbon with the Picture tools shown.
In the Adjust group, click the Artistic Effects button.
• Office highlights the image’s current effect.
• As you drag over each effect in the menu, the picture displays what the effect looks like when you apply it.
Click an artistic effect.
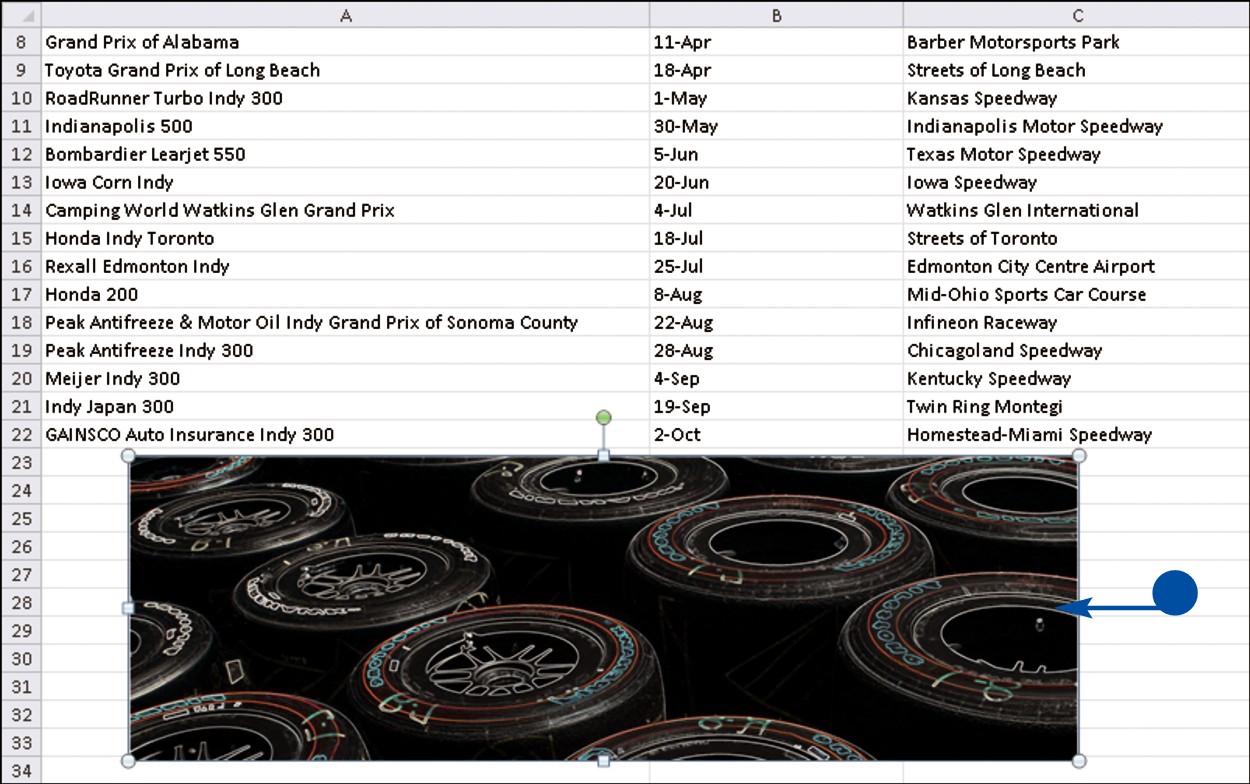
• The new effect is applied to the picture.
Create a WordArt Object
You can use the WordArt feature to turn text into interesting graphic objects to use in your Office files. For example, you can create arched text to appear over a range of data in Excel, or vertical text to appear next to a paragraph in Word. You can create text graphics that bend and twist, or display a subtle shading of color. You access the various WordArt options from the Insert tab on the Ribbon. After you convert text into a WordArt object, you can resize, move, rotate, and flip that object just as you would any other object in Office.
Create a WordArt Object
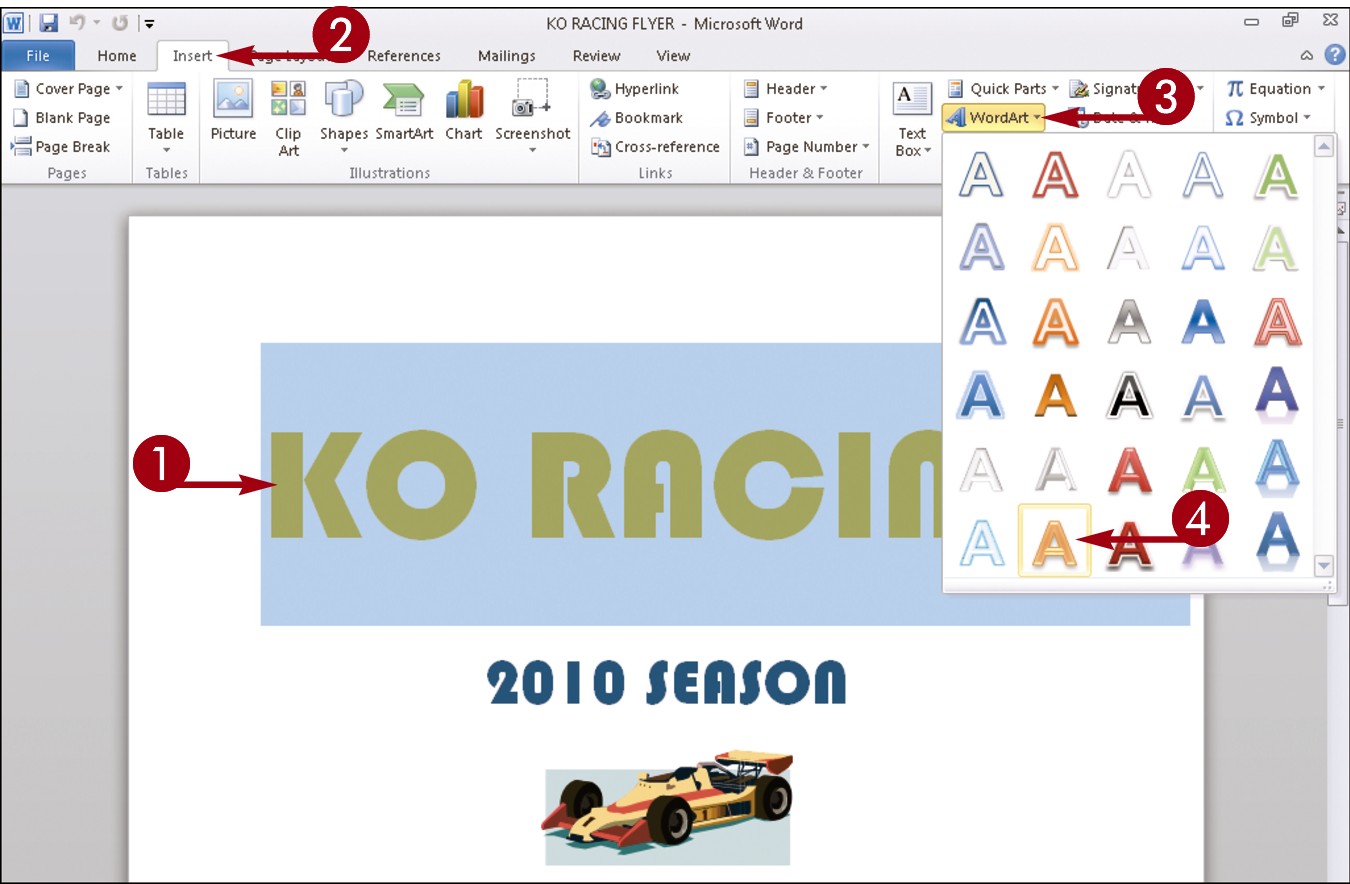
After typing the text you want to convert to a WordArt object, select the text.
Click the Insert tab.
In the Text group, click WordArt.
Click a WordArt option.

• Office converts the selected text to an object, applies the WordArt option you selected, and opens the Format tab with various Office drawing tools shown.
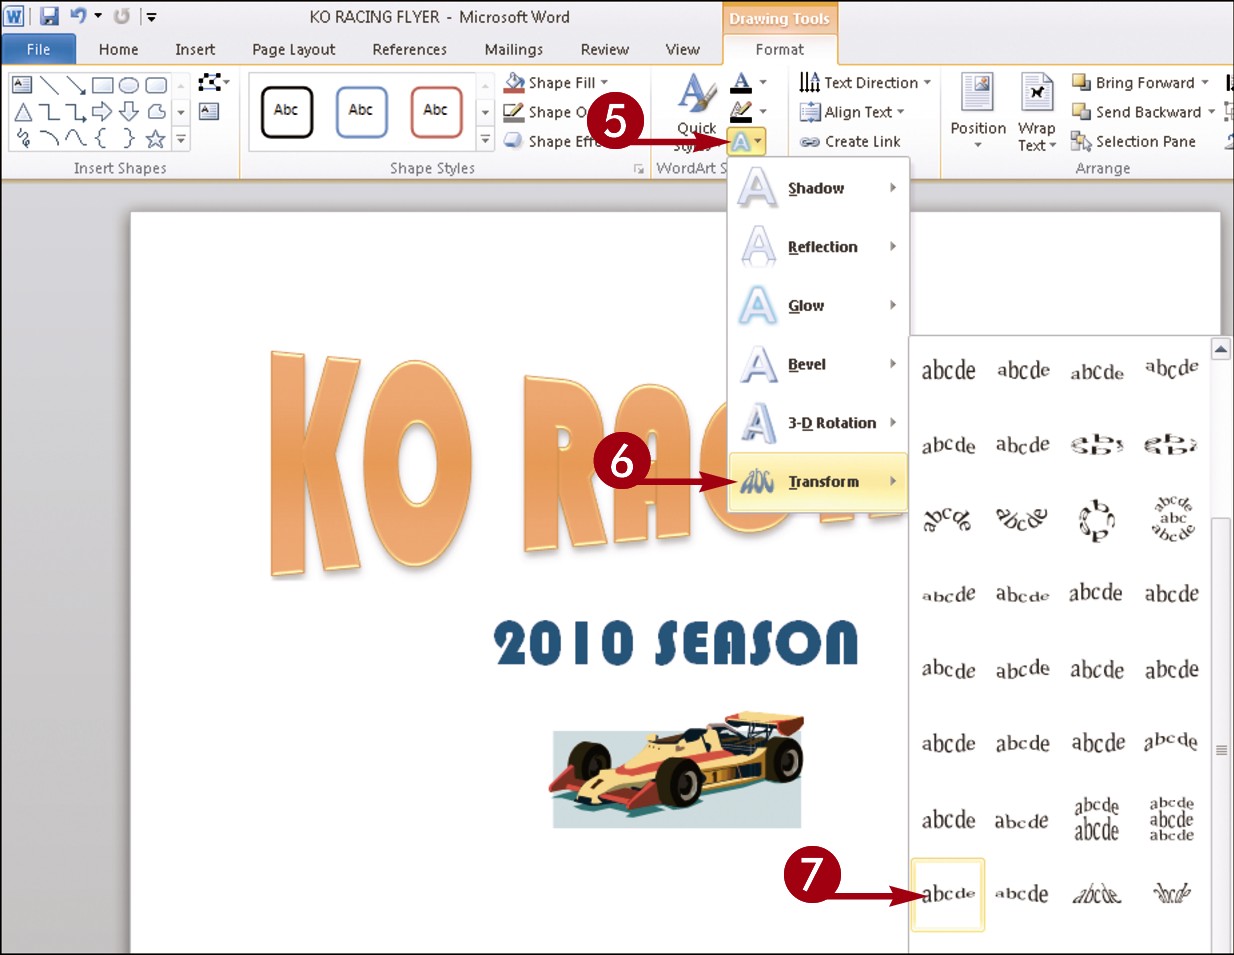
Click the Text Effects button ( ).
).
Click Transform.
 Click a transform style.
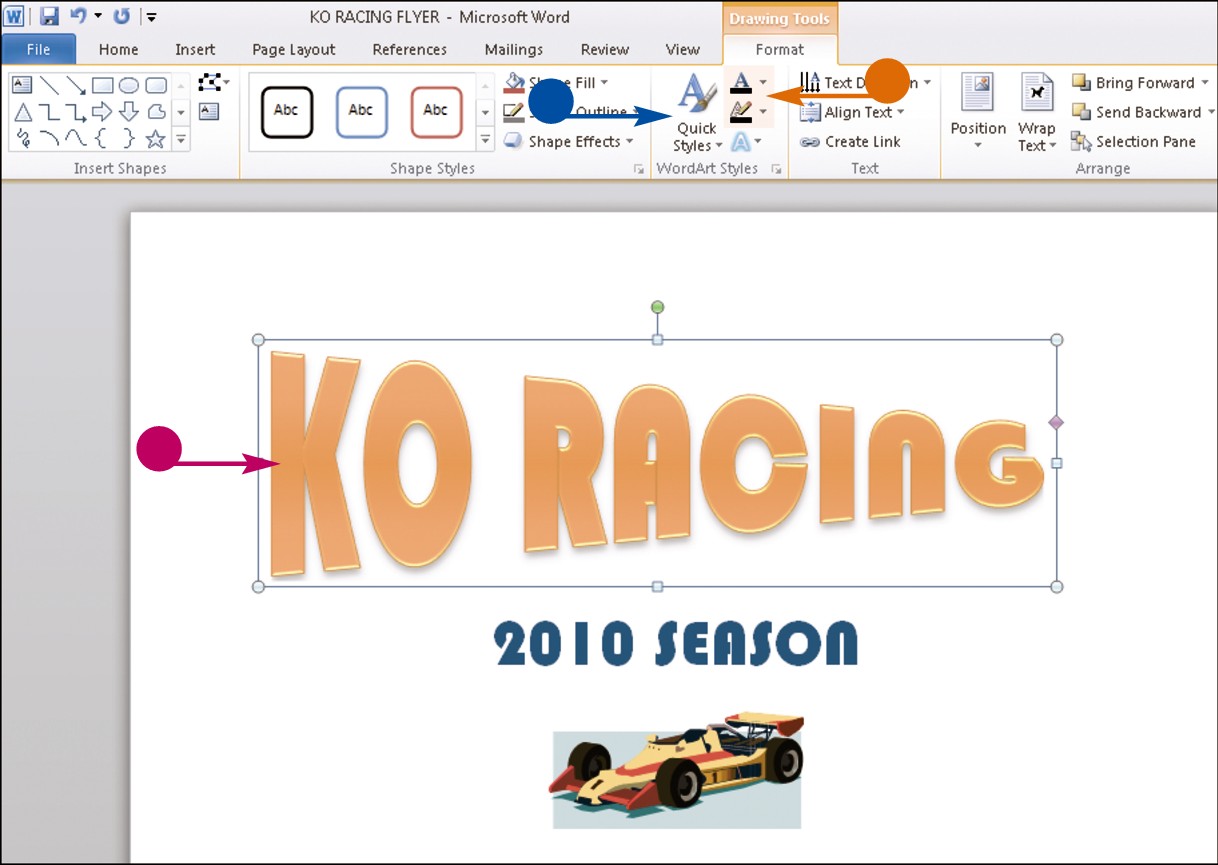
• The WordArt object is transformed.
You can resize or move the image.
Note: See the section “Resize and Move Objects” to learn more.
• You can click the Quick Styles button to change the text style.
• You can click these buttons to change the text outline color ( ) and text fill color (
 ).
).
Simplify It
How do I edit my WordArt text?
To edit WordArt text, simply click the WordArt text box, select the text that you want to change, and type over it. To edit the appearance of the WordArt object, use the WordArt Styles tools, located on the Format menu on the Ribbon.
How do I remove a WordArt object?
To remove a WordArt object from your Office file, click the WordArt text box and then press . Alternatively, click the WordArt text box, click the Quick Styles button in the Format tab, and click Clear Word Art. The WordArt object disappears.
Add SmartArt
You can use the SmartArt feature to create all kinds of diagrams to illustrate concepts and processes in your Office files. For example, you might insert a diagram in a document to show the hierarchy in your company or to show the workflow in your department.
Office 2010 includes several predefined diagram types from which to choose, including list, process, cycle, hierarchy, relationship, matrix, pyramid, and picture. In addition, you can choose from several diagram styles within each type. For example, if you choose to create a hierarchy diagram, you can choose from several different styles of hierarchy diagrams.
Add SmartArt
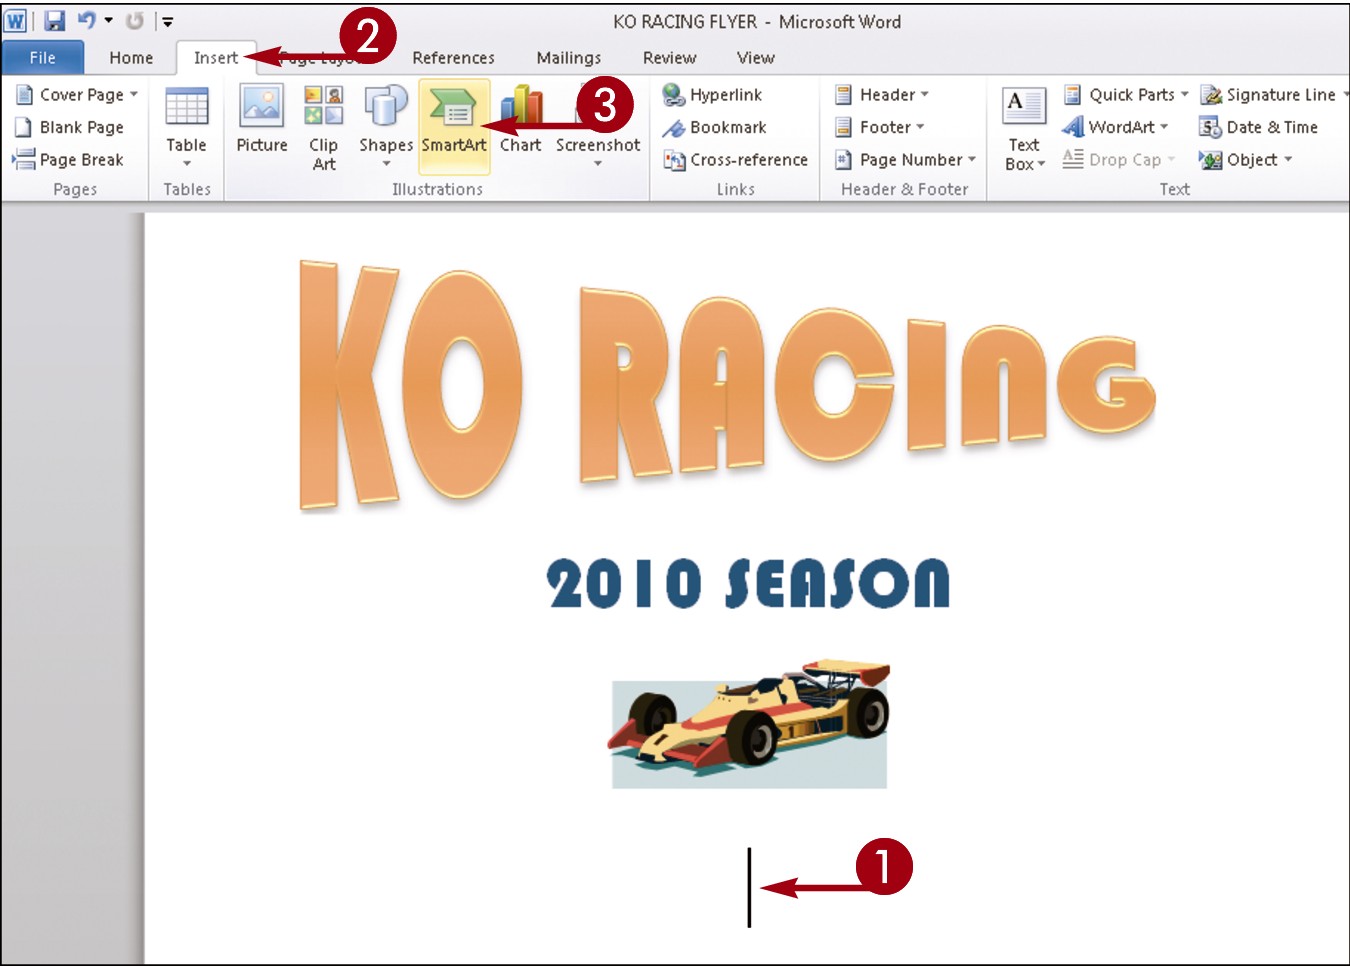
Click in your file where you want to insert the diagram.
Click the Insert tab.
Click the SmartArt button.
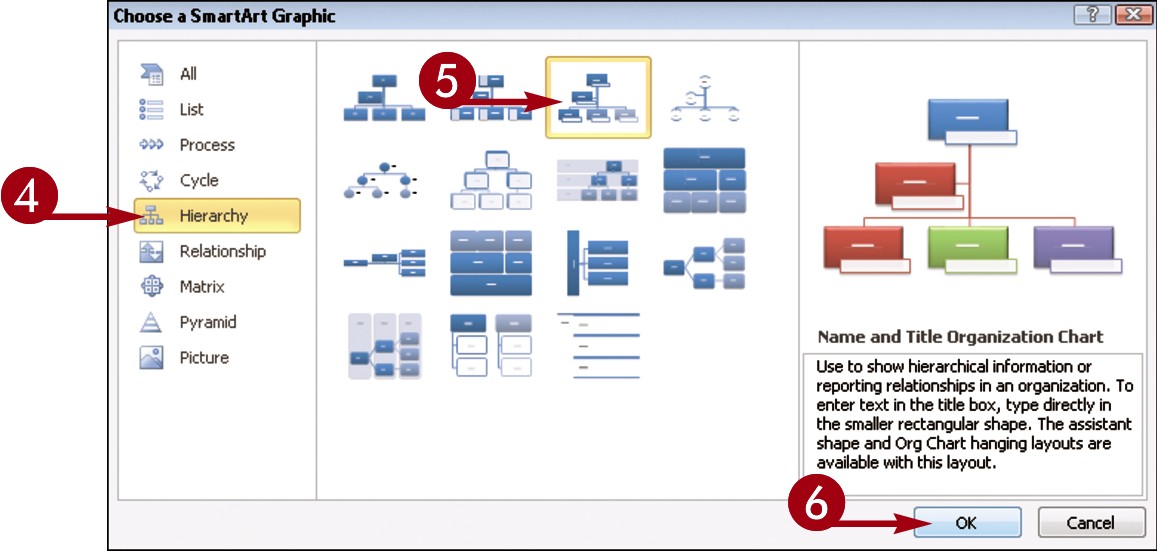
The Choose a SmartArt Graphic dialog box appears.
Click a category.
Click a chart style.
Click OK.
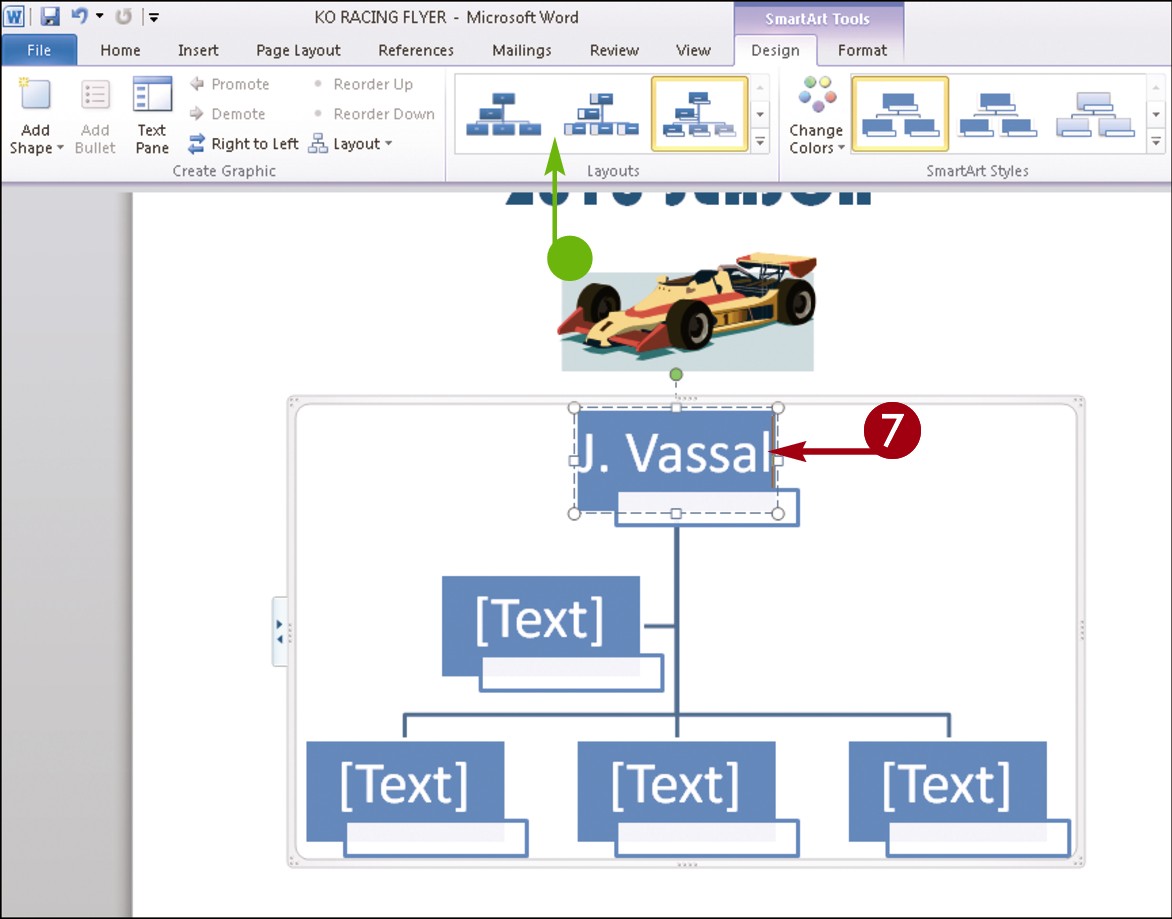
The diagram and placeholder text boxes appear, along with the Text pane.
Click in a text box and type the text for the item.
• You can change the layout here.
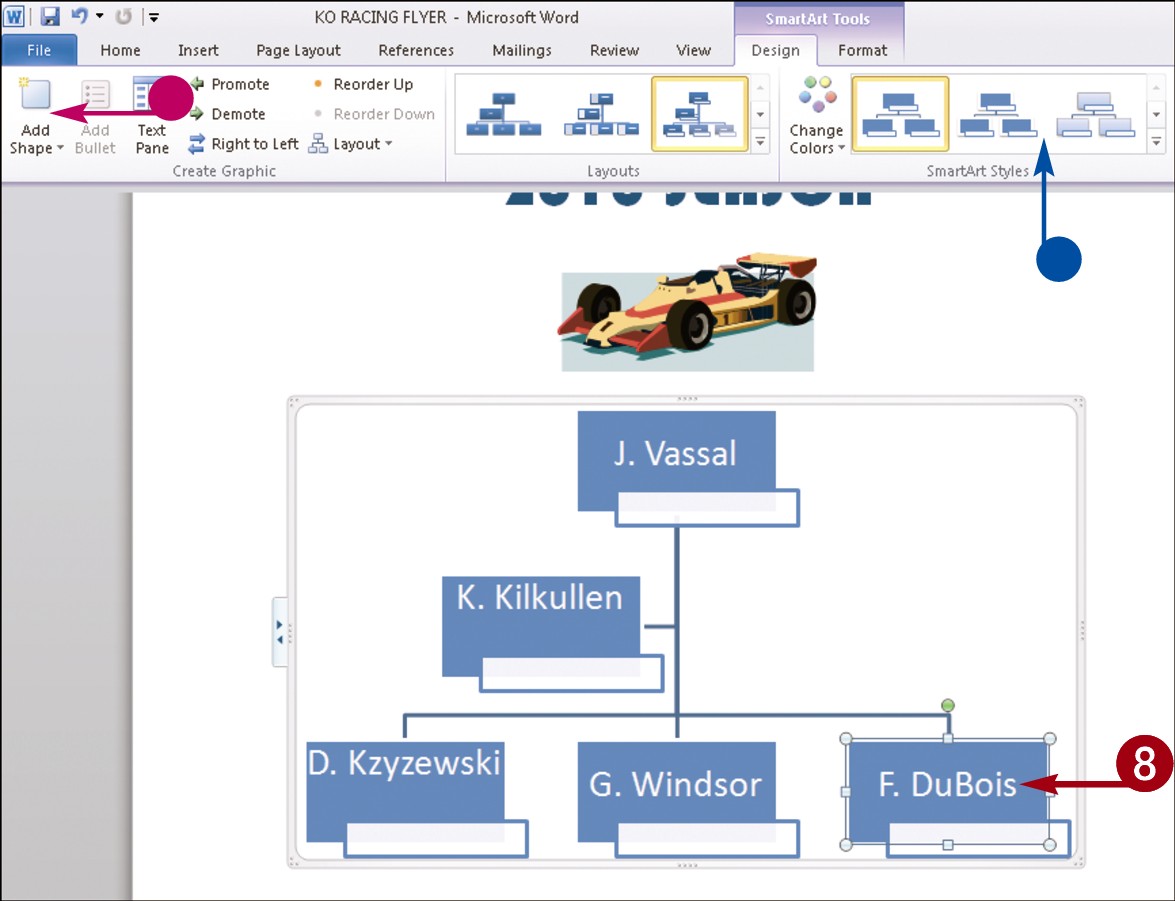
 Continue typing text in each diagram text box.
• To add another text box and element to the diagram, click the Add Shape button.
• To change the shape style, click another shape from the SmartArt Styles group.