Chapter 17: Adding, Finding, and Querying Data
Add a Record to a Table
You build a database by adding records to a table in the database. Any new records that you add appear at the end of the table. You add records to a table in Datasheet view.
As your table grows longer, you can use the navigation buttons on your keyboard to navigate it. You can press  to move from cell to cell, or you can press the keyboard arrow keys. To move backward to a previous cell, press
  +.
+.
After you enter a record in a database table, you can edit it if necessary. You edit records in a table in Datasheet view.
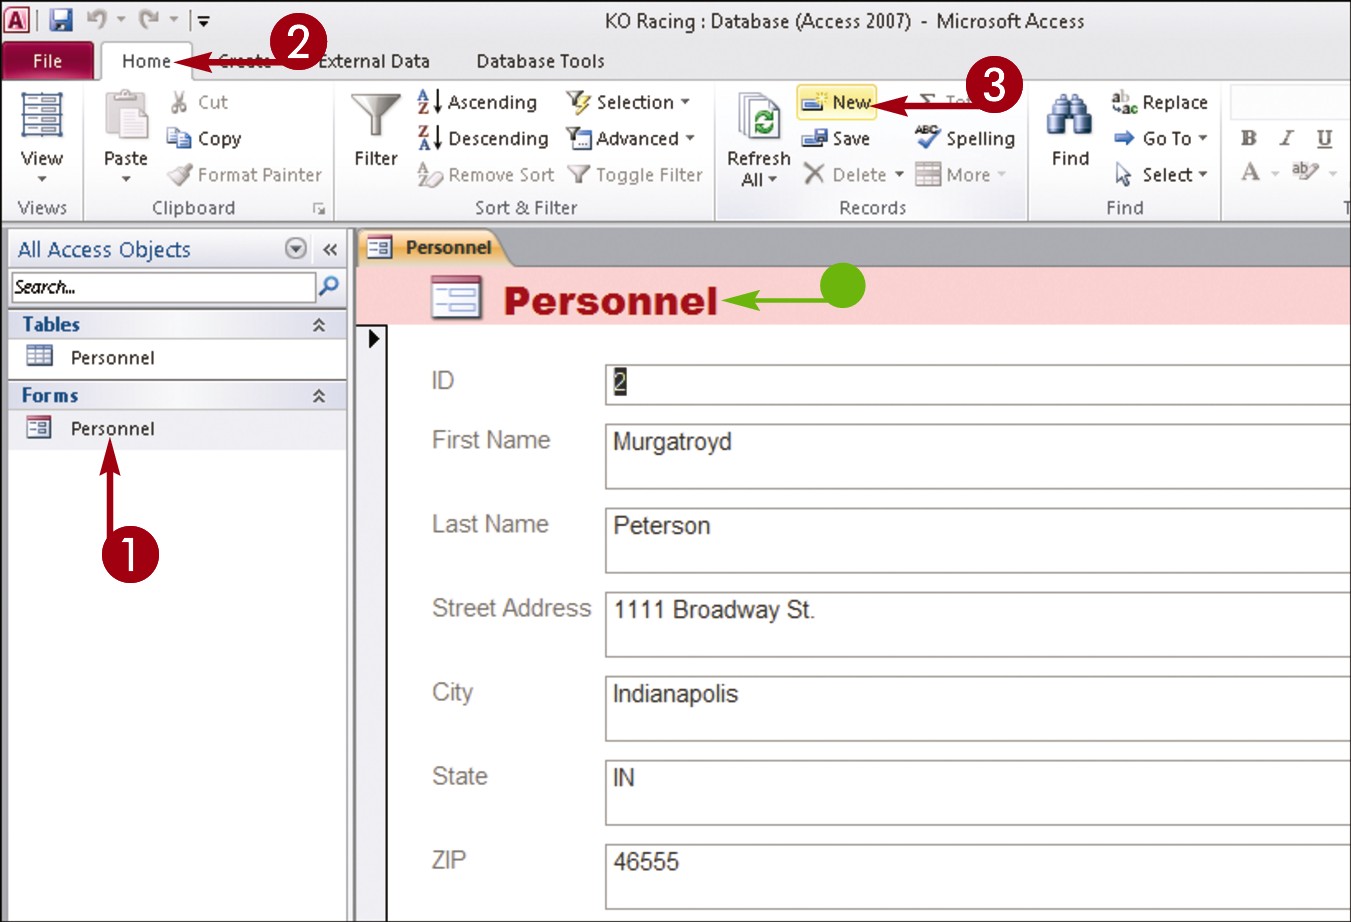
Add a Record to a Table
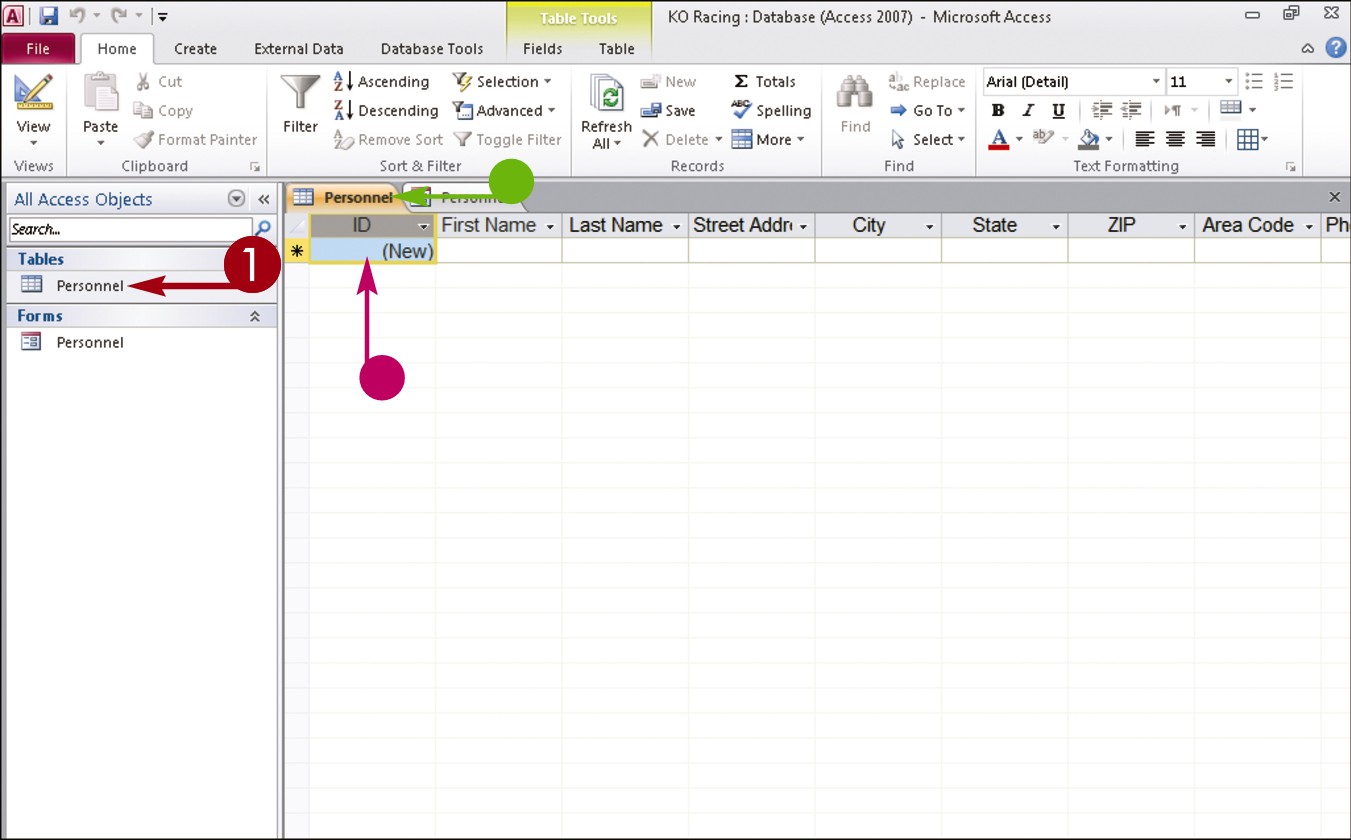
 In the Navigation pane, double-click the table to which you want to add a record.
• Access opens the table, placing the cursor in the first cell of the first blank row.
• By default, the first field in each table is an ID field, containing a unique ID number for the record. This value is set automatically.
 Press .
Access moves your cursor to the next cell in the row.
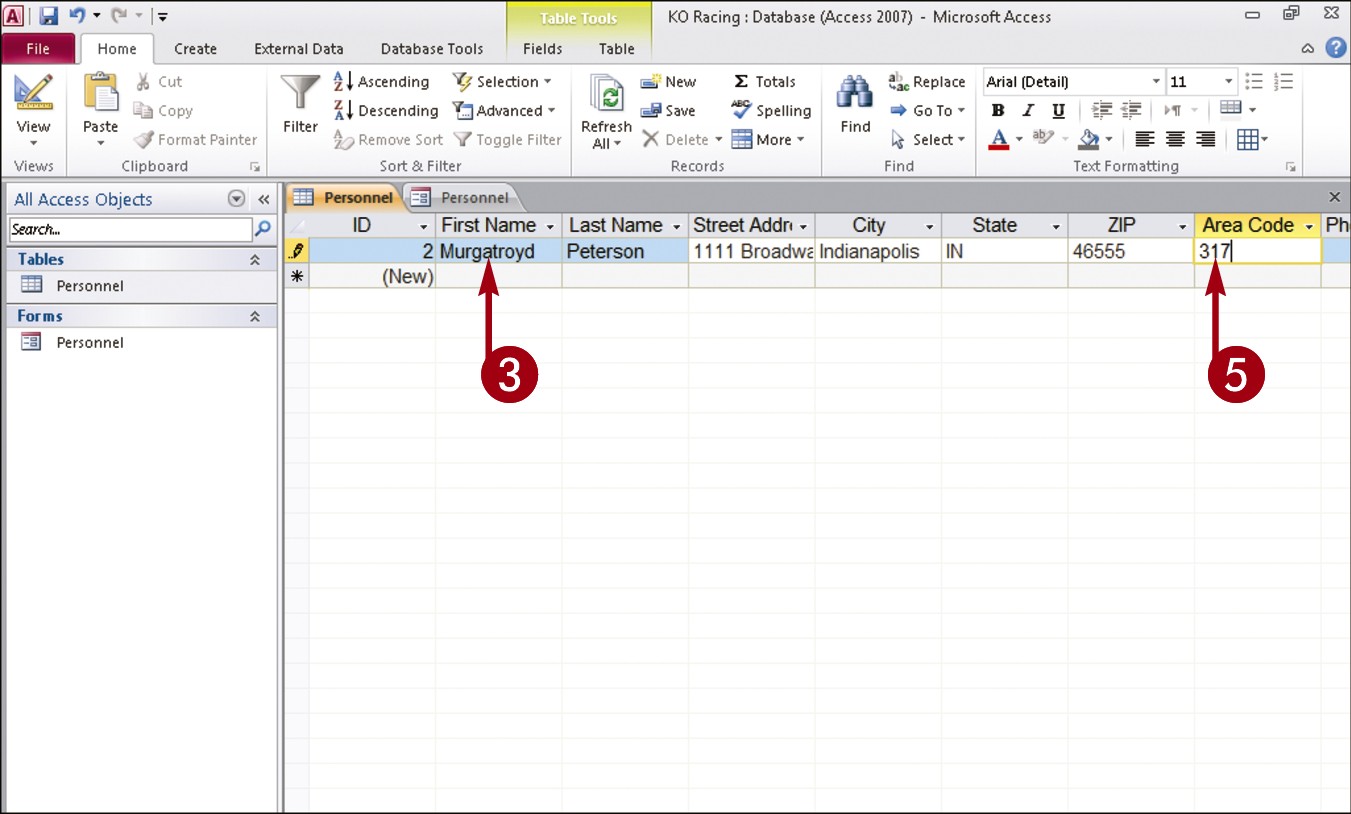
 Type the desired data in the selected cell.
 Press .
 Repeat Steps 3 and 4 until you have filled the entire row.
 Press
Press  or press to move to the next row, or record.
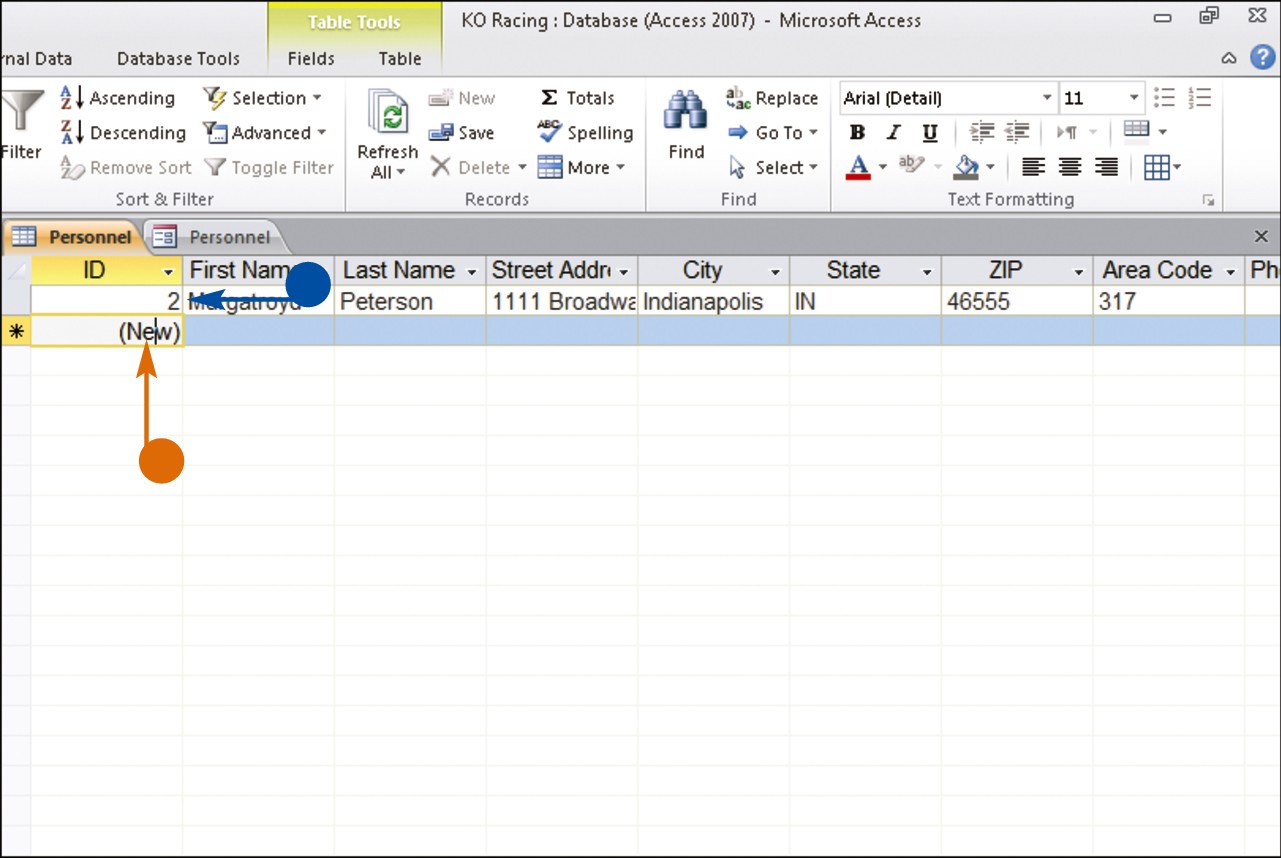
• Access adds the new record.
• Access moves your cursor to the first cell in the next row.
 Repeat Steps 2 to 6 to add more records to the table.
Access adds your records.
• You can resize a column by dragging the column border left or right.
• You can use the scroll bars to view different portions of the table.
Note: To edit a record in a table, open the table in Datasheet view, click in the cell whose data you want to change, double-click the data to select it, and type over the data to replace it.
Add a Record to a Form
You can use forms to quickly add records to your Access databases. Forms present your record fields in an easy-to-read format. You add records to a form in Form view; this view presents each field in your table as a box that you can use to enter data.
After you enter a record in a form, you can edit it if necessary. (See the tip at the end of this section for more information.) For help locating a particular record in the form window in order to edit it, see the next section, “Navigate Records in a Form.”
Add a Record to a Form
In the Navigation pane, double-click the form to which you want to add a record.
Note: If the form is not visible in the Navigation pane, click the  along the top of the pane, choose Object Type, and locate the desired form under the Forms heading.
• Access opens the form.
Click the Home tab.
Click the New button in the Records group.
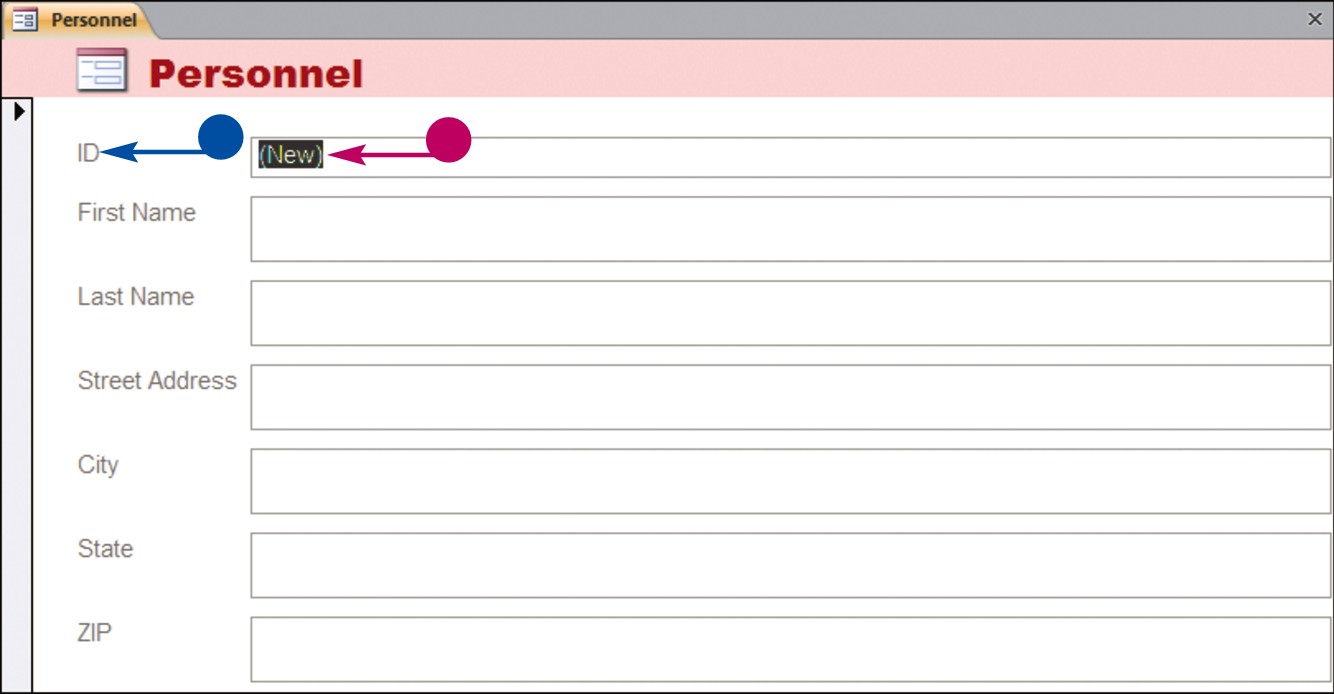
• Access opens a blank form, placing the cursor in the first cell of the first field.
• By default, the first field in the table associated with this form is an ID field, containing a unique ID number for the record. This value is set automatically.
Press .
Access moves your cursor to the next field in the form.
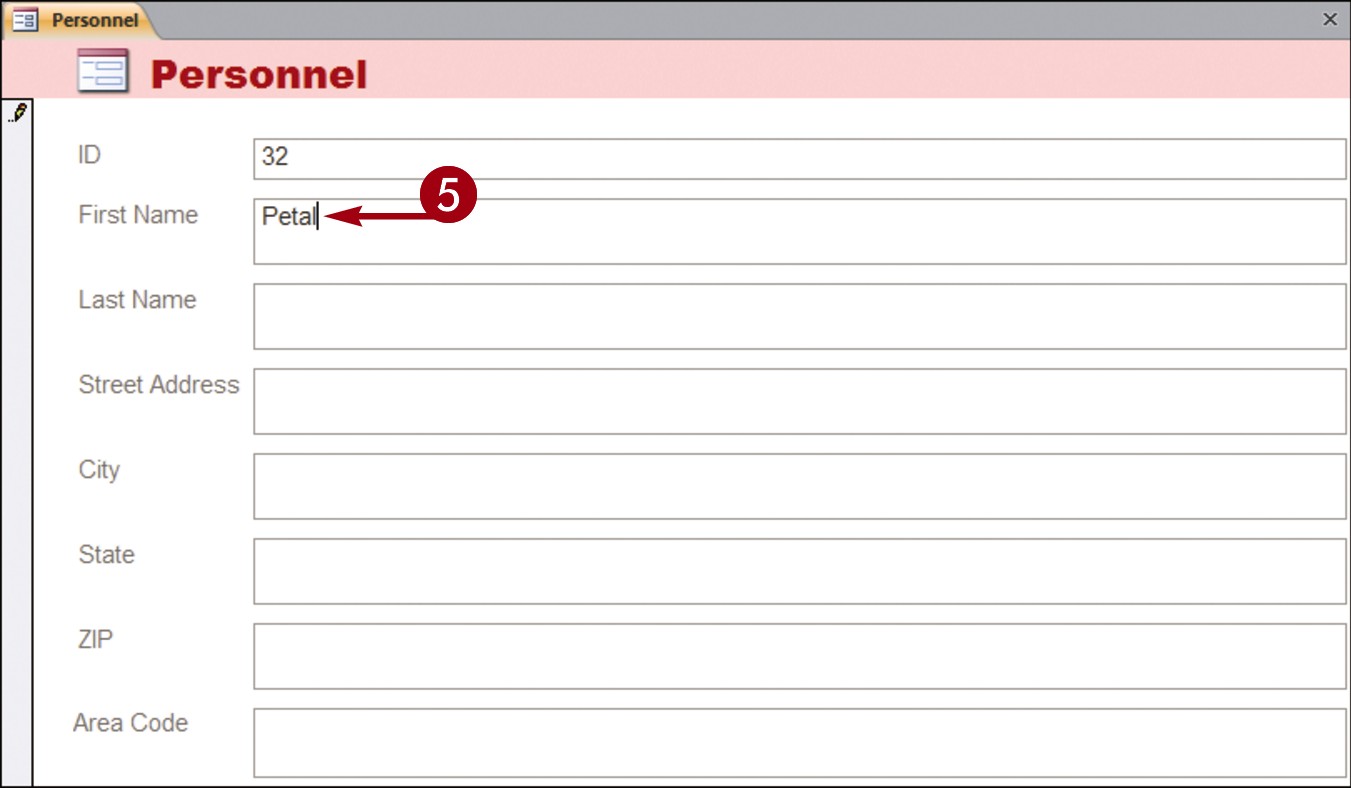
Type the desired data in the selected field.
Press .
Access moves to the next field in the form.
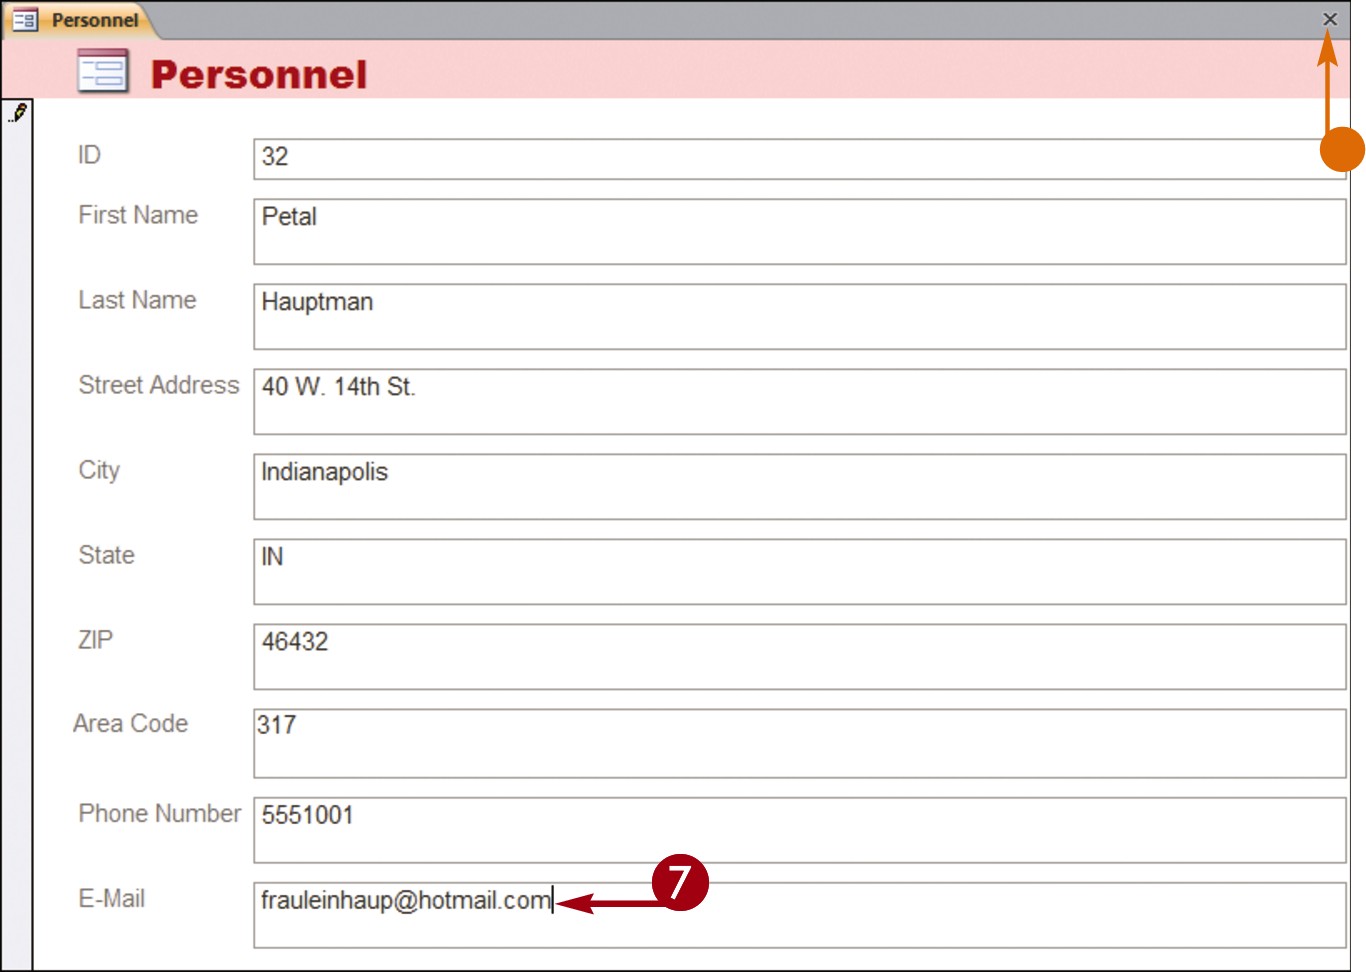
Repeat Steps 5 and 6 until you have filled the entire form.
 Press or .
Access displays another blank record, ready for data.
• To close the form window, you can click the Close button ( ).
).
Simplify It
Are there other ways to insert a new record?
Yes. You can click the New (Blank) Record button ( ) on the form window’s navigation bar (located along the bottom of the form) to create a new, blank record.
How do I edit a record in a form?
You can reopen the form, navigate to the record that you want to change, and make your edits directly to the form data. When you save your changes, Access automatically updates the data in your table. To learn how to display a particular record in a form, see the next section, “Navigate Records in a Form.”
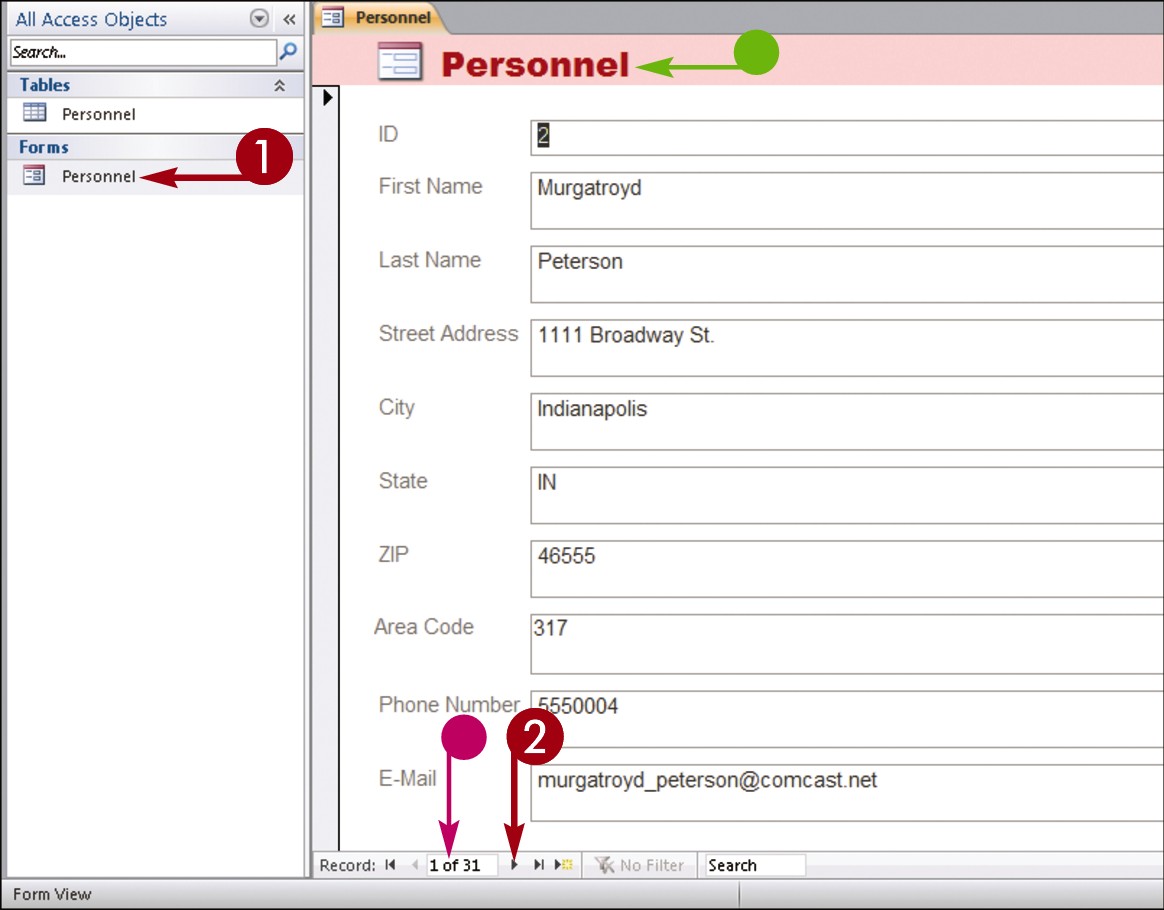
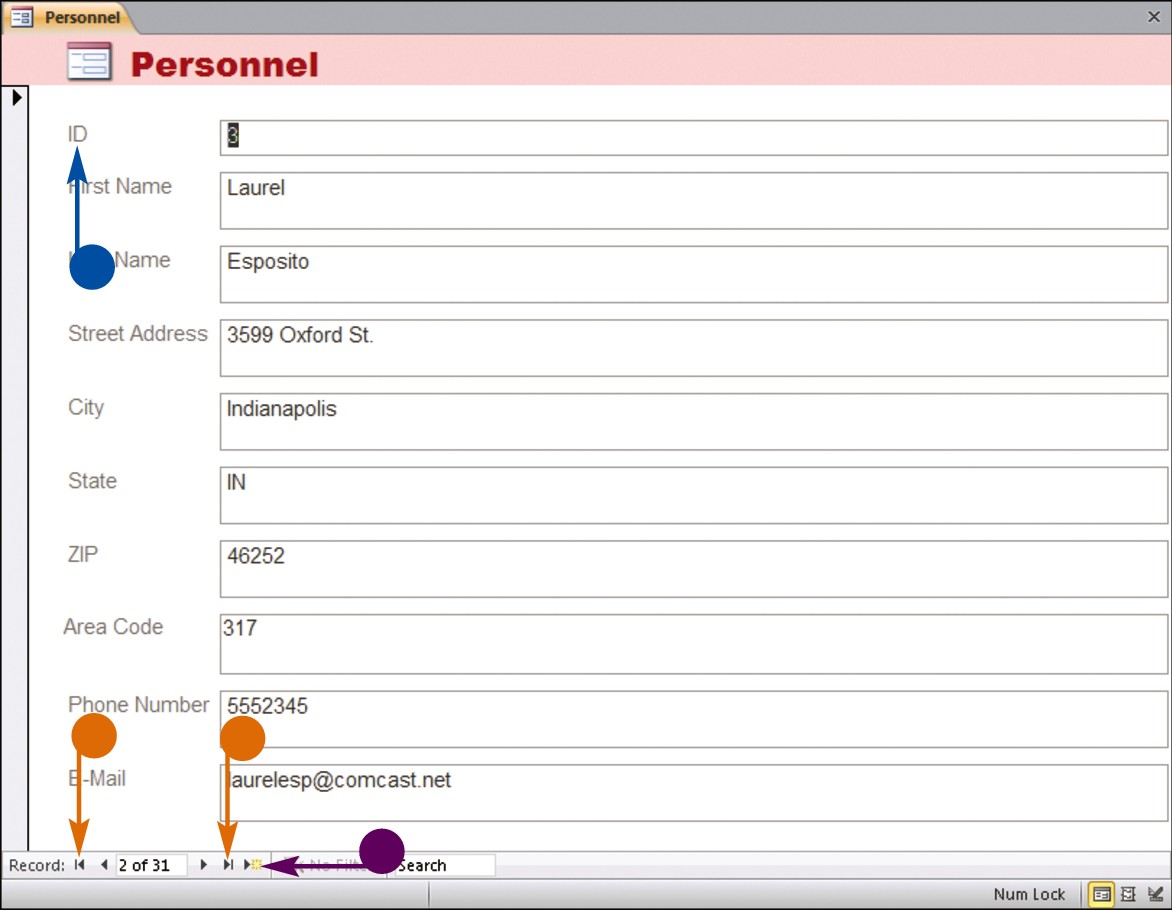
Navigate Records in a Form
You may find it easier to read a record using a form instead of reading it from a large table containing other records. Similarly, editing a record in a form may be easier than editing a record in a table. You can locate records you want to view or edit using the navigation bar that appears along the bottom of the form window. This navigation bar contains buttons for locating and viewing different records in your database. The navigation bar also contains a Search field for locating a specific record. (You learn how to search for a record in a form in the next section.)
Navigate Records in a Form
In the Navigation pane, double-click the form whose records you want to navigate.
Note: If the form is not visible in the Navigation pane, click the along the top of the pane, choose Object Type, and locate the desired form under the Forms heading.
• Access displays the form.
• The Current Record box indicates what record you are viewing.
Click Previous Record ( ) or Next Record (
 ) to move back or forward by one record.
• Access displays the previous or next record in the database.
• Click First Record ( ) or Last Record (
 ) to navigate to the first or last record in the table.
• Click New (Blank) Record () to start a new, blank record.
Search for a Record in a Form
As mentioned, you may find it easier to read and edit records in a form than in a large table containing other records.
One way to locate records you want to view or edit is to use the various buttons in the navigation bar, such as the Previous Record button, the Next Record button, and so on. (Refer to the preceding section for help using these buttons.) This method can become time-consuming, however, if the form contains numerous records. An easier approach is to search for the record using Access’s search functionality, also accessible from the navigation bar.
Search for a Record in a Form
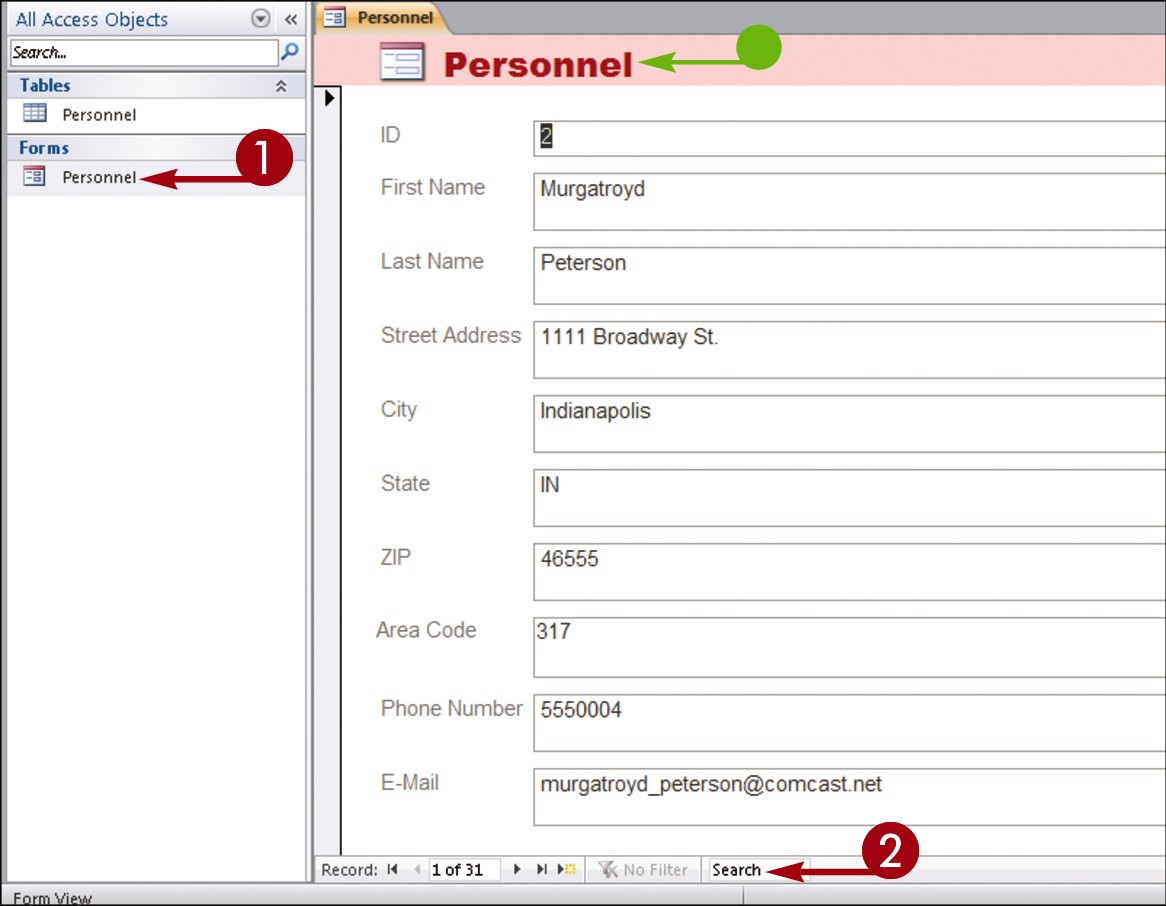
In the Navigation pane, double-click the form containing the record you want to find.
Note: If the form is not visible in the Navigation pane, click the along the top of the pane, choose Object Type, and locate the desired form under the Forms heading.
• Access displays the form.
Click in the Search field.
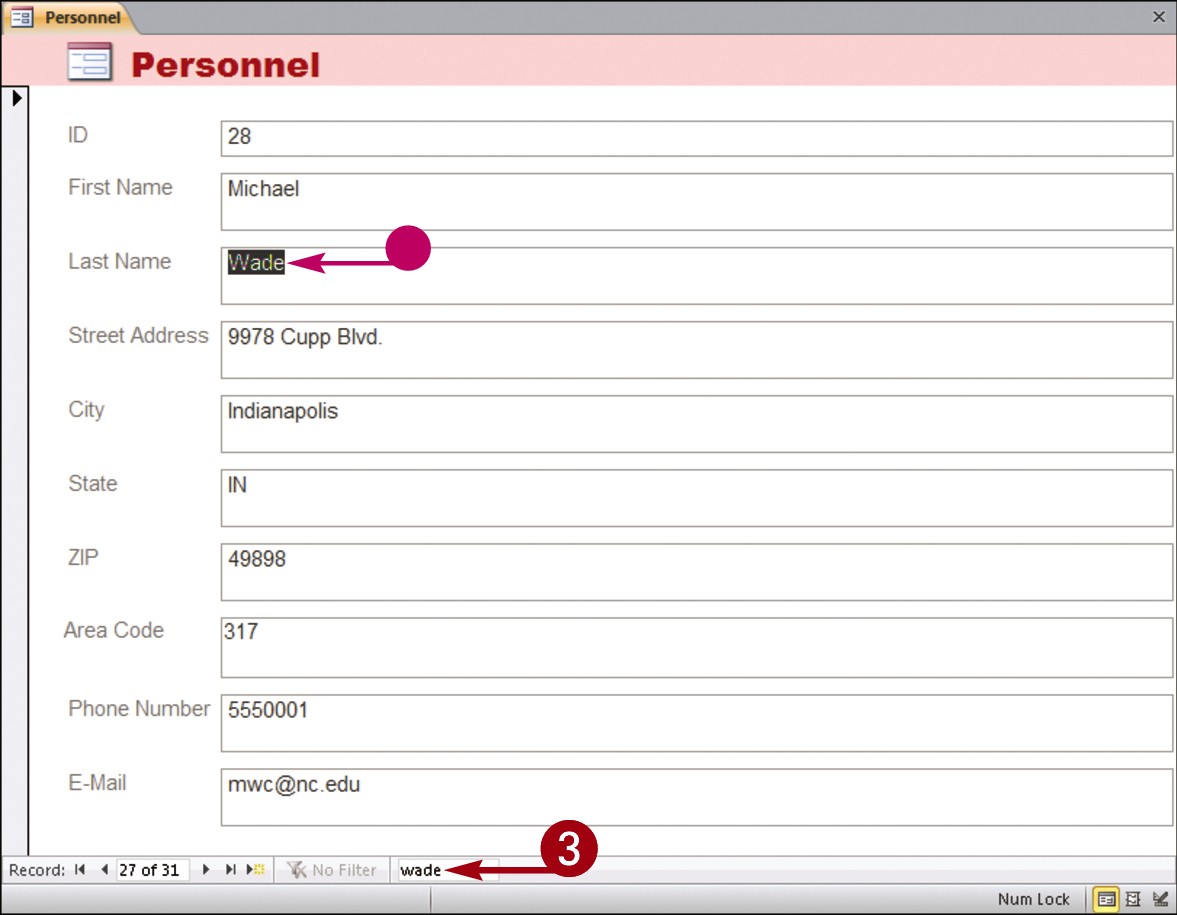
Type a keyword that relates to the record you want to find (here, a person’s last name).
• As you type, Access displays matching records.
Delete a Record from a Table
You can remove a record from your database if it holds data that you no longer need. Removing old records can reduce the overall file size of your database and make it easier to manage. When you delete a record, all of the data within its fields is permanently removed.
You can remove a record from a database by deleting it from a table or by deleting it from a form. This section shows you how to delete a record from a table. (For help deleting a record from a form, see the next section, “Delete a Record from a Form.”)
Delete a Record from a Table

In the Navigation pane, double-click the table that contains the record you want to delete.
• Access opens the table.
Position your mouse pointer over the gray box to the left of the record that you want to delete (the mouse pointer changes to  ) and click.
• The record is selected.
Click the Home tab.
Click the Delete button in the Records group.
Note: You can also right-click the record and then click Delete Record.
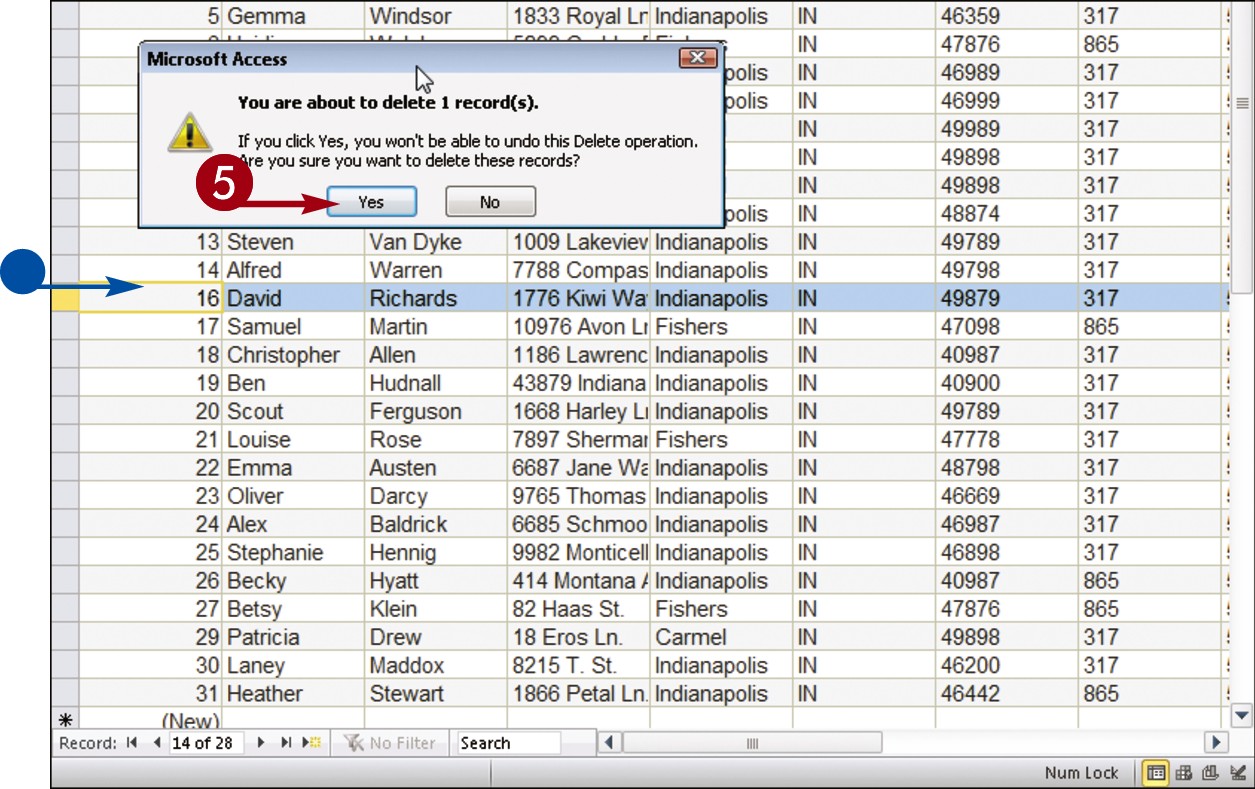
Access displays a warning box about the deletion.
Click Yes.
• Access permanently removes the record from the table.
Delete a Record from a Form
In addition to removing records directly from a table, as described in the preceding section, “Delete a Record from a Table,” you can remove records that you no longer need by using a form.
The first step is to locate the record you want to delete; refer to the sections “Navigate Records in a Form” and “Search for a Record in a Form” for help locating the record.
Removing old records can reduce the overall file size of your database and make it easier to manage. When you delete a record, whether from a table or a form, all the data within its fields is permanently removed.
Delete a Record from a Form
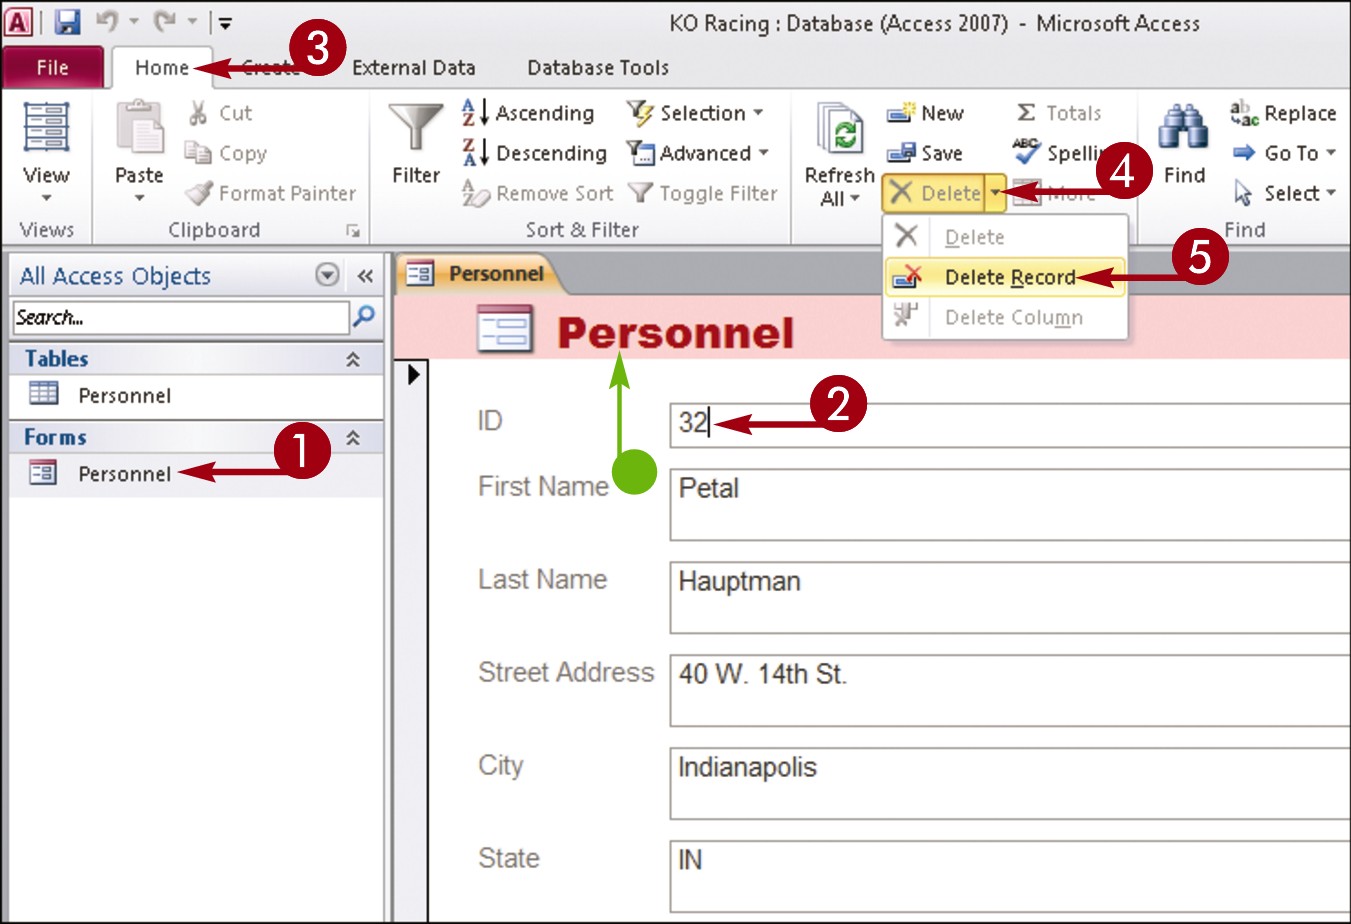
In the Navigation pane, double-click the form containing the record you want to delete.
Note: If the form is not visible in the Navigation pane, click the along the top of the pane, choose Object Type, and locate the desired form under the Forms heading.
• Access displays the form.
Navigate to the record you want to delete.
Click the Home tab on the Ribbon.
Click the Delete button’s  .
.
Click Delete Record.
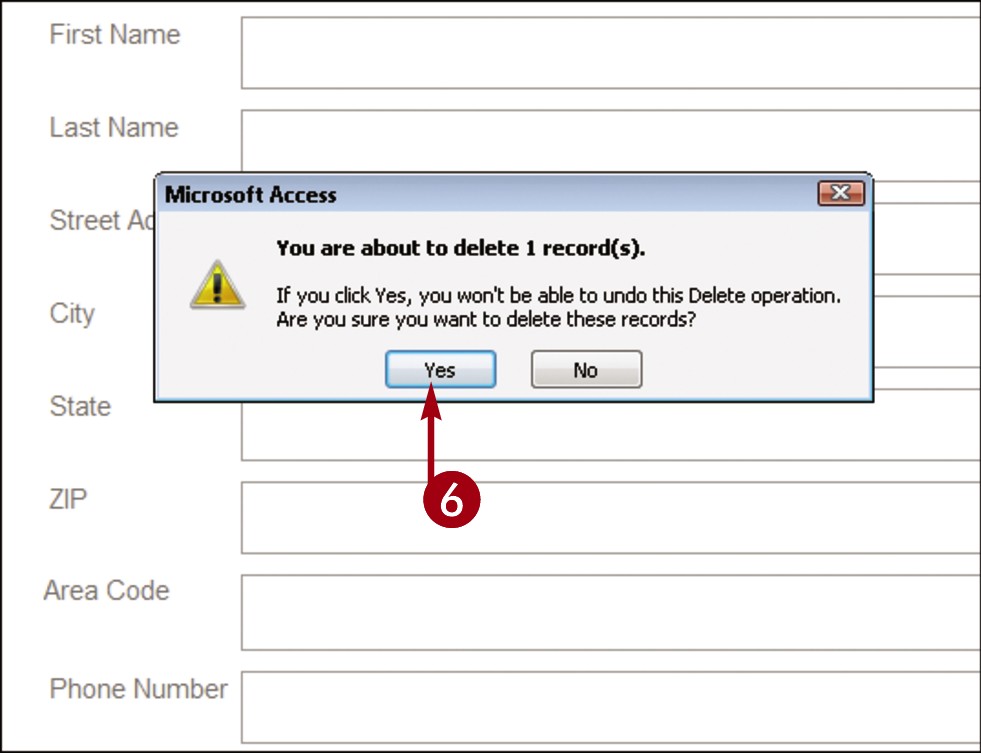
Access displays a warning box about the deletion.
Click Yes.
Access permanently removes the record.
Sort Records
Sorting enables you to arrange your database records in a logical order to match any criteria that you specify. For example, with a contacts database, you might sort the records alphabetically or based on the ZIP code. You can sort in ascending order or descending order. For example, if you are sorting alphabetically, you can sort from A to Z (ascending) or from Z to A (descending).
You can sort records in a table, or you can use a form to sort records. In this section, you learn how to do both.
Sort Records
Sort a Table
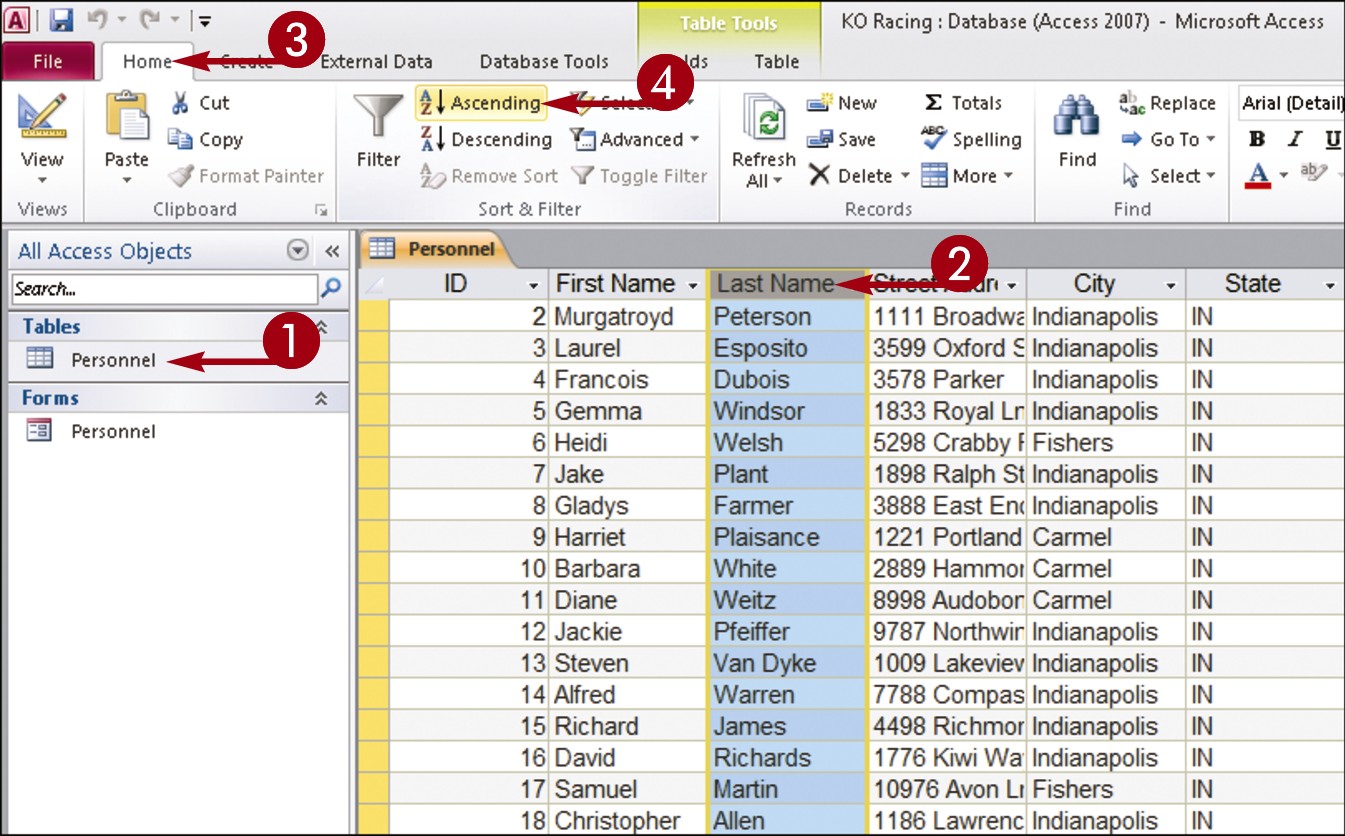
Open the table you want to sort.
Position your mouse pointer over the column header for the field by which you want to sort (the mouse pointer changes to  ) and click.
Click the Home tab on the Ribbon.
Click a sort button.
Click Ascending to sort the records in ascending order.
Click Descending to sort the records in descending order.
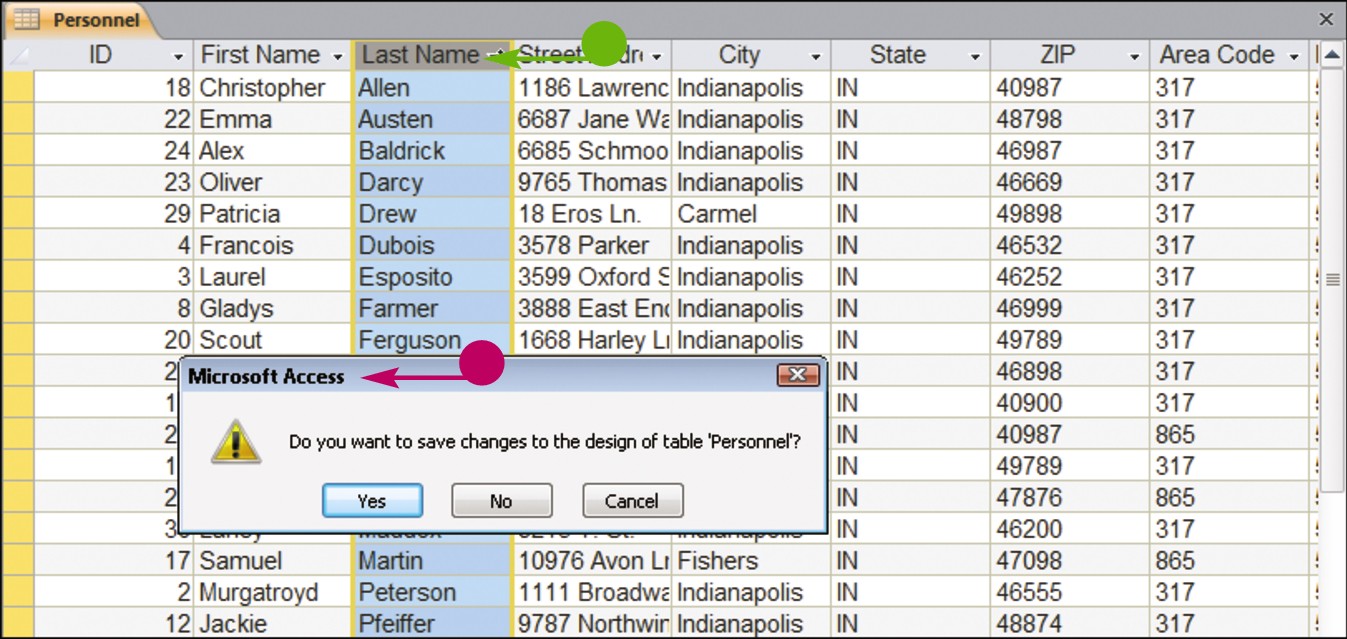
Access sorts the table records based on the field you choose.
• This example sorts the records alphabetically by last name in ascending order.
• In the prompt box that appears when you close the table, you can click Yes to make the sort permanent, or No to leave the original order intact.
Sort Using a Form
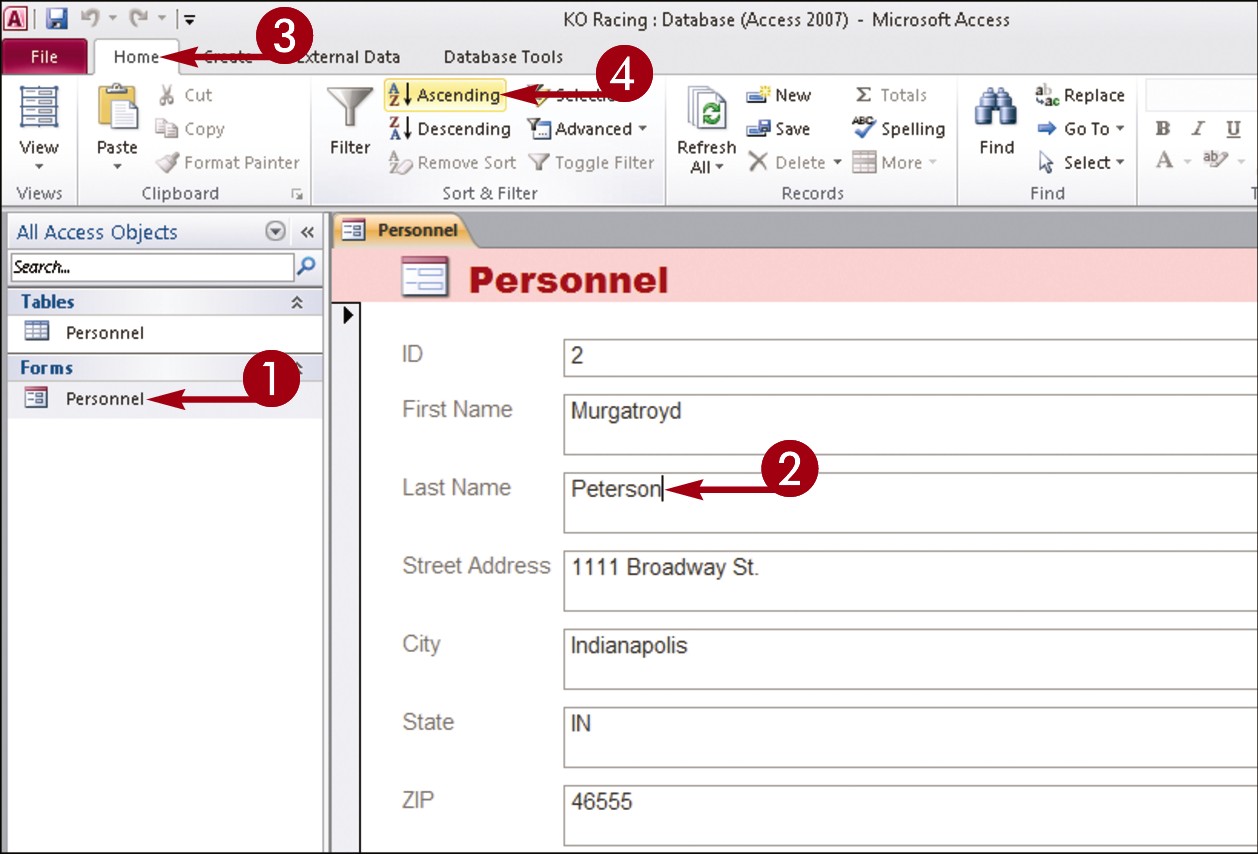
Open the form you want to sort.
Click in the field by which you want to sort.
Click the Home tab on the Ribbon.
Click a sort button.
Click Ascending to sort the records in ascending order.
Click Descending to sort the records in descending order.

Access sorts the table records based on the field you choose.
• This example sorts the records alphabetically by last name in ascending order.
• You can use the navigation buttons to view the sorted records.
Filter Records
You can use an Access filter to view only specific records that meet criteria you set. For example, you may want to view all clients buying a particular product, anyone in a contacts database who has a birthday in June, or all products within a particular category. You can also filter by exclusion — that is, filter out records that do not contain the search criteria that you specify.
You can apply a simple filter on one field in your database using the Selection tool, or you can filter several fields using the Filter by Form command.
Filter Records
Apply a Simple Filter
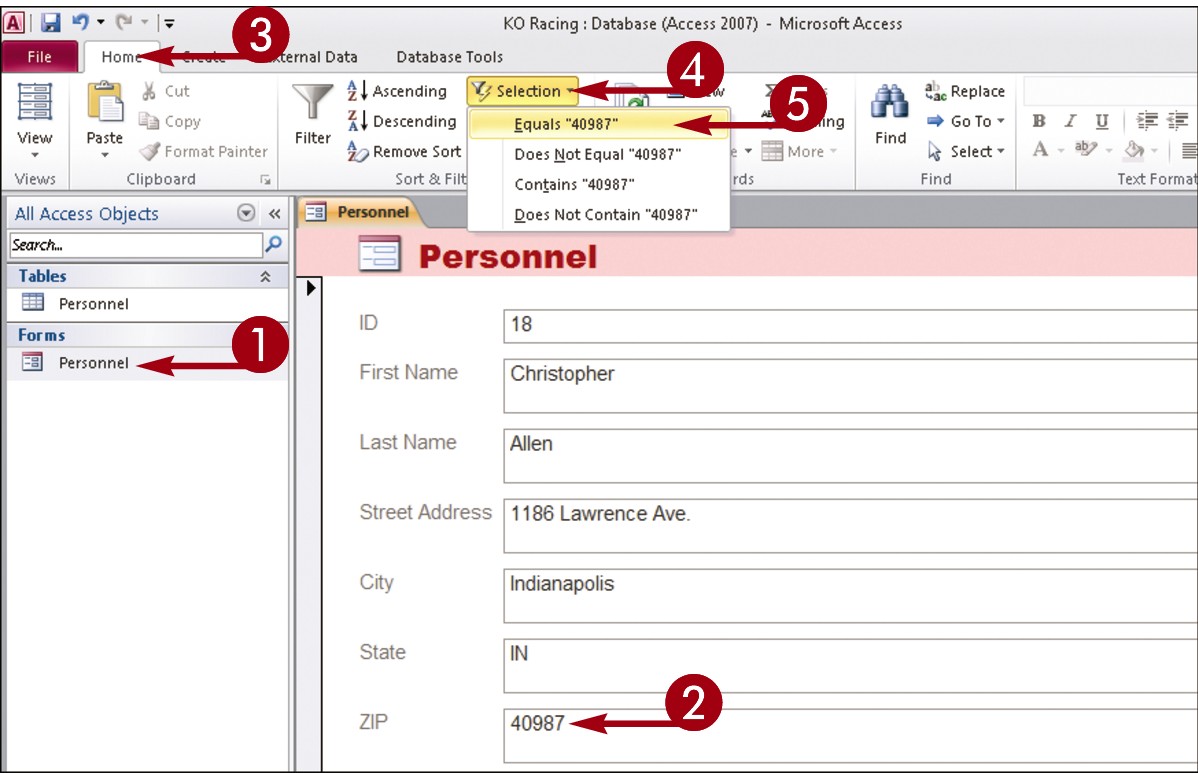
Open the form you want to filter.
Click in the field by which you want to filter.
Click the Home tab on the Ribbon.
Click the Selection button.
Click a criterion.
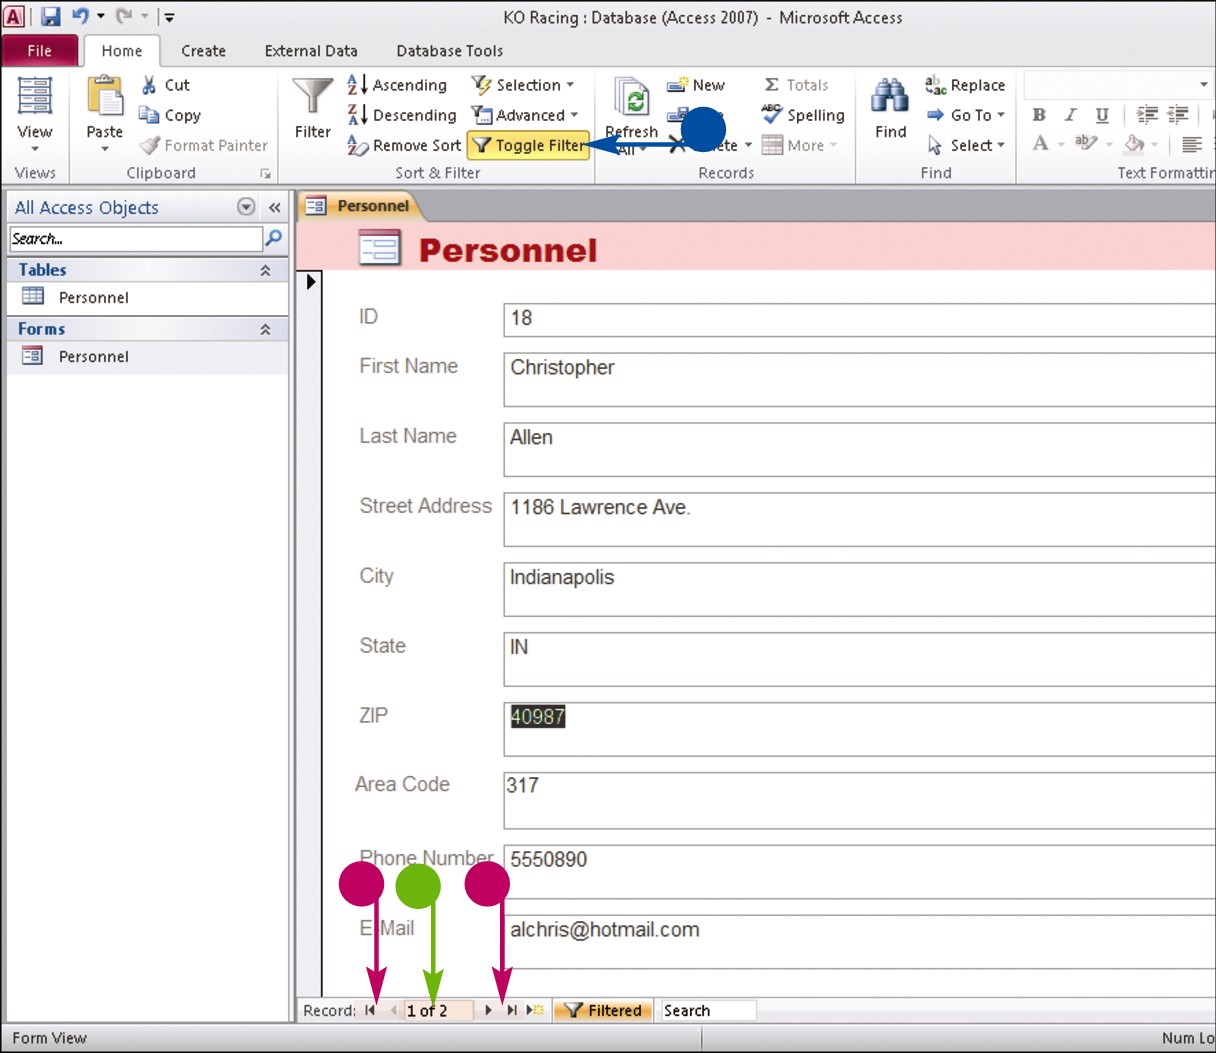
Access filters the records.
• In this example, Access finds two records matching the filter criterion.
• You can use the navigation buttons to view the filtered records.
• To undo a filter, click the Toggle Filter button.
Filter by Form
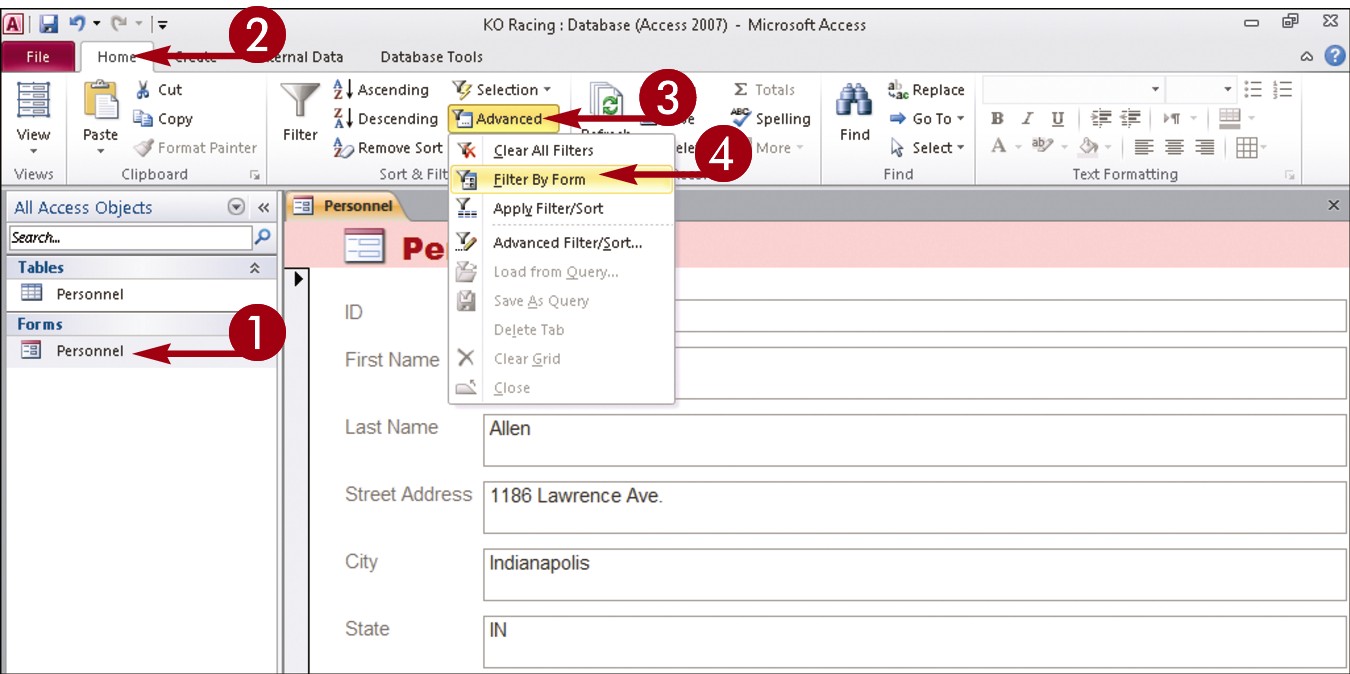
Open the form you want to filter.
Click the Home tab on the Ribbon.
Click the Advanced button.
Click Filter By Form.
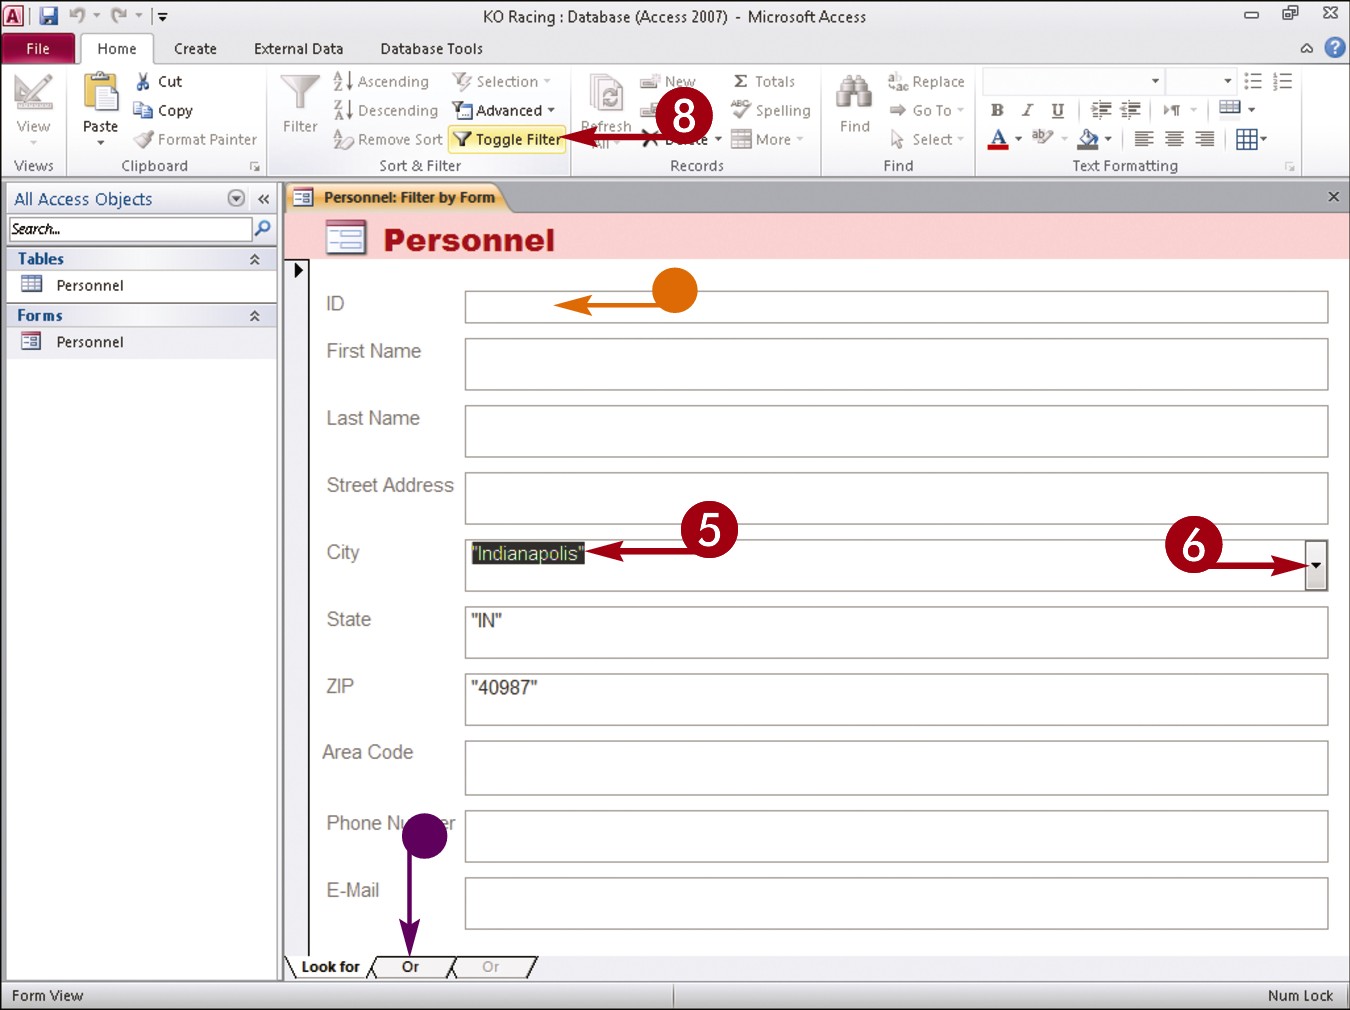
• A blank form appears.
Click in the field by which you want to filter.
Click the that appears and choose a criterion.
Repeat Steps 5 and 6 to add more criteria to the filter.
• You can set OR criteria using the tabs at the bottom of the form.
Click the Toggle Filter button.
Access filters the records.
To remove the filter, you can click the Toggle Filter button again.
Apply Conditional Formatting
You can use Access’s Conditional Formatting tool to apply certain formatting attributes, such as bold text or a fill color, to data in a form when the data meets a specified condition.
For example, if your database tracks weekly sales, you might set up Access’s Conditional Formatting feature to alert you if sales figures fall below what is required for you to break even.
You apply conditional formatting by creating a rule, which specifies the criteria that the value in a field must meet. Values that meet the criteria are formatted using settings you specify.
Apply Conditional Formatting

Open the form to which you want to apply conditional formatting in Layout view.
Click the field to which you want to apply conditional formatting.
Click the Format tab.
Click the Conditional Formatting button.
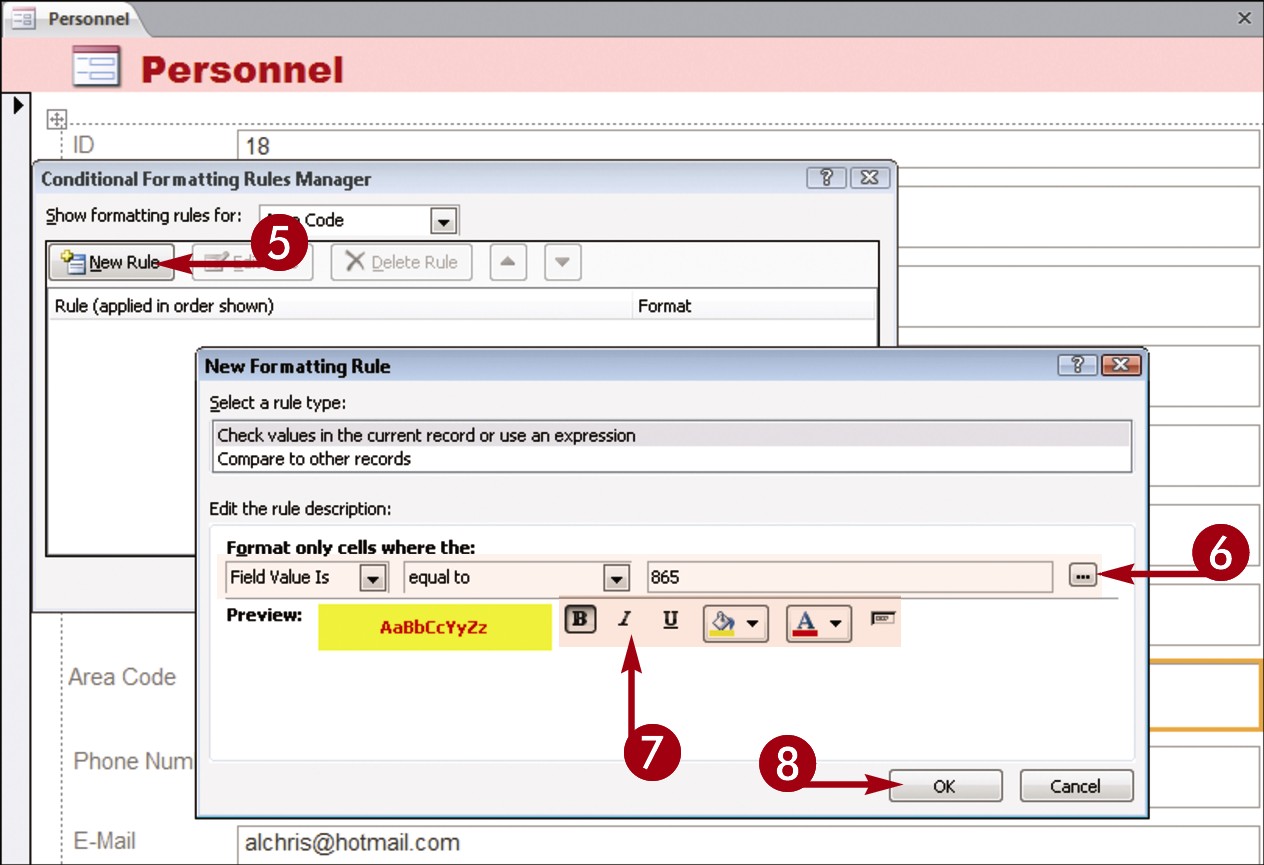
The Conditional Formatting Rules Manager dialog box opens.
Click the New Rule button.
The New Formatting Rule dialog box opens.
Set the criteria you want to use to apply conditional formatting.
Specify how values that meet your criteria should be formatted.
Click OK.

• Access creates a rule based on the criteria you set.
 Click OK.

• Access applies the conditional formatting.
Simplify It
How do I remove conditional formatting?
To remove conditional formatting, follow these steps:
Open the Conditional Formatting Rules Manager dialog box. (To open this dialog box, follow Steps 1 to 4 in this section.)
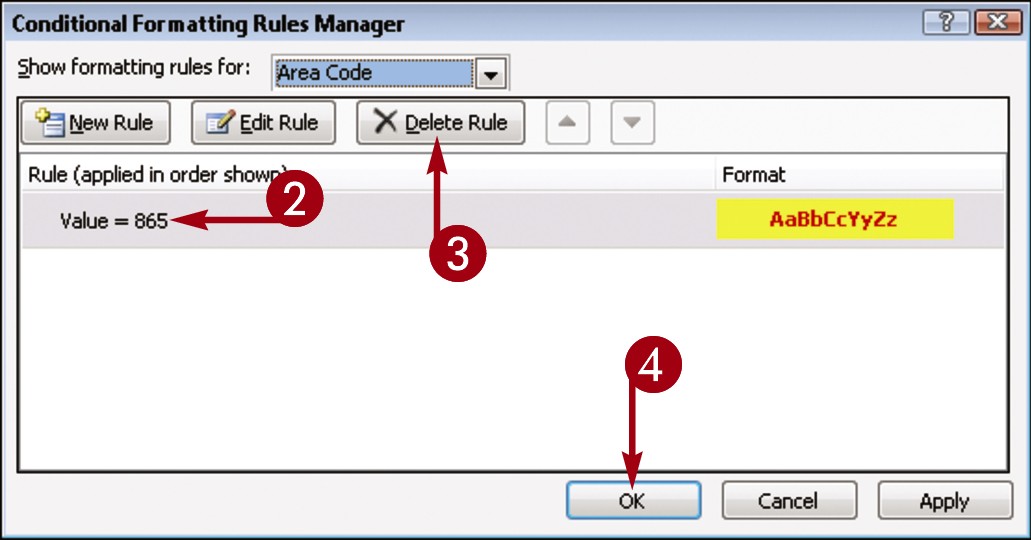
Click the conditional formatting rule you want to remove.
Click the Delete Rule button.
Click OK.
Access removes the conditional formatting.
Perform a Simple Query
You can use a query to extract information that you want to view in a database. Queries are especially useful when you want to glean data from multiple tables.
Queries are similar to filters, but offer you greater control when it comes to viewing records. You can use the Query Wizard to help you select what fields you want to include in the analysis. There are several types of Query Wizards. These include Simple, covered here; Crosstab, to display information in a spreadsheet-like format; Find Duplicates, to find records with duplicate field values; and Find Unmatched, to find records in one table with no related records in another table.
Perform a Simple Query
Create a Query
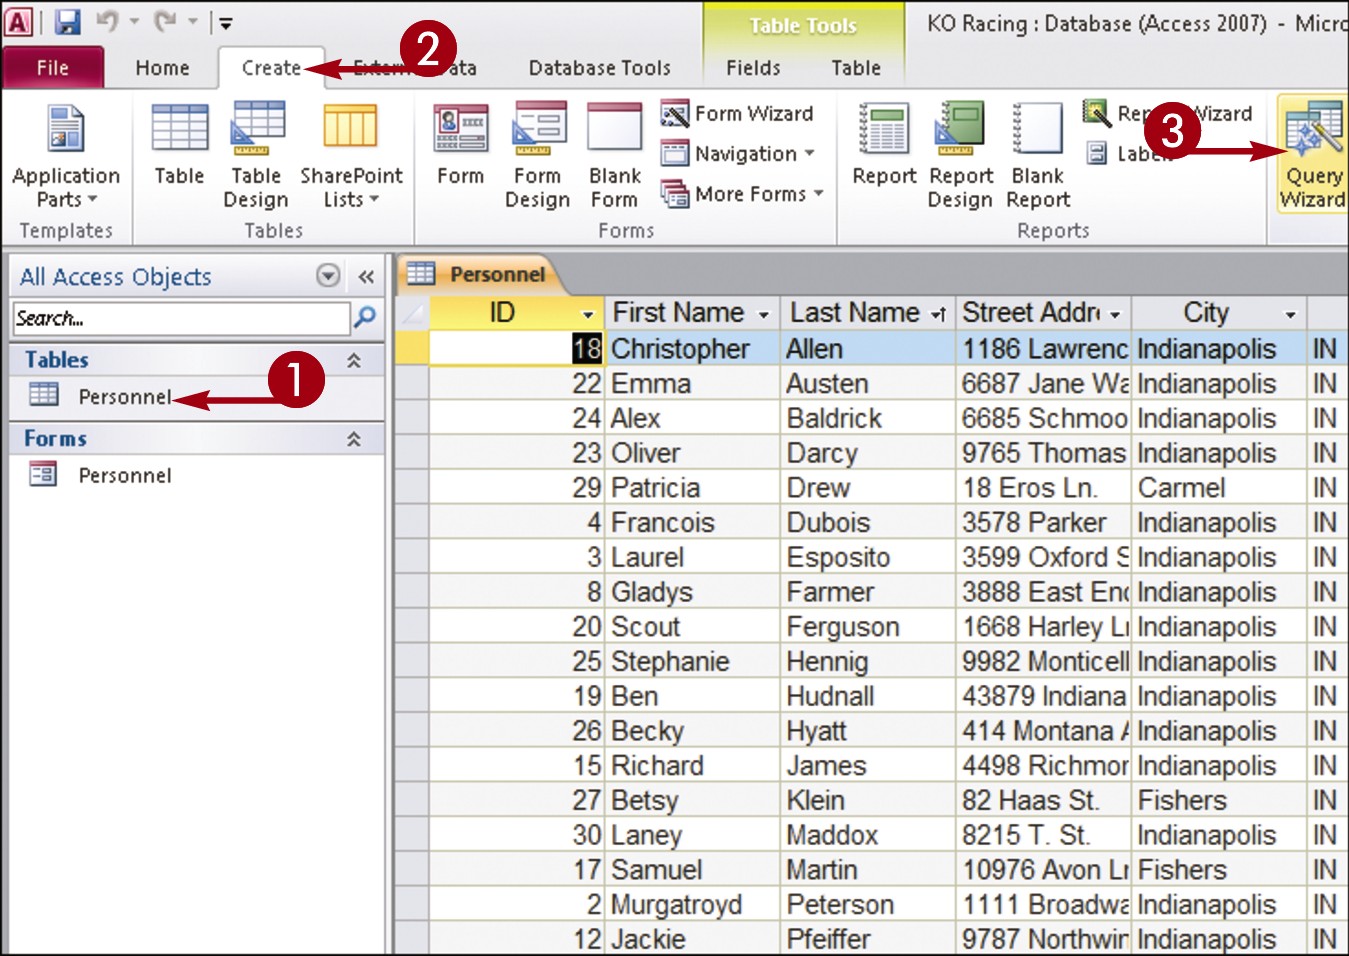
Open the table or form for which you want to perform a simple query.
Click the Create tab on the Ribbon.
Click the Query Wizard button.

The New Query dialog box appears.
Click Simple Query Wizard.
Click OK.

The Simple Query Wizard opens.
Click the Tables/Queries and choose the table containing the fields on which you want to base the query.
In the Available Fields list, click a field that you want to include in the query.
Click the Add button ( ).
).
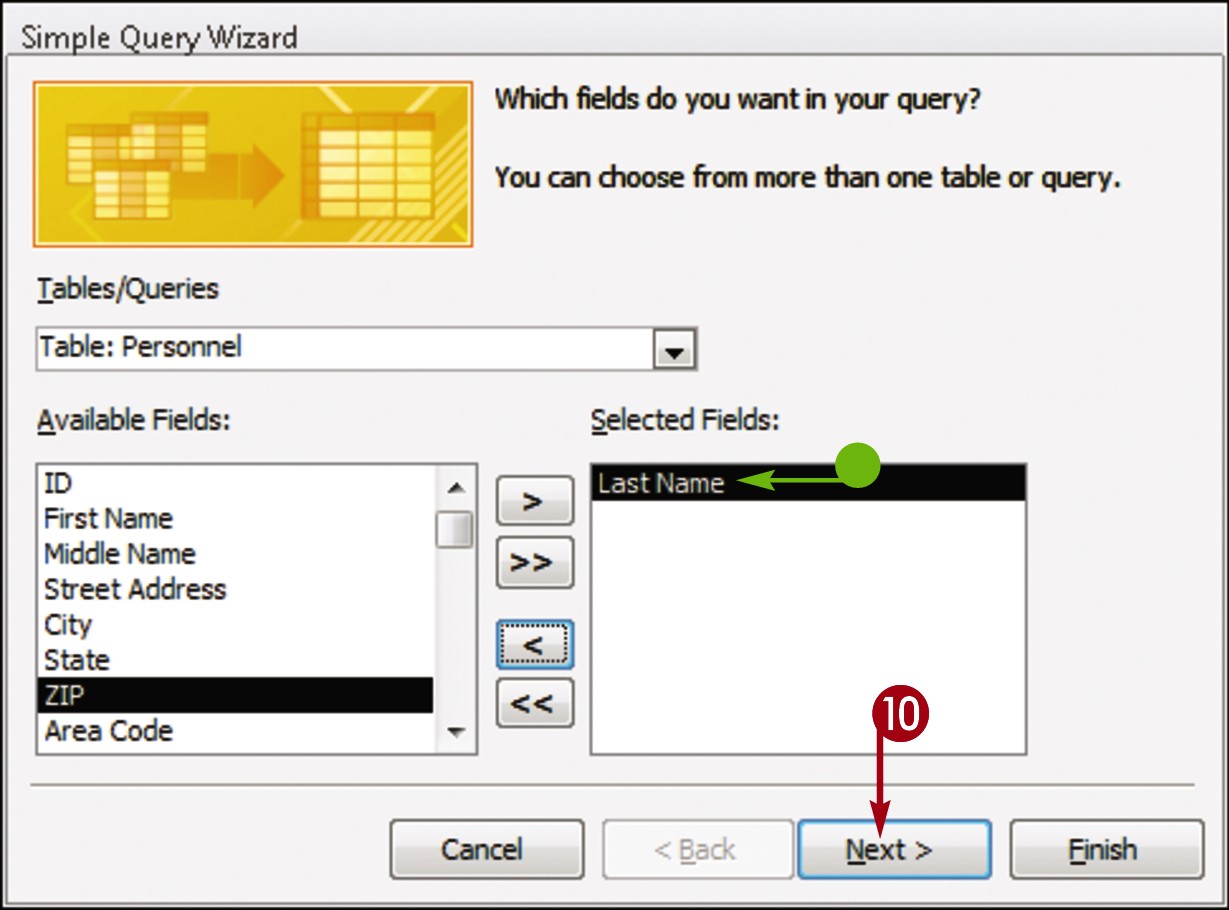
• The field is added to the Selected Fields list.
Repeat Steps 7 and 8 to add more fields to your query.
You can repeat Step 6 to choose another table from which to add fields.
Note: When using fields from two or more tables, the tables must have a prior relationship.
 Click Next.
Perform a Simple Query (continued)
During the process of creating a new query, the Query Wizard asks you to give the query a unique name. This is so that you can refer to the query later. All queries that you create are saved in the Navigation pane; you can double-click a query in the Navigation pane to perform it again.
If, after performing a query, you determine that you need to add more criteria to it, you can easily do so. For example, you may realize that the query needs to include an additional table in your database. You can also sort and filter your query results.
Perform a Simple Query (continued)
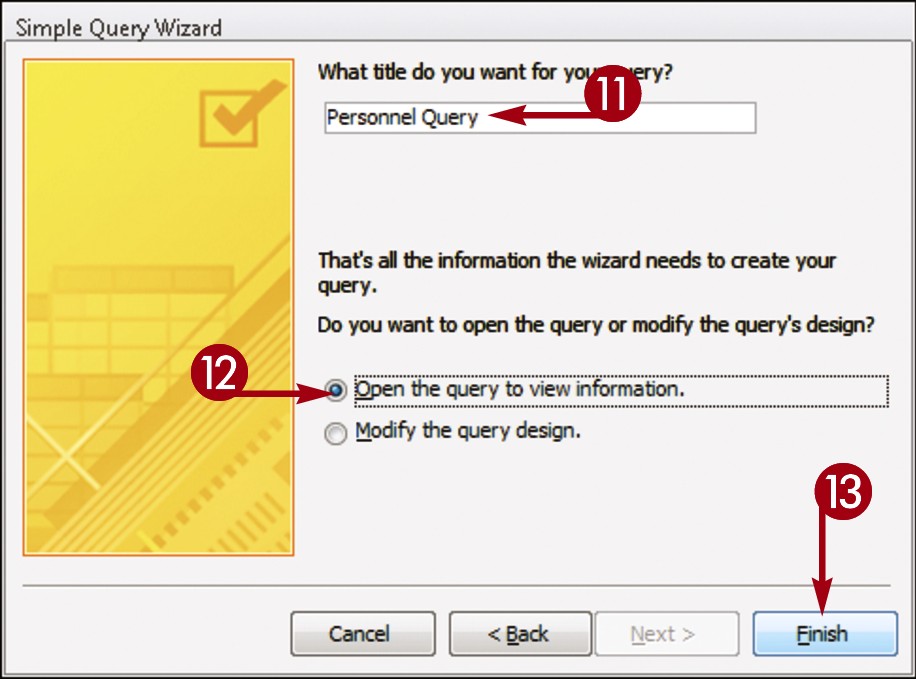
 Type a name for the query.
 Click the Open the query to view information radio button.
 Click Finish.
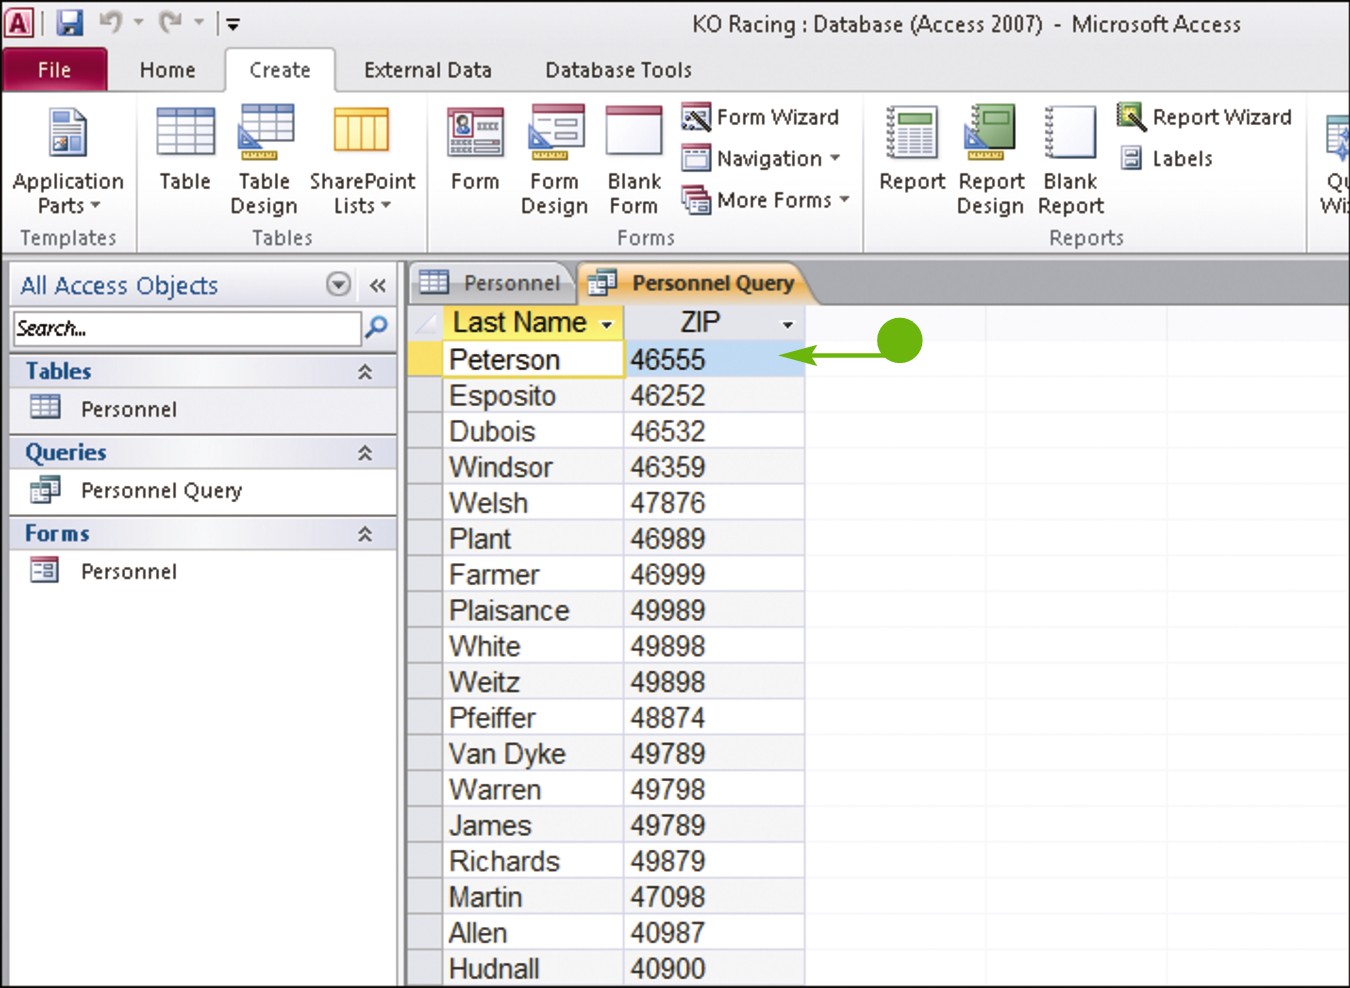
• A query datasheet appears, listing the fields.
Add Criteria to the Query
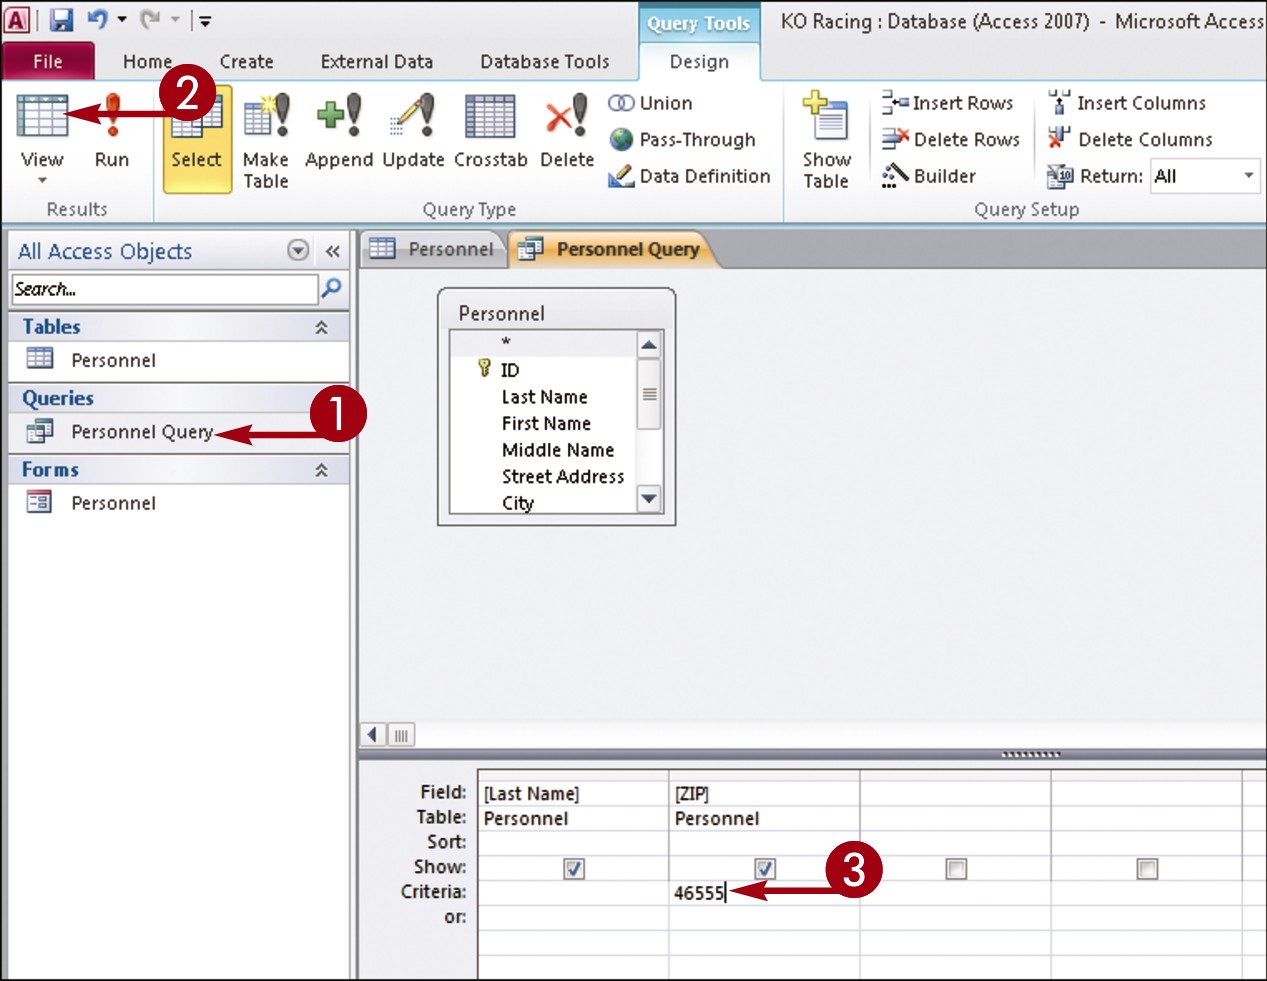
Double-click the query in the Navigation pane to open it.
Note: If the query is not visible in the Navigation pane, click the along the top of the pane, choose Object Type, and locate the desired query under the Queries heading.
Click the View button to switch to Design view.
Click in the Criteria field and type the data that you want to view.
This example lists a ZIP code as the criterion.

Click the View button again to switch back to Datasheet view to see the results.
• The table now shows only the records matching the criteria.
Create a Report
You can use Access to create a report based on one or more database tables. This can be a simple report, which contains all the fields in a single table, or a custom report, which can contain data from multiple tables in a database. (Note that to use fields from two or more tables, the tables must have a prior relationship; refer to the tip “What Is a Table Relationship?” in the preceding section for more information.)
To create a custom report, you can use the Report Wizard; it guides you through all the steps necessary to turn complex database data into an easy-to-read report.
Create a Report
Create a Simple Report
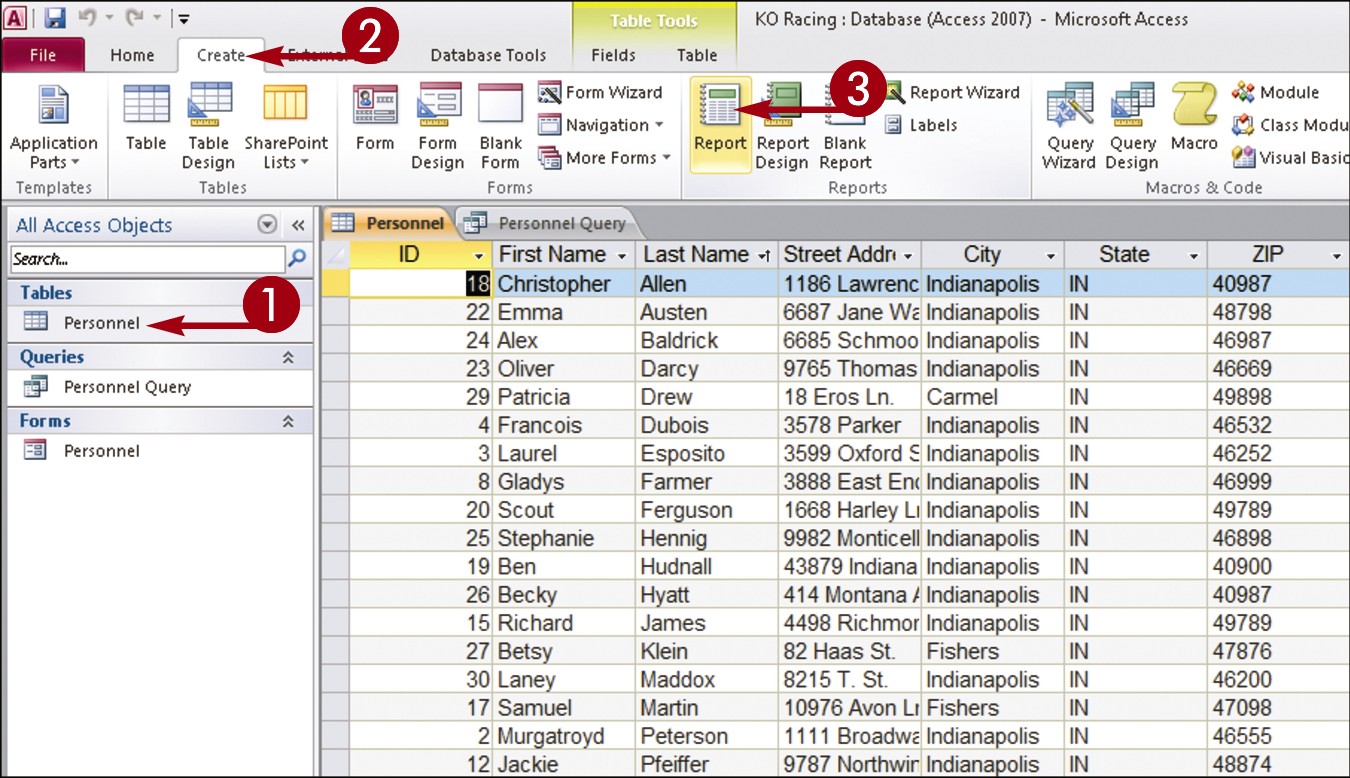
Open the table for which you want to create a simple report.
Click the Create tab on the Ribbon.
Click the Report button.
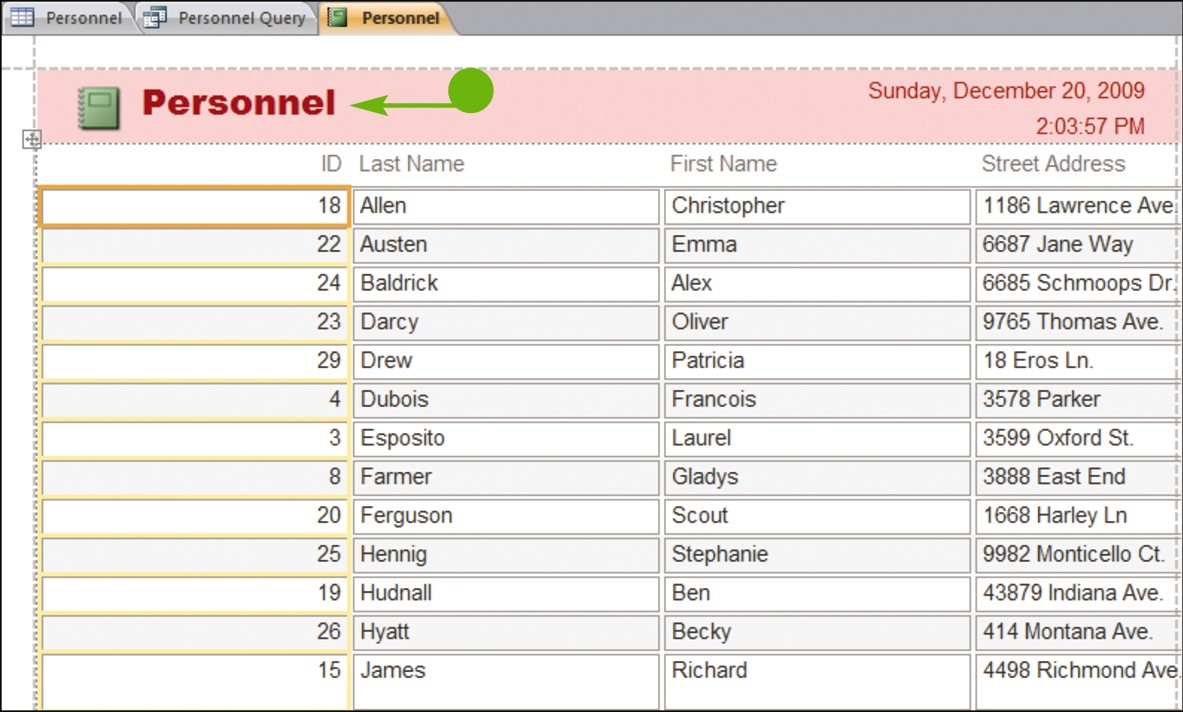
• Access creates a simple report based on the table you selected.
Create a Custom Report
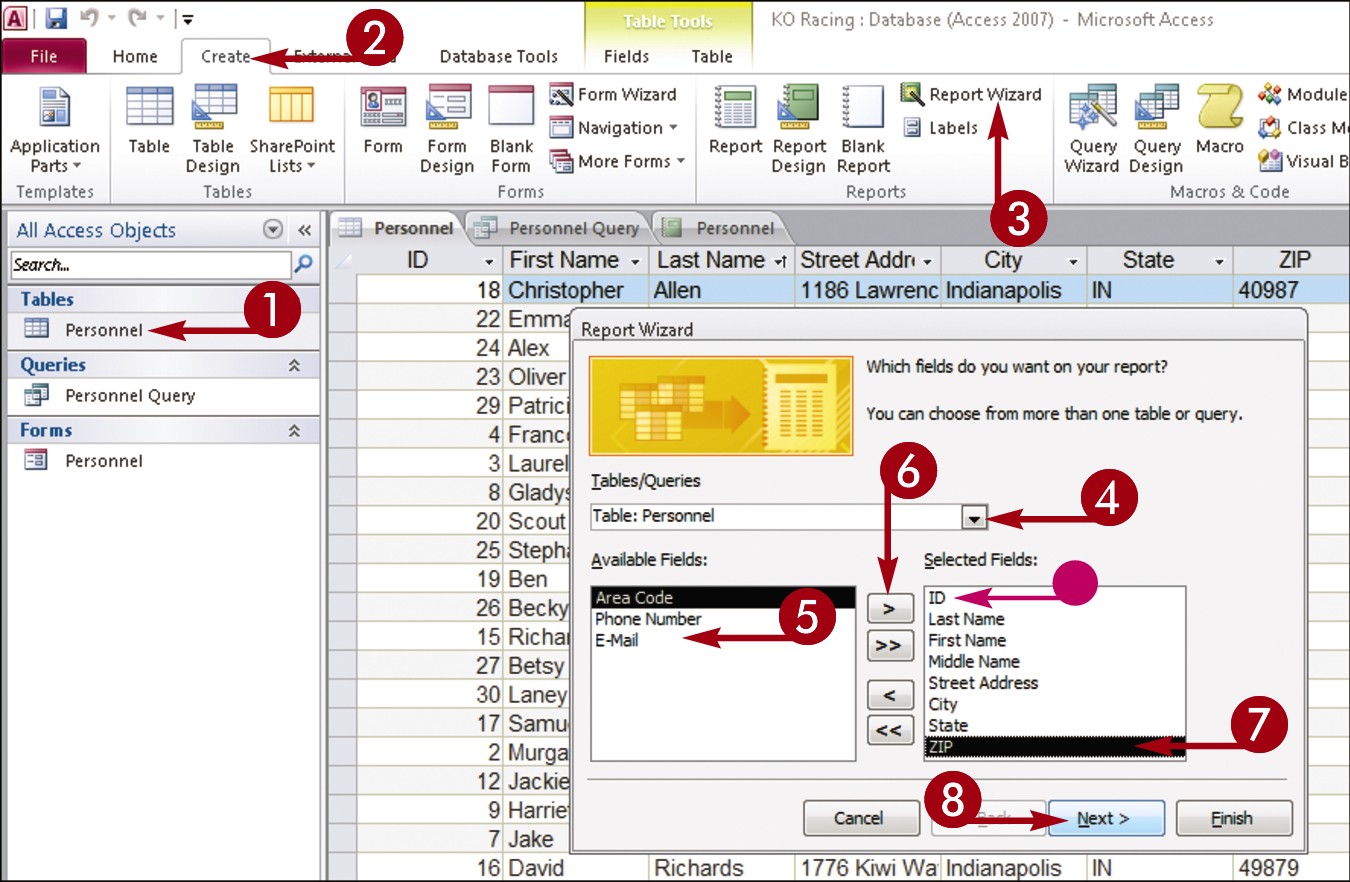
Open a table you want to include in a custom report.
Click the Create tab.
Click the Report Wizard button.
The Report Wizard opens.
Click the Tables/Queries and choose a table you want to include in the report.
Under Available Fields, click a field that you want to include in the report.
Click the Add button ().
• The field is added to the Selected Fields list.
Repeat Steps 5 and 6 to add more fields.
Click Next.

Click the field you want to use to group the data.
Click the Add button ().
• A preview of the grouping appears here.
Click Next.
Simplify It
How do I choose fields from different tables in a custom report?
Repeat Step 3 under “Create a Custom Report” to select additional tables that contain the fields you want to include.
How do I remove a field from a custom report?
If you have not yet completed the wizard, you can remove a field from the report by clicking the Back button until you reach the wizard’s first screen. Then click the field you want to remove in the Selected Fields list and click the Remove button ( ) to remove the field. To remove all the fields, click the Remove All button (
 ).
).
Create a Report (continued)
As the Report Wizard guides you through the steps for building a report, you are asked to decide upon a sort order. You can sort records by up to four fields, in ascending or descending order. The wizard also prompts you to select a layout for the report. Options include Stepped, Block, and Outline, in either portrait or landscape mode. (Note that you can change other design aspects of the report by opening it in Design view; for more information, see the tip at the end of this section.) After you create the report, you can print it.
Create a Report (continued)
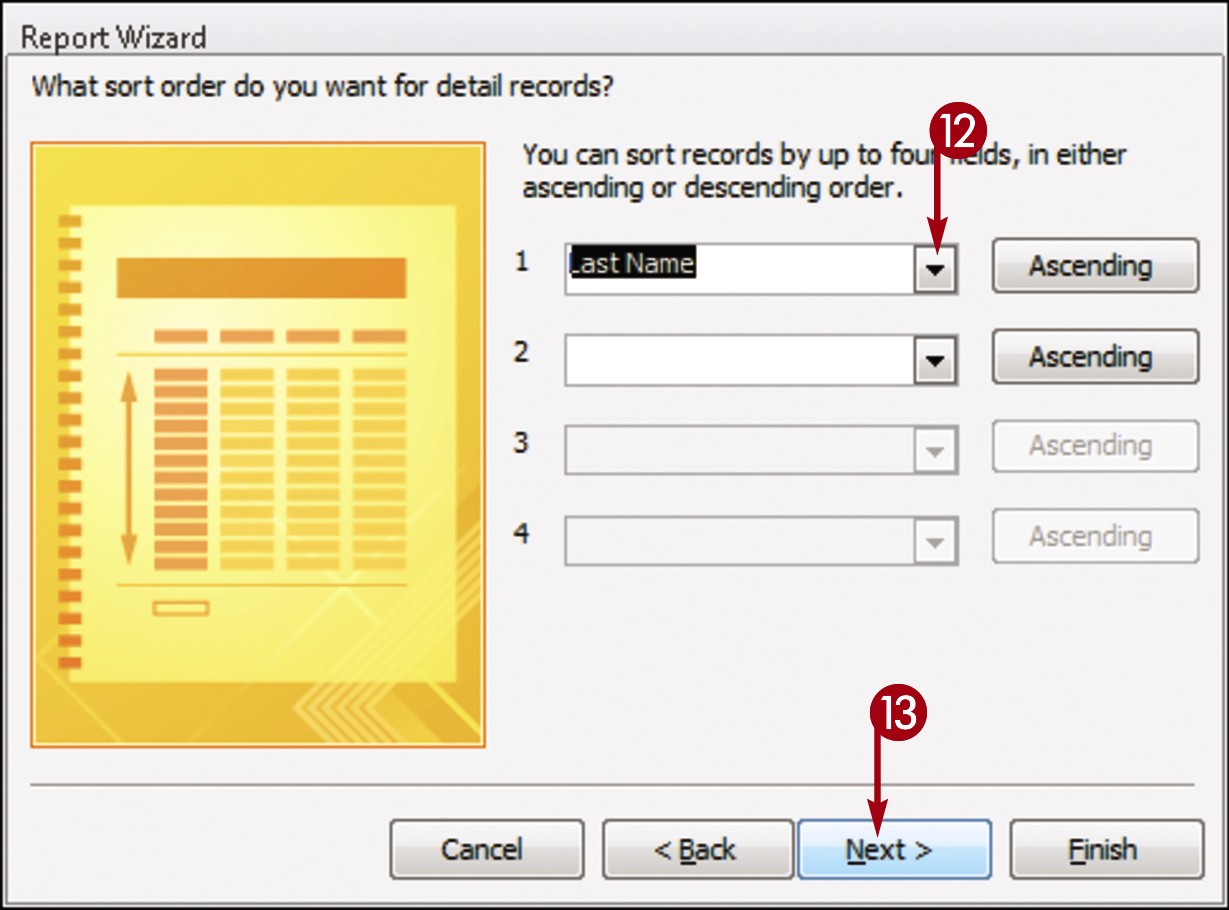
To sort your data, click the first and click the field by which you want to sort.
You can add more sort fields as needed.
Note: Fields are sorted in ascending order by default. Click the Ascending button to toggle to descending order.
Click Next.
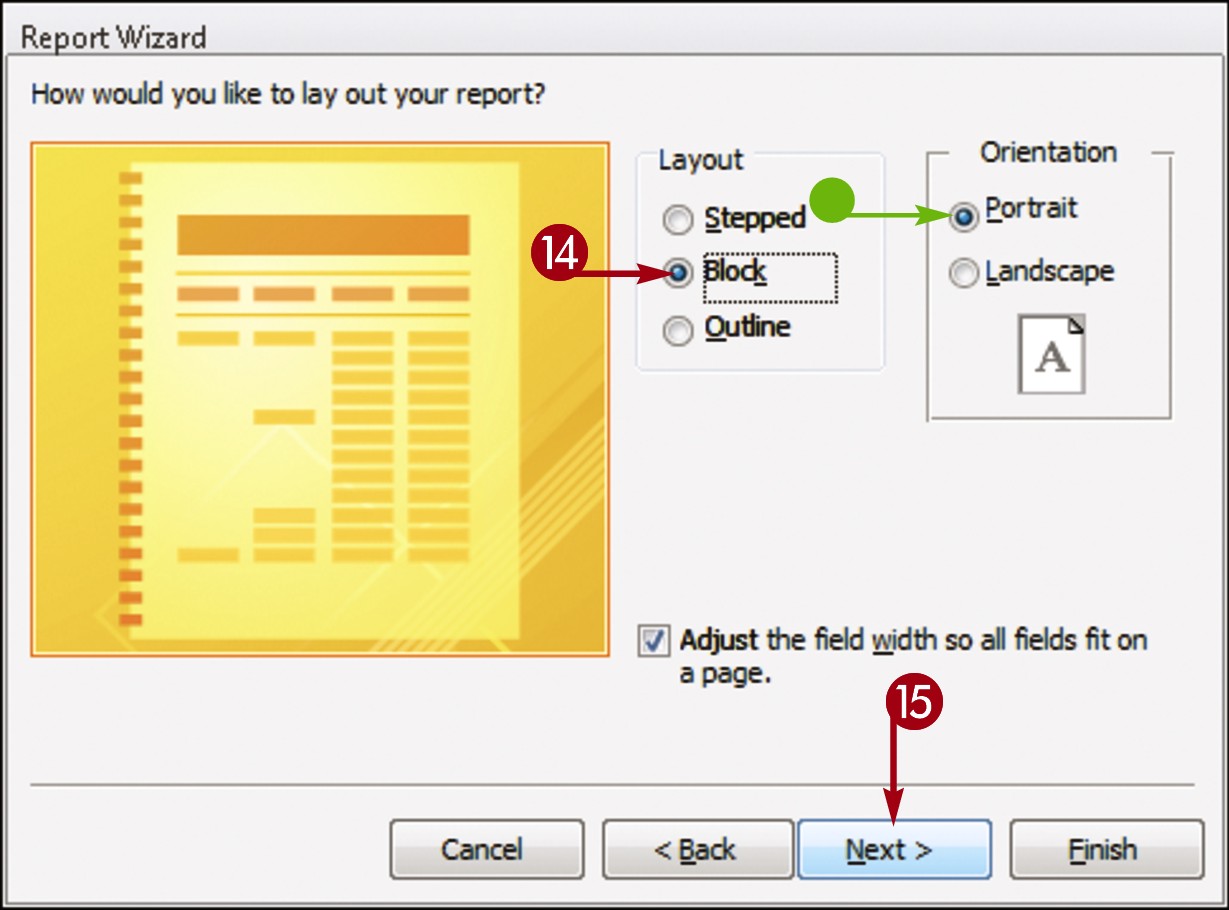
 Click a layout option.
• You can set the page orientation for a report using these options.
 Click Next.
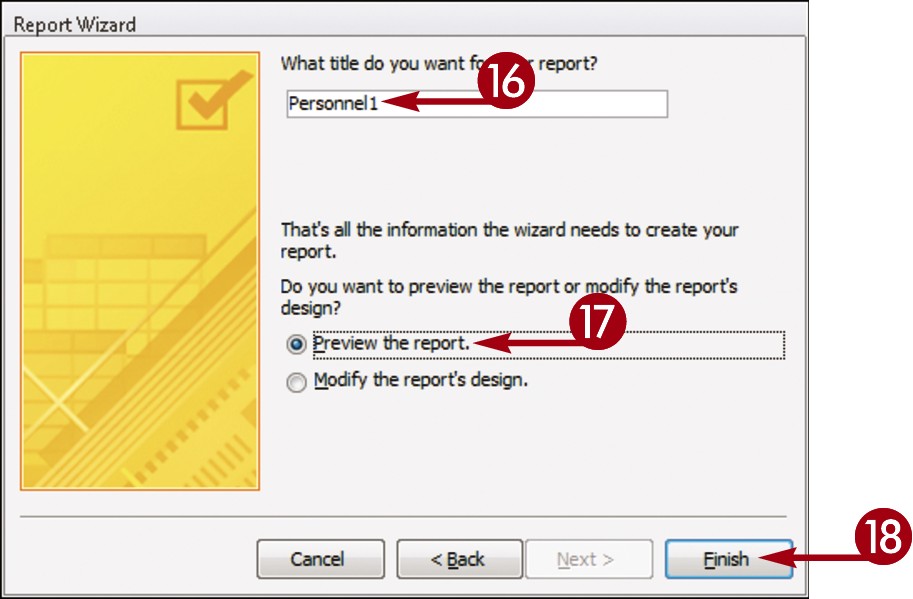
 Type a name for the report.
 Click the Preview the report radio button.
 Click Finish.

• Access creates the report and displays the report in Print Preview mode.