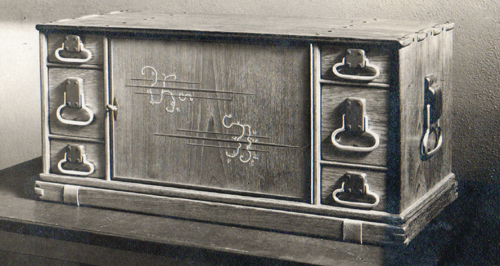
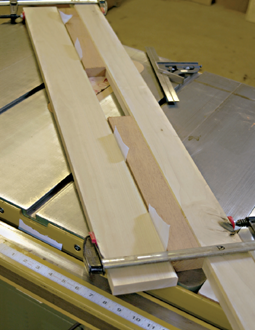
The Ford House letter case, c. 1908. Courtesy of the Gamble House.
Chapter 6
The Strap Detail
The strap detail was used only one time by the Greenes for the Ford House letter case, which was a relatively small piece made to sit atop a writing table. The original detail was, in fact, an actual leather strap that ran under the cabinet from the front of the base to the back. I think it is safe to assume the original straps were meant to protect the tabletop from scratches.
The drawings for the letter case, dated February 25, 1908, did not include straps. This should not be considered unusual though. Greene & Greene furniture often differed from the design as originally drawn.
The Ford letter case in general, and the straps in particular, have held my interest for some time. A few years ago, I attempted to locate the piece for a firsthand look. In the process I tracked down several “leads” that included, among other things, a mysterious storage unit in the Southern California desert. Sometimes the story varied with the storage unit being located in Florida. Searching every storage unit in the southern California desert and the entire state of Florida were beyond my resources. I do hope that the piece does still exist somewhere though. Unfortunately, the two possible locations do not bode well, one being extremely dry and the other extremely humid.
The Ford House letter case, c. 1908. Courtesy of the Gamble House.

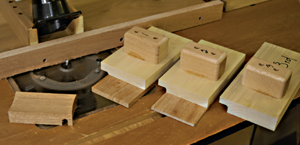
Greene & Greene Style Blanket Chest by Darrell Peart showing strap detail.
Given that I could not find the actual piece of furniture, the next best thing would be the only known original archival photo of the piece, which appeared in Randell Makinson’s book Greene & Greene: Furniture and Related Designs. Another dead end! The Greene & Greene archives had a record of the photo, but it was not in their possession and had been missing for some time. I had given up on even locating the photo until it was needed for a sidebar in a book that featured my blanket chest. After a renewed effort and numerous phone calls and emails, the original archival image was found mixed in with other papers. It is now back in the archives.
The primary reason I had exerted so much energy in locating the whereabouts of the original letter case was to acquire a better look at the straps, which had grabbed my imagination in a big way. Having only an archival black and white image to go on I could not see the detail as clearly as I would like. I could not even locate someone who had even as much as seen the original piece of furniture.
In an odd sort of way, it may have been good fortune that my search for the letter case did not pan out. Had I found it, I may not have relied so much upon my imagination when I decided to incorporate the detail into one of my designs.
So with my imagination employed I used visual analogies to help me design the strap, with my basic starting point being what I call “furniture DNA.” It’s not actual DNA, but rather “furniture building blocks” with which I play creator and lay down my own rules. Once the rules are laid down for a particular design those rules must permeate every detail as if it were nature’s blueprint. In other words each detail has a purpose which relates back to and supports the overall design as a whole.
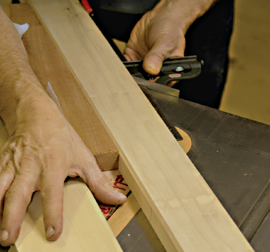
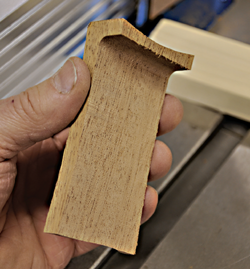
A. The Strap
The basic strap before sanding/shaping.
Visual weight plays a major role in my DNA scheme, with the strap detail serving to visually anchor the design to the ground (floor). To follow my train of thought you will need to rely upon your mind’s eye. Imagine it’s a couple of hundred years ago and you are at a dock where a cargo vessel is being loaded. The leather straps used to lift the heavy crates strain and stretch under their burden. To get to the next level in my scheme, your imagination has to do some serious heavy lifting as well. Think of the straps as agents in the employ of gravity. Instead of lifting upwards, they are pulling downward on the object that they have in their grasp. The straps are thus serving as anchors to secure the design to the floor. To determine placement of the straps, imagine the piece of furniture upside down and on the loading dock again: where would the straps be placed in order to evenly balance the load for lifting?
The strap detail, as it plays out in my scenario, would only be used with designs that possess sufficient solid mass. A design with mostly negative space would not contain the mass needed for strapping. To understand this, transport yourself back to the loading dock again. The design is waiting to be loaded. Does its mass and weight require that it be up hoisted onboard with a pulley and straps or could you simply pick it up and walk up the plank with it?
Making the Straps
The strap detail is made from wood, but meant to give the impression of leather under stress. A natural material such as leather has at least small inconsistencies from one piece to the next. This is what gives it character. The goal then is for the wooden straps to exhibit some small inconsistencies. This is not an excuse for sloppy work though. There is plenty of room in the process that will produce minor irregularities without making an effort to do so. In other words, aim for consistency but be pleased that you don’t quite reach it.
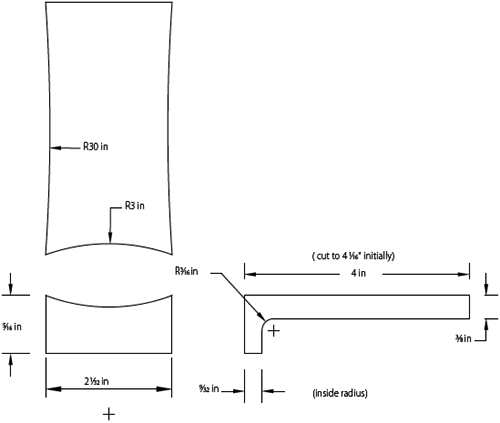
B. Side Profile Jig
Jig for the strap’s side profile.
Blanking out the Material
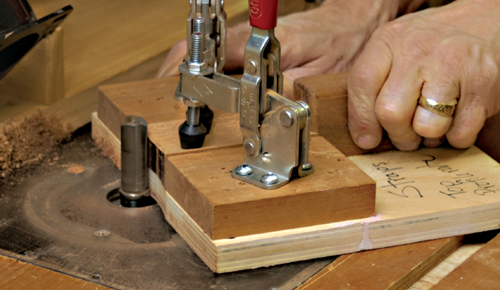
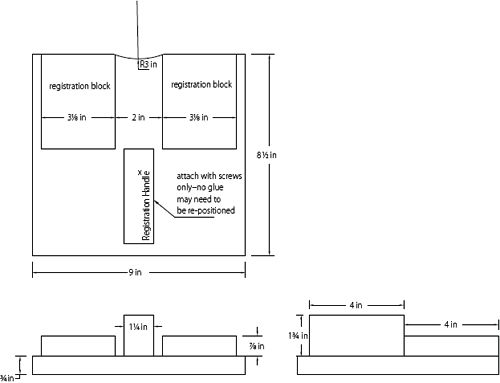
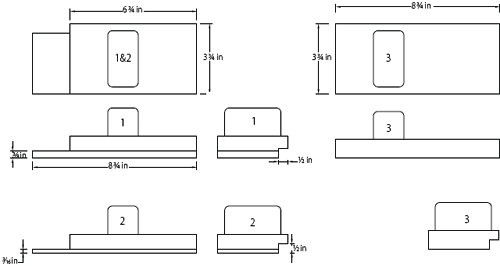
The first order is to blank out the detail to a point that it can be further shaped by hand. Start by making the two jigs shown in drawings B and C. The registration blocks precisely capture the stock material for machining and care must be taken with their placement. Use screws without glue for the initial placement of the registration blocks; their position may need to be adjusted later. The precision of the radiused profile edges are not critical. Lay them out in pencil and simply sand to the line. With the jigs complete, set them aside for now.
For safety, as well as efficiency, mill out the stock in long lengths 15⁄16" thick and 21⁄32" wide. Two to four foot lengths are fine. The width must fit closely between the registration blocks of the top profile jig. Make sure to cut out extra material to use for adjusting the setups.
Machining the Cove
Putting a cove down the center of the stock is the first step in shaping the strap. Start by raising the blade on the table saw to a height of 3⁄16". Next take two pieces of the stock material and capture them (leaving an opening in between) with two pieces of straight scrap that are long enough to span the table saw top at a 45-degree angle. Also, between the scrap and stock material place single pieces of paper to hold the scrap a few thousands of an inch farther apart. Position the clamped assemblage at a 45-degree angle to the tabletop. Then moving the assemblage, find the spot where the teeth disappear into the throat plate evenly on either side of the opening. In other words, center the path of the blade from side to side while keeping the assemblage at 45-degrees.
With the saw set up, run a test piece through using push blocks. The resulting cut should be a cove that is exactly centered in the stock; if it is not, make the necessary adjustments. Once an acceptable cove is achieved, run all the stock and then cut them to 41⁄16" lengths.
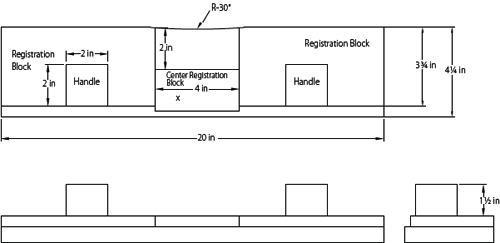
1. The blank stock must fit between the registration blocks of the top profile jig.
2. Take two pieces of the stock material and capture them (leaving an opening in between) with two pieces of straight scrap that are long enough to span the table saw top at a 45-degree angle.
3. Center the path of the blade, keeping the assemblage at 45-degrees.
4. Run a test piece through using pushes blocks.
5. The resulting cut should be a cove that is exactly centered in the stock.

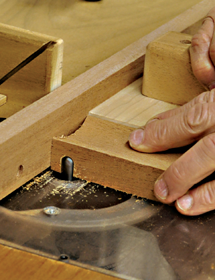
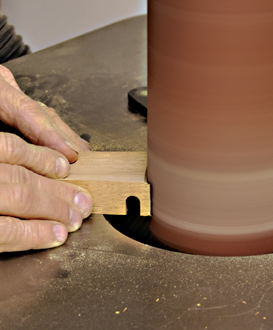
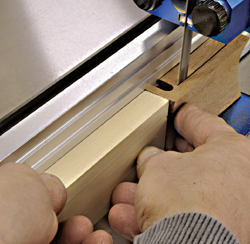
6. Place one of the blanks in the top profile jig.
7. Routing the strap stock.
The Top Profile
To emulate leather under stress, two arched profiles, top and side, will be routed into the blank. The next three steps (top profile route, inside radius, and side profile route) must be done in the order given.
To begin with, set up a top bearing flush trim bit in the router table. Going back to the top profile jig, mount two De-Sta-Co type toggle clamps for securing the stock. Next, place one of the blanks in the jig. The stock should over hang the front edge at the corners by 1⁄32"–1⁄16". If not, re-position the “registration handle” to correct it. With the jig set up correctly, route all the strap stock.
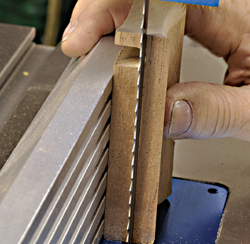
C. Strap Detail
Jig for shaping the top profile of the strap.
D. Push Blocks
Push block for routing the inside radius.
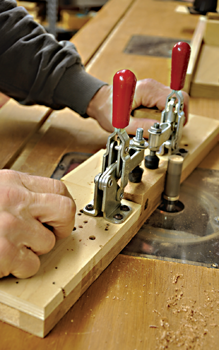
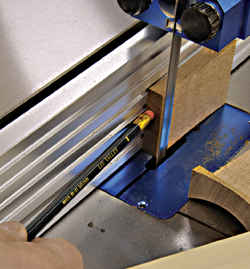
8. Setting the core box.
9. Make three passes to minimize blow-out.
The Inside Radius
When finished, the strap will wrap around and attach to the base. I normally apply a 3⁄16" radius to the top edge of my bases, which means the back inside corner of the strap must have a matching radius. If you choose to use a different radius for your base, change the following step accordingly.
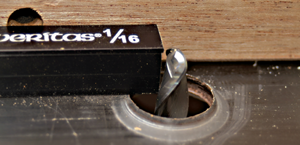
First, set up a 3⁄8" diameter (3⁄16" radius) core box bit in a router table to a height of 9⁄16" and 5⁄16" back from the fence. I like to use a spiral bit because it is less likely to blow out the backside of the route, but a straight fluted bit will work as well. To further minimize the chance of blow-out, the 9⁄16" depth should be taken in three incremental passes using push blocks similar to those shown in drawing D.
10. Routing for the backside radius.
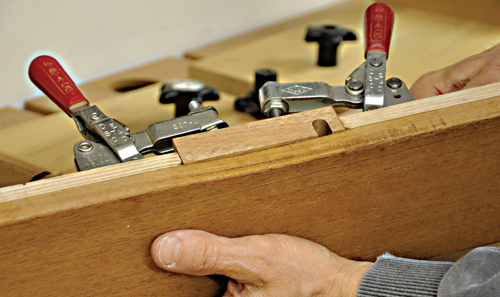
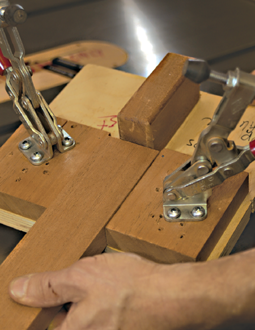
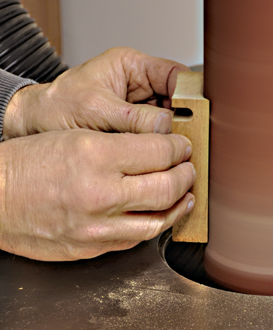
11. Set the stock in the jig and check the overhang, which should be about 1⁄32.
12. Machine one side, then flip the stock and machine the opposite side.
Now, mount two De-Sta-Co style toggle clamps on the side profile jig and as before check that the stock slightly overhangs the routing profile. If necessary, reposition the “center registration block.” To route, first clamp the stock in the jig and run one side, then flip the stock and run the opposite side.
13. Sand the top profile.
14. Sand the coved face.
15. Sand the top and bottom edges.
16. The top and bottom edges.
17. Trimming the blank.
18. Use a push block.
19. Use a small stick or pencil to finish the cut.
20. The completed backside.
Preliminary Sanding and Shaping
Take the opportunity now, before the stock is cut, to sand and lightly shape the piece. Set up a spindle sander with a four-inch (or the largest spindle available) spindle. Sand both the top profile and the coved face to take out the machine marks. With a pivoting motion lightly roll over the top edge as well as the bottom edge.
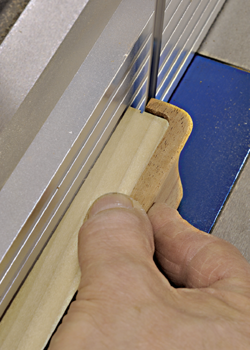
Band Saw to the Inside Radius
For the next step, place one of the blanks on the band saw with the backside (flat side) against the fence and visually line up the tangent point of the inside radius with the blade. Using a push block, run the stock with the flat side against the fence and the straight end first into the blade. Stop when the cut reaches the tangent point. Use a small stick or pencil to push the wasted material on through the saw. If the cut is not within about 1⁄64" of the tangent point, adjust the fence and try again with another piece of stock. Repeat this until the cut is satisfactory, and then run all the parts.
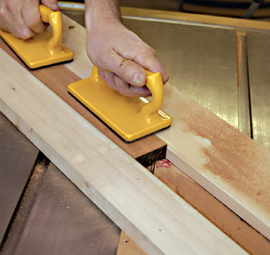
21. Sand the strap until the backside is smooth and even.
22. Smooth out all the sharp edges.
23. Soften the four corners.
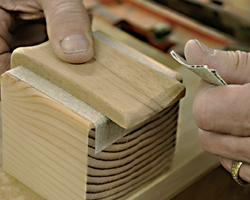
Sand the Backside to Perfect Shape
The backside of the strap can now be fine-tuned so it wraps around the base flawlessly. First find a piece of scrap that is about 6" wide and 8" long, or larger. Along one corner of the edge route a 1⁄8" radius. Starting with the radiused edge, wrap a lengthwise section, 6 inches or so, of the scrap piece with adhesive backed (PSA) 80-grit sandpaper. With the added thickness of the sandpaper, the 1⁄8" radius will now mimic closely the 3⁄16" radius on the actual base. Clamp the sandpapered scrap piece in a bench vise, then using a back and forth motion, sand the strap until the backside is smooth and even. When sanding the strap, be sure to position it so it rests consistently in the same plane as it is moved back and forth. In other words do not let it rock on its axis.
Blending to Shape
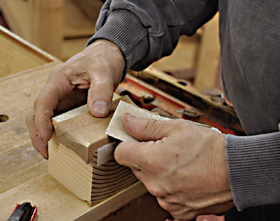
The basic shape of the strap now needs to be smoothed and blended to its final shape. Again, the end purpose here is to produce something that loosely mimics leather, a natural substance. Exact copies are neither the goal nor even desirable.
The general idea is to heavily soften all the sharp edges and corners. To start, cut a piece of scrap material into approximately a three-inch cube. Radius all the corners on one face and then attach it to another piece of scrap about three inches wide and nine inches long. Clamp the assembled fixture to the bench then stretch a piece of 80-grit PSA paper over the face of the cube. The fixture will be used to hold and steady the strap while it is being shaped. With 80-grit sandpaper held in your palm, and backed by your thumb, use a sort of flapping motion to smooth out all the sharp edges. Put a little extra emphasis on the softening at the four corners, but not so much as to lose the appearance of stretched leather. Once the shape is basically established, finish the sanding by touching up and blending where necessary. Continue sanding through the grits up to 220, and 320 on the end grain at the top corner.
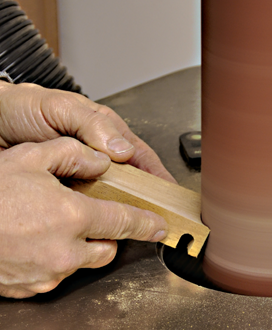
24. If it is more than 1⁄16", roughly trim the excess overhang on the band saw.
25. Sanding for a perfect fit.
Fitting the Strap to the Base
When I first made the strap detail, there were no instructions to help me. I had to make it up as I went along. This went fairly well until I needed to trim the overhang to precisely match the corresponding distance at the top of the base. Although near the floor, the detail is unusual and at some point it will, hopefully, capture the viewer’s attention, which in turn will likely lead to a closer inspection. The view will be from overhead, looking directly down on the point where the trimmed overhang meets with the case or pedestal. Even the slightest gap will be painfully conspicuous. A perfect fit is essential and at first this eluded me. The problem is, no matter how diligent and precise you are, you will never be able to consistently align the base with the case or pedestal so that it is the same, within a few thousands of an inch all around the entire perimeter. In other words, there is no uniformity to rely upon. Each individual strap placement must be custom fitted.
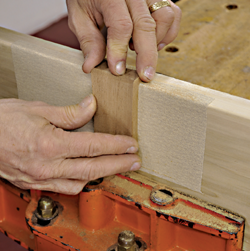
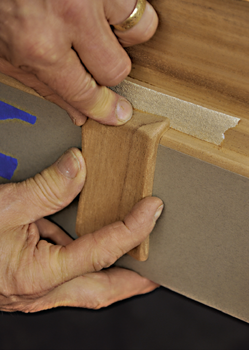
Like most woodworking problems, the seemingly difficult solution was surprisingly simple once it was solved. To precisely fit the strap, first estimate how much material needs to be trimmed. If it is more than 1⁄16 of an inch, back up the strap overhang with a push block to trim the excess off on the band saw. Next, apply a narrow strip of 80-grit PSA sandpaper to the strap location at the point on the case or pedestal where it meets with the overhang. Measure the thickness of the PSA sandpaper with Vernier calipers. Now find an equivalent thickness of paper, which usually equals about two thicknesses of card stock. Tape the measured paper to the base just below the PSA sandpaper. Next, with the strap in position, slide it back and forth letting the 80-grit sandpaper remove material from the overhang until it ceases to remove anything. The measured paper should have allowed the sandpaper to remove precisely the amount of material to form a perfect fit. If a small gap appears (too much material removed) you may have placed too much pressure on the topside of the strap. Even sanding pressure should be given on the overhang of the strap where it rests on the face of the base.
26. Position and glue the strap in place.
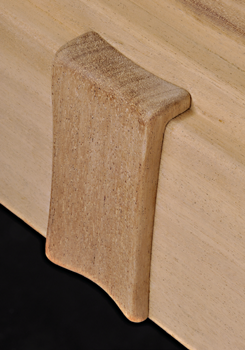
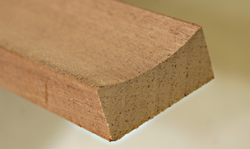
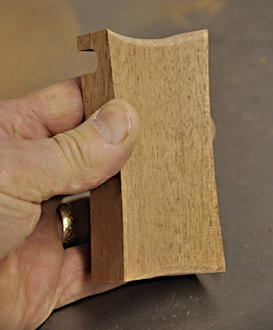
27. The finished strap detail.
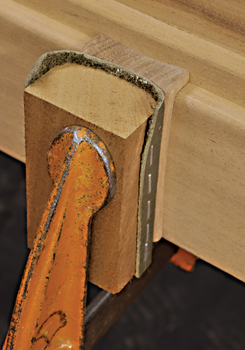
Attaching the Strap to the Base
First, make a clamping caul by tracing the coved shape of the strap on a block of wood roughly the same width and length as the strap itself. Cut the shape out on the band saw and smooth out any inconsistencies on an edge sander, and then attach a soft material, such as leather, to the face. Before clamping, the piece of furniture being worked on must be elevated with blocks so a clamp can reach in behind the base. Next using a small amount of glue, position the strap in place, and clamp it using the newly made caul.
The strap detail was an inspired feature. Although the Greenes never used it in same manner as I have, I believe it lends itself well to the style. As always, use it in context, but do not be afraid to experiment and have fun with it.