Fancy Ribbon Sash Baby Bibs
BY LAURA JENKINS THOMPSON
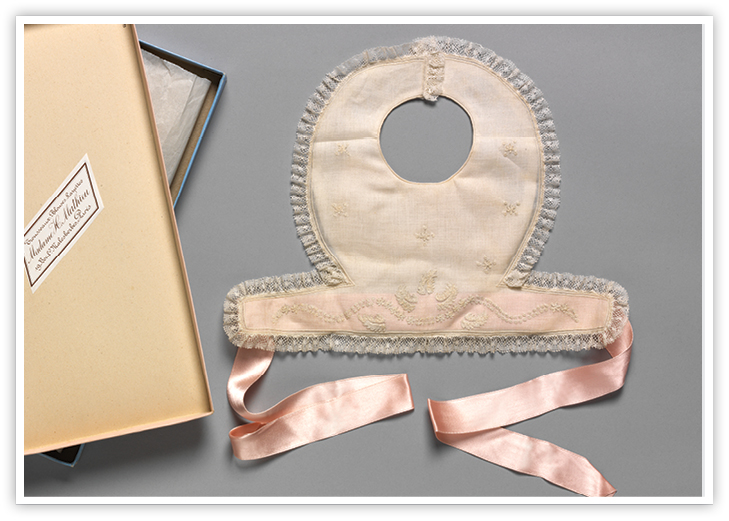
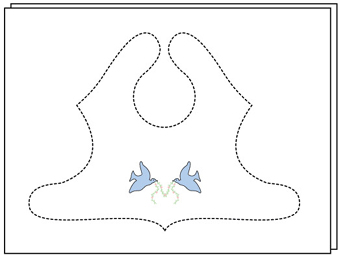
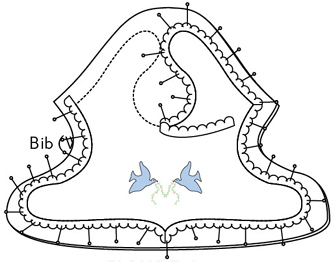
T HE CONTINENTAL BIB from the Victoria & Albert Museum of Childhood book is just the elegant style baby needs to protect a precious gown worn beneath. Based on an antique from her vintage collection, Laura Jenkins Thompson’s bib is similar in feel and hails from the same era. We’ve included both bib patterns in the downloadable pattern files along with a bonus butterfly machine shadow-stitch embroidery file, a hand-embroidery bluebird template, and the floral spray template from the Continental design. The instructions for making Laura’s bib, which is self-lined and finished around the edge with straight lace and pin stitching, and directions for stitching out the butterfly embroidery designs are detailed in this chapter.
What You’ll Need…
PATTERN
(included in the downloadable pattern files, available here)
“Fancy Ribbon Sash Bib”
“Continental Bib”
FABRIC & TRIM
1⁄3 yd (30.5 cm) of white handkerchief linen or batiste
2 yd (1.8 m) of 5⁄8" wide (1.5 cm) lace edging
EMBROIDERY
(included in the downloadable pattern files, available here)
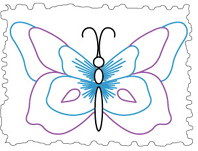
“Butterfly” shadow embroidery by machine design (sized for 4 × 4 hoop)
“Bluebird of Happiness” shadow embroidery handwork design
Floral spray handwork template
SUPPLIES
#120 jeans needle for pinstitching
#70 embroidery or Metafil needle
One 1⁄2"–5⁄8" (1.3–1.5 cm) pearl shank button
24" (61 cm) of 3⁄4" (2 cm) wide silk satin ribbon
DMC Six-strand embroidery floss (to hand-shadow-stitch bluebird)
#225 ultra v lt shell pink
#368 v lt pistachio green
#828 v lt blue
Robison-Anton Machine Embroidery Thread (to machine shadow-stitch butterfly)
#2206 baby blue
#2414 coral
#2234 glow
#2230 tamarack
#2434 tropic blue
White fine machine sewing thread
Water-soluble stabilizer
Temporary spray adhesive
Blue wash-away marking pen
Hand-embroidery hoop (optional)
What to Cut…
FROM MAIN FABRIC
Square for bib front large enough to hoop
How to Make It…
Machine Shadow Embroidery
- Spray starch and press fabric.
- Using a wash-away marking pen, trace the bib pattern to prepared fabric. Mark where you would like the butterfly centered on the bib. Do not cut out.
- Adhere two layers of water-soluble stabilizer together with temporary spray adhesive and hoop. Mark the hoop’s center on the top stabilizer layer with a wash-away marking pen.
- Wind the bobbin with white thread.
- Using a #70 needle, Robinson-Anton thread colors listed and stitching directly on the stabilizer, follow the embroidery sequence stitch order included in the downloadable pattern files (colors 1–4).
- When you reach the sequence that says “place and center fabric in hoop,” remove the hoop from the machine and apply temporary spray adhesive directly to the area to be stitched and lightly to the back of the square of fabric to which you’ve traced the bib. Match the center of the stitched-out design to the mark you made in Step 2 to center the butterfly on the bib. Smooth out the fabric but do not stretch.
- Return the hoop to the machine and continue the embroidery sequences to completion (FIG. 1).
- When the embroidery has been completed, remove your project from the hoop. Cut away the larger portions of the stabilizer from the embroidery on the back (FIG. 2). Soak and rinse the remaining stabilizer and center markings from the fabric. Let dry and press the finished embroidery on a folded towel. Retrace the bib pattern to the fabric square positioning the butterfly as desired.
NOTE: If you would prefer to hand-shadow-stitch the bluebird or hand-embroider the floral spray on your bib, trace the bib pattern to a fabric square large enough to secure in a hand-embroidery hoop. Trace off the chosen design and follow the embroidery or shadow-work instructions, if necessary, which can be found in the Techniques section.
Bib Construction
- Thread machine with white fine sewing thread.
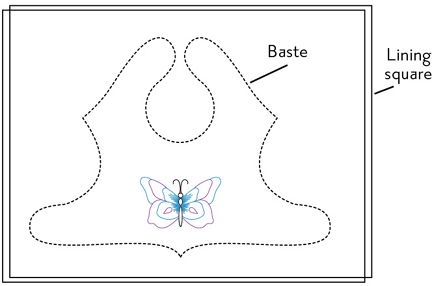
- Cut another square of linen the same size as the embroidered bib square to serve as the lining.
- Place lining square beneath machine embroidered bib front square with wrong sides together and right side of embroidery facing up. Baste together carefully along stitching lines using a straight stitch (FIG. 3). Cut out bib 3⁄4"–1" (2–2.5 cm) from stitching line.
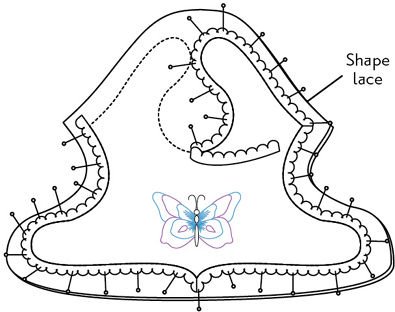
- On a shaping board or ironing board, shape lace around entire perimeter of bib starting at one shoulder corner. Pin along scalloped edge, while aligning lace heading along machine-stitched basting lines.
- Pull lace heading thread to ease lace into shape along curves; miter pointed edges (FIG. 4). Re-pin lace flat to fabric.
- Baste lace edging along header edge using a zigzag (L=1.5; W=1.5).
- Spray starch and press. Clip fabric under lace along curves and press fabric back away from lace on to bib.
- Change needle to a #100-120 jeans needle.
- Change machine setting to pinstitch with length and width (about L=2.0; W=2.5). (Test before actually stitching.) Mirror image if necessary so that the vertical stitch will be on the fabric and the horizontal stitches will be only on the lace.
- Pinstitch lace along entire bib edge.
- On wrong side of bib, trim away raw edges close to stitching line (FIG. 5).
- Position button and buttonhole. Stitch buttonhole in place by machine.
- Trim away excess stabilizer. Soak bib in clear water, let dry, and iron.
- Cut length of silk ribbon in half. Fold back raw edges and stitch in place on both sides by hand (FIG. 6).
- Stitch shank button in place by hand.