Chapter 14
‘We are going to charge the town’
September to December 1918
On 22 September 1918, General Allenby met with General Chauvel at Megiddo. Chauvel now had his eyes on Syria, in particular Damascus and then Aleppo, the loss of which would almost certainly end the war in the east for the Turks. Allenby’s first objectives were Haifa and Acre on the coast, while inland Chauvel would drive for the Sea of Galilee at Tiberias and Semakh with General Hodgson’s Australian Mounted Division.
Grant’s 4th Brigade advanced on Beisan, clearing it on 24 September. Grant was then ordered to attack Semakh, on the southern edge of the Sea of Galilee, on the next day. That night the 11th Light Horse crossed the Jordan River just south of the Sea of Galilee and moved off in squadron columns. When the light horsemen came under fire, Colonel John W Parsons called out ‘we are going to charge the town, form squadron line’. Two squadrons under Major Edward Costello and Major Jim Loynes charged through the darkness at the German machine guns. Albert Donovan was with Loynes’s A Squadron: ‘“Draw swords, charge!” came the command, and away we went, full gallop, straight for the line of spurting flame . . . braving bullets, earth pits and trip wires.’ Donovan watched as ‘the wild sons of the Australian bush . . . their swords gleaming in the moonlight, seemed to demoralise the Turks’. Donovan’s horse leapt across a machine-gun position as it opened fire at point-blank range.1
One position was overrun and then the railway buildings, at a distance of 1600 metres, were charged, but heavy machine-gun fire split the advance some 700 metres out. Loynes’s squadron went left towards the town while Costello swung his squadron to the right, heading for the railway station. His men came under heavy machine-gun fire and nearly 50 horses went down. The squadron dismounted about 200 metres away from the station and took what cover it could. Eight light horse machine guns were quickly directed at the windows of the station building to keep the German machine-gunners from using them.2

Two dead enemy machine-gunners and their well-used machine gun alongside the railway line at Semakh. Walter Smyth collection.

Map 9: Syria
Meanwhile, Loynes’s men dismounted by the Galilee shore some 150 metres from the station. Sheathing their swords and fixing their bayonets, they closed in on the station buildings under the cover of Major Harold Harper’s machine-gunners. Many of the light horsemen sheltered behind a wooden fence on top of a cutting about 20 metres from the station buildings.3 Bert Donovan was with a group of men sheltering behind the railway line firing at the station building when a hand came out the door holding a white handkerchief. When Captain Wesley Whitfield ordered a ceasefire and went forward to take the surrender, however, he was shot down. The enraged light horsemen then attacked. ‘Needless to say we took no prisoners from that joint,’ Donovan later noted.4 ‘This action sent our boys mad. They rushed the station building,’ Arthur Mills was told. He also offered a possible explanation. ‘Unfortunately one part of the garrison in the railway station put up the white flag without letting the others in the building know.’ When the light horsemen reached the building they ‘could not force the doors and the enemy threw bombs at them through the windows’, but once the doors were forced, ‘our men rushed in with the bayonette [sic] and that was the end of it’.5

Semakh railway station after the battle. ‘The enemy was inside a stout brick building with plenty of ammunition and good cover,’ Arthur Mills wrote of the two-storey building shown here. Reg Dixon collection.
One of the troopers later put the action to verse:
Victors and vanquished fight with eyes aflush,
While dawn breaks out with golden crimson flush,
Dust smeared and sweating, straining life for life,
Point blank the range, and hand to hand the strife.6
There were ‘dead men and horses just outside the station yard, closer up more dead men and in the building more dead men,’ Arthur Mills wrote. ‘The walls were scored with bullets and splashed with blood . . . blood from a wounded Turk upstairs was dripping through the ceiling into the room below.’7 During the fight for Semakh, three Australian officers had been killed alongside eleven of their men. Another 29 men were wounded. In comparison, 98 enemy troops were killed and 364 captured, including 150 Germans.
When General Chauvel told Allenby of the fall of Semakh, Allenby made it clear that Damascus was now the objective. Tiberias soon fell and the road to Damascus beckoned. ‘The road winds down the hills like a corkscrew,’ John Lowe wrote, ‘and we see Tiberias nestling on the shore of the Sea of Galilee at the foot of the hills.’8 Meanwhile, General Barrow was directed east to Deraa, where he could link up with Colonel Lawrence’s Arabs. If Deraa could be taken, the 20,000–30,000 men of the retreating Turkish 4th Army would be cut off. From Deraa, the plan was that Barrow would also drive north for Damascus. Once he took Deraa, however, Barrow did not have the troops to capture the Turkish force that was withdrawing to Damascus. The columns were well protected by German machine guns and disinclined to surrender while the Arabs were on their eastern flank, baying for blood.

The light horsemen enter Semakh. Walter Smyth collection.

German prisoners at Semakh. Walter Smyth collection.

The 3rd Brigade moves along the road past the Sea of Galilee. Ralph Kellett collection.
On the morning of 27 September, the Australian Mounted Division moved out—with Macarthur-Onslow’s 5th Brigade leading, followed by Wilson’s 3rd. At Benat Yakub, a span of the stone bridge across the Jordan River had been blown and, under fire from the opposite bank, Wilson looked north and south for a fording point. Colonel Bourchier’s 4th and Langley’s 14th Light Horse scrambled across a ford about 3 kilometres south of the bridge, but harsh ground delayed a flanking move until daylight. ‘Hats of light horsemen peeped above long dry grass at top of ridges,’ Henry Gullett wrote of the attack at Benat Yakub, ‘and in valleys behind were the horse holders restless for the gallop which so often followed dismounted fight.’9
Colonel Todd’s 10th Light Horse got across to the north, and Lieutenant Colonel Arch McLaurin’s 8th Light Horse followed as the 10th rolled up the enemy positions. Wilson’s brigade kept moving, and later in the day captured the Circassian village of Kuneitra, ‘a hungry little bluestone village’ on the main road to Damascus.10 Of the villagers, John Lowe wrote, ‘the men wear a large black fur headgear similar to a British soldier’s busby’.11
The 9th Light Horse led Wilson’s brigade up the road to Damascus until stopped by machine-gun fire south of Sasa. This forced the troopers from the 9th and 10th Light Horse to dismount and advance over the rough terrain on either side of the road. Meanwhile, the 8th Light Horse advanced close to the road in the darkness and all six enemy machine-guns were captured, their locations given away by their gun flashes. When the 1500 defenders pulled out in motor vehicles, Grant’s brigade took up the chase.
‘The men, unshaven and dusty, thin from the ordeal of the Jordan, and with eyes bloodshot from the lack of sleep, rode with the bursting excitement of a throng of schoolboys,’ Henry Gullett later wrote.12 General Hodgson could see the Turkish column to the east trying to beat him to Damascus. With support from the ever-reliable Notts battery, Bourchier led the 4th and 12th Light Horse against Kaukab while Macarthur-Onslow’s brigade crossed the Barbar River, which runs into Damascus from the south-west. The appearance of the French cavalry regiment moving around their right flank disturbed the German machine-gunners, and twelve machine guns were abandoned to Bourchier’s men.
The Barada River brought water from the mountains through the Barada Gorge to Damascus, but what brought life to the city only brought death to the Turkish Army retreating north-west through the gorge. ‘It was long and very narrow between very steep cliffs and only bare room for the stream, the railway line and a narrow road,’ Ron Kemp wrote of the gorge. ‘We had great difficulty in getting through the havoc and debris.’13 The light horsemen had earlier set up machine guns covering the gorge and shot up the retreating enemy columns. ‘Machine guns posted on the hills overlooking the gorge had the enemy at their mercy,’ Arthur Mills later wrote.14 The retreating Turks were cut off and some 4000 prisoners taken.
Damascus itself had few natural defences and could not long be held, despite significant numbers of Turkish troops in the city. Wilson decided that the chaotic state of those troops gave him the chance to march his light horsemen straight in. After some 400 years of Turkish rule, Damascus would fall to the Australians. In this they were helped by an act of treachery from the Turkish commander, Ali Riza, who met with General Barrow north of Deraa and handed over the plans for the city’s defence. Djemal Pasha left the city on the afternoon of 30 September, and that night John Lowe watched from the hills as the Turks fired an ammunition and petrol dump. ‘The explosions shake the ground like an earthquake and the flames make the night like day,’ he wrote.15

The destruction in the Barada Gorge. Royal New South Wales Lancers Memorial Museum collection.
At dawn on 1 October, Wilson’s 3rd Brigade left its bivouac on the southern outskirts of Damascus and made its way towards the city, aiming to move through quickly and take the Homs road north. The 10th Light Horse passed the Turkish hospital and barracks, and soon thereafter Emir Said surrendered the city. ‘We being the first troops to enter we got a great reception from the people who lined the streets and welcomed us with cheers and clapping,’ Ron Kemp wrote.16 Guided out of the city and onto the Homs road, Wilson was clear not long after 7 a.m. The Australians soon encountered German machine-gunners at Duma covering the retreating Turkish columns, but they rapidly broke through, taking 500 prisoners and 37 machine guns. Colonel Lawrence and his frenzied Arabs entered Damascus after Wilson had already left.

The light horsemen enter Damascus. Ralph Kellett collection.
Under Arab control, conditions in Damascus were soon chaotic. The population was starving, as were the many Turkish prisoners, but the Arabs were incapable of organising food supplies. Escorted by a squadron from the 2nd Light Horse, Chauvel rode through Damascus at noon on 2 October, followed by other units of his multinational force. Arthur Mills was there four days later. ‘All day long and at night too rifles are being discharged,’ he wrote. ‘Street fights between the [Hejaz] troops and the Druses take place daily.’ Conditions at the hospital were horrific. ‘The job of burying the dead from the Turkish hospital is a big one,’ Mills wrote on 11 October. ‘Hundreds die daily.’17 On 2 October, Arthur Mills noted, ‘Our chief trouble is not from the enemy but from “friendly natives” who loot everything they can get their hands on and snipe at our despatch riders and [motor transport] drivers.’ A captured sniper was executed in front of the local village sheiks as a warning. ‘Shooting this man may put an end to this,’ Mills wrote.18 The final light horse action of the campaign came on 2 October, when Major Tom Daly’s 9th Light Horse charged enemy positions and captured some 1500 troops, three field guns and 26 machine guns. Back in Egypt, Edwin Brown watched as ‘Long train loads of Turkish prisoners still continue to go through.’19

From 19 September to 2 October, the Australian Mounted Division had captured 31,355 prisoners, although more than 3000 of them would soon die of disease and starvation. The division lost only 21 men killed and 71 wounded,20 but as Arthur Mills wrote on 5 October, ‘the horses are looking played out and many of the men are sick but they must hang on a bit longer’.21
Chauvel now aimed for Aleppo, some 300 kilometres to the north. His 4th and 5th Cavalry Divisions headed in that direction while the Australian Mounted Division remained at Damascus. General Allenby already had his infantry moving up the coast with the aim of securing the port facilities at Beirut, from which Chauvel’s mounted troops could be better supplied. Preceded by armoured cars, General Macandrew’s 5th Cavalry Division moved through Rayak and Baalbek, then entered Homs on 15 October. But with the two cavalry divisions now drastically weakened by disease, Chauvel soon sent the Australian Mounted Division north to help. ‘The boys are having a pretty rough time of it,’ Arthur Mills wrote from hospital on 21 October. ‘Most of them are sick [and] the others have 10 and 12 horses to attend to besides cooking and looking after their sick mates.’22 Macandrew reached Aleppo on 22 October but did not have the troop strength to enter until 26 October. Captain Ernest James was with the armoured cars that first entered Aleppo. ‘We entered without opposition,’ he wrote. ‘As the last train of Turkish troops was steaming out at one end, the armoured cars and light car patrols were driving into the other.’23
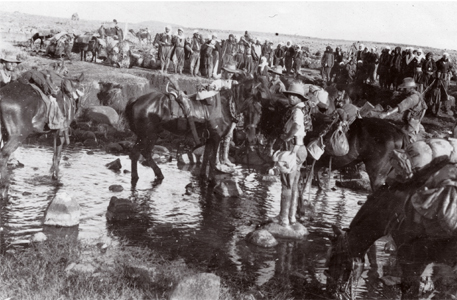
Water for the horses. Walter Smyth collection.
Thirteen kilometres north-west of Aleppo, 2500 Turks took up defensive positions, but as General Hodgson’s Australian Mounted Division prepared to confront them, the Turks made their smartest move of the campaign and signed an armistice. ‘I never saw such a change in men before,’ Ron Kemp wrote of the weary light horsemen. ‘They were like a lot of happy school boys, just let out of school.’24 The Australian Mounted Division then marched across the mountains from Homs to Tripoli, where the camp conditions were superior. Meanwhile, the Anzac Mounted Division, badly affected by disease during the advance from the Jordan Valley, pulled back to their camps in Palestine. The light horsemen who had enlisted in 1914 were already on their way home. On 12 November, John MacNamara wrote of how ‘all the 1914 men are down here now awaiting embarkation any day for Australia’.25 Most of them sailed on 15 November and were home for Christmas.
The Australians lost 1397 men during the Middle Eastern campaigns. Although casualties on this scale were suffered on a number of occasions by Australians in a single day of fighting on the Western Front, it does not diminish the sacrifice of these brave men, whom some derided as ‘cold-footed’ for not being involved in France and Belgium. Referring to the losses at Second Gaza, Ted Dengate wrote that ‘if they could have seen the Battlefield after the 19th April last year, where the Light Horse and Camel Corps went into action, they would have seen the bones of “cold footed light horsemen”, slowly bleaching in the hot summer sun’.26 There the bones still lie, buried alongside so many others from conflicts past and present across this harsh land.

The 6th Light Horse Regiment took 520 horses to war in 1914. The eighteen horses shown here were the only originals that remained at the end of the war. No horses returned to Australia after the war. The majority were either transferred to Indian mounted units or shot due to old age. Ralph Kellett collection.
The war was over but the killing was not. Surafend was a small town near Ludd around which the light horsemen had spent considerable time in camp. On 9 December, the Anzac Mounted Division was in camp there when an Arab thief shot a New Zealand soldier. The aggrieved New Zealanders, joined by some other troops, soon surrounded Surafend and demanded the murderer be handed over. The New Zealanders had previously had men killed by local Arabs, notably at Ain es Sir in March 1918. Their response on that occasion was immediate, but this time they waited throughout the day, giving the higher authorities the opportunity to take action. By nightfall no action had been taken so the troops, ‘angry and bitter beyond sound reasoning’, went into the village, evacuated the women and children and then burned down the village, killing many Arabs in the process. A nearby nomad camp was also razed.27 ‘They got all the women away and then burnt the village down,’ Robert Farnes wrote. ‘A lot of the Arabs were killed . . . there will be a terrible row about it.’28 ‘The Anzac Division are in great disgrace,’ Granville Ryrie added.29
When General Allenby visited the Anzac Division a week later and ‘spoke about the show on the Arab village he was very upset’, Robert Farnes observed. ‘He said he had been proud of us but was no longer.’30 The official historian had earlier noted that ‘British policy pandered foolishly’ to the Bedouin and that ‘Firm punishment for gross offences at the outset would have saved infinite trouble later on.’31 Now that the trouble had arrived, ‘the disciplinary machinery was as active as hitherto it had been tardy’ and the whole division was held responsible.32
Nonetheless, the British command was still happy to have the light horse units kill Arabs when it suited their cause, such as to put down a revolt against British rule in Egypt in March 1919. The twelve light horse regiments that were still in Egypt awaiting repatriation were used to help suppress a rebellion that had turned violent. ‘Christians in the country towns were attacked and murdered, particularly Armenians. British officers and tourists proceeding to Upper Egypt on holidays were attacked in the train,’ Brigadier General Lachlan Wilson wrote. ‘Several of them were murdered and so mutilated with sticks that their bodies could not be identified.’33 One of those casualties was Private Lawrence Redding, a South Australian serving with the Australian Army Medical Corps. He was aboard a Cairo-bound train that had left Luxor late on 17 March 1919 and was the object of boisterous stone-throwing Egyptian crowds as it passed through stations heading north. Next morning at Dairut, about 300 kilometres south of Cairo, the train was boarded by rioters and seven soldiers were murdered. Redding, who had been on a week’s leave in Luxor and was returning to Cairo, was among them.

The train carriage in which seven soldiers, including Private Lawrence Redding, were murdered by rioting Egyptians. Godfrey Burgess collection.
On that same day, at Minet el Qamh, north-east of Cairo near Zagazig, some 1000 stone-throwing rioters rushed a post held by Lieutenant Fred Macgregor and twenty men from the 10th Light Horse. The rioters got to within 10 metres of the post before Macgregor ordered his men to open fire; it was kill or be killed. The mob broke, leaving 39 rioters dead and another 25 wounded, but in the rush to flee, another 40 or so were drowned trying to cross a canal.34 There were other clashes over the next two weeks, but the uprising petered out in early April and by July 1919 the last light horse units had embarked for Australia.
For some who returned to Australia the sacrifice went on. George Mitchell was a highly decorated war hero from the Western Front who appreciated the comradeship that war had engendered among the men of the 1st AIF. When he attended a light horse Anzac Day reunion in April 1936, Mitchell’s eye was drawn to a group of light horsemen gathered around a man in a wheelchair. ‘This cheerful looking youngster was shot in the spine during the fight at Amman, when a whole squadron of the Sixth was laid out,’ Mitchell wrote.35 The disabled youngster was Bert Scurrah, the 6th Light Horse trooper who had been wounded at Amman and then carried out strapped across the back of a horse down the rugged mountain track to the Jordan Valley. That painful journey had been only the start of Bert Scurrah’s struggle, and he was between life and death for three months before being evacuated back to Australia in July 1918. Things got no easier for him back home; though he had left the war behind, the war would never leave him. Following that Anzac Day reunion in 1936, Bert Scurrah would only see another two of them. May we ever remember his ilk, that tough breed of Australian horseman who had ridden into history.

Light Horse veterans at Randwick stables in Sydney on Anzac Day 1982. Left to right: Max Nichols, Eric Turner, Ted Pavel (7th Light Horse), Stan McColl, Jack Bowden (9th Light Horse), Duncan McKenzie (1st Remount Unit) and Jack Pollock (1st Light Horse). Tenterfield Museum collection.