Bake
BREADS, CAKES, COOKIES, TARTS AND TREATS
BAKING TIPS
Baking successfully is an immensely satisfying enterprise; it’s also healthier and cheaper than store-bought goodies. To maximise your chances of success, adhere to a few simple guidelines:
- Use fresh ingredients. Check sell-by dates and discard stale flour, nuts, baking powder, etc.
- Weight measurements vary considerably for dry ingredients, such as nuts, sugar, flour, etc. Invest in a small digital scale and eliminate the guesswork. As baking is an exact science the dry ingredients in this chapter are measured in grams.
- Have your oven thermostat checked annually and set to the correct temperature.
- Humidity and altitude affect results: make the necessary allowances.
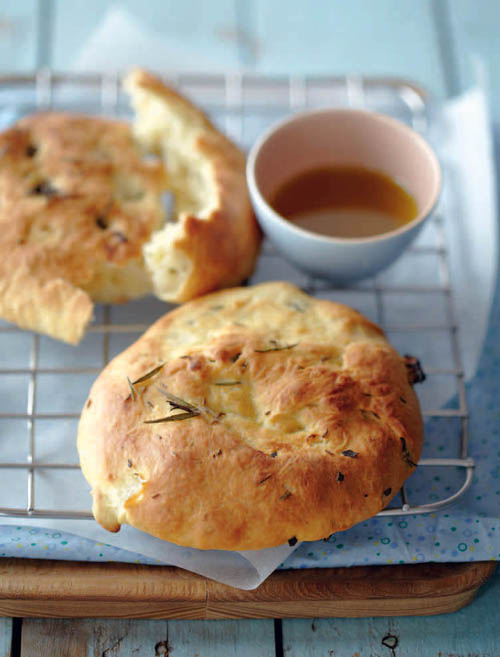
ROSEMARY FLATBREAD WITH APPLE AND SPICE
This is child’s play to make. My children love to make it with me. – Sonia
- 1 x 10 g sachet instant dried yeast
- 450 g organic white cake flour
- 1⁄4 cup (60 ml) skim milk powder
- 1 t (5 ml) salt
- 2 T (30 ml) very finely chopped fresh rosemary leaves
- 1⁄2 t (2.5 ml) ground cumin
- 2 T (30 ml) olive oil, plus extra for brushing
- 1 cup (250 ml) lukewarm water
- 1 t (5 ml) honey
- 1⁄4 cup (60 ml) chopped dried apple
- 1 T (15 ml) whole fresh rosemary leaves
- 2 t (10 ml) cumin seeds
- Stir together the yeast, flour, milk powder, salt, chopped rosemary and cumin until the rosemary is evenly dispersed.
- In a separate large warmed bowl, stir together the olive oil, water and honey until the honey dissolves.
- Gradually add the flour, stirring with a wooden spoon to form a soft sticky dough – you may not need all the flour.
- Turn out the dough onto a lightly floured surface, scatter over the apple and knead for 8–10 minutes until the dough becomes puffy, elastic and warm under your hands. Alternatively, put the dough in your blender with a dough-hook and knead on 3 for 10 minutes. The dough is ready for first rising when it stretches when you pull at it and doesn’t break. Another way of checking whether it has been kneaded enough is forming it into a ball and prodding it with a finger – if the indent made slowly rises out again, it’s ready for the first rise. (Don’t overknead either!)
- Place the dough in a lightly oiled, warm bowl, roll to cover with a thin film of oil, then cover the bowl with clingfilm and a kitchen towel and leave in a draught-free place to rise until doubled in size: 30–60 minutes depending on the ambient temperature.
- Preheat the oven to 200 °C. Oil two baking trays.
- Punch back the dough and knead lightly for 2 minutes.
- Form into four balls and press each between your palms to 1.5 cm thickness. Place on the baking trays, cover lightly with clingfilm and leave to rise for a further 30 minutes until doubled in size.
- Brush the flatbreads with extra olive oil, scatter over the rosemary leaves and cumin seeds and bake for 15 minutes until golden brown and the base sounds hollow when tapped.
- Cool on wire racks and serve warm or at room temperature.
Makes 4
TOMATO AND BASIL FLATBREADS
This bread, known as fougasse, is a classic speciality of Provençal France. This particular recipe is based on one by Ursula Ferrigno in The Family Bread Book. Substitute the cherry tomatoes and basil for other herbs, cheese, roast peppers, roast courgettes, crispy roast potato cubes or pitted olives – anything you fancy. This is wonderful as part of a brunch antipasto platter.
- 1 T (15 ml) extra-virgin olive oil, plus extra for drizzling
- 290 ml lukewarm water
- 450 g organic white bread flour
- 1 t (5 ml) sea-salt flakes, plus extra for sprinkling
- 1 x 10 g sachet instant dried yeast or 20 g fresh yeast (if using fresh yeast, let it sponge with 2 T (30 ml) of the warm water)
- 2 cups (500 ml) cherry tomatoes, roughly chopped
- handful of fresh basil leaves, torn in strips
- Stir the olive oil into the warm water.
- Put the flour, salt and instant yeast (if used) in a bowl and stir to mix thoroughly. Make a well in the middle.
- If using fresh yeast, add the creamed yeast to the dry ingredients now. Gradually add enough of the water and oil mixture, raking the flour into the centre of the well with your fingers, to make a dough. Mix with your hands until the dough pulls away from the sides of the bowl. Keep kneading until your hands come clean.
- Turn the dough out onto a lightly floured surface and knead for 10 minutes until smooth and elastic, then form into a ball. Put the dough into a warmed, lightly oiled bowl, cover with clingfilm and a kitchen towel and leave in a draught-free place to rise until doubled in size – about 1 hour depending on the ambient temperature.
- Knock back the dough (punch it to let the air out), turn out on a lightly floured surface and knead for 5 minutes.
- Divide the dough in half and flatten each piece with the palms of your hands. Scatter the tomatoes and basil evenly over both pieces of dough, then roll them up like sausages.
- Flatten each sausage and cut in half so you have four even-sized pieces. Use a sharp knife to make four deep diagonal cuts in each loaf. Prise the cuts apart with your fingers to achieve a ladder-like effect.
- Place the loaves on oiled baking trays and cover with lightly oiled clingfilm. Leave to rise for 1 hour until doubled in size.
- Preheat the oven to 220 °C.
- Just before baking, drizzle some olive oil over each loaf, sprinkle over a little salt and bake for 25–30 minutes until golden brown and crusty.
Makes 4
BASIC WHITE BREAD
The secret to baking really good bread at home is straightforward – use top-quality, stoneground bread flour, organic if possible. Instant or fresh yeast can be used, and a really good knead is required to develop the gluten in the dough for a light and airy texture. Use your blender and its dough-hook for easy kneading if your arms don’t feel up to it! Nothing beats the smell of homemade bread baking in the oven. Fresh yeast is easily obtained from any supermarket bakery – about 20 g is enough for 750 g flour.
- 1 x 10 g sachet instant dried yeast or 15 g fresh yeast
- 700 g unbleached, stoneground strong white bread flour
- 1⁄2 T (7.5 ml) salt
- 2 T (30 ml) wheatgerm
- 1 t (5 ml) honey
- 425 ml tepid water
- If using instant yeast, mix with the flour, salt and wheatgerm before adding the liquid. If using fresh yeast, dissolve the honey in the warm water and crumble in the yeast. Leave to sponge for about 5 minutes.
- Put the flour, salt, wheatgerm and instant yeast (if used) in a large, slightly warmed bowl. Make a well in the centre. Dissolve the honey in the water and slowly add this to the dry ingredients, all the while raking flour into the well with your fingers. Keep mixing until the dough forms a sticky ball. Turn out on a lightly floured surface.
- Work the ball of dough with your hands until your hands come clean – the ball of dough should be firm but not hard. If it feels soft and sticky, add a little extra flour and work into the dough, about 1 T (15 ml) at a time. If the dough feels dry and crumbly, add a little extra water, 1 T (15ml) at a time.
- Keep kneading with the base of your hand, pushing the dough away from you and pulling it back to form a ball. Do this for 10–15 minutes until the dough starts feeling puffy and warm under your hands. The dough should stretch when it’s ready, and not break.
- Lightly oil a large bowl and rest the ball of dough in it, rubbing a little oil all over the ball as well. Cover with clingfilm and a couple of clean, dry cloths and set aside to rise until the dough has doubled in size – 1–11⁄2 hours or overnight in the refrigerator.
- Punch down the risen dough and reform into a ball. Knead again for another minute or so, form into a loaf and place on a greased baking tray or in a loaf tin lightly sprayed with non-stick cooking spray. Cover again with clingfilm or slip the entire tray or tin inside a large plastic bag, blowing air in to inflate it slightly and tying it off tightly. Let the dough rise once more, for about 45 minutes to 1 hour, until doubled in size.
- Preheat the oven to 220 °C.
- Uncover the loaf, slash the top deeply a few times with a razor or very sharp knife and bake in the centre of the oven for 35–40 minutes until the base sounds hollow when rapped with your knuckles. If it doesn’t, return to the oven for another 5 minutes before testing again. Leave to cool completely on a wire rack before slicing.
COOK’S TIPS:
You can make bread rolls and breadsticks out of this dough too – form into the desired shapes after the first rising and leave on baking trays to rise under clingfilm. Brush with sweetened milk and sprinkle with poppy or sesame seeds before baking for 25–30 minutes.
Flavour your basic white loaf by adding 1 cup (250 ml) grated strong cheese and 1 T (15 ml) chopped fresh sage or 1⁄2 cup (125 ml) chopped sundried tomatoes and 1⁄2 cup (125 ml) pitted chopped black olives. Experiment with your own choice of flavours, remembering that less is more!
Makes 1 large loaf
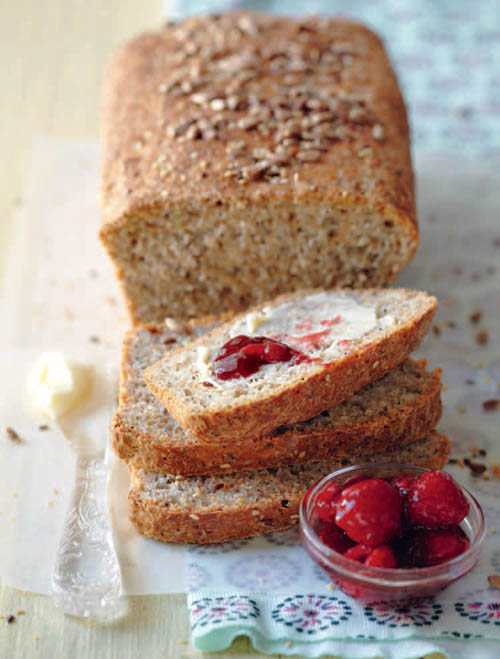
EASY SEED LOAF
Seed loaf is a Cape classic and a typical spoonbread that requires no kneading – the ingredients are stirred together into a soft batter. If you can stir, you can make it! It lasts well, makes gorgeous toast and freezes beautifully for up to a month. Try freezing individual slices that you can pop into the toaster from frozen.
- 300 g Nutty Wheat flour
- 280 g stoneground brown bread flour
- 140 g stoneground white bread flour
- 15 g instant dried yeast
- 1⁄2 T (7.5 ml) salt
- 1 T (15 ml) each of sesame, poppy, sunflower and linseeds, plus extra for sprinkling
- 1 t (5 ml) honey
- 3 cups (750 ml) warm water (slightly warmer than tepid as brown flour absorbs a lot of heat)
- 1 T (15 ml) oil
- Mix the flours, yeast, salt and seeds in a large bowl.
- Dissolve the honey in the warm water and add the oil.
- Pour the wet mixture into the flour and stir very well with a wooden spoon until thoroughly mixed. It should be the consistency of thick porridge.
- Spoon into two 500 ml-capacity greased loaf tins, sprinkle over the extra seeds and cover with clingfilm and a few clean, dry cloths. Set aside to rise for about 1 hour until doubled in size.
- Preheat the oven to 200 °C.
- Once risen, bake the loaves in the centre of the oven for 30 minutes, then turn down the heat to 180 °C without opening the oven door. (This prevents the seeds scorching.)
- Bake for a further 30 minutes until golden brown and the bases sound hollow when rapped with your knuckles.
- Turn the loaves out onto a wire rack and leave to cool completely before slicing. Wrap tightly in clingfilm to store, as this will keep the crusts nice and tender.
Makes 2 medium loaves
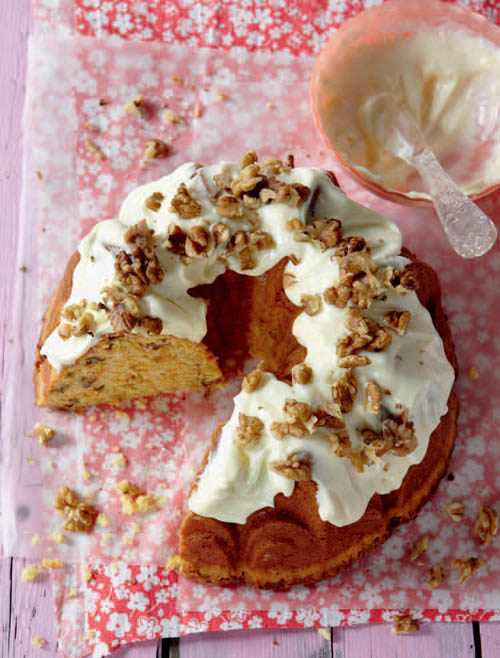
ADÈLÉ’S CARROT AND WALNUT CAKE
My mom (Jade’s grandma) Adèlé loved baking and her carrot cake was legendary. It’s rich with spice, imbued with aromatic citrus zest and crowned with a glorious, tangy cream cheese and walnut icing. This recipe is a family heirloom. Since the batter is very dense, it’s customary to use a tube cake tin for this, as the tube conducts the heat to the centre of the cake, which would otherwise remain raw while the exterior reached doneness. The cake will keep for several days in an airtight container. – Sonia
- 375 g unsifted cake flour
- 2 t (10 ml) baking powder
- 1 t (5 ml) bicarbonate of soda
- 1 t (5 ml) ground cinnamon
- 1⁄2 t (2.5 ml) salt
- 2 T (30 ml) grated lemon zest
- 2 T (30 ml) grated orange zest
- 2 T (30 ml) lemon juice
- 2 T (30 ml) orange juice
- 250 g butter, softened
- 225 g light brown sugar
- 250 g white granulated sugar
- 4 large eggs
- 500 g peeled and coarsely grated carrots
- 125 g coarsely chopped walnuts
- 155 g sultanas or seedless raisins (optional)
- CREAM CHEESE ICING
- 1 x 230 g tub low-fat cream cheese
- 1 T (15 ml) lemon juice
- 1 t (5 ml) grated lemon zest
- 225 g icing sugar, sifted
- 155 g coarsely chopped walnuts
- Sift the flour, baking powder, bicarbonate of soda, cinnamon and salt into a large bowl.
- Mix the citrus zest and juices and set aside.
- Preheat the oven to 180 °C. Lightly spray a tube cake tin with non-stick cooking spray.
- Beat the butter and both sugars at high speed in your blender for 4–5 minutes until light and fluffy. Stop beating every now and then to scrape the butter off the sides and bottom to reincorporate into the mixture.
- Keeping the blender running, add the eggs one by one, making sure each egg is thoroughly incorporated into the batter before adding the next. Keep beating for a further 3 or so minutes until the mixture is light and thick.
- Turn the blender to low speed and add the flour mixture (in fourths) alternately with the citrus juice (in thirds), beginning and ending with flour. Beat lightly for 1 minute until smooth.
- Use a metal spoon to fold in the carrots, walnuts and sultanas or raisins if using. Stir lightly to blend very well, dispersing the additions evenly throughout the batter.
- Spoon the batter into the cake tin and bake in the centre of the oven for about 1 hour, or until a metal skewer inserted in the centre of the cake comes out clean. (Start testing after 50 minutes.) Remove from the oven and cool in the tin on a wire rack for 20 minutes. Then slide a very sharp knife around the edges to loosen the cake. Turn out of the tin onto a wire rack and cool completely.
- Once the cake is cooled, you may ice it. Beat all the ingredients for the icing except the nuts until very smooth. Spread over the top of the cake, scatter over the chopped walnuts and serve.
Serves 12
SOUR CREAM CHEESECAKE WITH RASPBERRY GLAZE
This is the cheesecake of my childhood memories – my mother Adèlé famously made it with a pineapple glaze, although any berry or fruit glaze would work. Served naked with its sour cream topping it’s equally glorious. Make it the day before you intend serving it. – Sonia

- 200 g Tennis biscuits
- 125 g unsalted butter, melted
- 3 x 230 g tubs low-fat cream cheese
- 1 T (15 ml) finely grated lemon zest
- 1 t (5 ml) vanilla essence
- 225 g castor sugar
- 3 large eggs
- 3⁄4 cup (180 ml) sour cream or crème fraîche
- 1⁄4 cup (60 ml) lemon juice
- RASPBERRY GLAZE
- 500 g frozen raspberries or any other berries, thawed
- 2 T (30 ml) castor sugar
- 4 t (20 ml) cornflour
- 3 T (45 ml) raspberry jam
- Process the biscuits into fine crumbs in a food processor. Add the melted butter through the chute while the motor is running and blend to combine. Press the crust over the base and against the sides of a 24 cm springform cake tin. Refrigerate for 30 minutes to firm it up.
- Preheat the oven to 180 °C and remove the crust from the fridge.
- Beat the cream cheese with the lemon zest, vanilla essence and castor sugar in a large bowl until very smooth. Add the eggs one at a time, blend until thoroughly incorporated and then add the sour cream or crème fraîche and lemon juice. Beat until smooth.
- Pour the filling onto the prepared crust, smooth over and bake in the middle of the oven on a baking tray for about 11⁄2 hours until set. The top should not be browned – cover it with inverted foil if you are worried this might happen.
- Remove from the oven and cool completely before refrigerating overnight.
- About 3 hours before serving, make the glaze by draining the thawed berries, reserving any juice. Add sufficient water to the juice to make 1 cup (250 ml) liquid.
- Combine the castor sugar, cornflour and juice in a saucepan and stir over medium heat until the sugar has completely dissolved. Bring to the boil and boil for 1 minute.
- Remove from the heat and cool for 45 seconds before stirring in the berries and jam. Cool completely before pouring over the cheesecake. Return to the fridge for 1 hour to set.
Serves 12
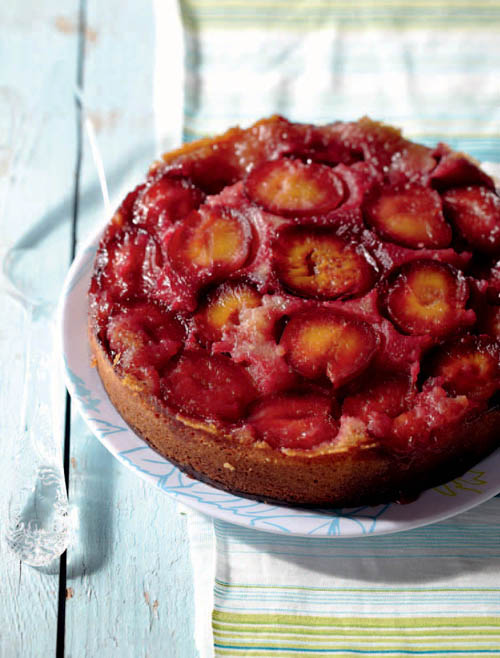
PLUM AND ALMOND UPSIDE-DOWN CAKE
Fruit and pastry, or cake, make a magical combination. This beauty makes the most of sweetly tart, lushly scented summer plums. Serve with a spiced syrup made from boiling 1 cup sugar, 2 cups water, 3 star anise, a 5 cm stick cinnamon and 3 cardamom pods together until syrupy. Some cold thick cream won’t go amiss here either.
- 50 g unsalted butter
- 115 g light brown sugar
- 10 small plums, washed, halved and pitted
- 185 g cold butter, cubed
- 225 g light brown sugar
- 3 large eggs
- 50 g ground almonds
- 62.5 g cake flour
- 62.5 g self-raising flour
- Preheat the oven to 180 °C. Lightly grease a 22 cm springform cake tin and line with lightly greased baking paper.
- Melt the first amount of butter with the first amount of sugar in a saucepan over medium heat, stirring until the sugar dissolves. Pour into the base of the cake tin.
- Arrange the plums cut-side down on the melted butter in the tin.
- Beat the cold butter and second amount of sugar in a large bowl for 4–5 minutes until light and fluffy. Add one egg at a time, making sure each egg is thoroughly incorporated before adding the next.
- Add the ground almonds and both kinds of flour, and beat for another minute.
- Spread the batter over the plums in the tin and bake in the centre of the oven for 1 hour, or until a skewer inserted in the middle of the cake comes out clean. (Start testing at 50 minutes.) Remove from the oven and cool for 5 minutes before loosening the sides of the tin. Place a plate upside down on top of the tin and swiftly turn right side up. Carefully remove the base of the tin from the top of the cake. Serve warm or cool.
Serves 10
GLUTEN-FREE CHOCOLATE SPONGE CAKE
This yields a lovely moist cake that will last, un-iced, for several days in an airtight container. If you are wheat sensitive, make sure to use maize cornflour like Maizena, not a wheat-based one.
- 280 g castor sugar
- 50 g cocoa powder
- 110 g cornflour
- 125 g soy flour
- 1 t (5 ml) bicarbonate of soda
- 1 cup (250 ml) soy milk
- 1 T (15 ml) white vinegar
- 150 g unsalted butter, melted
- 1 very ripe banana, well mashed
- 2 large eggs, beaten
- 2 T (30 ml) smooth strawberry jam
- 1 cup (250 ml) non-dairy cream, whipped thick
- Preheat the oven to 180 °C. Spray two 22 cm springform cake tins with non-stick cooking spray and line the bases with baking paper.
- Sift the dry ingredients into the bowl of your blender.
- Stir the soy milk, vinegar and butter together and blend with the dry ingredients at low speed for 1 minute.
- Add the mashed banana, eggs and jam and beat at medium speed for 3 minutes until very smooth.
- Pour the batter into the cake tins and bake for 30 minutes or until a skewer inserted into the middle of the cakes comes out clean. Remove and cool for 5 minutes before loosening the sides with a spatula. Unclamp the sides and stand the cakes on wire racks to cool completely before sandwiching together with whipped ‘cream’.
Serves 8–10
LOW-FAT EGG- AND DAIRY-FREE FRUITCAKE
Yes, you may sin with a clear conscience. This cake contains no eggs or dairy and no added fat or sugar, and is a breeze to make.
- 225 g pitted dates
- 300 ml water
- 175 g wholewheat flour
- 1 T (15 ml) carob powder
- 1 T (15 ml) baking powder
- 1 t (5 ml) mixed spice
- grated zest of 1 medium orange
- 25 g ground almonds
- 175 g seedless raisins
- 100 g sultanas
- 100 g currants
- 50 g mixed candied peel, finely chopped
- 1⁄4 cup (60 ml) water
- handful of flaked almonds
- Preheat the oven to 160 °C. Lightly grease a 1 kg loaf tin and line with baking paper.
- Warm the dates and the first amount of water in a saucepan over medium heat until softened. Remove from the heat and blend the dates with the water to a smooth purée.
- Mix the remaining ingredients except the almonds with the puréed dates in a large bowl.
- Spoon into the prepared loaf tin and smooth the top with the back of a moistened spoon.
- Scatter over the flaked almonds and bake in the middle of the oven for 11⁄2 hours, or until a skewer inserted in the middle of the cake comes out clean. Protect the top of the cake with inverted foil to prevent it over-browning.
- Remove from the oven and cool for 5 minutes before loosening the sides with a spatula and inverting the cake onto a wire rack. Allow to cool completely before wrapping. It will last up to three months in a cool dry place. You may drizzle a little brandy over it once a week to moisten and flavour it.
Makes 1 loaf
OLD-FASHIONED SOETKOEKIES
Sweetly nostalgic and redolent with heady spices, these cookies were synonymous with Christmas holidays during my childhood. Today my children relish both baking and eating them. The cookies taste better after maturing in the cake tin for a week or so since they are quite hard when freshly baked. They make the perfect midnight snack with a glass of ice-cold milk. – Sonia
- 350 g cold unsalted butter
- 180 g treacle sugar
- 450 g cake flour
- 4 t (20 ml) ground ginger
- 4 t (20 ml) ground cinnamon
- 2 t (10 ml) ground cloves
- 2 t (10 ml) allspice
- grated zest of 1 medium orange
- Beat the butter and sugar in a mixer at medium speed for about 4 minutes until fluffy and light.
- Mix the flour with the spices and grated zest and add to the creamed butter. Beat at medium speed for about 3 minutes until thoroughly blended.
- Remove the dough from the mixer and knead on a lightly floured surface for about 4 minutes. Shape into a ball, wrap tightly in clingfilm and refrigerate for at least 30 minutes. (The dough lasts up to 2 weeks in the fridge.)
- Preheat the oven to 190 °C. Remove the dough from the fridge 15 minutes before you want to start rolling. Line three baking trays with baking paper.
- Roll out the dough on a lightly floured surface to about 0.5 cm thick and cut out shapes using cookie cutters. Place on the baking trays and bake for 15 minutes until light golden brown. Remove and cool on wire racks before storing in airtight containers for up to 1 week.
Makes 24–30
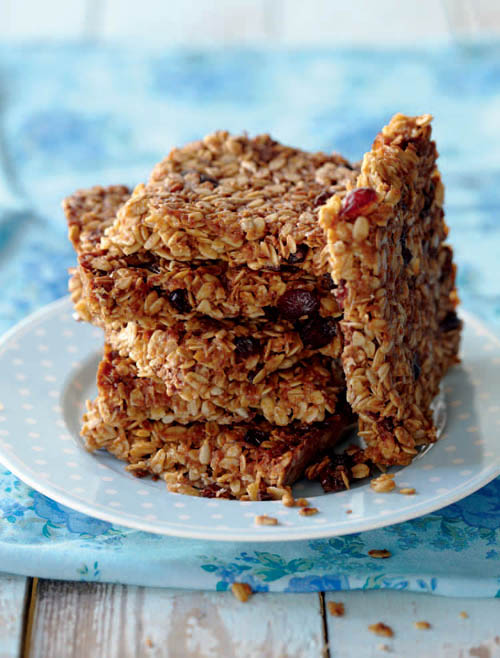
CHOC-CHIP, CRANBERRY, COCONUT AND OAT BARS
Use an equal amount of soft dried apricots if you can’t find dried cranberries, and use dark or white chocolate chips, or both!
- 1 T (15 ml) organic honey
- 115 g firmly packed soft brown sugar
- 125 g butter
- 1⁄2 t (2.5 ml) ground cinnamon
- 75 g dried cranberries
- 1⁄4 cup (60 ml) sunflower seeds
- 1⁄4 cup (60 ml) desiccated coconut
- 2 T (30 ml) chocolate chips
- 200 g rolled oats
- Preheat the oven to 160 °C. Spray a 20 x 30 cm cake tin with non-stick cooking spray and line the base and sides with two rectangles of baking paper, leaving several centimetres spare above the edges of the tin.
- Melt the honey, sugar and butter in a saucepan over medium heat and set aside.
- Mix all the remaining ingredients, pour in the melted butter and stir until well blended.
- Press evenly into the prepared cake tin and bake in the middle of the oven for 30 minutes until light golden brown. Remove and cool for 3 minutes before cutting into squares. Cool completely before clasping the paper sticking out over the edges and lifting to get the squares out of the tin.
Makes 8–10
GREEK WALNUT SHORTBREAD
Crescent-shaped and heavily dusted with icing sugar, kourabiedes are served during Easter and other festive holidays and are delicious with strong Turkish coffee. You can shape the dough into balls or fingers if you prefer.

- 250 g unsalted butter
- 110 g icing sugar, sifted twice, plus extra for dusting
- 1 t (5 ml) vanilla essence
- 1 large egg yolk
- 300 g cake flour, sifted
- 1⁄2 t (2.5 ml) baking powder
- 90 g walnuts, very finely chopped
- 2 T (30 ml) orange flower water
- Preheat the oven to 160 °C. Line three baking trays with baking paper.
- Beat the butter in a large mixing bowl until pale and creamy, then add the icing sugar, vanilla essence and egg yolk. Beat until thoroughly incorporated.
- Add the flour, baking powder and walnuts and stir very well to combine.
- Pinch off tablespoonfuls of the dough and roll into little sausage shapes, which you bend into crescents. Place them 3 cm apart on the lined baking trays and bake for 15–20 minutes until light golden brown.
- Remove from the oven and sprinkle the cookies with orange flower water. Dust with icing sugar while still warm and allow to cool completely. Once cool, dust with more icing sugar – it should literally puff up in little clouds as you bite into the cookies! Store in an airtight container for up to 2 weeks.
Makes 24–26
OATCAKES
These are great with cheese and are a tasty treat for those with wheat intolerance.
- 175 g medium oatmeal (available at health stores), plus extra for rolling
- 1⁄2 t (2.5 ml) salt
- 15 g unsalted butter
- 150 ml boiling water
- Mix the oatmeal, salt, butter and boiling water in a bowl. Stir until you’ve got a sticky dough.
- Let the dough stand for 5 minutes for the oatmeal to absorb the water and expand, which will make the dough pliable.
- Preheat the oven to 180 °C. Grease two baking trays.
- Turn out the dough onto a surface lightly dusted with oatmeal and roll out very thinly, about 2 mm. Cut out circles with cookie cutters and lift onto the baking trays with an egglifter. Bake for 15–20 minutes until dry but not browned. Remove and cool to crisp up before storing in an airtight container.
Makes 20–24
ROUGH PUFF PASTRY
Store-bought frozen pastry is a boon when you’re busy, but a good homemade rough puff pastry can’t be beaten for a hearty pie.
- 200 g cake flour
- 1⁄4 t (1 ml) salt
- 75 g very cold white margarine, diced
- 75 g very cold unsalted butter, diced
- 1 t (5 ml) lemon juice
- 100 ml cold water
- Stir the flour and salt into a large mixing bowl.
- Swiftly blend the cold margarine and butter into the flour with a knife, using a cutting motion. Don’t break up the lumps.
- Stir in the lemon juice and cold water and quickly mix to a stiff dough – on no account let the fats warm or melt.
- Roll out the dough on a lightly floured surface to form a rectangle about 30 x 10 cm. Place it with the longest side running horizontally on the surface in front of you.
- Fold the top third of the pastry down in a strip towards the middle and the bottom third up. Pinch the edges to close them.
- Turn the pastry 90 degrees and start rolling into a rectangle as before. Repeat steps 4 and 5 altogether four times, letting the pastry rest for 15 minutes between each repetition of folding and rolling so it doesn’t get too warm.
- Wrap in clingfilm and rest in the fridge at least 30 minutes before using.
Makes about 400 g
DINE’S FOOLPROOF PANCAKE BATTER
There is simply no better pancake recipe than this. I share it with you with kind permission from my friend, Dine van Zyl, writer and author of several cookbooks on traditional South African cooking, or boerekos. – Sonia
- 125 g cake flour
- 1 t (5 ml) baking powder
- 1⁄2 t (2.5 ml) salt
- 2 large eggs
- 2 cups (500 ml) milk
- 1 T (15 ml) melted butter
- sunflower oil
- Beat the flour, baking powder, salt, eggs and milk in a food processor or blender for 8 minutes at high speed.
- Let the batter stand for no less than 30 minutes and up to 1 day in the fridge.
- Just before cooking, whisk in the melted butter.
- Pour just enough oil into a medium non-stick frying pan or crêpe pan to coat the bottom. Heat over medium heat until the oil starts to move and then pour out into a heat-proof bowl.
- Using a 1⁄4 cup (60 ml) measure, pour batter into the pan, swirling the pan around to coat the entire bottom. Cook until small holes appear in the surface, loosen the edges with a spatula and immediately flick the pancake over to cook for about 35 seconds on the other side.
- Slide out onto a warmed plate and continue until all the batter is used up. Remember to re-oil the pan every fourth pancake or so, wiping away excess oil with absorbent paper towel.
COOK’S TIP:
For some reason, the first pancake is usually a flop, which makes the household pets very happy! You’ll attain best results by reserving a pan solely for the purpose of making pancakes, since the tiniest scratch on the surface will make the pancakes stick. Practice makes perfect.
Makes 12–18