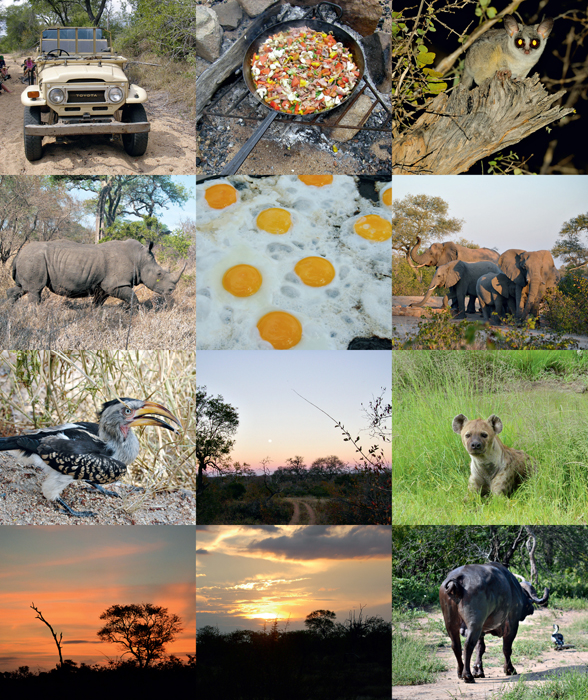
THE  BUSHVELD

OUPA SE KIND
When I was a little girl, my dad owned an orange and blue aeroplane. It always reminded me of the old South African flag and I thought to myself he must be very patriotic. Every winter holiday we would decamp to the farm in the Timbavati Game Reserve. My father would load the plane to the hilt with enough food and ammunition for three weeks in the bush. Bags of oranges, loaves of bread and enough rifles to kick-start a rebellion were stuffed between the seats. Our domestic worker Paullina was strapped in behind the pilot’s seat, with my brother on her lap; I was seated next to her and, in the very back, was Hendry the African grey and Tootie Poo our Siamese cat.
My favourite part of the journey was the landing. My father always had to do several flybys to scare the animals from the runway. Once safely on the ground, the adventure truly began. The tyres were covered with wet hessian sacks to prevent the hyenas chewing on them, which was a frequent occurrence.
Shortly after our arrival, my father would gather a hunting party and we would all set off in search of something large. My heart always sank at the prospect because everyone had to chip in and help butcher the meat and make biltong regardless of your age. Inevitably Graham and I had to stand on the crumbling old cement table in the vleiskamer (meat room) and hang the wet biltong onto the rows and rows of wire crisscrossing the room. A thankless job. The vinegar brine always dripped down onto our jerseys and we stank like biltong for the rest of the holiday.
There was no electricity or real kitchen to speak of and all meals were taken in the open boma around a fire. The area was never fenced and predators regularly walked into camp. We even had a hyena visit us in the house once. No one was that worried about it, except my mother, because it chewed up her Tupperware lid and ate the lentil salad she had made for my birthday!
Moira’s all-bran rusks
My mother Moira always had a barrel of these homemade rusks on the farm. The old kitchen had no electricity and the bucket stood near the door. First one up in the morning would grab the barrel and head straight for the stoep. There we would all congregate and drink coffee from tea cups.

- 1 kg (4 C) self-raising flour, sifted
- 10 ml (2 tsp) baking powder
- 5 ml (1 tsp) salt
- 500 ml (2 C) brown sugar
- 500 ml (2 C) rolled oats
- 750 ml (3 C) All-Bran Flakes®
- 500 ml (2 C) sunflower seeds
- 60 ml (1⁄4 C) linseed
- 500 g salted butter
- 500 ml (2 C) buttermilk
- 2 large eggs, lightly beaten
- Preheat the oven to 180 °C. Grease a large roasting pan.
- Mix all the dry ingredients together in a large mixing bowl. Melt the butter, then stir in the buttermilk and eggs and pour the mixture over the dry ingredients. Use your hands to mix well.
- Spoon the mixture into the prepared roasting pan and spread evenly. Bake for 1 hour or until golden brown and a skewer inserted into the centre comes out clean. Remove from the oven, leave to cool for 10 minutes in the roasting pan, and then turn out onto a wire rack. Leave to cool for a further 10–12 minutes.
- Use a serrated or bread knife to cut the rusks into squares. Place the rusks onto baking trays and return to the oven at 90 °C for 3–4 hours or until completely dry. Keep checking from time to time to see if they are done. Once cool, store rusks in airtight containers.
Makes 35–40 rusks.
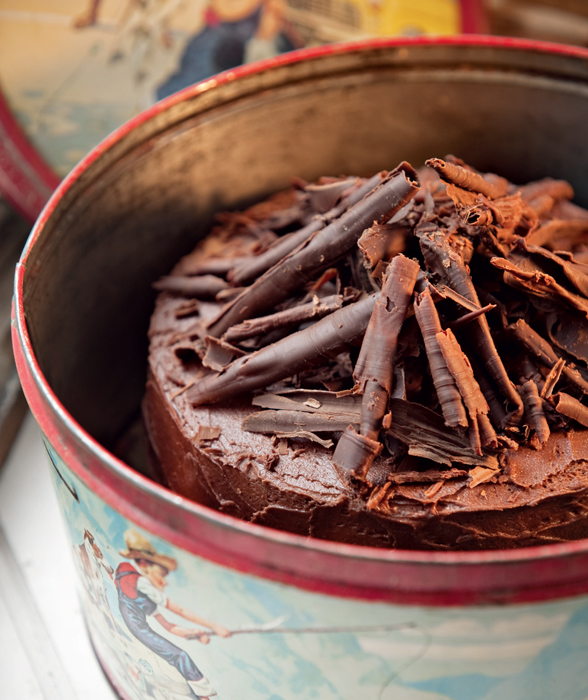
Engela’s moist chocolate cake
My grandfather was one of the most eccentric people you could ever wish to meet. A highly educated man with a doctorate in languages, he was a legend in Parys. Once a month he travelled to his farm in the Timbavati Game Reserve to write and my grandmother diligently baked her famous chocolate cake for the trip. The cake, which always lasted him two weeks, was placed in an old tin on the front seat of his Chev truck. Occasionally he would receive a visitor. Tea would be made from second-hand teabags – yet no one complained – and later they would just stare in disbelief as he calmly cut away the mould and served his favourite cake. He thought nothing of this, and those who knew him well loved him for his eccentricity and total devotion to a life less ordinary. I guess I have his genes.
- 500 ml (2 C) cake flour
- 5 ml (1 tsp) baking powder
- 10 ml (2 tsp) bicarbonate of soda
- 2.5 ml (1⁄2 tsp) salt
- 190 ml (3⁄4 C) cocoa powder
- 500 ml (2 C) white sugar
- 225 ml (3⁄4 C + 21⁄2 Tbsp) oil
- 225 ml (3⁄4 C + 21⁄2 Tbsp) strong hot coffee
- 225 ml (3⁄4 C + 21⁄2 Tbsp) buttermilk
- 2 extra-large eggs, lightly beaten
- 5 ml (1 tsp) vanilla essence
Chocolate icing
- 60 g dark chocolate, at least
- 70% cocoa
- 125 g butter, at room temperature
- 750 ml (3 C) sifted icing sugar
- 30 ml (2 Tbsp) milk
- 10 ml (2 tsp) vanilla essence
- 1 ml (1⁄4 tsp) salt
- Preheat the oven to 180 °C. Grease two 20 cm diameter cake tins.
- To make the cakes, sift all the dry ingredients together in a mixing bowl. Make a well in the centre and add the oil, hot coffee and buttermilk. Stir well to combine, ensuring there are no lumps, but do not over beat. Add the eggs and vanilla essence and combine well. Pour the mixture into the prepared cake tins and bake for 35–40 minutes or until a skewer inserted in the centre comes out clean.
- Remove from oven and leave to cool for 10 minutes in the tins. Later, remove the cakes from tins and cool completely on a wire rack.
- To make the icing, melt the chocolate in a double boiler or heatproof bowl suspended over a saucepan of simmering water. Alternatively, melt it in the microwave oven. Stir until smooth and then leave to cool slightly. Add the butter, icing sugar, milk, vanilla essence and salt. Beat until smooth and well combined. Sandwich the cakes with a thin layer of icing, and then ice the rest of the cake.
Makes 1 double-layer cake.
TIPS
• When beating eggs into a creamed mixture, add 15 ml (1 Tbsp) of the sifted flour with the addition of each egg. This will prevent the mixture from separating or curdling.
• When melting chocolate for domestic baking, always do so in a double boiler or small heatproof bowl firmly placed over a saucepan of simmering water. Do not allow any water or steam to come into contact with the chocolate or it will harden and you won’t be able to use it, no matter what you add.
• Chocolate can be melted in a microwave oven on high for 1 minute. Stir frequently to prevent burning.
• Always ensure the eggs are at room temperature before you start baking.
• This cake can be baked in a ring or Bundt pan. Add 10–15 minutes to the cooking time, baking it for 40–55 minutes depending on the depth of the pan. Double-check and return to the oven if a skewer inserted in the centre does not come out clean.
Chicken coq au vin potjie (aka Bromvoël bredie)
I have been cooking this dish on the farm every year for my birthday for as long as I can remember. My brother casually strolled past the large simmering pot one afternoon and commented, ‘Hey Sissie, how’s that bromvoël bredie of yours?’ I guess the term stuck and now it has become a Barnes’ classic. The trick was always to get this dish cooked before we set off for the last game drive of the day. We never really knew how many sundowners it would take to see the sun actually set and my mother would have to step in often and cook at the last minute or no one would eat.

- 90 ml (6 Tbsp) olive oil
- 2 large onions, sliced
- 500 g button mushrooms, left whole
- 1 × 250 g packet streaky bacon, roughly chopped
- 5 cloves garlic, crushed
- 1.5–2 kg chicken thighs
- 250 ml (1 C) cake flour, to dust
- 1 litre (4 C) red wine
- 750 ml (3 C) chicken stock, homemade is best
- 1 × 70 g can tomato paste
- 5 dried bay leaves
- 2 sprigs fresh rosemary or parsley
- 15 ml (1 Tbsp) brandy
- Heat half the oil in a large cast-iron pot over a fire or on top of the stove, whichever you prefer. Sauté the onions, mushrooms, bacon and garlic until lightly browned. Remove from the pot and set aside. Give the pot a good wipe and add the remaining oil. Dust the chicken with flour and give it a good shake to remove any excess. Cook the chicken in batches in the hot oil, for 5–6 minutes or until well browned. Return the onion mixture to the pot, add the remaining ingredients, except brandy, and cook, covered, for 1–11⁄2 hours. It’s ready when the meat is tender and almost falling off the bones.
- Remove the chicken from the sauce, set aside and keep warm. Increase the heat, add the brandy and boil the sauce rapidly for 15 minutes or until reduced and thickened. Return the chicken to the pot and serve with rice.
Serves 8–10.
TIPS
• I have modified this recipe from the classic version. However, if you prefer or have the patience to peel 20 baby onions, then use them instead of sliced onion.
• This recipe makes a good-sized pot. Use box wine if you have to – sometimes it is the only wine we have on the farm – as long as it is dry. Although with so much red wine in this dish you really should be using the very best. If you can’t find fresh chicken, then 1.5 kg of frozen chicken pieces will do. Leftover chicken can be flaked and turned into a pie.
• Cook this dish either over the fire in a large cast-iron pot or on top of the stove. If you cook over the fire, the chicken may take a little longer, just keep checking. If you feel the fire is not hot enough to reduce the sauce, then simply thicken it with a little flour or cornflour and water paste. It won’t look the same but it will taste fine.
AWB braai sauce
There are literally hundreds of different versions of this famous braai marinade in circulation, but none more aptly named than this one. Neighbours of ours, who were staunch AWB supporters, made this sauce in bulk and always sent over a couple of bottles. Eventually it became a Barnes’ staple, although the recipe has evolved somewhat over the years.
- 375 ml (11⁄2 C) brown vinegar
- 250 ml (1 C) water
- 125 ml (1⁄2 C) salt
- 2 large onions, grated
- 8 cloves garlic, thinly sliced
- 60 ml (1⁄4 C) brown sugar
- 25 ml (11⁄2 Tbsp) Worcestershire sauce
- 5 ml (1 tsp) sweet or hot smoked Spanish paprika
- 5 ml (1 tsp) white pepper
- 10 dried cloves
- 8 black peppercorns
- 3 star anise
- 1 stick cinnamon
- 5 ml (1 tsp) cayenne pepper
- 3 dried bay leaves, crumbled
- Combine the vinegar and water in a medium-sized saucepan, and then stir in the salt. Bring to the boil while stirring continuously to dissolve the salt. Remove from the heat and add all the remaining ingredients. Transfer to a large bowl or jar. Cover with plastic wrap or a lid and leave to stand for at least 10 days in a cool, dark place. Strain to remove onion and spices, and then pour into a sterilised 1-litre glass bottle.
- Use as a basting sauce for all braaied meats or lamb on the spit. Shake well before basting. Do not salt the meat if you are using this marinade. Store in the fridge for up to three months.
Makes 1 litre.
TIPS
• Make ahead of time and store for weeks in a cool, dark place. The best way to go about this is to clean out and sterilise a 1-litre glass cold drink bottle or an old brandy bottle. Use a skewer or any sharp object and punch holes into the cap. If preferred, you can slice the onions and try to push them through the neck of the bottle. This way you don’t need to strain the marinade after it has matured.
• This sauce has a lovely smoky flavour and goes particularly well with lamb.
• Double up on ingredients for very large quantities. Never spice the meat before grilling as this sauce provides enough salt. Taste before serving and adjust seasoning if necessary.
Roast leg of warthog with dried pears, hanepoot and cinnamon
A trip to the Bushveld is synonymous with a joint of venison on the kettle braai. My father would usually shoot something very large for the pot early on in the trip and we would cook venison and make biltong for weeks after that.
- 1.5–2 kg leg of venison on the bone, preferably warthog
- 1 × 250 g packet rindless streaky bacon, roughly chopped
- 10 cloves garlic, peeled
- 10 dried cloves
- 1 × 500 g carton buttermilk
- 500 g dried pears
- 500 ml (2 C) pear juice
- 500 ml (2 C) sweet white dessert wine, such as hanepoot or white muscadel
- 5 ml (1 tsp) dried crushed chillies
- 60 ml (1⁄4 C) olive oil
- 2 onions, sliced
- extra 5 cloves garlic, peeled
- 5 ml (1 tsp) ground cinnamon
- 1 large stick cinnamon
- 2 star anise
- 2 fresh bay leaves
- 500 ml (2 C) warm beef stock
- Salt and freshly ground
- black pepper
- Make small incisions in the venison and stuff each hole with a piece of fatty bacon and 1 clove garlic. Push them in as deep as you can. Insert a dried clove into the same hole. Reserve the remaining bacon. Transfer the venison to a large glass dish or plastic container. Add the buttermilk. Cover with plastic wrap and leave to marinate in the fridge for 24–48 hours, turning the meat every now and again so that the whole joint is well covered. For a larger joint, use 2 × 500 g cartons buttermilk, ensuring the whole joint is covered at all times with the buttermilk.
- Soak the pears in the pear juice, 250 ml (1 C) of the sweet wine and the chillies for 3 hours or preferably overnight while you marinate the joint. Heat the olive oil in a pan and sauté the onions, garlic and reserved bacon until soft. Add the ground cinnamon, cinnamon stick, star anise, bay leaves, and the soaked pears with the juice. Stir in the warm beef stock. Cook for a few minutes to combine and reduce the liquid slightly. Transfer the venison to a large roasting pan and season very well. Add the pear mixture.
- Preheat the oven to 160 °C. Cover the roasting pan with a layer of baking paper (this is done to trap the moisture) followed by two layers of foil. Secure tightly. Place the roasting pan on the bottom shelf of the oven for 2–21⁄2 hours or until the meat is soft. The juices should run clear when a sharp knife is inserted into the centre of the meat near the bone; if the juices are still pink, cook for a few minutes longer. Remove from oven and uncover. Turn the heat up to 190 °C, move the roasting pan to the middle of the oven and continue to roast for a further 15–20 minutes or until the meat is nicely browned on top. Remove from the oven and leave to rest for 10 minutes before carving.
- Add the remaining wine to the juices in the pan, adjust seasoning and cook rapidly on top of the stove in the roasting dish, scraping together all the onions and pears until thickened. Discard the whole spices. It’s best to carve up the joint completely and then spoon lashings of the sauce over the meat. Serve with roast potatoes.
Serves 8–10.
TIPS
• If you don’t have access to warthog, use any other medium-sized joint of venison. Warthog is a slightly sweeter meat than venison from an antelope, and is comparable to pork, only drier. It’s my favourite venison.
• Any of the fortified wines, such as muscadel, hanepoot or port, are excellent with venison. Game meat has no fat and can be very dry if cooked incorrectly, so it should be larded with bacon or pork fat before cooking. It is highly recommended to marinate all venison in buttermilk for 24–48 hours before proceeding with cooking.
• Average roasting time for venison is 15–20 minutes per 500 g, and 2 hours of slow cooking for 1–1.5 kg of meat.
• The best fruit juice for this recipe is the long-life variety that comes in a carton. Apple or mango can be substituted for pear.
• Raw venison can be frozen for 12 months.
Venison and honey boerewors
My father has been making venison boerewors according to our family’s recipe for almost 40 years.

SMALLER QUANTITIES
15 kg venison, 7 kg pork, 625 ml (21⁄2 C) spice, 7.5 ml (11⁄2 tsp) salt, 2 × 500 g jars honey.
7 kg venison, 3.5 kg pork, 500 ml (2 C) spice, 5 ml (1 tsp) salt, 11⁄2 × 500 g jars honey.
5 kg venison, 2.5 kg pork, 375 ml (11⁄2 C) spice, 5 ml (1 tsp) salt, 1 × 500 g jar honey.
- 30 kg venison, off the bone
- 15 kg pork, with some fat, off the bone
- 5 × 250 ml (5 C) Crown National droëwors or boerewors spice
- 15 ml (1 Tbsp) salt
- 3 × 500 g jars honey
- 1 pack of sausage casings
- Cut up the meat into more manageable pieces. Mix the meat with the spice, salt and honey in a large plastic container or an enamel basin. Leave to marinate in the fridge for 24–48 hours.
- Mince the meat using an electric mincer and stuff the boerewors using sausage casings and the attachment on your food processor. Alternatively, ask your butcher to do it for you.
- Freeze the boerewors in 1 kg individual freezer bags so it’s easy to store.
Makes 45 kg.
TIPS
• Halve or quarter the recipe to make less at home. Go easy on the salt, even if it acts as a preservative. Crown National make the best spice preparations for large quantities. Visit them online, www.crownnational.co.za, or ask your local butcher for the ingredients. When pressed for time, I usually cut up and marinate the meat at home and then ask my butcher to process the boerewors. I use droëwors spice for this recipe and not boerewors spice, but you can use either.
• Honey is really the secret here: I use one jar for 5 kg of venison, 2 jars for 15 kg and 3 jars or more for 30 kg. Venison boerewors can be frozen for three to six months.
Bean salad
When we lived on the farm my mother had to be creative with her salads as popping into town to purchase anything remotely unusual was never an option. The drive took an hour. During the summer months, Sundays were often spent next to the Vaal River, where we would braai and water-ski while my mother devoured the Sunday Times and my father cooked lamb chops by the bakkie load. Nearby stood an enormous willow tree with a crumbling concrete table underneath. Numerous Tupperware containers occupied the shade and one of them inevitably contained this bean salad. This is my version of the old Free State classic. We never travelled to the Bushveld without it as this salad could keep for a week.
- 80 ml (1⁄3 C) apple cider vinegar
- Juice of 1 lemon
- 250 ml (1 C) extra virgin olive oil
- 5 ml (1 tsp) mustard powder
- 10 ml (2 tsp) dried oregano
- 5 ml (1 tsp) brown sugar
- 2.5 ml (1⁄2 tsp) sweet smoked Spanish paprika
- 1 × 400 g can red kidney beans, drained
- 1 × 400 g can butter beans, drained
- 1 × 400 g can mixed beans, drained
- 5 cloves garlic, crushed
- 1 small onion, finely chopped
- 60 ml (1⁄4 C) finely chopped fresh coriander
- 25 ml (11⁄2 Tbsp) chopped fresh mint
- Salt and freshly ground black pepper to taste
- Mix everything together and season well. Store in an airtight container in the fridge for up to a week.
VARIATION
- Add cubes of feta cheese just before serving.
Serves 6–8.
African roasted veg and couscous salad
What is couscous? It is North African semolina made from durum wheat and is actually a cousin to pasta. Nowadays the couscous available in supermarkets has been pre-steamed, making it easy to just rehydrate at a ratio of 1:1.5, using either chicken stock or hot water. The rehydration is instant and the couscous needs no further cooking. Simply fluff the mixture with a fork and add a dollop of butter to prevent the grains from sticking together. If in doubt, always follow the instructions on the packet. Use only 500 ml (2 C) dried couscous for this recipe.
- 500 ml (2 C) dried couscous
- 60 ml (1⁄4 C) good quality extra virgin olive oil
- 1 large red onion, roughly chopped
- 5 cloves garlic, crushed
- 1 × 500 g packet assorted root vegetables, off the shelf
- 10 ml (2 tsp) dried
- crushed chillies
- 5 ml (1 tsp) salt
- 10 ml (2 tsp) freshly ground
- black pepper
- 60 ml (1⁄4 C) harissa paste
- 25 ml (11⁄2 Tbsp) chopped fresh
- Italian parsley
- extra 60 ml (1⁄4 C) extra virgin olive oil
- 45 ml (3 Tbsp) red wine vinegar
- 15 ml (1 Tbsp) honey
- 125 ml (1⁄2 C) flaked almonds
- 1 small tub Danish-style
- feta cheese
- 250 ml (1 C) fresh
- coriander leaves
- Preheat the oven to 180 °C.
- Rehydrate the couscous according to the instructions on the box and set aside. Pour the olive oil into a large roasting tray. Add the onion, garlic, vegetables, chillies, seasoning, harissa paste and parsley. Use your hands to combine everything until well coated.
- Place the roasting tray in the oven and roast for 45–50 minutes or until the vegetables are soft. Keep checking to see if they are okay and give the dish a good shake every now and again.
- Remove from the oven, stir in the extra olive oil, red wine vinegar and honey. Scrape the juices together and ensure everything is well combined. Leave to cool for about 10 minutes. Taste and adjust seasoning if needed. Add this mixture to the couscous.
- Combine well to ensure everything is coated. Transfer to a serving platter. Sprinkle flaked almonds and feta over and top with fresh coriander. Keeps well in a large plastic container with a tight-fitting lid for up to three days in the fridge.
Serves 10–12.
TIPS
• The spicy North African harissa paste that we have come to love in South Africa can be purchased at any large supermarket or speciality food store. Once opened, it will keep for weeks in the fridge. Use it as a rub for chicken or potatoes, mixed with a little olive oil, salt and thyme.
• Rehydrated couscous freezes well.
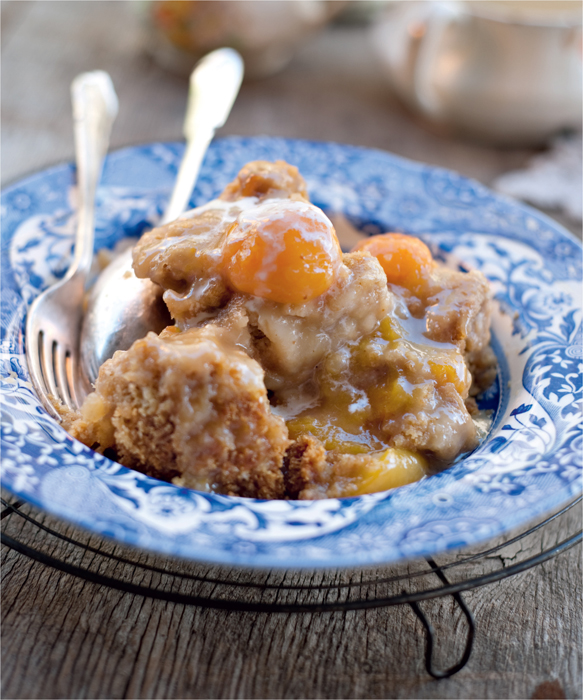
Apricot pot pudding
No trip to the farm was ever complete without apricot pot pudding. I regularly made this dessert in a very large cast-iron pot over a couple of hardekool (leadwood) coals in the boma. This classic South African favourite is well known, but one year the local petrol station was handing out free recipe booklets and it was amongst those now worn pages that this pudding first entered our lives.
Syrup
- 1 × 410 g can apricots in syrup
- 160 ml (2⁄3 C) sugar
- 2.5 ml (1⁄2 tsp) salt
- 5 ml (1 tsp) ground ginger
Batter
- 125 g butter, at room temperature
- 125 ml (1⁄2 C) smooth apricot jam
- 10 ml (2 tsp) bicarbonate of soda
- 375 ml (11⁄2 C) sifted cake flour
- 2.5 ml (1⁄2 tsp) salt
- To make the syrup, drain the apricots and reserve the syrup. Add enough water to the syrup to make up 500 ml (2 C) of liquid. Place the syrup, sugar, salt and ginger in a heavy-bottomed saucepan over medium heat or in a cast-iron pot over the fire and bring to the boil, stirring from time to time until all the sugar has dissolved. Add the apricots. Leave to simmer while you prepare the batter.
- To make the batter, melt the butter in a separate saucepan. Remove from heat and stir in the apricot jam and bicarbonate of soda. Add the flour and salt, and stir until the mixture no longer sticks to the sides of the saucepan. Drop tablespoons of the batter into the boiling syrup. Cover tightly with a lid, reduce the heat and simmer with the lid on for 10 minutes.
- Serve warm with custard or cream.
Serves 6–8.