
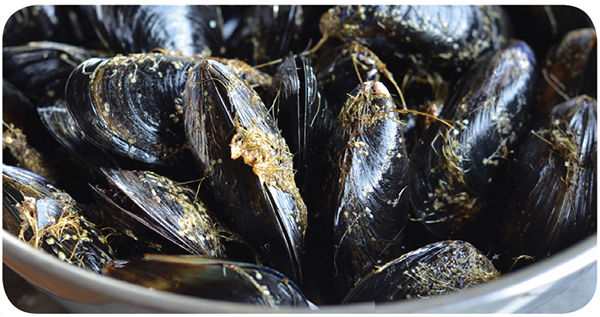
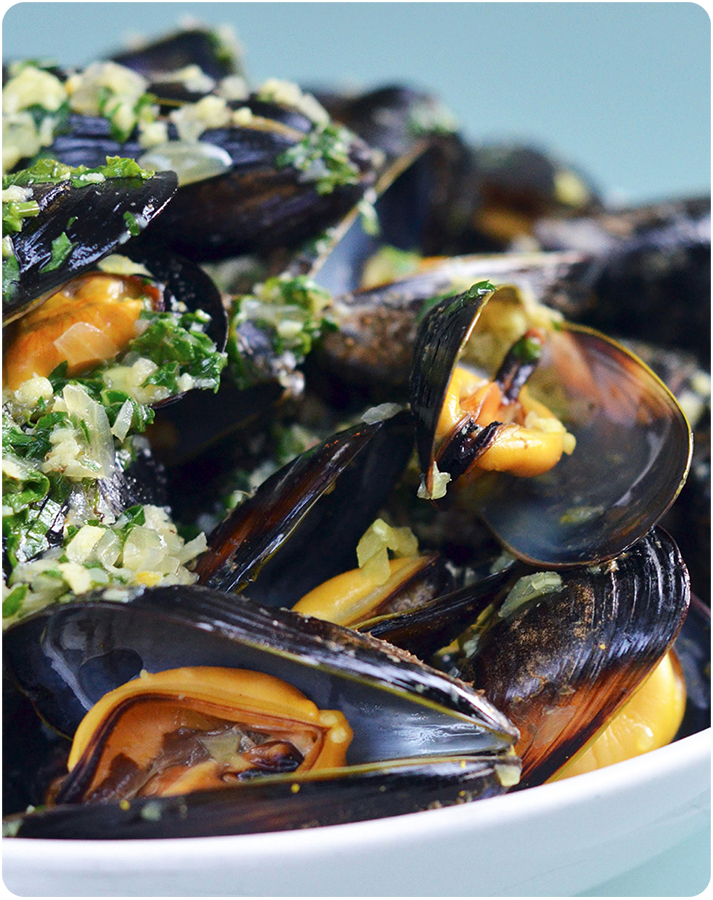
I’m no hunter, but I’m proud to say I’ve killed my own food. That’s right: I’ve sent scores of bivalves to their quick, painless, and delicious deaths, and I honestly couldn’t be happier with the results. Mussels are inexpensive, sustainable, and yummy. Pair ’em with a big, poufy green salad, and slurp away!
| Makes 2 servings | 4 garlic cloves, minced | |
| Hands-on time: 15 minutes | ¼ cup minced shallots | |
| Total time: 30 minutes | 1 cup chicken broth | |
| 1 small dried bay leaf | ||
| ½ teaspoon Indian curry powder | ||
| 2 pounds fresh, live mussels, cleaned | ||
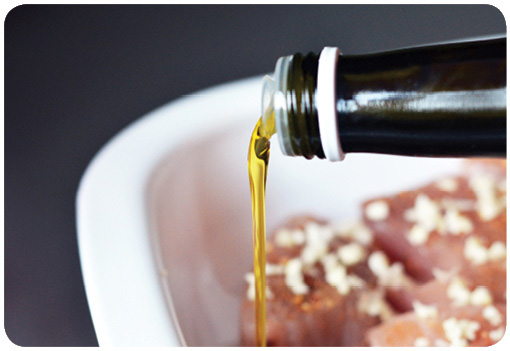
| 2 tablespoons ghee or fat of choice | ||
| 1 tablespoon chopped fresh cilantro | ||
| 1 tablespoon chopped fresh mint | ||
| 1 tablespoon chopped fresh basil | ||
| Kosher salt (optional) |
DO THIS:
CHEW ON THIS:

I’ve always loved walnut prawns. When my parents would take us out for celebratory feasts (in Chinese restaurants, naturally), I could never resist the siren call of crunchy shrimp and candied nuts—all slathered in a creamy, tangy-sweet sauce. When I went Paleo, I resigned myself to a bleak gastronomic future bereft of my favorite childhood dish...until I invented this utterly authentic-tasting real-food version.
| Makes 4 servings | 3 tablespoons Paleo Mayonnaise | |
| Hands-on time: 20 minutes | 1 tablespoon honey | |
| Total time: 20 minutes | 1 teaspoon fresh lemon juice | |
| 1 pound (approximately 20 to 25) uncooked large fresh shrimp, peeled and deveined | ||
| ¾ teaspoon kosher salt | ||
| 1 egg white | ||
| 2 tablespoons tapioca starch | ||
| 1 cup ghee or fat of choice, for frying | ||
| ½ cup Maple-Spiced Walnuts | ||
| 1 tablespoon sesame seeds, toasted |
DO THIS:

 Sometime in the late 1980s or early 1990s, walnut prawns made their way from Hong Kong to Chinatown restaurants in San Francisco and Los Angeles, and have since become a favorite worldwide for those who crave "authentic" Chinese food.
But although walnut prawns originated in Asia decades ago, this dish (and in particular, its sweet, creamy sauce) was originally inspired by "Western-style" American cuisine.
Irony, thy name is "walnut prawns."

Enjoy this dish with a steaming bowl of Easy Cauliflower "Rice"!


This dish originated in the tropical coasts of Southeast Asia, where both coconuts and crustaceans abound. Coconut shrimp has since spread the world over, but my recipe takes it back to its roots, marrying it with another regional specialty: spicy sriracha. This ain’t your momma’s coconut shrimp; sink your teeth into the crunchy, golden coconut crust, and you’ll discover tender shrimp marinated in a fiery Asian chile sauce.
| Makes 4 servings | 1 pound (approximately 20 to 25) uncooked large fresh shrimp, peeled and deveined but with tails left intact | |
| Hands-on time: 30 minutes | ¼ cup Paleo Sriracha or hot sauce of choice | |
| Total time: 1½ hours | Finely grated zest from ½ small orange | |
| Melted ghee, for greasing | ||
| 3 egg whites, lightly beaten | ||
| ½ cup arrowroot powder | ||
| ¼ cup coconut flour | ||
| ¼ cup almond flour | ||
| 1 teaspoon kosher salt | ||
| ½ teaspoon paprika | ||
| ¼ teaspoon freshly ground black pepper | ||
| ½ cup shredded unsweetened dried coconut |

To devein your shrimp, make a shallow slit along the length of the shrimp's back, and pull out the dark ribbon running from head to tail. The "Vein" is not actually a vein, by the way -- it's the digestive tract. You don't have to remove it, but it has a flavor and texture that not everyone enjoys.
DO THIS:
FRY IT!
Prefer pan-fried shrimp? No problem!
Turn the burners on the stove to high, and heat ½ cup of ghee (or enough to reach a depth of ¼ inch) in a cast-iron skillet. Once the oil’s hot and shimmering, turn the heat down to medium, and pan-fry the shrimp for 1 to 2 minutes per side, or until golden on the outside and just opaque in the center. Drain on a wire rack before serving.
I know what you're thinking: What am I supposed to do with the 3 leftover egg yolks? Answer: use them to make Paleo Mayonnaise and Mexican Chocolate Pots de Creme!

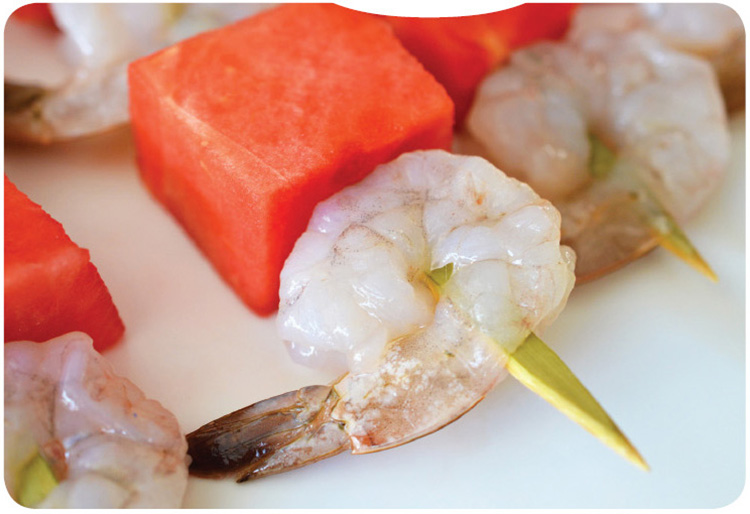
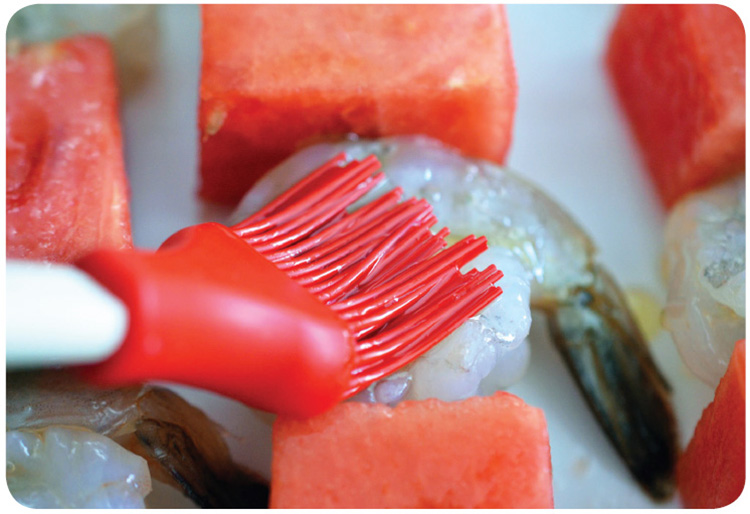
These quick and easy skewers are a perfect balance of summery textures and flavors. The snap of briny grilled shrimp pairs surprisingly well with the juicy sweetness of charred watermelon—and a liberal squeeze of lime at the end adds a tangy zing that marries all the components together.
| Makes 16 servings | 2 pounds (approximately 20 to 25 per pound) uncooked large fresh shrimp, peeled and deveined, but with tails intact | |
| Hands-on time: 15 minutes | 2 pounds watermelon flesh (from about ½ medium watermelon), cut into 1-inch cubes | |
| Total time: 15 minutes | 3 tablespoons macadamia nut oil or melted ghee | |
| ½ teaspoon lemon pepper seasoning | ||
| Kosher salt | ||
| 4 limes, quartered |

DO THIS:

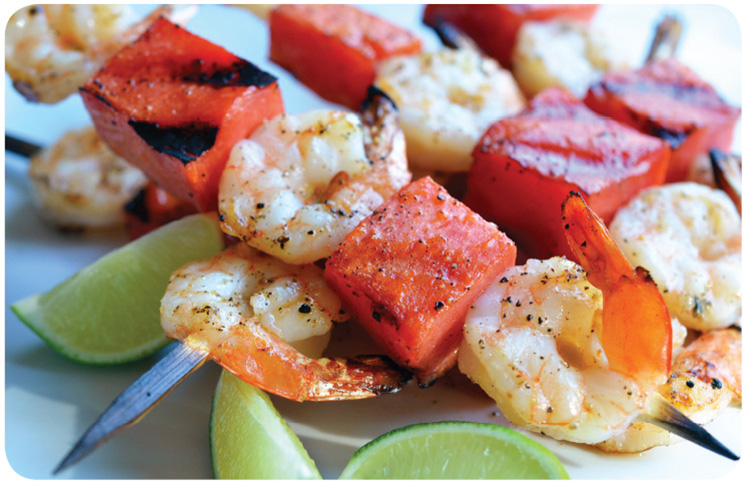
According to the folks at America's Test Kitchen, there's no need to pre-soak the wooden skewers. The tips will always burn no matter what, so why bother?
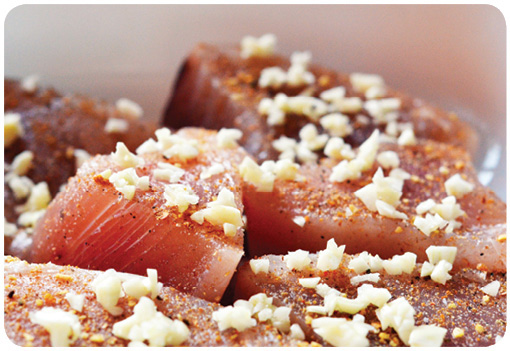
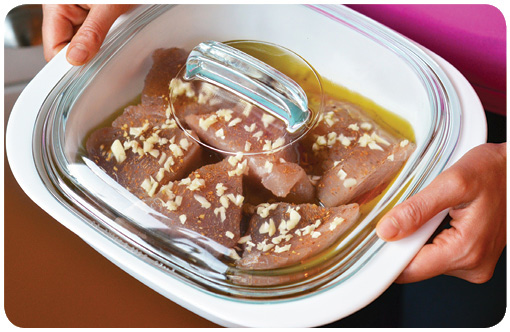
If you’ve got fresh albacore, you must make this dish, which I adapted from a David Tanis recipe. It doesn’t get easier than oven-poaching tuna in olive oil, and by adding a generous sprinkle of Magic Mushroom Powder, you exponentially increase the umami in this dish. Bonus: leftovers stored in the braising liquid will keep for up to a week, which means you’ll always have a healthy snack at your fingertips.
| Makes 4 servings | 2 pounds skinless fresh albacore fillet | |
| Hands-on time: 10 minutes | 2 teaspoons Magic Mushroom Powder | |
| Total time: 30 minutes | 4 garlic cloves, minced | |
| ⅔ cup extra-virgin olive oil |
DO THIS:

Tuna itself is already umami-rich due to its high inosinate content. Add Magic Mushroom Powder to the mix, and your taste buds will be giving you high-fives.

Makes 4 servings | Hands-on time: 30 minutes | Total time: 8 hours
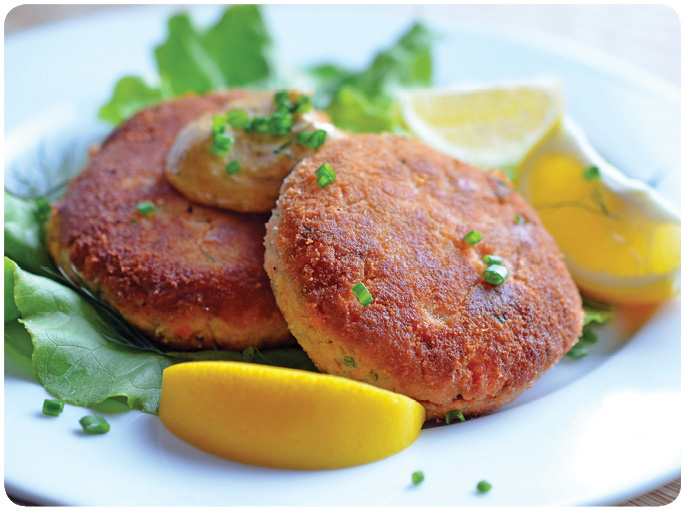
Fresh, wild-caught salmon is wonderful, but I don’t always have the time (or energy) to herd the kids into the car for a drive to the market or fishmonger. Fortunately, I keep a stockpile of canned fish in my pantry; when I’m short on time, I simply whip out my trusty can opener and voila! Dinner is served!
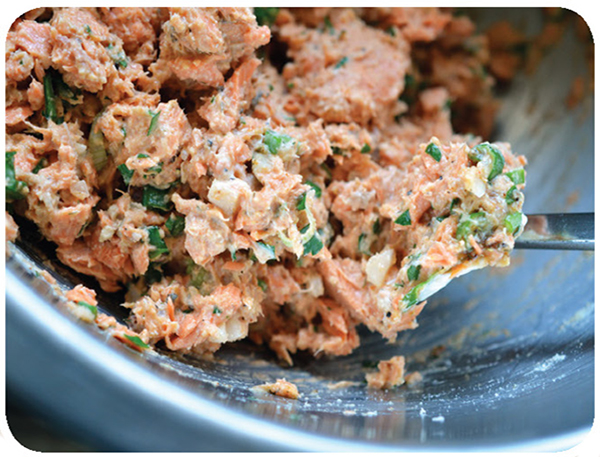
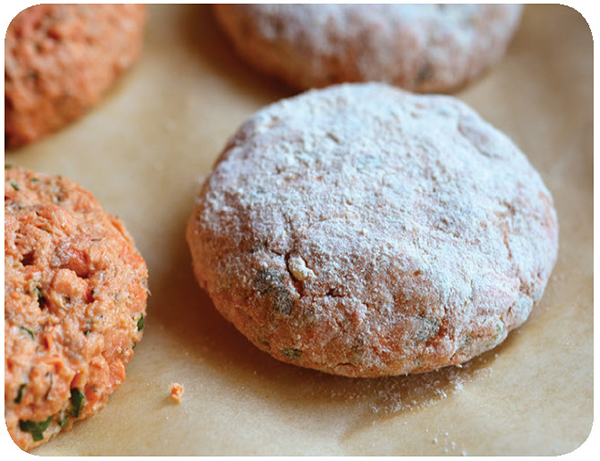
What? You’re not keen on eating fish straight from the can? Then transform that lowly can of wild salmon into savory, delicate patties. Crisp and golden brown on the outside, tender and moist on the inside, these salmon patties make for a great weeknight meal—and no one’ll suspect that you made ’em with canned fish. (Just remember to throw away the open cans. They’re a dead giveaway.)
GET:
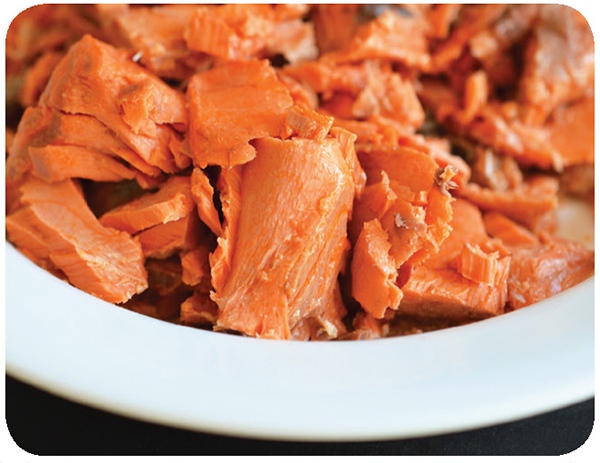
1½ pounds canned boneless, skinless wild sockeye salmon packed in water, drained and broken up into small chunks
¼ cup Paleo Mayonnaise
2 scallions, thinly sliced
2 large eggs, lightly beaten
2 tablespoons chopped fresh Italian parsley
¼ medium yellow onion, minced
¼ cup coconut flour, divided
1 teaspoon paprika
½ teaspoon dried dill
½ teaspoon kosher salt
¼ teaspoon dried mustard
¼ teaspoon garlic powder
¼ teaspoon freshly ground black pepper
2 tablespoons ghee or fat of choice
2 lemons, cut into wedges
¼ cup Louisiana Rémoulade (optional)
DO THIS:

Not a salmon lover? Substitute tuna or lump crab meat instead!
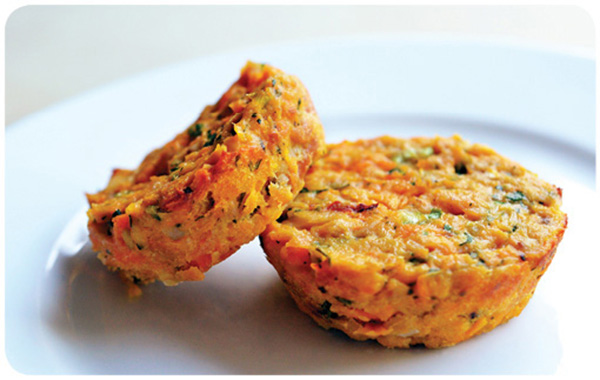
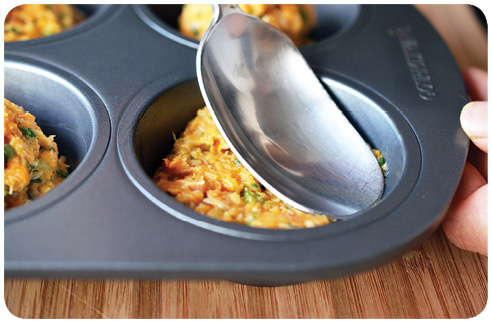
You may not normally associate canned fish with sweet potatoes and jalapeño peppers, but these hot ’n spicy tuna cakes are a revelation. They’re tender and sweet, but with a wickedly peppery bite that sneaks up on you. Eat them for breakfast, lunch, or dinner—or whip up an extra-big batch for your next dinner party.
| Makes 12 cakes | 3 tablespoons melted ghee, divided | |
| Hands-on time: 20 minutes | 10 ounces canned albacore tuna packed in water, drained | |
| Total time: 45 minutes | 3 scallions, thinly sliced (about ⅓ cup) | |
| 2 tablespoons finely minced fresh cilantro | ||
| 1⅓ cup mashed Oven Baked Sweet Potatoes | ||
| 2 large eggs | ||
| 1 tablespoon minced jalapeño pepper | ||
| Finely grated zest from ½ medium lemon | ||
| ½ teaspoon red pepper flakes | ||
| Kosher salt | ||
| Freshly ground black pepper | ||
| 3 medium lemons, cut into wedges (optional) |

DO THIS:
Who needs sandwiches? These spicy little bites are perfect for packed lunches.


I had my first bite of branzino over a decade ago, after Henry and I had slowly eaten our way from the Tuscan countryside up to Venice. We lost ourselves for hours each day, exploring every nook and cranny of the vibrant City of Bridges, from the quiet streets of Giudecca to the crowded center of San Marco. No two corners were the same, but at every restaurant we visited, I insisted on ordering whole roasted branzino.
A prized catch in Northern Italy, branzino—also known as Mediterranean seabass or loup de mer—is now booming in popularity in restaurants throughout North America, and it’s not hard to see why. Branzino isn’t expensive, and it’s among one of the most eco-friendly seafood choices on the market. Most important (to me, anyway), its flesh is deliciously tender and flavorful, with mildly sweet and nutty notes.
Yes, the prospect of whole-roasting a fish—especially one nicknamed the “wolf of the sea”—can be a bit daunting. But just for you, I’ve come up with quick, foolproof method that’ll dirty just one pan. Ready?
| Makes 2 servings | 2 (1-pound) branzini, gutted and scaled | |
| Hands-on time: 10 minutes | Kosher salt | |
| Total time: 25 minutes | Freshly ground black pepper | |
| 1 small lemon, thinly sliced | ||
| 4 sprigs fresh Italian parsley | ||
| 6 sprigs fresh thyme | ||
| 2 tablespoons melted ghee, divided | ||
| 1 lemon, cut into wedges |
Can't find branzini? You can use rainbow trout instead. Just shorten the cooking time if your fishies are on the smaller side!
DO THIS:
As the fish cook, their fins will raise to say "hello." Clip 'em off with kitchen shears if you're skeeved out by the salute!


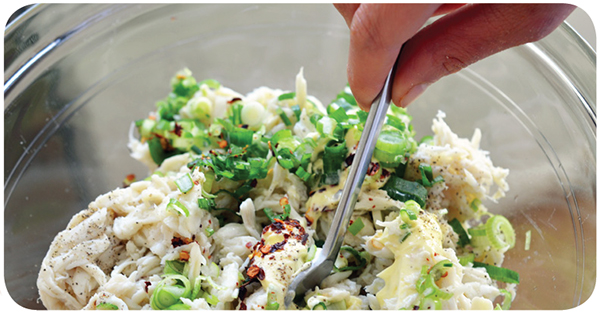
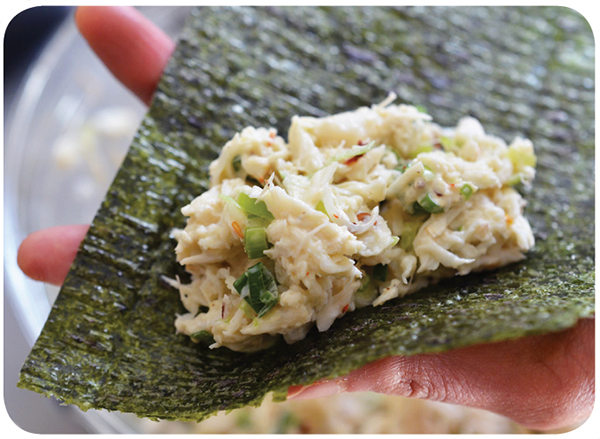
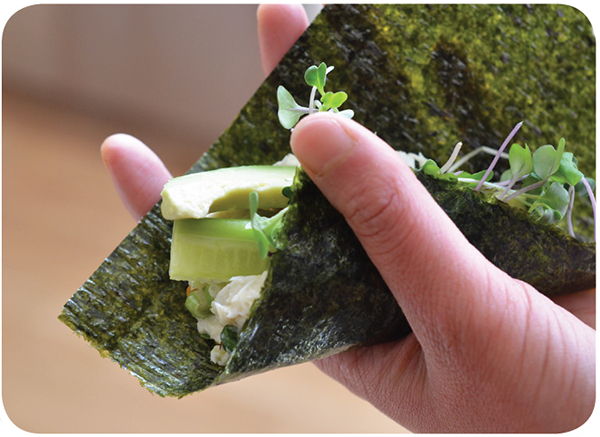
We’ve always been big sushi fans, so temaki (seaweed-wrapped hand rolls) with spicy crab and avocado make regular appearances in our kitchen. I usually have all the ingredients for these creamy, crisp rolls in our fridge and pantry, so it’s a breeze to throw together this no-cook recipe. Plus, everyone in the family can assemble their own, which means even less work for me.
| Makes 16 hand rolls | 2 tablespoons Paleo Mayonnaise | |
| Hands-on time: 15 minutes | 2 scallions, thinly sliced | |
| Total time: 15 minutes | 1 pound cooked lump crab meat | |
| ½ teaspoon red pepper flakes (optional) | ||
| Juice from ½ medium lime | ||
| Kosher salt | ||
| Freshly ground black pepper | ||
| 8 toasted standard-size nori sheets, cut in half width-wise | ||
| 1 large Hass avocado, pitted, peeled, and thinly sliced | ||
| 2 small Japanese or Persian cucumbers, cut into matchsticks | ||
| Handful of radish sprouts or micro greens |
DO THIS:
HUH?
Nori, the Japanese name for paper-thin sheets of dried seaweed, can be found at most Asian markets.
It’s packed with calcium, iron, zinc, and protein, and is used for all kinds of food preparations across Asia. In Japan alone, roughly 9 billion (!) sheets of nori are consumed every year.
I keep nori on hand to roll up sushi or to garnish dishes and clear soups. Keep some toasted nori in your pantry; it can be a culinary lifesaver.


Feeling spicy? Add a dash of shichimi togarashi (Japanese seven-flavor chili pepper)!
