There’s more than one way to have a good time with rolling papers. Flex your cannabis creativity muscle with some of these clever crafts that are fun for the whole family of stoners.
![]()

Rizzling
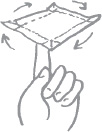
Rizzling is the amazing art of spinning rolling papers on your fingertips like magic as you walk around the room. Never thought you’d be dabbling in magic? Think again. Your friends will be comparing you to Doug Henning before you know it.
1. Get stoned.
2. Take a rolling paper and fold all sides in, about the width of the glue strip.
3. Unfold each of the four folds.
4. Pinch the four corners just to the width of the folds, to create what looks like a tray with pointy corners.
5. Prepare to amaze.
6. Put your index fingertip in the middle of the paper and start walking—it should start spinning.
7. If it doesn’t work at first, try troubleshooting by: (a) loosening up the folds slightly; and if that doesn’t work, (b) gently pinch the middle of the paper between your thumb and index finger, then releasing your thumb as you start walking.

Bracelet
Jewelry makes a great gift—whether you’re giving it to a friend or to yourself. A rolling paper bracelet is an even greater gift considering all the potential you sacrificed in making it!
1. Do a bong hit.
2. Get the wrist size of the person you’re making the bracelet for.

3. Lay out several rolling papers in a line, until they reach your desired length plus three extra inches.
4. With the glue strip facing up and at the top, fold the paper over, one-third of an inch at a time, from the bottom up until the last fold is flush with the top of the glue strip. Make sure the glue does not attach yet.
![]()
5. Repeat Step 4 with all of the papers.
6. Take two of the folded papers, one in each hand.
7. On the top-left corner of the right-hand paper, fold down one-eighth of an inch of the folded paper, exposing the corner of the glue strip.
8. Starting about a quarter inch from the left side, lick the glue strip on the left-hand paper, leaving the left side dry.
9. Lick the glue strip on the right-hand paper from the left to the right, stopping a half-inch from the right edge.

10. Slide the left edge of the right-hand paper between the last fold and the glue strip of the left-hand paper, and press it together. The glue strip from the left-hand paper will bind to the outside of the right-hand paper, and the glue from the right-hand paper will bind to the inside of the left-hand paper.

11. Repeat Steps 8-10 until all papers have been joined except for the first and last papers.
12. Wrap the paper string around the chosen wrist, and complete Steps 8-10 on the final two papers to complete the piece.
![]()

Anklet
Jewelry makes a great gift—whether you’re giving it to a friend or to yourself. A rolling paper bracelet anklet is an even greater gift than a bracelet, considering the extra potential you sacrificed in making this longer piece!
1. Repeat all steps from the “Bracelet” instructions above, substituting “ankle” for “wrist” in Steps 2 and 12.
![]()

Necklace
Jewelry makes a great gift—whether you’re giving it to a friend or to yourself. A rolling paper bracelet anklet necklace is an even greater gift than a cheapo bracelet or anklet, considering the sacrifice you made that will leave you with no more papers left to roll doobies!
1. Repeat all steps from the “Bracelet” instructions above, substituting “neck” for “wrist” in Steps 2 and 12.

Cat Toy
This is the easiest paper craft to accomplish; unfortunately, it takes up the largest amount of rolling papers. But your cat will absolutely love it*!
1. Get high.
2. Remove all sleeves from four or five packs of rolling papers
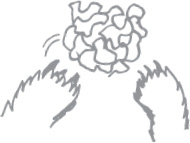
3. Scrunch them all up into a giant ball; as the ball grows, you’ll have to lick the glue strip to get each new paper to stay on it
4. When all papers are on the ball, toss it to your cat.
5. Your cat will absolutely love it—*for several minutes—and then will be completely disinterested.
![]()

Paper Airplane
You can make a single-engine prop plane, or a jumbo jet—depends on how much paper you’ve got to spare. Personally, most of our papers are earmarked for other purposes, so we’ll just focus on the classic one-seater.
1. Fire one up.
2. Use the largest-sized papers in your stoner kit—1.5s work pretty good.
3. Start with the paper folded in half on the original crease.
4. Fold the right corner of one side of the paper down to form a triangle, with the right side of the paper now flush with the bottom.

5. Flip the paper and repeat on the other side, even with the first fold.
6. Fold the triangle again to form another triangle, again making the fold flush with the bottom.

7. Flip the paper and repeat on the other side.
8. Turn off all personal electronics; your rolling-paper airplane is now ready for takeoff.
![]()

Mini Sculptures
Rolling papers are so thin and pliant, and yet so durable when handled with care, that they make an excellent media for sculpted art. And the thin glue strip allows the artist to create shapes that stay in place.
1. Smoke some weed.
2. Conceive the sculpture you want to make. This can come in a dream, a vision quest, or while riding the bus.
3. Sketch out your sculpture in two dimensions, then in three dimensions, on paper.
4. Draw a few extra sketches, just in case the finished work becomes famous—the extra sketches can be sold for some good money!
5. Get your papers in order, and start making art. At this point, you’re pretty much on your own. But we’re with you, spiritually.
![]()

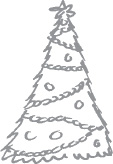
Christmas Tree Garland
Make your holly-jolly Christmas even holly-jollier with this inventive string of garland.
1. Smoke a bone.
2. Lay out about fifty rolling papers in a line.
3. With the glue strip facing up and at the top, fold the paper over, one-third of an inch, from the bottom up. Repeat until the last fold is flush with the top of the glue strip. Make sure the glue does not attach yet.
![]()
4. Repeat Step 3 with all of the papers.
5. Take two of the folded papers, one in each hand.
6. On the top-left corner of the right-hand paper, fold down one-eighth of an inch of the folded paper, exposing the corner of the glue strip.
7. Lick the glue strip on the left-hand paper.
8. Lick the glue strip on the right-hand paper from the left to the right, stopping a half-inch from the right edge.

9. Slide the left edge of the right-hand paper between the bottom fold and the glue strip of the left-hand paper, and press the left-hand paper together along the glue strip. The glue strip from the left-hand paper will bind to itself and to the outside of the right-hand paper, and the glue from the right-hand paper will bind to the inside of the left-hand paper, creating a link.
10. Repeat Steps 7-9 until all papers have been joined to create a long garland. You can string this classic-white garland on the tree now, or move on to Step 11.
![]()
11. Lay the garland on an old bedsheet and, doing two feet at a time, spray it with spray glue and immediately sprinkle it with sparkles.

12. After the glue and sparkles are dry, string your garland around and around the tree.

Finish Line
Haven’t you always dreamed of running through one of those big finish-line paper strips at the end of a marathon foot race, with your arms up and a triumphant look on your face? Well, now you can make that dream a reality without ever leaving your living room.
1. Blaze.
2. Measure the opening of the doorway between your living room and kitchen (or some other doorway in your home).
3. Lay out several rolling papers in a line, until they reach your desired length plus ten extra inches.
4. Take two papers, one in each hand, folded along the pre-made horizontal fold out of the pack.
5. On the top-left corner of the right-hand paper, fold down one-eighth of an inch of the non-glue side of the paper, exposing the corner of the glue strip.
6. Starting about a quarter inch from the left side, lick the glue strip on the left-hand paper, leaving the left side dry.
7. Lick the glue strip on the right-hand paper from the left to the right, stopping a half-inch from the right edge.
8. Slide the left edge of the right-hand paper between the last fold and the glue strip of the left-hand paper, and press it together. The glue strip from the left-hand paper will bind to the outside of the right-hand paper, and the glue from the right-hand paper will bind to the inside of the left-hand paper.
9. Repeat Steps 6-8 until all papers have been joined except for the first and last papers.
10. Lick the last bit of glue on the last left-hand link and press it against the door frame on one side, then lick the last bit of glue on the last right-hand link and press it against the door frame on the other side.
11. Prepare for glory.
![]()

Notes to Self
We don’t know who invented sticky notes, but our guess it was a stoner, because look at it. It’s a thicker rolling paper with a less-sticky glue strip. Do it.
1. Bake.
2. Try to remember what it was that you wanted to remember.
3. Take out a rolling paper and write a note-to-self on the side opposite the glue strip.
4. Lick the glue strip and stick it to a wall where you will be sure to see it.
5. Procrastinate; you can get to that note-to-self later.