Space Agriculture
Idea by Dave Banks
As mankind inevitably reaches out into space to search out new worlds and new civilizations (to conquer, MUAHAHAHA!), one of the most important things we’ll have to worry about is the food we’ll have on the long intra- and inter-solar journeys. Freeze-dried foods and nutritional supplements do the job, but wouldn’t it be great if we could invent a way to enjoy fresh fruits and veggies during our journey to the stars?
To shed some light on how we’d successfully grow plants on our long voyages, we need to know how plants will grow in space. That means thinking about light and gravity. What are the impacts of gravity and directed growing light on the staple plants we want to take with us? This experiment will reveal those secrets.
If you go for a drive along a coastal road where the wind is always blowing in from the sea, you’ll notice that the trees all look like cartoon characters who just survived an explosion—they have been blown in one direction for so long that they look frozen in an awkward position This is a tropism, meaning an effect of and external stimulus on a biological organism. In this case, the near-constant force of the wind has trained the trees to grow in the path of least resistance. If you remember the mathematician character in Jurassic Park pointing out (over and over again) that “life finds a way,” tropisms are an excellent example of that truism.
Life, including plants that don’t have consciousness per se, can react to stimuli and adapt physically by altering their growth patterns. But how? What happens when an external stimulus is introduced, removed or changed, and influences an organism’s vital needs? We’ll find out the answer through the two experiments below.
There are many examples of tropism—touch, water, and chemicals can all act as tropism agents—but in these experiments, we’ll look at two very basic examples that will help simulate the unique conditions you’ll find on your deep space voyage. One is phototropism, the effect of light on growth; and the other is geotropism, the effect of gravity on growth.
PHOTOTROPISM EXPERIMENT
If you’re performing this experiment as part of a science fair, first consider your hypothesis. How do you think messing about with the light source of your plants will affect their grown patterns, if at all?
STEP 1: Take two 1-gallon cardboard milk cartons (cleaned out!) and punch about a dozen holes in the bottoms for drainage.
STEP 2: Wrap the sides of both cartons in foil or heavy tape to make sure no light reaches inside (even light filtering through the cardboard).
STEP 3: Fill bottom of each carton with some potting soil, about 2 inches deep and lightly tamped down.
STEP 4: Place several lima bean seeds, evenly spaced in soil, and water until it starts to drain out of the holes in the bottom (sit the cartons in or over a plate or tray to catch the water run-off).
STEP 5: In one carton (write “Control” on the outside), close the top to leave the bean seeds in the dark. In the other carton (write “Experiment” on the outside), cut a 1-inch by 1-inch square on one side of the carton about 3 inches down from the top of the carton.
STEP 6: Close the tops of both cartons and seal them so that no light can get in through the top (the only light available to any of the seeds should be the hole you cut in the “Experiment” carton).
STEP 7: Place near a window (again, with a tray or plate beneath cartons to catch drainage!). You can open the stops to water and observe each carton on a daily basis, but make sure to close them when you’re done. After a week, you should see enough growth to make a scientific observation.
Your project data should answer the following questions: Did the control seeds grow? Which beans are taller? When you look inside the “Experiment” carton, are bean stems leaning toward the hole? You can use a ruler to measure vertical and horizontal growth, to see how far the bean stems lean away from being fully vertical. Track growth rates for each carton to see how much of a difference the light actually makes to plant growth.
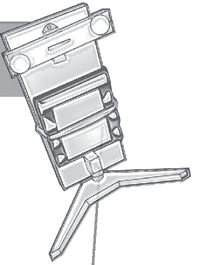
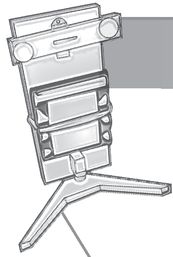
It can also be very helpful to take pictures of each of the carton interiors when you record your data. Set up a tripod or other support device for your camera so that you can take a picture looking down into each carton from exactly the same height and orientation each time. This way, when you compare photographs, the perspective will be the same. These visuals will look great on a science fair report board.
What Else Can I Do?
Okay, that’s the basic phototropism experiment, but you can take this so much further. If you want a more in-depth experiment, try these variations:
▶ Do this experiment with one control and four test containers, each with their sunlight hole facing in a different direction, and then compare them—is the phototropism effect more obvious?
▶ Try a variety of hole sizes or orientations to see if there’s any difference in the growth.
▶ Try two controls—a completely dark one, and one with the top left open all the time—to see the difference between top light and side light.
▶ If you have holes on two adjacent sides, does the effect average out, causing the plants to grow toward the corner?
Another experiment is the “Maze” variant:
STEP 1: Place a fast-growing plant (like an ivy) in the bottom of a large cardboard box that is set to open from the side, like a door, so you can access the plant to water it (make sure no light enters from around the edges of the door).
STEP 2: Above the plant, tape a partition into the box that cuts off about ¾ of the box on the left, a little above the plant. Then, do the same again a few inches above the first partition, leaving space on the right open. You’re creating a little maze.
STEP 3: Above the upper partition, cut out a large hole and place the box near a window, with the hole side facing toward the light. Tend to the plant as needed and watch as the plant grows around the maze to reach toward sunlight.
GEOTROPISM EXPERIMENT
Astronauts have done many experiments growing plants in zero gravity and the results always seem to be that roots need to know which way is down to grow properly. While we don’t have the capacity yet to create a zero-gravity testing area (though we’ll certainly make figuring out how to do that a mad scientist priority!), we can play with directional changes in gravity pretty easily.
STEP 1: Take a couple of paper towels and get them wet. Place them along the bottom of a sandwich-size sealable plastic bag.
STEP 2: Place a few bean seeds on top of a paper towel and plastic bag (with air inside!). Make sure beans are between paper towel and wall of plastic bag. Using Magic Marker, write “Control” on the side of this bag.
STEP 3: Make another, similar bag as described in steps 1 and 2, but label this one “Experiment.” Do your best to make sure the amount of water, air, and number of seeds are exactly the same.
STEP 4: Tape the bags to a wall, chair, or other surface where they can get sunlight. The bags can even be tacked to the outside of your house, taped to a swing set, hung from a clothesline, or whatever.
STEP 5: Check the bags daily for growth, and record observations. Moisten (but do not soak) the paper towels as needed to keep the growing medium viable, making sure to keep things as identical as possible in both bags.
STEP 6: Once beans sprout (in 3–5 days), rotate the “Experiment” bag 90 degrees and re-hang in the same place but in this new orientation. Leave the “Control” bag as it was before. Continue moistening the towels and observing.
STEP 7: After several days, did the “Experiment” sprouts change their growth and bend toward the skies again? What did the roots do? Rotate the experiment bag again and observe. Always leave the “Control” bag in its initial orientation so you have a baseline to compare to.
Data recording for this experiment is far more observational, unless you want to use a ruler or calipers and maybe a protractor to take detailed measurements of the angle of growth away from vertical.
Again, it’s always good to take pictures, and this project could be an awesome one to consider making a stop-motion movie with. If you can set up your experiment bag on a wall and put a camera on a tripod in front of it, you can try taking pictures every hour or two when you’re at home (there are also apps for some camera-equipped smartphones to allow setting timers for taking stop-motion pictures, so you can leave it during the day and get regular snapshots). Being able to show off a movie with your report that demonstrates the growth pattern would be great!
What Else Can I Do?
Another excellent space agriculture study you might wish to try is the hydroponics project from the original Geek Dad book (the red one). Hydroponics are likely to be the method of choice for growing plants in space. Studying different growth media, watering, or oxygenation techniques are excellent experiments as well.