Growing Crystals for Power
Idea by Kathy Ceceri
Someday, we’ll break free of our secret alien oppressors. Oh sure, nobody knows about them. They all look the same as we do, unless you catch them at the right moment when their eyes glow, and all of a sudden you hear background music playing menacingly—just like the movies.
Aliens are notorious for having cool devices and powers. One neat thing you see they often have in the movies or books is a stargate—a large device shaped like a ring, which when powered correctly, opens a portal through space to other such devices located on other worlds; other galaxies even. It’s like a space door!
But to get a stargate to work, you need a controller mechanism to filter incoming power through special crystals. This experiment will show you how to grow your own crystals. It will power you through space and beyond!
We’re mostly familiar with crystals that have the good press agents. Take snow—it has all those meteorologists out there doing daily updates on it all winter. Diamonds and other special gemstones are crystals as well, and are highly sought after. But there are many kinds of crystals, some of which we can even make ourselves.
Crystals are formed when atoms or molecules are arranged in a repeating pattern. Sometimes it’s a matter of some combination of heat, pressure, time, or all three, but under the right conditions, atoms or molecules in a liquid will start to come together around a crystal nucleus in regular household mad scientist laboratory conditions.
A Little Bit of Science History
Crystals have been used in electronics for quite a while (almost as long as electronics as a thing has existed). In 1880, Pierre and Jacques Curie (they were brothers; Pierre was married to Marie, with whom he won a Nobel Prize for Physics; their daughter Irene later won a Nobel Prize for Chemistry with her husband, Frederic Joliot—smart family!) discovered that some crystals produce an electrical charge when compressed, which is known as the piezoelectric effect. Today, crystals are used to power watches, produce laser beams, as sensors, and to convert electrical energy into vibrations in radios.
To grow a mass of crystals on another surface, like a geode forms, you can pour a specific chemical solution over a rough surface, which gives the crystals places to grow. To grow one giant crystal, you can take a tiny seed crystal and encourage the atoms or molecules to grow around it. As the crystal gets bigger, it will always retain the same general shape—the shape in which the molecules themselves are arranged. So a crystal is just a magnification of what’s going on at the molecular level.
And that’s exactly what we’re going to do. We will use alum, a substance made famous in old Warner Bros. cartoons for making you pucker and shrink when you accidentally put your head in a jar of it. Actually there are a few kinds of alum compounds, literally called alums. We want the most common form, potassium alum—hydrated aluminum potassium sulfate, KAl(SO4)2 × 12H2O—which can be used to grow large crystals. It is also used to dry and shrink vegetables like pickles, in styptic pencils to dry up shaving cuts, and in some recipes for homemade Play-Doh.
This experiment will show you how to grow a basic, white alum crystal. You can build a science fair–type of experiment out of this by making hypotheses based on any of the factors (time, heat, concentration, chemicals used) included in these instructions.
It is possible to make crystals of different colors using additives (including food coloring). You can even make crystals that glow under black-light. Researching possible additives and trying to produce crystals of different colors could be an excellent science fair project.
GROWING YOUR CRYSTALS
STEP 1: The first thing we need to do is make some starter crystals—the basic seeds of what our larger crystals will grow from. To make the starter crystals, we’ll create a saturated solution of alum in water, from which the seed crystals can precipitate.
Pour ½ cup of hot tap water into a clean jar. Add a little alum at a time, stirring constantly. Keep adding more alum until it stops dissolving and you start to see powder collect in the bottom of the cup or jar you’re using. Place a paper towel or coffee filter on top of the cup and let it sit for a day or two in a place where it will not be moved or jostled. Yes, this is not a fast project.
STEP 2: When you see small crystals developing in the bottom of the cup, evaluate them for size. You need at least one, if not more, seed crystals that you can actually tie a piece of fishing line or thread around. When you think you have that, carefully pour the liquid in the cup into a second cup, leaving the crystals behind. Pour the tiny crystals out onto the paper plate.
Pick the largest crystals out to be your seed crystals. For each seed crystal, tie a string around it, leaving about 6 inches of string at the top. Nylon fishing line is best because the line itself will not start accumulating crystals. If you find it too hard to handle, however, regular thread works fine.
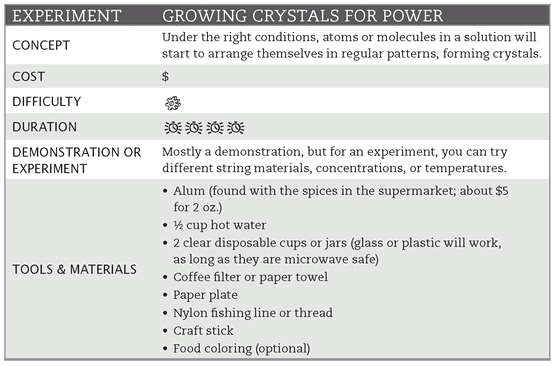
Tie the other end of the line around a craft/Popsicle stick and rest the stick across the top of the second cup so that the seed crystal hangs in the middle of the cup, without touching anything.
From the Mad Scientist’s Notebook
If none of your crystals are big enough to handle when you first pour them out, you’ll need to let them sit another day or two. You can start over without using more alum by pouring the small crystals back into the cup and putting the cup into the microwave oven for a few seconds. Heating the water should make them melt back into a solution. Then leave them as before and wait.
STEP 3: The hardest work you have to do for this experiment is to watch and wait, because it’s all about evaporation. As the water in the cup evaporates, the alum solution becomes more concentrated, which causes more alum to go into solid crystal form (precipitate). Because we have this seed crystal in the cup, the alum will mostly decide to latch onto it and form up into the same nice crystalline structure it’s already used to. However, if crystals start to form on the inside of the cup, you’ll want to carefully pour the solution into a clean cup and move the seed crystal, or the solution will precipitate on the other crystals as well.
The crystal will keep growing until all the alum in the solution is used up. To keep the crystal growing, make a new solution of alum as in Step 1, being sure to let it cool to room temperature before moving the crystal. As the crystal grows, it will encompass the string supporting the seed crystal as well. Eventually the string will be coming out of the middle of the larger crystal.
In the end, your level of patience (and the size of the cup) will determine when the crystal is “done.” You can keep growing it in this manner relatively indefinitely.
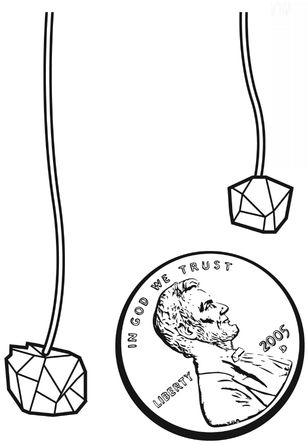
When you’re finished growing your crystal, you can take it out of the water and snip off the string (if you want). The basic alum crystal will look like a short, fat diamond with the top and bottom points sliced off. The cool thing is that this is also the shape of each alum molecule.
And that’s it. You have grown your own crystals and learned the skill to make more. Even better, you’re on your way to powering up that old Space Portal and taking the battle with the aliens onto their own home turf. There’s only room for one planetary ruler here on Earth, and that position will be filled by a mad scientist, gol-durnit!