One way you could incorporate wrinkles is by leveraging the skills you already have and adding additional edge loops. Earlier in the chapter, you saw how the base of the wrist sharpened as a new loop was placed closer to it. The same is true for wrinkles. As a result, for each wrinkle, I want three edge loops: one for the wrinkle itself and one on either side to help sharpen that detail. An example is adding a crease to a finger. I decide I want an existing edge at one of the joints to become a crease.
The steps are as follows:
- In Edit Mode, click on Loop Cut and Slide and add an additional loop directly above the existing edge:
Adding an extra edge loop above the wrinkle
- Use Loop Cut and Slide again to add an additional loop directly below:

Adding an extra edge loop below the wrinkle
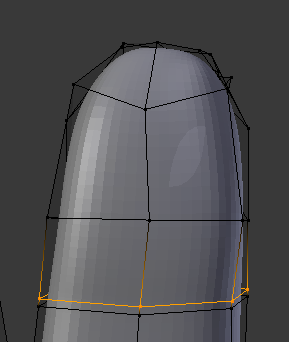
- Right-click on the leftmost vertex in the original edge. Holding down Shift, right-click on the rightmost vertex. Hit S to scale them closer together:

Scaling two vertices from the wrinkle closer together
- With those two vertices still selected, click on the Z (blue) axis arrow and pull them into the finger.
- Adjust vertices as needed to get the look you want.
When you are done, your finger will now have a crease:

New crease in finger
With additional details such as fingernails and creases, your hand starts to become more alive:

Hand with fingernails