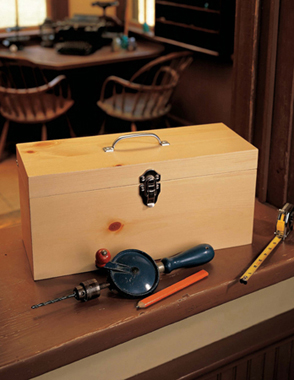
This toolbox is perfect for holding all those everyday tools that you use around the house — a tack hammer, screwdrivers, tape ruler, extra screws and nails, etc.
The techniques used to make this box are simple and fun. As with all the projects in this book, you can change the dimensions to suit your particular needs. For example, it would be a simple matter to make this box twice as big.
I prefer to see the wood that I use to build my projects, so I used a clear finish on all but two of the projects in this book. Feel free to finish these projects as you like — with paint, stain or whatever suits your needs.
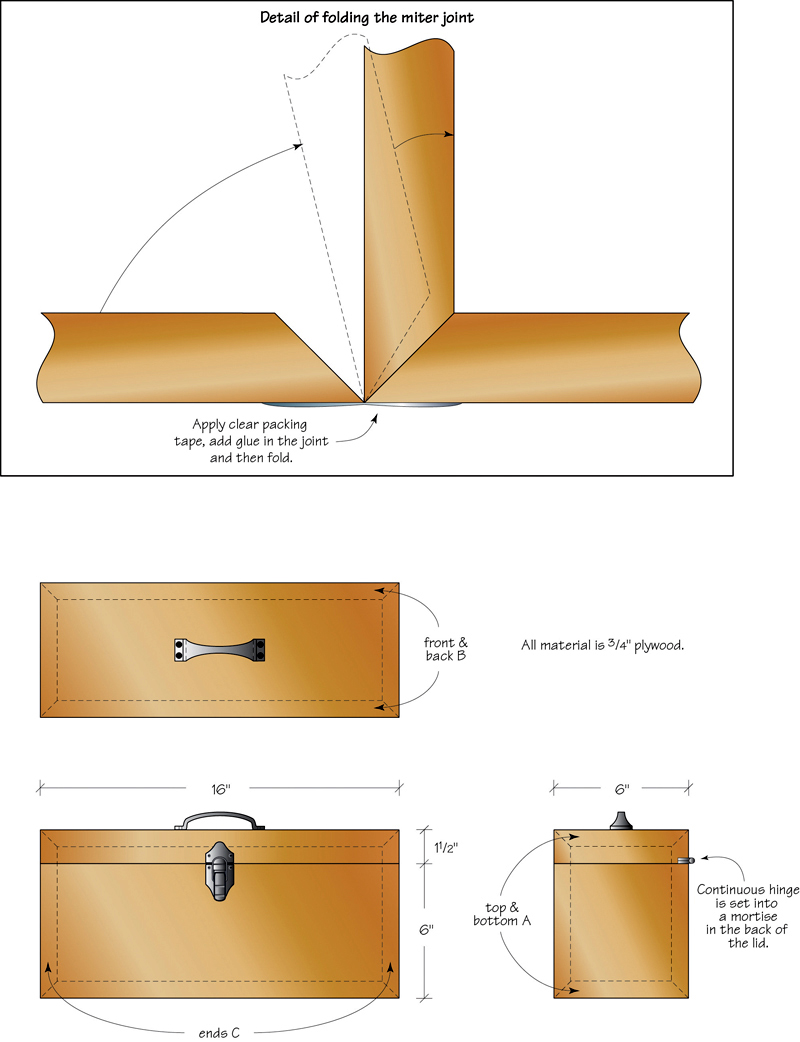
INCHES

hardware
MILLIMETERS

hardware
STEP-BY-STEP
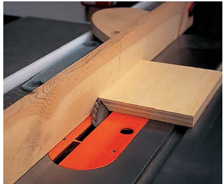
step 1 • Cut all the parts to size as shown in the materials list. Then tilt the table saw blade to 45° and attach a sacrificial fence to the saw’s fence. Adjust this setup until you can cut a 45° bevel on the edge of the box parts. This setup allows you to cut bevels on parts that have already been cut to size, which is easier than trying to cut all the parts to size and bevel them at the same time.
step 2 • Double-check the 45° bevel to be sure that a perfect 90° corner is formed. This is critical for all the parts to join together squarely at glue-up time.
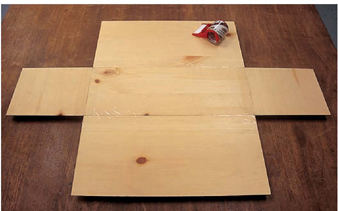
step 3 • Lay out the bottom A, the front and back B and the two ends C faceup as shown. Use clear packing tape to tape the joints, creating a hinge. Be sure that the sharp edges of the bevels come together as cleanly as possible when you apply the tape.
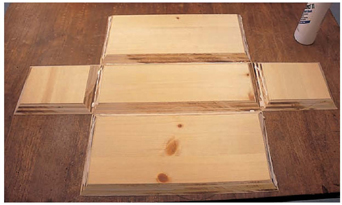
step 4 • Turn the whole assembly facedown, then apply glue to all the edges that will be coming together when it’s folded up.
step 5 • You will need to use a few clamps to hold the side joints tightly. Don’t use too much pressure, as that will distort the joint and cause it to open up at the sharp edges.
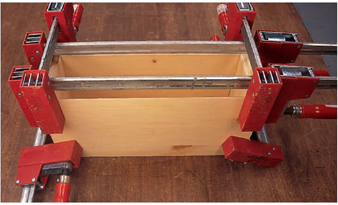
step 6 • When the glue has dried, remove the clamps, apply glue to the remaining beveled edges and attach the top.
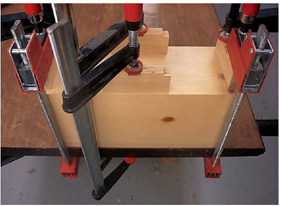
step 7 • Use blocks under the clamps to even out the pressure. At this point you might be wondering if you could tape the top to the assembly when all the parts are lying flat in step three, and I say, “Yes, you could!” (I didn’t because I simply got ahead of myself.) If I made this again, I would tape all the parts and fold up all six sides at one time.
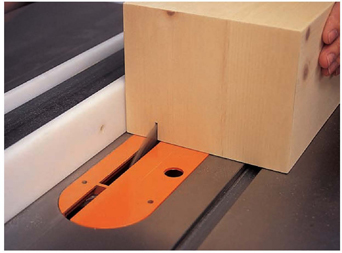
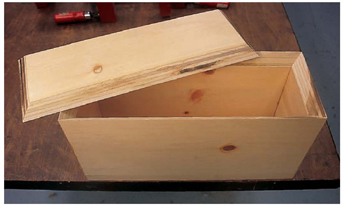
step 8 • When the glue has dried, gently scrape or sand away any glue squeeze-out. Cut the lid off the box, using the table saw.
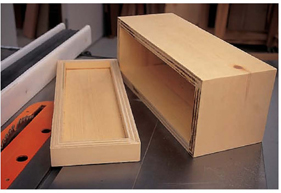
step 9 • The lid will fit perfectly on the box using this technique.
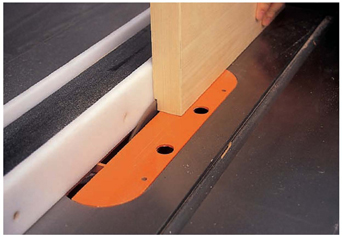
step 10 • Measure the thickness of the continuous hinge. Set the table saw fence to this measurement and make a through-cut.
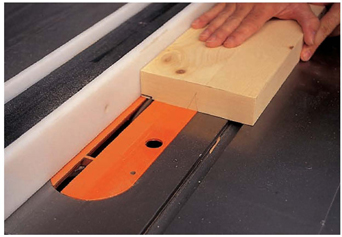
step 11 • Reset the fence to the width of the hinge leaf (this does not include the barrel of the hinge) and make the cleanup cut. This cut squares out the corner of the rabbet cut.
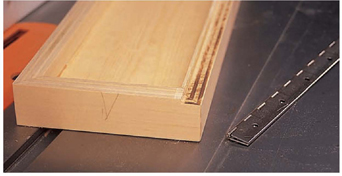
step 12 • This is the finished cut. If your saw blade is a little dull (as mine is), you will have some burn marks on your wood. This is OK, as the hinge will cover these marks. (I guess I should get my saw blade sharpened!)
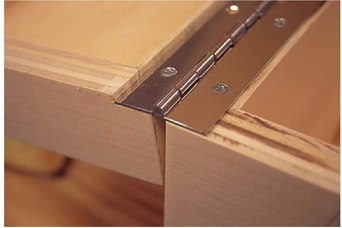
step 13 • Install the hinge. If your cut is accurate, the hinge is lined up easily by holding the edge of the hinge leaf against the shoulder of the rabbet. By allowing the barrel of the hinge to extend beyond the edge of the box, the lid can be opened 180°.
step 14 • This is a quick but neat and tidy way to install a hinge. You can now install the drawbolt and screen door handle.
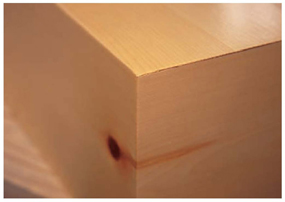
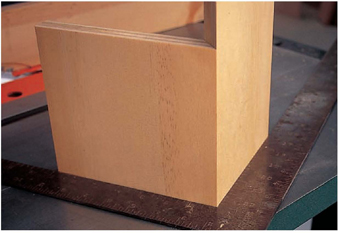
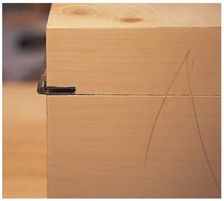
step 15 • When you've finished the box, the corners will have a nice, clean look. This is a strong joint. The gluing surface is large, and no splines or biscuits are needed.