To get up and going on a Mac, you simply need to choose the type of Swift toolchain you want to develop against. You can choose a version from the Download section. Swift on a Mac is included with Xcode, making it really easy to get started. Swift 3 requires you to have macOS 10.11.5 (El Capitan) or later and Xcode 8. Let's walk through the steps together and install Swift 3 on a Mac.
- Download a toolchain - Grab the latest Swift 3 release or preview candidate from the downloads page on https://swift.org/. Xcode is created and maintained by Apple, selecting a release to download from https://swift.org/ will take you to Apple's downloads section on their developer portal.
Note
An Xcode toolchain is a special binary with a toolchain extension that includes Xcode and all of the tools and libraries that make up Swift (LLVM, LLDB, REPL, and other tools) all targeted at a specific Swift version. You can think of a toolchain as a bundled development environment that you install and extract onto your system to work with a specific release. When you want to try out a different version, you have to download and install the toolchain that corresponds to the target version.
- Run the package installer - This will install Xcode (toolchain).
Note
The Xcode package that you download for a release or developer snapshot should be digitally signed with a developer ID (Developer ID Installer: Swift Open Source (V9AUD2URP3)) of the open source project to protect against malicious code and tampering. The Swift installer should display a lock on the right side of the title bar. When you click the lock, you should see details on the developer signature.
- Select a Toolchain [Optional] - If this is the only Swift version on your machine, you can skip this step. However, if you have multiple developer snapshots or previews, you can tell Xcode which version to use by navigating to Preferences, choosing Components | Toolchains or using the Toolchains menu listed under Preferences... directly:
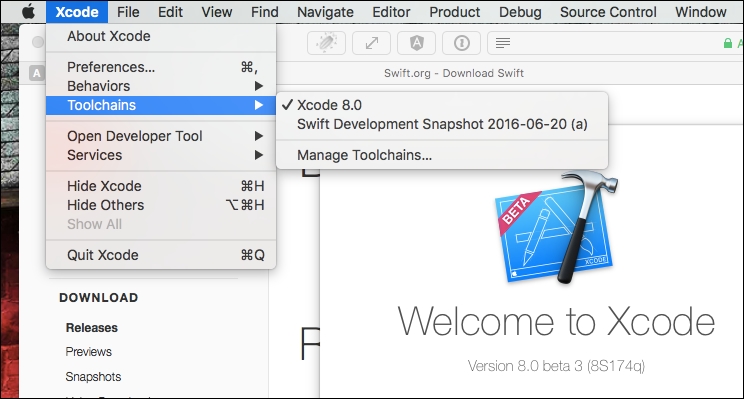
Selecting Toolchains in Xcode 8
- Next, you select the Toolchain you want to develop against, which will only change the Xcode settings. If you want your command line tools settings to change as well, you need to configure those using the xcrun and xcodebuild.
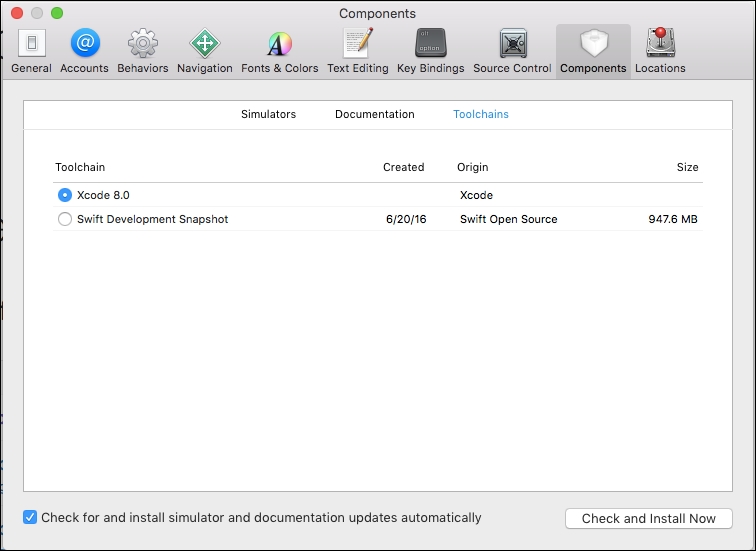
Toolchains menu in Xcode
- Each command has an option to point to a specified Swift
toolchain.$ xcrun --toolchain swift $ xcodebuild --toolchain swift
Once you have your toolchain installed on your Mac, you simply need to launch Xcode and you can begin developing. Since we will spend the majority of the next few chapters tackling new Swift features using Xcode, we are going to shift gears and spend the rest of this chapter discussing Swift on Linux.