Use a hammer and sturdy nail to make a few drainage holes in the base of suitable containers.
I always think gardening is more enjoyable when you just “have a go,” rather than getting bogged down with lots of advice, which can be a little overwhelming—especially for beginners. Having said that, it can be useful to learn a few basics before you begin to avoid making expensive mistakes. With this in mind, I have put together some tips and gentle advice to help you on your way.
CHOOSING CONTAINERS
There are pots, planters, troughs, window boxes, and hanging baskets available in a range of sizes, shapes, materials, and colors from garden centers and online. When deciding on a container, consider materials and colors that will offset your chosen plants well, or stick to classic terracotta, which looks good planted with just about anything. I love the look of old enamel and galvanized metal containers, which you can often pick up cheaply from second-hand stores and markets. Look out for old cans and boxes, as these make lovely containers, and also old pails (buckets) and tubs, which might not look very promising at first, but can be transformed by pretty planting.
PREPARING CONTAINERS
Before planting up a container, there are a few simple steps you can take to get your new plants off to a good start.
Making drainage holes
An important point to bear in mind when choosing containers is that they should ideally have drainage holes in the bottom, as most plants do not like sitting in very wet soil. However, you can easily make holes in containers made from materials like metal or wood with a hammer and large, heavy-duty nail. Simply turn the container upside down and hit the nail hard with the hammer to make several holes randomly around the base. You can also use an electric drill to make the holes.
If you can’t make holes in a container, perhaps because it is made from stone, china, or terracotta, then use it for indoor planting or keep it in a covered area outside so that you can ensure the potting mix does not become waterlogged.

Use a hammer and sturdy nail to make a few drainage holes in the base of suitable containers.
To help prevent pests and diseases damaging your plants, clean containers before planting. Scrub them with warm, soapy water, rinse thoroughly, and let dry.
Using drainage crocks
Crocks are bits of old, broken terracotta pot, china, or old tiles that can be placed over the drainage holes at the bottom of a container to prevent them becoming blocked with potting mix, thus improving drainage. To make crocks, put the broken pots, etc. in a plastic bag (to prevent bits from hitting you), or wear protective goggles, and smash them up with a hammer. Aim for pieces that are roughly 1¼–1½in (3–4cm) square. Add a few handfuls of drainage crocks to the bottom of the container before planting. Set aside a supply of crocks for future displays.
BUYING AND PREPARING PLANTS
Always start with healthy plants, buying them from reputable suppliers and, if you can, take the plant out of its pot and inspect it before buying. Check the plant is not pot-bound, is disease-free, and has healthy-looking roots, leaves, and flowers. Also choose plants suitable for the size of the container and ensure there is ample space for the roots. For small planters, look for alpine and dwarf varieties, which will live happily in more cramped conditions.
Soaking plant roots
Give your container plants the best start by soaking their rootballs in water before planting. Immerse the rootballs in a pail (bucket) of water for 10–20 minutes, or until they are soaked through. Larger plants will need 20 minutes, but 10 minutes should suffice for plants with small rootballs.
Loosening plant roots
If you find that the roots of a plant look pot-bound when you remove the plant from its plastic pot for planting, it has probably been growing in the same pot for too long. Gently loosen the roots to encourage them to spread out and grow in the new pot.

Gently loosen the roots of pot-bound plants, being careful not to damage them as you do so. This encourages the roots to spread out in the new container.
POTTING MIXES
You’ll find a wide selection of potting mixes at garden centers and online. Learning a little about the different types of potting mix will help you to select the correct one for each planting display. There are two main types: soil-based potting mix and soil-less potting mix (which contains peat or a peat substitute).
Soil-based potting mix
Soil-based potting mix is a good, all-purpose mix that is suitable for most container displays. It provides plants with decent nutrition for the weeks immediately after planting and also retains moisture. In addition, its free-draining qualities encourage roots to grow. Soil-based potting mix is ideal for a range of applications, including:
• Seeds and cuttings: Potting mixes for growing seeds and cuttings must be sterile, lightweight, and nutrient-poor (as too many nutrients can scorch newly germinated seedlings). The seedlings will need potting on to bigger pots as they grow.
• Annuals and perennials: These plants require a richer potting mix than seeds and cuttings, with a higher nutrient content to encourage root and foliage growth. Also available is bulb potting mix, a specialist mix that contains added grit or sand to provide a free-draining growing medium suitable for growing bulbs.
• Permanent plantings: Container plants must obtain all their nutrients from the potting mix. For this reason, plants such as the hydrangea in the Rusty Planter with Daisies and Snapdragons (see pages 36–39) and the Potted Kumquat (see pages 130–33), which are grown permanently in a container, need a potting mix that is rich in nutrients, with slow-release fertilizers, and also free-draining.
Soil-less potting mix
You can also buy soil-less potting mix, but this is better suited to short-term plantings because it is much lighter and tends to dry out very quickly. You will need to feed plants grown in this type of potting mix regularly to maintain nutrient levels, which tend to be low. It is, however, often cheaper than soil-based potting mixes and can be useful in small containers. Always try to avoid potting mixes that contain peat, as their production is very damaging to the environment.
Specialist potting mixes
For certain types of plant, a specific or “specialist” potting mix is necessary if they are to thrive. Plants that require a specialist potting mix include cacti and succulents, which need extra grit for drainage. If you can’t get hold of any cactus and succulent potting mix, a general-purpose potting mix with added horticultural grit or gravel will work fine. Ericaceous plants, such as heathers, blueberries, and some ferns, are lime-hating and need an ericaceous potting mix with a pH lower than 7. This is often available in smaller bags, making it more economical to buy.
Incorporating additives
Container displays can benefit from various additives being mixed into the potting mix before the plants go in. While not essential, these additives can be very useful. Horticultural sand or grit, for example, can be used to improve drainage. This is especially important when growing cacti, succulents, and alpines, all of which prefer a free-draining growing medium. Only use sand or fine gravel for seedlings or very small plants, to avoid damaging their roots.
Vermiculite, which is an expanded mineral, and perlite, a naturally occurring volcanic glass, both improve drainage and help aerate the potting mix. They should be available from garden centers or online, and can often be bought in small quantities, which is useful for small-scale gardening.
Mulches and decorative trims
Mulches are materials that are spread over the surface of the potting mix to help preserve moisture, protect plant roots from extreme temperatures, or purely as a decorative finish.
Gravel, which is available in a wide variety of colors and sizes, adds a lovely finishing touch to container plantings and can also help to keep leaves off damp potting mix, so preventing them from rotting and causing disease. Gravel is traditionally used around cacti and succulents.
Slate, pebbles, pieces of broken glass, and shells are also readily available and can look very pretty when used as a mulch. Wood chippings and bark can also be used as mulches, although they are more useful for large-scale plantings. Sheet and cushion moss, available from florists and garden centers, both provide a natural-looking cover for the surface of the potting mix and can finish off a planting scheme beautifully.
CARING FOR PLANTS
Looking after container plants well is important and will help to keep them looking good for longer. Follow these simple tips and your plants will bloom throughout the summer season.
Container gardens are particularly prone to drying out, especially in warm weather, so it is essential to check the potting mix regularly and water as required. Try to water in the evening rather than the morning, to reduce the rate of evaporation. Generally, plants need more water during their growing season, over the summer, and much less in winter.
Most plants prefer moist rather than soaking-wet potting mix, but do not like to dry out completely. Check your containers daily, particularly in warm weather. A good way to check moisture levels in a container is to stick your finger in the potting mix, as the surface can sometimes look wet but be dry underneath. If the potting mix feels dry, then you need to water the container.
You can also add moisture-retaining granules to the potting mix when planting up your containers. Although not essential, these can be useful for small containers, hanging baskets, and indoor displays that are prone to drying out quickly.
If your plants start to look unhappy, try changing the watering regime or moving them to a different spot. In very hot weather, for example, you may need to water your containers twice daily. Also, if the sun is particularly strong, it might be worth moving the containers into the shade to provide some protection.
If a container feels very dry, plunge the whole thing into a large tub of water and let it soak thoroughly. Leave the plant soaking for at least half an hour, then remove and let drain.
Feeding
Most general-purpose potting mixes provide plants with enough nutrients for six to eight weeks following planting. After this time, container-grown plants benefit from additional feeding on a regular basis, in the form of either liquid feeds or slow-release fertilizer granules. Regular feeding is especially important for flowering and fruiting plants.

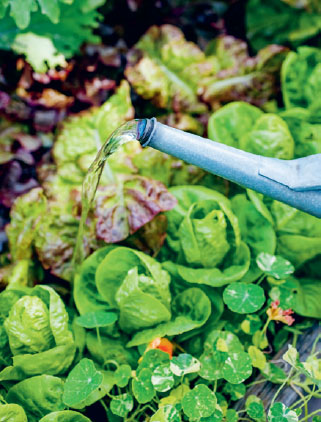
Plants grown in containers or confined spaces, such as this raised bed, can dry out quickly. Remember to water plants regularly, preferably in the evening.

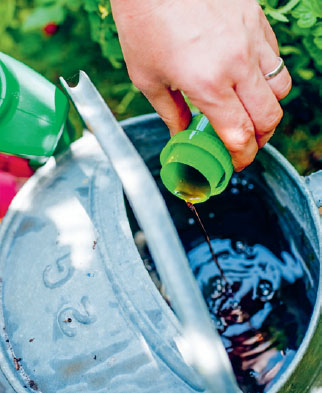
Regularly feeding container-grown plants with a liquid feed, diluted according to the manufacturer’s instructions, will result in healthier plants.
* Liquid feeds: These are available for either general use or specific types of plant, such as tomatoes, roses, or strawberries. Following the manufacturer’s instructions, the feed can be diluted and added either weekly or fortnightly throughout the growing season. Liquid feeds are a good buy and work well for most outdoor containers.
* Slow-release fertilizer granules: You can add these to the potting mix before planting or roughly fork them into the top of the potting mix in established containers. This type of fertilizer reduces the need for regular liquid feeds.
* Foliar feeds: These are great options for giving your container plants a quick boost. They are diluted liquid fertilizers that are sprayed directly onto plants to perk them up quickly, but are not a substitute for feeding the potting mix. Don’t spray the plant in direct sunlight, because the leaves may scorch as the solution dries.
Deadheading
To promote new growth, dead flower heads and leaves must be removed from container-grown plants. This can increase flowering by encouraging the plants to put their energy into producing new flowers rather than setting seed, while also keeping them looking neat and tidy. Remove the dead flower heads and leaves by hand, or use a pair of scissors or hand pruners (secateurs) if the stems are harder or woodier. This approach also reduces the risk of pest and disease infestation.
Staking
Some plants, such as dahlias, delphiniums, achilleas, and pepper plants, can grow quite tall. Staking provides additional support and stops the stems bending over and looking untidy. Simply use garden twine, string, or colorful raffia to tie the stems to garden canes or twiggy stems pushed into the potting mix.

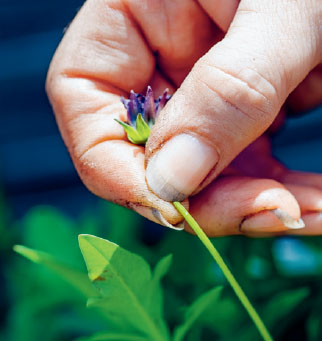
Removing spent blooms from plants—a technique known as deadheading—can promote further flushes of flowers.

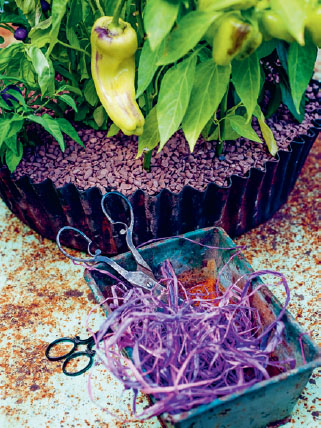
Support taller plants by tying their stems to garden canes or twiggy stems pushed into the potting mix. Here, pretty raffia is being used to tie in some pepper plants.
DEALING WITH PESTS AND DISEASES
If unchecked, pests and diseases can quickly decimate your plants and garden. Vigilance, as well as acting quickly upon the first signs of an infestation, is good practice for keeping your plants and containers healthy and looking good for as long as possible. Here are some useful tips to help keep your displays in tip-top condition:
* Always clean containers thoroughly before planting.
* Buy strong-looking plants with healthy rootballs and no obvious signs of disease. You can check for possible problems by removing the plant from its pot and inspecting it before purchasing.
* Make sure you use a good-quality potting mix that is correct for the plants you’re growing, and keep the container in a suitable spot, both to encourage healthy growth and to reduce the risk of disease.
* Feeding regularly results in healthier plants, making them less likely to succumb to problems.
* Check your plants regularly for signs of pest and disease infestation.
* If possible, use organic products to help combat any pests and diseases. Other commercially available treatments risk harming welcome wildlife, which can help to reduce pest infestations naturally.
Aphids (blackfly and greenfly) must be removed at first sight. They suck the sap from plants, resulting in a lack of vigor and, ultimately, distorted growth. A light infestation can be removed with your fingers, although commercial treatments are available for heavier infestations. If you are unsure about using chemicals in the garden, spraying with a dilute solution of water and dishwashing detergent can work well too.
Botrytis (gray mold) is a fungal infection that occurs if plants are damp and have insufficient ventilation. It is a common problem, characterized by a quick-spreading, gray, dusty mold on the stems and leaves of plants. To remedy this, use an organic fungicide and improve ventilation. Be careful not to confuse gray mold with dehydration, a telltale sign of which is a similar whitish bloom on the foliage; this should be remedied with additional watering and feeding.
CONTAINER GARDENING KIT
You don’t need lots of expensive equipment to enjoy container gardening. Below is a list of recommended items that will get you off to a flying start.
Garden canes or twiggy branches (for staking plants)
Garden trowel
Gardening gloves
Hammer and large, heavy-duty nail (for making drainage holes in containers)
Hand fork
Hand pruners (secateurs)
Plant labels and waterproof pen
Scissors
String and/or garden twine
Watering can, with a fine rose attachment
Water spray bottle