RESTful services may or may not be a part of your web application, but we still need to understand how to implement them.
So, now it's time to do some real work. Add ProductController to the project, as well as the following action:
public ActionResult Index()
{
  var webClient = new RestSharpWebClient();
  var products = webClient.GetProducts();
  return View("ProductList", products);
}
Take a look at the preceding code snippet. We have called the GetProducts method of RestSharpWebClient and populated our Index.cshtml view with a complete list of products.
To add another action method, enter the following complete code of our ProductController. The following code snippet contains the Index action method and gives us a list of products:
public class ProductController : Controller
{
  public ActionResult Index()
  {
    var webClient = new RestSharpWebClient();
    var products = webClient.GetProducts();
    return View("ProductList", products);
  }
  public ActionResult Details(string id)
  {
    var webClient = new RestSharpWebClient();
    var products = webClient.GetProductDetails(id);
    return View(products);
  }
Let's now look at two Create action methods: HttpGet and HttpPost. The first one provides us with an entry screen for input and the second posts all the data (the input values) using the HttpPost method. On the server side, you can receive all data in an IFormCollection parameter, and you can also easily write logic to get all of your values in ProductViewModel.
  public IActionResult Create()
  {
    return View();
  }
  [HttpPost]
  [ValidateAntiForgeryToken]
  public IActionResult Create(IFormCollection collection)
  {
    try
    {
      var product = new ProductViewModel
      {
        ProductId = Guid.NewGuid(),
        ProductName = collection["ProductName"],
        ProductDescription = collection["ProductDescription"],
        ProductImage = collection["ProductImage"],
        ProductPrice = Convert.ToDecimal(collection["ProductPrice"]),
        CategoryId = new Guid("77DD5B53-8439-49D5-9CBC-DC5314D6F190"),
        CategoryName = collection["CategoryName"],
        CategoryDescription = collection["CategoryDescription"]
      };
      var webClient = new RestSharpWebClient();
      var producresponse = webClient.AddProduct(product);
      if (producresponse)
      return RedirectToAction(nameof(Index));
      throw new Exception();
    }
    catch
    {
      return View();
    }
  }
The following code snippet shows us the code for the Edit action method, which is similar to the Create action method but except that it updates existing data rather than inserting new data:
  public ActionResult Edit(string id)
  {
    var webClient = new RestSharpWebClient();
    var product = webClient.GetProductDetails(id);
    return View(product);
  }
  [HttpPost]
  [ValidateAntiForgeryToken]
  public ActionResult Edit(string id, IFormCollection collection)
  {
    try
    {
      var product = new ProductViewModel
      {
        ProductId = new Guid(collection["ProductId"]),
        ProductName = collection["ProductName"],
        ProductDescription = collection["ProductDescription"],
        ProductImage = collection["ProductImage"],
        ProductPrice = Convert.ToDecimal(collection["ProductPrice"]),
        CategoryId = new Guid(collection["CategoryId"]),
        CategoryName = collection["CategoryName"],
        CategoryDescription = collection["CategoryDescription"]
      };
      var webClient = new RestSharpWebClient();
      var producresponse = webClient.UpdateProduct(id, product);
      if (producresponse)
      return RedirectToAction(nameof(Index));
      throw new Exception();
    }
    catch
    {
      return View();
    }
  }
The Delete action method is meant to remove a specific record or data from a database or collection. The action method Delete of HttpGet fetches a record based on a given ID and displays the data ready for modification. Another Delete action of HttpPost sends modified data to the server for further processing. This means the system can delete data and records.
  public ActionResult Delete(string id)
  {
    var webClient = new RestSharpWebClient();
    var product = webClient.GetProductDetails(id);
    return View(product);
  }
  [HttpPost]
  [ValidateAntiForgeryToken]
  public ActionResult Delete(string id, IFormCollection collection)
  {
    try
    {
      var product = new ProductViewModel
      {
        ProductId = new Guid(collection["ProductId"]),
        ProductName = collection["ProductName"],
        ProductDescription = collection["ProductDescription"],
        ProductImage = collection["ProductImage"],
        ProductPrice = Convert.ToDecimal(collection["ProductPrice"]),
        CategoryId = new Guid(collection["CategoryId"]),
        CategoryName = collection["CategoryName"],
        CategoryDescription = collection["CategoryDescription"]
      };
      var webClient = new RestSharpWebClient();
      var producresponse = webClient.DeleteProduct(id, product);
      if (producresponse)
      return RedirectToAction(nameof(Index));
      throw new Exception();
    }
    catch
    {
      return View();
    }
  }
}
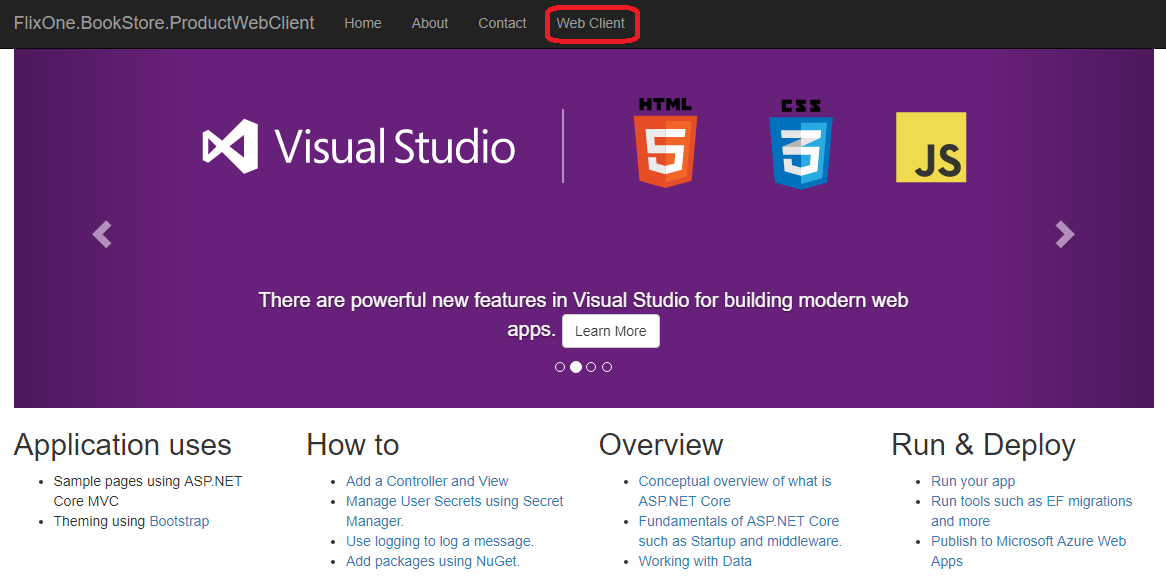
Now let's open _Layout.cshtml from the Shared folder and add the following line to add a link to our newly added ProductController:
<li><a asp-area="" asp-controller="Product" asp-action="Index">Web Client</a></li>
You should see a new menu named Web Client when you run the project, as shown in the following screenshot:

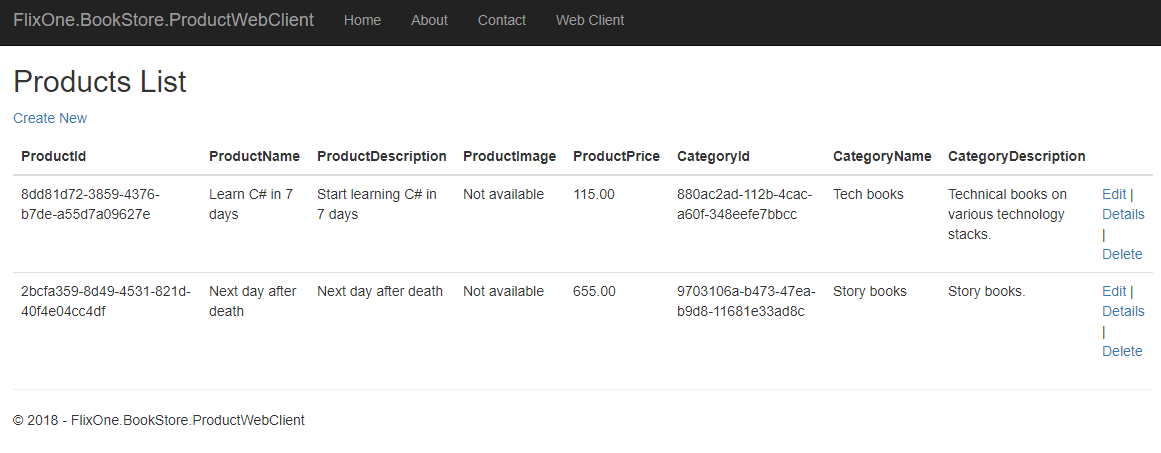
We are now ready to see some results. Click on the Web Client menu, and you will see the following screen:

From the preceding screen, you can perform other operations, as well as call and consume your product APIs—namely, Create, Edit, and Delete.