
Frank Jardim
Located in Italy’s northern gun-making region, family-owned-and-operated Davide Pedersoli & Company takes great pride in the quality of their historic replica firearms. Nobody makes as many different muzzleloaders. European competitive marksmen win lots of medals with them too. They’re exceptionally well made and show admirable dedication to historic accuracy.
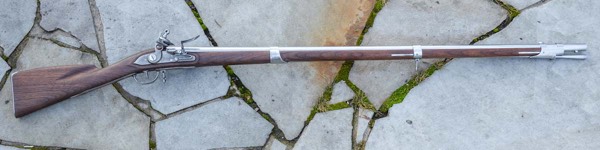
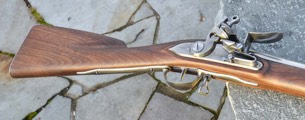
Completed Davide Pedersoli & Co. 1763/66 Charleville Musket kit with Frank’s Continental Army modifications.
Their pricing reflects that quality, but if you have a moderate amount of skill you can save over 20% by buying their guns in kit form and building them yourself. The retail on the factory-finished musket in this story is $1,595, while the kit is only $1,275.
This isn’t something likely to be found at the local gun shop, but you or your hometown dealer can order anything in the Pedersoli online catalog from IFG (Italian Firearms Group) that imports, distributes and services Pedersoli products. If IFG doesn’t have it in stock, it will be on the next inbound container.
A Beginner/Intermediate Project
One of the best features of Pedersoli kits is you need not be an expert to finish them into beautiful guns. They are perfect for beginners because all the stock inletting, fitting and even some finishing is done at the factory. The guns arrive dry-fit (completely assembled with the stock fully inlet and every part in its correct position).
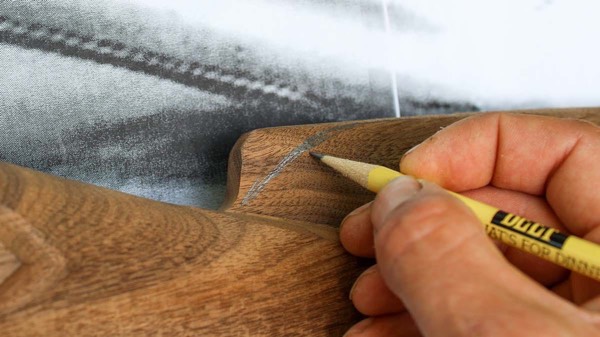
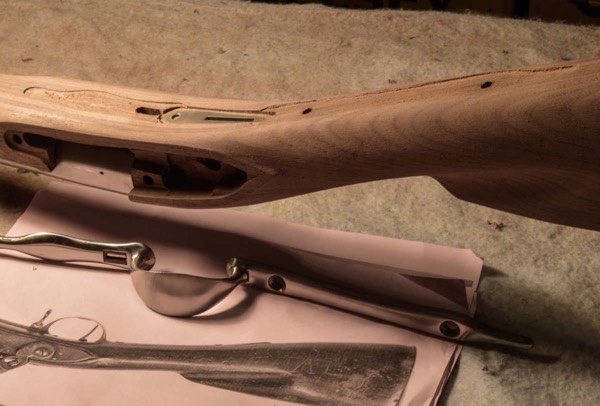
Frank marked the wood to be removed from the reproduction stock using scaled photos of originals as a guide.
By starting with a dry-fit gun, you cut out the most challenging and anxious aspect of the build. Most people haven’t built, or even seen, enough Charleville muskets to know the exact location of the rear barrel band, trigger guard, etc. When you start a Pedersoli kit, you jump ahead to the inspection stage and double-check their work instead of going through the sometimes-lengthy process of researching, locating and then adjusting the inletting and fit of each part yourself.

Tape helped visualize the final comb shape after wood removal. This was as close to parallel with the bore axis as Frank was willing to take it.
On kits from lesser brands, you should always be suspect of the inletting, hole locations and stock geometry.
Expect everything to be a little off and some things to be a lot off.
Is the time you spend correcting those issues on lower priced kits worth it? That’s for you to decide. You need to be a much more competent craftsman to get the cheaper kits to come out nice.
This Charleville’s walnut stock was 95% finished, remaining a little beefy from rear barrel band to butt. Most of the remaining work was focused there. It’s important to note where the three barrel bands fit, the stock was already at its correct final size. I noticed this during my dry-fit inspection. Take care when stock sanding to avoid reducing these areas any further, or you could end up with loose bands. Mark their edges on the stock with a sharp pencil so you can see where not to sand.

Tap out the trigger and sling swivel pins from the outside with a punch. Driving them from the inside out could chip the wood in the last place you want — where it shows!
This kit also had the difficult metal polishing of the lock and trigger guard already done, and the barrel nearly so. The rest of the metal parts were as cast and needed the mold sprues filed off. You'll also need to do some fine shaping with files and sequential hand polishing with 100-, 150-, 220-, 360-, 400-, 500- and 600-grit sandpaper or emery cloth to give them that rust-resistant, armory-bright look. Back when this was state-of-the-art military issue, the troops used a regular issue of fine brick dust to keep them polished.
Frank’s Custom Design
If I’d made this kit to match the factory finished guns, it would have taken two weekends of my full attention.
However, I had something else in mind, and it’s the beauty of a kit-built gun. You can modify them into precisely the gun you want.
I wanted to make a gun that had the look of surviving examples with provenance to the American Revolution.
During the Revolution, the French government sold or otherwise provided the American cause with approximately 200,000 muskets. Most were older French muskets of at least six different obsolete patterns held in storage at their military arsenals. While these guns were obsolete from the French point of view, they were the equal or better of the British Brown Bess musket, and the Americans needed them badly.
Regardless of the actual French military model nomenclature or the actual arsenal of their manufacture, the Americans called the French muskets “Charlevilles” after one of the arsenals that made them. Besides the standard models, the French sent repaired and partially upgraded muskets sharing characteristics of two or more models.
In fact, from the looks of surviving historical examples, it appears they frequently varied in the minor details of their furniture, particularly triggers, trigger guards, front barrel bands and bayonet lug location. I think this is because the guns of this era were all essentially handmade and it’s the result when six different models’ parts are combined. However, one characteristic was reasonably consistent: the general geometry of the buttstock.
Fact Finding
To research this Revolutionary War Charleville build, I studied photographs and descriptions of 15 reportedly original muskets from excellent to relic condition and inspected one in very fine condition in a local museum collection. With a sampling this small, I wouldn’t bet my life on my conclusions, but it appeared nearly all the original guns had very similar buttstocks that differed significantly from the Pedersoli replica.
The replica has a long, high, upward-angled, square-nosed comb. The original Revolutionary War Charlevilles had shorter, lower, level combs with a sloping nose. Unlike the replica, the top of the original combs ran parallel — or close to parallel — to the axis of the barrel, and the butt was deeply fluted on each side of the comb above the wrist. Sometimes this fluting ran 3/4 the length of the comb.
I asked Stefano Pedersoli about this and learned their replica was based on research done by the respected French military arms historian Jean Boudriot. Pedersoli kindly sent me copies of the relevant pages of Boudriot’s 1961 book Armes a Feu Francaises Modeles Reglementaires . Their stock matched the illustration perfectly.
Pedersoli observed the earlier model French muskets had combs similar to those I was finding in my research. I don’t feel I can offer a definitive answer to explain why nearly all the original examples I found differed from Boudriot’s drawing of the 1766 model. It could be any number of things, starting with too small a study sample to post-war modification while in American military arsenals.
It’s tough to tell what’s happened to a gun over the course of 250 years, even when you can hold it in your hands. In any case, I decided to copy the geometry of the best original Revolutionary War muskets found in my research. Fortunately, there’s plenty of wood on the semi-finished stock of the kit to work with.

When coarse filing in the distinctive comb flutes above the wrist, don’t cut into the wrist. Be sure to leave extra material for sanding to final size.
Woodwork First!
When building the kit, it makes sense to start with the wood because you can go back and work on the metal parts while the stock finish is drying. Begin by studying the assembled gun and make note of where wood needs to be removed. I enlarged pictures of the original stocks as close to full scale as I could with a photocopier and laid a straight edge over them to understand the geometry. Then I transferred my findings onto the beefy buttstock of the replica and started marking the areas to be removed.

Using photos as a guide, Frank marked the wood to remove from the point of the comb to get the correct “spear point” geometry.
Carefully remove all metal work from the stock except for the buttplate and put the parts in the original box so you don’t lose them. Set up to work where dust won’t be a problem and you have plenty of room because the stock is long! Have a few clamps and scraps of smooth board to hold the stock steady so you can work on it. I often make holding fixtures out of scrap wood to clamp the stocks securely without damaging them. Without the metal attached, the stock is fragile and must be handled carefully.

Frank used 80-grit emery cloth to take down excess wood to match the tang.
Since wood can’t be put back after you take it away, I was very conservative when carving, filing and sanding away material. Check your work more often than you think you should, and keep the example photographs in sight at all times while working.
Stock Work …
To more closely match my chosen original, the stock needed thinning above and below the lock, thinning of the wrist and an extensive reshaping of the buttstock, comb and buttplate. I completed all of my rough wood removal for shaping work on the heavy wood of the wrist and butt using 36- and 50-grit sandpaper and coarse files. Then I finished close to the final shape with 80-grit sandpaper. It’s easy to take off too much with abrasives so rough. You may want to work with 80-grit paper alone for the sake of caution.

Brownells’ Hard-Cut Curl Scraper Set is useful for inletting and general stock shaping. Frank is using it here to shave away excess around the lock area.
I began by shaving a thin triangular slice off the top of the comb’s nose, tapering rearward to the tang of the buttplate. This gave the comb a slightly humpback look, which I observed on some original guns. To get the comb perfectly parallel to the barrel axis would have required re-inletting the buttplate so the upper tang was parallel with the barrel. It was more trouble than it was worth.
On the bottom of the buttstock I shaved off about 2mm from the trigger to the buttplate, reducing the trigger guard inletting to a shallow 0.5 mm like the original guns. Then I cut back the comb’s nose to match the sloping angle of the original. I ended up moving the nose back another 10mm after ruminating on my photos of original stocks.
I cut the comb flutes on either side in two stages too, first with a coarse file and then with 80-grit sandpaper wrapped around a 1/2" dowel. Files and sandpaper this coarse really hog out material fast, so again I advocate caution and frequent inspection. Leave enough material for final shaping. You must also take great care to remove material only from the comb. Don’t drift down into the wrist area of the stock. The fluting is all above the wrist line.
Eventually, I extended my fledging flutes halfway down the butt. I cut the nose of the comb to a triangular point that looked surprisingly abrupt, like a spear point, when viewed from the top. This pointed comb nose and the deep fluting were the hardest part of the buttstock geometry to understand from photos alone. If you were to cut through the stock comb vertically and look at the severed end, it would resemble a number “8” with the flutes pinching the top from the bottom. This shape actually made for an excellent grip. At the time, the French were world leaders in arms development.

It’s fine to sand across the grain when rough shaping, but leave extra material and go with the grain when you get over 100-grit abrasive.
Moving Forward
On the top of the stock, above the lock where the barrel tang fit, I used a “shoeshine” technique and 100-grit emery cloth to quickly get the wood down to the tang. Later, I noticed the barrel wasn’t fully seated in the channel and the tang inletting was holding it up. I removed another 0.5 mm to lower it and reduce the gun’s thickness through the lock area. I might have reduced it another 1mm with more tang inletting, but it would put the touch hole below the priming pan. I would then have to grind out the bottom of the pan to fully expose the hole. This didn’t seem worth the trouble.
The time to glue in a chip is immediately after it’s discovered. Wipe off excess glue, clamp it and let it dry before you resume sanding.
I sanded the bottom of the forend until the inletting for the front of the trigger guard was only 0.5mm deep and tapered it up to the pencil line marking the back of the rear barrel band — my “no sand-zone.” With the basic upper and lower limits of the stock geometry now set, I focused on sanding the outside edges of these flat borders to the correct radii and shaping the wrist and lock areas using traditional curl scrapers and sandpaper.

You can use a file to get close to the right metal-to-wood fit, then use a sanding block and sandpaper for the final adjustment.
The Brownells Hard Fit Curl Scraper Set I used included three flat and three round scrapers of increasing size. They can slice away a sliver of wood thinner than a piece of paper, and the big handles improve your control. Sometimes they cut better in one direction along the wood’s surface than they do the other. Though intended for inletting, I found them very helpful in stock shaping prior to sanding with 80-grit paper.
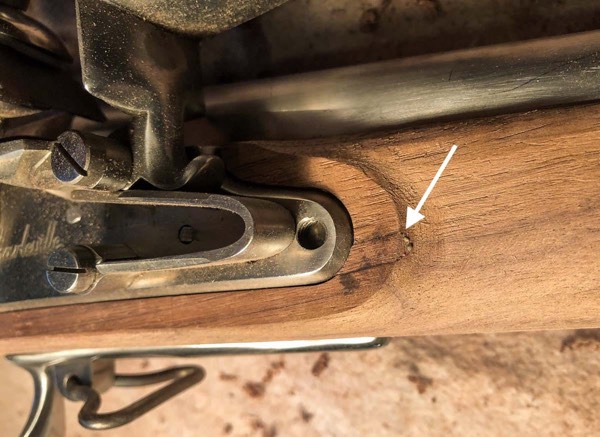
Note how shallow the inletting became when Frank thinned down this area. The originals were the same.
All the outside upper edges of the stock forend along the barrel channel also need to be carefully beveled. When I got all the lines right, I began finish sanding with 100-, 150- and 220-grit papers. Sand with the grain until the scratches from the previous grit are gone.
Finishing Touches
When done, wipe the stock with water and let it dry to raise the grain. When dry, the surface will feel like fine sandpaper and is ready for oiling with tung oil.
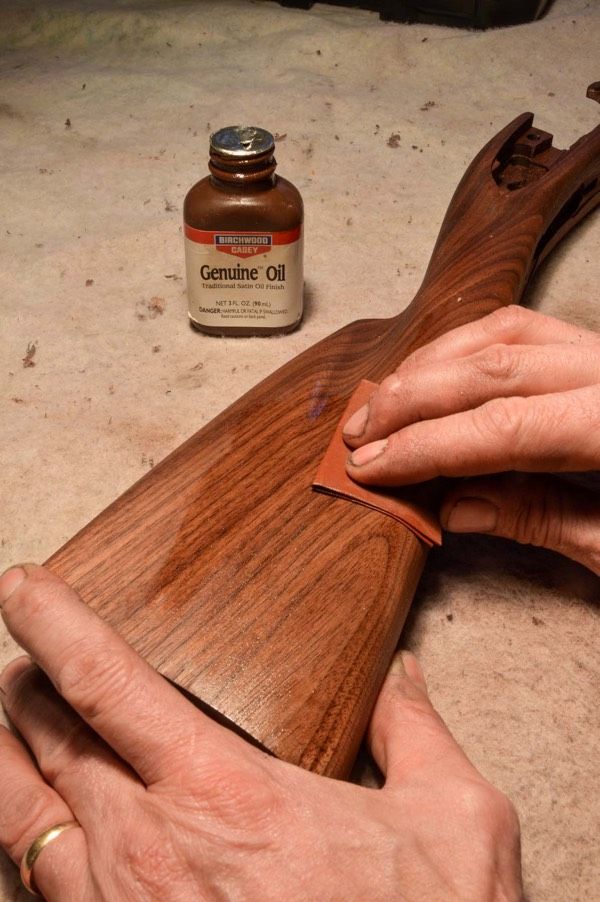
Frank finished and sealed the stock by wet-sanding with Birchwood Casey Genuine Oil (tung oil) and 320-, 400-, 500- and 600-grit sandpaper to fill the grain. Let it dry a day between applications.
To seal wood on military guns, I prefer Birchwood Casey’s Genuine Oil. This high-quality tung oil is quicker to apply, more durable and more easily touched up than boiled-linseed oil. I wet-sanded the oil on the wood with 320-, 400-, 500- and finally 600-grit sandpaper, allowing the slurry to dry, fill in and seal the grain. The result is a low-sheen, military, rubbed-oil finish. Dispose of the oily rags outside because they can spontaneously combust.

Steel parts in the raw have a coarse finish from casting.
Metalwork
There aren’t many metal parts to finish out on this kit. The more involved work is cleaning up and polishing the casting marks off the buttplate, trigger, trigger plate, sling swivel loops and the barrel bands.

Frank found there was room to lower the tang a little more in the stock by deepening the inletting directly under it, but unless you’re ready to grind down the bottom of the priming pan, you can’t go far because the flash hole will be too low.
The barrel and barrel-band springs needed only some work with 400- and 500-grit sandpaper before a final polish on the buffing wheel.

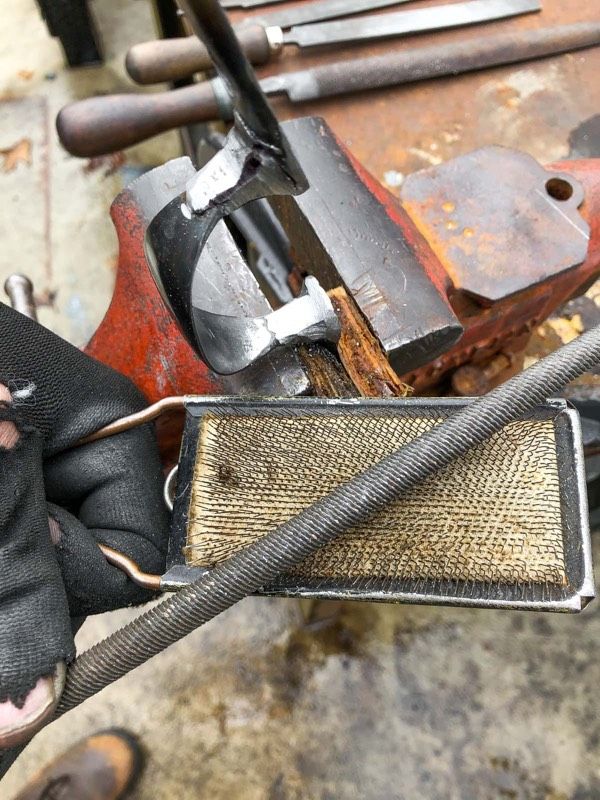
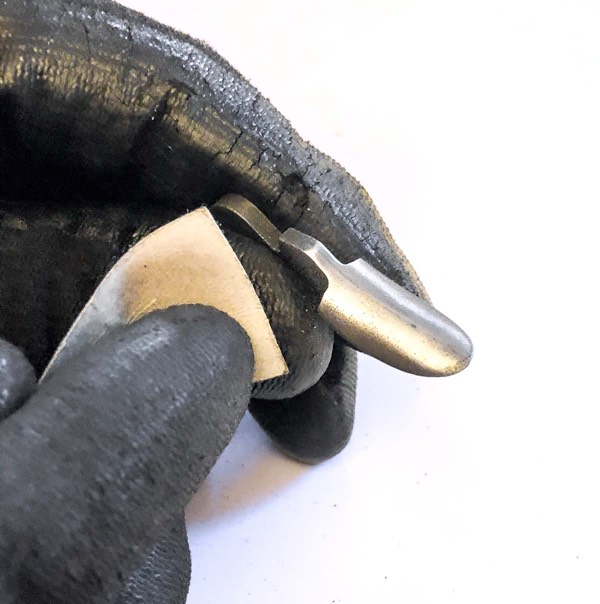
As he shaped the wood first, Frank had to file the edge of the buttplate back to shape to with the stock.
Steel is a lot harder to work than brass, and I resorted to the delicate use of a Dremel tool to get the porous-looking cast surface finish smoothed out fast. After that, I used files and progressively finer sandpaper just like working on the wood.
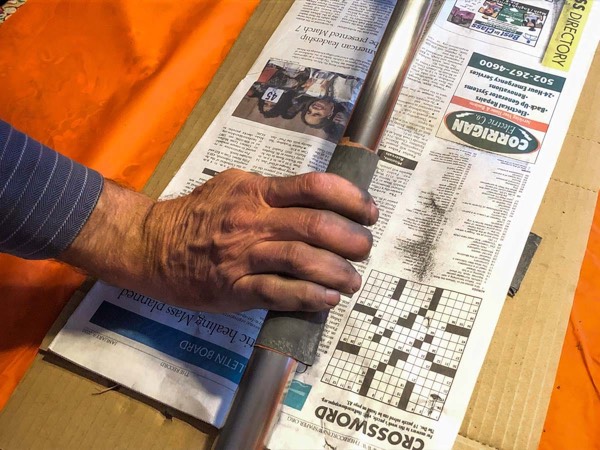
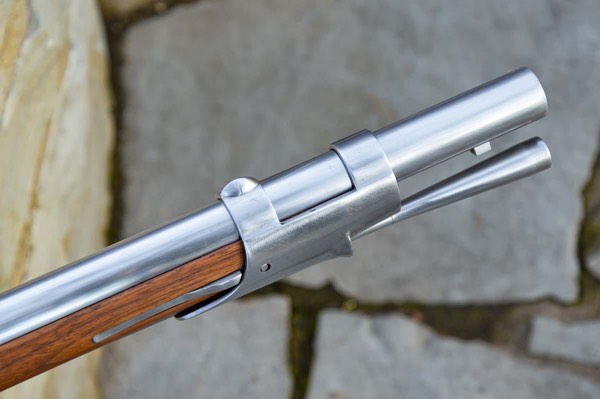
The barrel is the easiest part to final polish to armory bright since it’s nearly there as delivered.
The only fine-tuning required on the metal parts was a slight enlargement of the middle band retaining spring hole with a round file, a slight beveling on the back inner edge of all the bands so they install without catching and gouging the stock (especially the rear band) and reshaping of the buttplate.
Clean your file with a card file often so chips don’t get stuck in it and scar your work. A little chip can do a lot of damage to the surface.
The material shaved off the bottom of the buttstock left about 2mm of buttplate hanging in the breeze that had to be cut off; filed to match the correct profile of the wood buttstock; filed again along its edge to a uniform 1mm thickness and finally again filed to slope the edge up to a crown at the centerline as it was originally.
Sanding the casting lines off the trigger is a job for 80-grit sandpaper.
Once all the reshaping I was willing to do was complete, I was quite satisfied with the overall look of the piece. It was now unique among modern reproduction Charlevilles, much like the originals seem to have been.

However, unlike the mixed bag of fine and flawed European arms that made it to the desperate empty hands of Continental soldiers 240 years ago, this Pedersoli is of known excellent quality.
For more info: www.