RHYTHM & NOTE VALUES
Fascinating rhythm! Feel it; clap it; read it
If you tap or clap the rhythm of a familiar song, other people usually recognize it. So, knowing the rhythm of a piece of music goes a long way in learning and notating that music.
Try this exercise: walk at an easy pace; clap once for every step; count out loud, one number for each step—one, two, three, four. Think of a simple song or nursery rhyme, and say it in rhythm as you walk. If you prefer sitting, put both hands flat on a table or your lap and use your hands to “walk” (tap lightly) the regular beats or pulses. Notice, as you say the words to your regular beat, that some words are held longer than others, and that you can tap two steps to one word. Since the quarter note is the basic beat, each step can equal a quarter note.
Table of Note Values and a Pattern to Clap
- The relationship of the note values to each other is always the same.
- From this list of note values, any rhythm, no matter how complicated, can be notated.
- The basic beat is the quarter note. The basic beat is doubled, then tripled, then quadrupled.
- Now the basic beat is divided, first into eighth notes, then sixteenth notes.
- Count out loud as you clap: “1” for each quarter note, “1-2” for each half note.
- Find a large space to walk, hold your book up, and count as you walk the quarter notes steadily.
- Count out the rhythms over the steady quarter-note steps.
- Lightly tap these rhythms as you count out loud.
We use measures to organize the patterns into a regular number of beats—two, three, four, five, six, and sometimes more. In the time signature the top number informs you of the number of beats in a measure. The bottom number is a symbol of the kind of note that equals one beat. In these beginning instructions we will use the number 4 (a symbol for quarter note) as the bottom number, although it is possible to use any note value to equal one beat.
Yes, there are 32nd and 64th notes; to notate these, add a flag or a beam to the note(s). If a 16th note has two beams or flags, the 32nd note will have three beams or flags; the 64th note will have four beams or flags. You can find examples in slow movements (usually the second movement) of classical sonatas by Haydn, Mozart, and Beethoven.
Rhythm Patterns to Clap or Tap
- More rhythms to clap or tap. Try walking the quarter notes and clapping the rhythm at the same time.
- Find words that fit these rhythms, either words of songs or nursery rhymes, or ones you invent.
- Examples are: the first phrase of “Jin-gle Bells,” recited slowly; “Walk on By”; or “List-en Now.”
- Think of words that go with the rhythm as you tap your hands on a table.
- The up stems on the noteheads mean right hand.
- The down stems on the noteheads mean left hand.
- At the end of these rhythms the hands tap or clap simultaneously.
Track 1 
MORE RHYTHM
You are surrounded by the “beat,” or the pulse of life
In Western music, rhythm has been traditionally organized into measures, with a set number of beats per measure. We call this organization “meter.”
The first beat of the measure is called the downbeat, and is usually the strongest beat in the measure. A waltz has three beats per measure and is felt as ONE, two, three; ONE, two, three. The march rhythm usually has two or four beats per measure; it is felt as ONE, two, ONE, two, or as ONE, two, three, four, ONE, two, three, four.
Think of “Hot Cross Buns,” or “Twinkle, Twinkle Little Star,” or “Mary Had a Little Lamb,” when you count two or four. “My Darling Clementine” has three beats in a measure. Take a moment to think of these songs: sing them, or say the words in rhythm. Can you feel where the beat is stronger? The strongest beat is not always the first note of the song. The strongest beat in “Clementine” occurs on the first syllable of the word, “DAR-ling?”
Hot Cross Buns
- Tap or clap this rhythm to “Hot Cross Buns.” Then play it on the three black keys, starting with the highest key in the group, and using one finger, or fingers 4-3-2.
- Now play the tune on B-A-G. Use one finger, or fingers 4-3-2.
- Left hand gets equal time! Play the tune on the three black keys; use either one finger, or fingers 2-3-4.
- Left hand plays the tune on B-A-G, fingers 2-3-4.
London Bridge
- A dot beside a note makes the note longer by one half. For example, a dotted half note equals three beats. A dotted quarter note equals one and a half beats.
- “London Bridge” is the perfect example of the dotted quarter note. It is usually followed by an eighth note.
- The first two notes are written two ways, but they sound the same. You can see how they saved ink, and time, with the second version!
The two numbers at the beginning of each piece of music make up the time signature. The top number tells you how many beats are in a measure. The bottom number tells you what kind of note equals one beat. These are not fractions!
GREEN●LIGHT
In addition to clapping or tapping these rhythms, you can try playing the tunes by “ear”; i.e., find the tune on the keys using one finger. “Twinkle, Twinkle Little Star” reaches up from the key, C, to the next G, then up to A, then down to G and each white key on down to C. Most of these keys are played twice (repeated notes).
Ode to Joy
- This is the rhythm of Beethoven’s “Ode to Joy.” Tap or clap it. You can try it on the piano starting on E, or on B.
- The measures are marked and there are four beats in each one.
- At the end of measure twelve is a tied note. The first beat of measure thirteen is the same note connected to it with a curved line. Notes “tied” together form one sound, held the length of the two notes together.
Track 2 
THE ORIGINS OF NOTATION
The history of music notation flows logically from dots over the words
First, words of a religious chant were written on a page; the tune for the words was passed from one generation of choir members to another, until someone got a bright idea to put dots over the words to remind the singer of the movement of the tune. If the dots went higher, the tune went higher. If the dots went lower, the tune moved downward.
The next step in this simplified history of notation was one line drawn above the words to represent one definite pitch (the highness or lowness of a sound). The definite pitch letter (A, B, C, D, E, F or G) was written at the beginning of the line. If the tune went up from the lined note, the dots went above the line. If the tune moved downward from the lined note, the dots went below the line.
Medieval Chant Notation
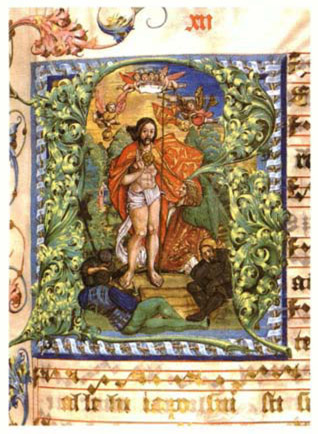
- The symbols over the words are called “neumes,” from the Greek “neuma,” which means sign or nod. Notice that they rise and fall, following the contour of the melody.
- The neumes were reminders of the chant. The singer would have memorized the exact melody.
- The conductor of the choir would indicate with his hand the rise and fall of the melody.
With the addition of other lines, the dots became line notes and space notes. If you played or sang A up to B, It looked like a space note up to the next line, or a line note up to the next space.
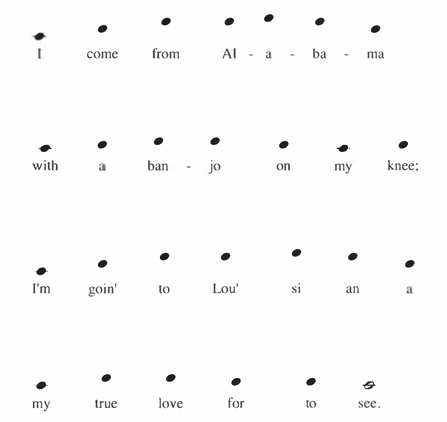
“Oh! Susanna,” Verse
- The words to this song have dots over the syllables reminding us of the melody.
- If you did not know this tune, you would have a difficult time getting it from the little dots! Memory plays a more important part here.
As you sit at the keyboard with the book open, visualize the direction of the dots over the words and connect it with the appropriate direction on the keyboard.
Medieval Chant Notation
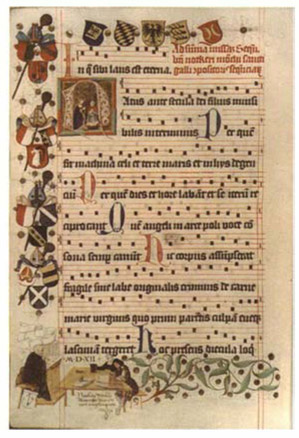
- Notice the one line above the Latin words, with the letter “F” at the beginning.
- The other markings were indications for how long to hold notes and how to sing them.
A book with chants and music that goes way back to the year 1200 or so is still being printed, and is used by choirs who sing Gregorian chants. The chants are written on four-line staffs, and the clef signs, G, F, and C, are used freely, and often changed in the middle of the chants so that ledger lines can be avoided.
“Oh! Susanna,” Verse
- The dots have been made a little more specific by adding a line above the words, indicating the first note of the line.
- Try playing “Oh! Susanna” on the piano, starting on middle C.
- The first three keys are intervals of a 2nd part: C, up a 2nd D, up a 2nd E.
TREBLE & BASS CLEFS
A place for all the high notes and low notes on the staff
By the year 1400, notation had developed into a staff with five lines and four spaces: high notes, or treble notes, are indicated on the treble staff; low notes, or bass notes, are indicated on the bass staff. (“Bass” is pronounced like “base.”)
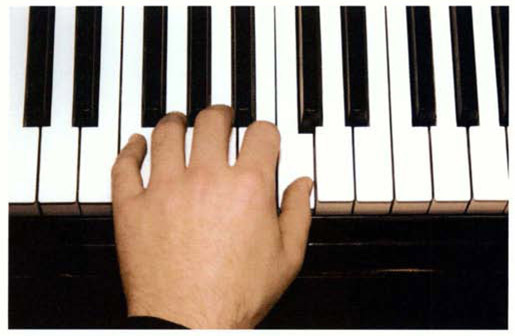
There are line notes and space notes. Notice the first two photos below, showing treble G down to middle C on the Treble Staff, then treble G down to middle C on the keyboard. There is no line for middle C, so an extra line (ledger line) has to be drawn through the note.
Photos three and four show bass F up to middle C on the bass staff, then bass F up to middle C on the keyboard. Again, there is no line for middle C, so an extra line has to be drawn through the note.
Treble Staff
- Today’s staff has five lines, and is named after the G line. The treble clef used to be the letter G.
- The treble (“high”) clef is also called “G clef,” and indicates the second line from the bottom as G above middle C.
- The staff comprises five lines and four spaces. When the treble clef is at the beginning, it is called the treble staff.
- Using the marker note, treble G, the keys from G down to middle C are written Line-Space-Line-Space-Line.
Treble G and Middle C on Keyboard
- When seated facing the middle of the keyboard, the C nearest the middle is called middle C.
- Treble G (the “marker” note) is the first G above middle C.
- Notes written on the treble staff are for women’s voices, higher (tenor) men’s voices, violins, flutes, etc., and the high keys (around and above middle C) on the piano.
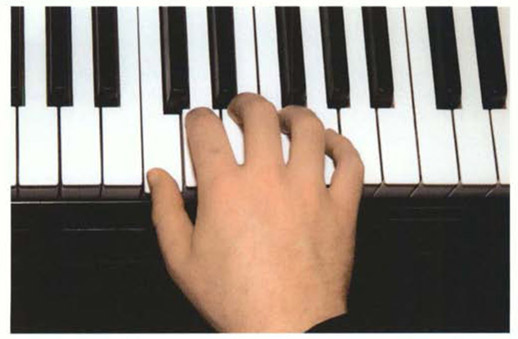
- Play all the white keys from treble G down to middle C with the right hand. Use one finger; then use fingers 5-4-3-2-1.
Usually the treble clef sign is used for the top staff (right hand), the bass clef sign is used for the bottom staff (left hand). But there are times when both hands play above middle C on the piano; then the treble clef sign is used on both staffs. Conversely, there are times when both hands play below middle C; then the bass clef sign is used on both staffs.
Bass Staff
- The bass (“low”) clef, is also called the “F clef,” and indicates the 2nd line from the top as the first F below middle C. The F clef used to be the letter F.
- When the bass clef is at the beginning of the staff, it is called the bass staff.
- Using the marker note, bass F, the keys going up to middle C are line-space-line-space-line. They are all next-door-neighbor notes.
Bass F and Middle C on the Keyboard
- When seated facing the middle of the keyboard, the C nearest the middle is called middle C.
- Bass F (the “marker” note) is the first F below middle C.
- Notes written on the bass staff are for men’s bass and baritone voices, cellos, trombones, etc., and the low keys (around and below middle C) on the piano.
- Play all the keys from bass F up to middle C with the left hand. Use one finger; then use fingers 5-4-3-2-1.
Track 3 
THE GRAND STAFF
Twenty-two places for notes; 88 keys on the piano?!
When you bracket the bass and treble staff together, you have a grand staff—the upper staff is for right hand notes, the lower staff is for left hand notes. This gives you a good range of 22 white keys. But what if you want to notate and play below or above this range?
You could draw another line all the way across the staff to locate more notes. But that would make it difficult to read. In A.D. 1300 the staff for the church chants consisted of four lines. The clef signs used would change if the chant went too high or too low. But in modern times we recognize the value of the ledger line, a small segment of the extra line, just big enough to fit over, under, or through the note. Ledger line notes are extensions to the staff.
Treble Staff, Hand in Treble
- Both hands are above middle C.
- Left hand plays middle C up to E.
- Right hand plays treble G and A.
- You may find that when both hands play above middle C, you will feel more comfortable if you sit on the right side of the bench. Move the smaller bench or chair to the right.
When a melody is written on one staff, but played by both hands, the note stems indicate which hand is to play which notes: up-stem notes (stems drawn on the right side of the notehead) are for the right hand; down-stem notes (stems drawn on the left side of the notehead) are for the left hand.
Below, see two ways to notate “Oh! Susanna.” The first one shows the melody on the treble staff. The second one shows the melody on the grand staff. When there is only one hand playing from one staff, the notation guidelines indicate that on notes below the middle line, stems go up (on the right side of the note). On the middle line and higher, the stems of the notes go down (on the left side of the note).
Grand Staff, Both Hands in Bass
- Both hands are above middle C.
- Right hand plays treble G and A.
- Left hand plays from middle C up to E.
- Again, you will feel more comfortable playing both hands above middle C, if you move to the right side of the bench; or if you move your smaller bench or chair to the right.
Track 4 
“OH! SUSANNA” IN NOTATION
A look at our “theme” melody on the staff
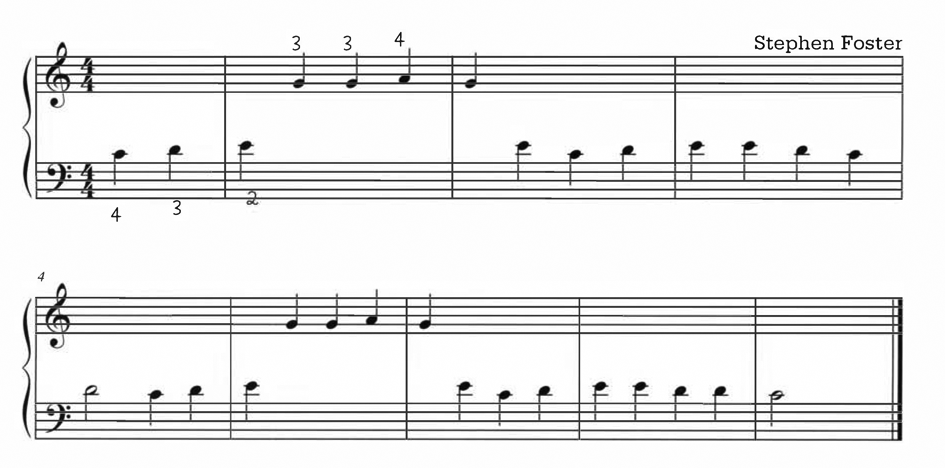
I have selected one familiar Stephen Foster song to illustrate each new aspect of notation. You can see, at this point in your piano education, how “Oh! Susanna” looks on a single staff with both hands playing, and on the grand staff with both hands playing.
Let’s take a moment to plan the learning of this piece. Your left hand will only play three notes when they occur in the piece—C, D, E. Use the three longest fingers for this—4-3-2—and you see that I have marked those finger numbers under the notes, C, D, E. If you don’t feel comfortable playing with the left hand, finger 4 should play middle C slowly and deeply five times. Do the same for finger 3 on D and finger 2 on E. Remember to keep the hand, wrist, and arm relaxed.
Treble Staff Melody, Both Hands
Oh! Susanna
- The down-stem notes are played with the left hand.
- The up-stem notes are played with the right hand.
- Can you name the first note in each hand?
- Notice the finger numbers over the notes. This will help you learn the pattern of intervals more easily. Writing the names over the notes does not help with the learning of the pattern.
Now play fingers 4-3-2 in a row, just as it is marked in the music, but play slowly and repeat five times.
The right hand will play treble G with finger 3, and the A above it with finger 4. Practice those two fingers the way you practiced the left hand keys. The finger pattern in the music is 3,3,4,3, so play that pattern slowly five times. Keep the hand, wrist and arm relaxed.
Play “Oh! Susanna” slowly; it won’t sound the way you want it to, but you need to have control over the fingers, and slow playing does the trick!
This is only the verse of the song; later on you will learn the chorus, or refrain. Do you know what the difference is? In the verse, the tune is the same but the words change each time. In the refrain, the words and tune are the same each time.
Grand Staff Melody
Oh! Susanna
- “Oh! Susanna” is played on the same place on the keyboard.
- The left hand notes are on the bass staff; right hand notes are on the treble staff.
- The song is played exactly as before.
- Again, the finger numbers are written over or under the notes. You must learn the names of notes, but seeing the finger pattern is more helpful is more learning a piece.
Track 5 


