
ALL-IN-ONE BASKET
Finished basket covers: 19˝ × 19˝
Techniques: Wool appliqué • Embroidery
I love baskets—just ask Kelsey. I am always on the lookout for the next basket, old or new.
Even more fun for me is modifying a basket for a project. Baskets have endless uses around the house: hiding ugly things, providing visible storage, or adding texture to a room.
When I was designing this project, I knew I wanted to use a basket. Kelsey and I came up with the idea for a project basket. We always need a basket for storing our in-process work— something we don’t use to store threads and needles, just a nice place to lay out projects that are not quite done. I had the basket hand made just for this project, and then I designed a simple cover to protect the pieces inside from dust, dirt, and light. The covers add a decorative element to this storage piece. The beautiful handmade top could also be used to hide books, magazines, or unsightly objects in your homes.
There are two cover options. My Wool Appliqué Cover features large flowers blooming on a trellis background, echoed by the windowpane cotton base. Kelsey’s Embroidered Cover leans more toward the monochrome, with smaller—and more easily embroidered— flowers and leaves.

Photo by Tessa Christine Smith
One of the many uses for my baskets is garden work, a hobby I share with Kelsey.
—Rebekah
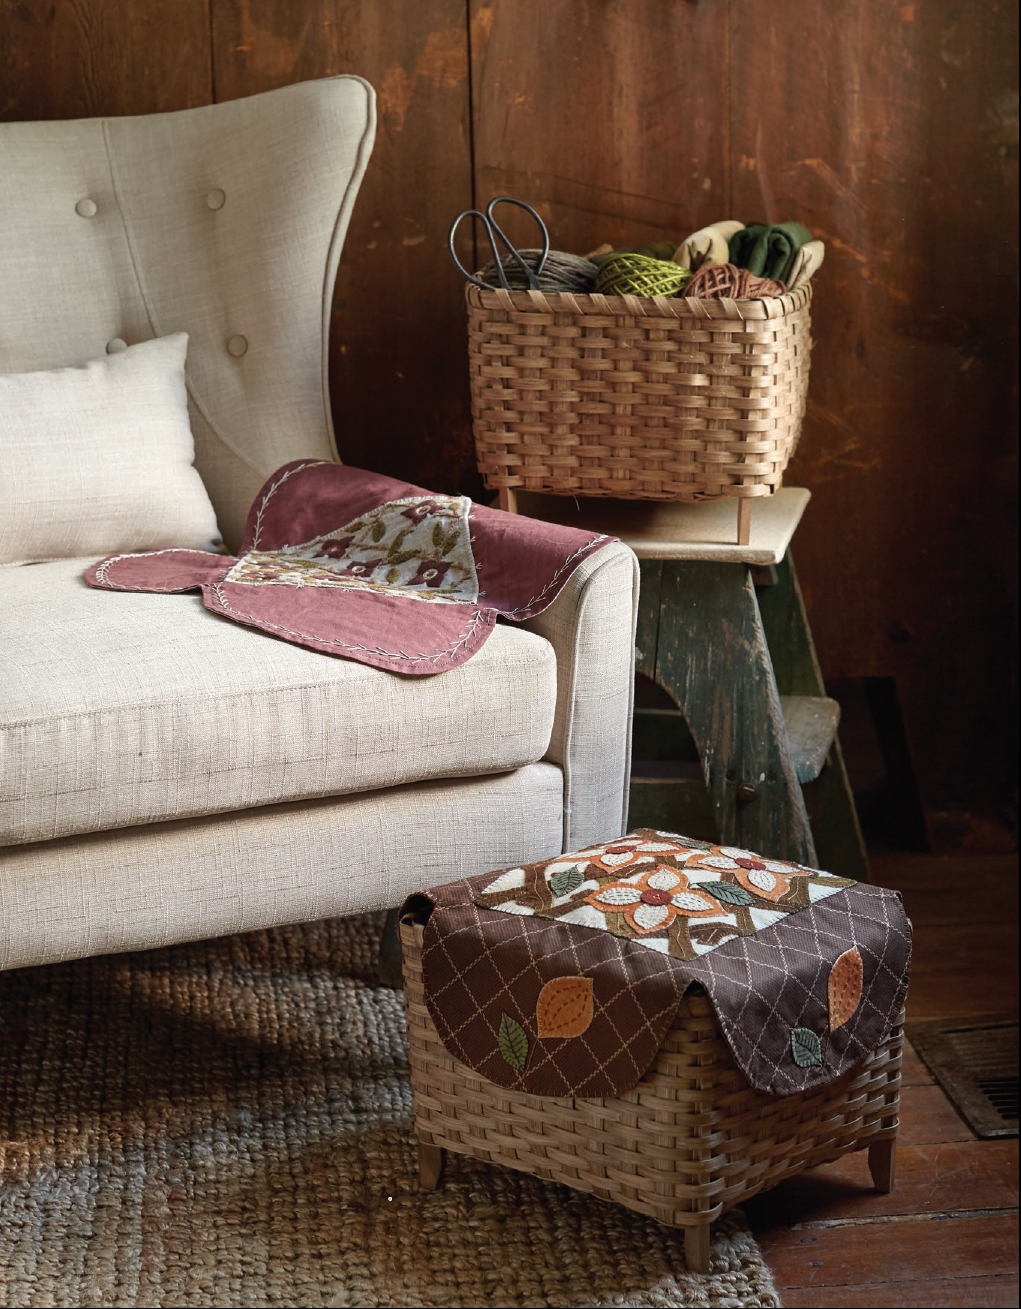
Try two variations on a theme: one in appliqué and one in embroidery.
Wool Appliqué Cover
MATERIALS
• 1 antique-white wool square 9˝ × 9˝ for background
• 1 brown wool rectangle 9˝ × 15˝ for trellis branches
• 1 orange wool rectangle 7˝ × 12˝ for 3 large flowers and 4 flower buds
• 1 antique-white wool rectangle 4˝ × 6˝ for flower petal centers
• 1 dark-orange wool rectangle 1½˝ × 3½˝ for flower centers
• 1 green wool rectangle 4˝ × 6˝ for 7 leaves
• 1 brown print square 19½˝ × 19½˝ for front of basket cover
• 1 brown linen square 19½˝ × 19½˝ for back of basket cover
• Freezer paper (such as Quilter’s Freezer Paper Sheets by C&T Publishing)
• Sewing machine
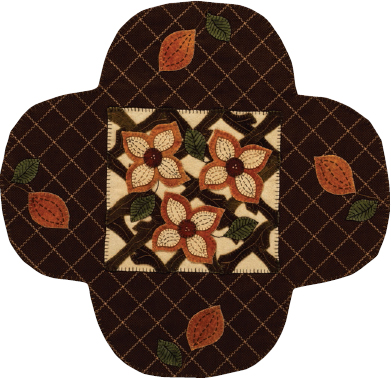
Wool-appliqué basket cover by Rebekah L. Smith.
Getting Started
Refer to How to Wool Appliqué as needed for additional details on these steps.
1. Cut out the wool appliqué pieces using the patterns.
2. Lay out the wool project to be sure you have all the pieces.
3. Lay the lattice branches on the antique-white background wool in an interwoven pattern before stitching, as shown (below).
Making Your Project
Refer to Stitching Your Projects for details on the blanket stitch and embroidery stitches.
1. Using the blanket stitch, appliqué all the wool pieces to the antique-white background. Start with the lattice pieces and then add the flowers and leaves.
2. Add the embellishment stitches as desired.
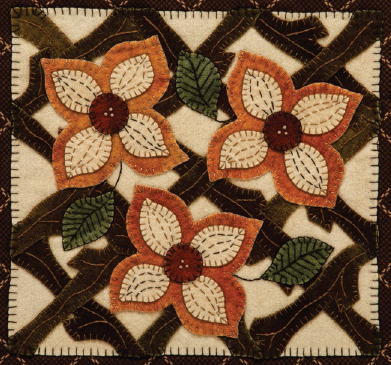
3. Using a steam iron on the wool setting, press the finished piece on the wrong side.
Making the Cover
1. Using the basket cover pattern, make 2 freezer-paper templates of the basket cover. Tape the 2 templates together along the center dotted line, and use this to cut the front of the basket cover. Repeat this with the linen fabric to cut the back of the cover.
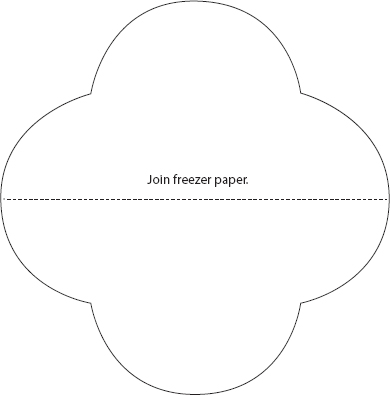
Making the freezer-paper pattern for the cover background
2. Pin the 2 basket cover pieces right sides together.
3. Machine sew around the edges, using a ¼˝ seam allowance and leaving an opening of approximately 4˝ along the bottom for turning.
4. Turn the basket cover right sides out and press.
hint Before turning the basket cover, notch carefully around the curved parts to get a nice clean curve.
5. Pin together the opening and carefully whipstitch the opening closed.
Finishing
1. Center the finished appliqué piece onto the top of the basket cover. Blanket stitch into place through both layers of the cover.
2. On each of the rounded flaps of the basket cover, appliqué an orange bud and a green leaf. Add the embellishment stitches as desired.
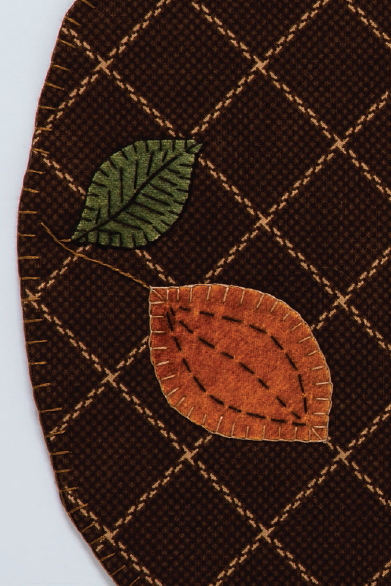
Detail of the appliqué motifs on the basket cover flaps
3. Blanket stitch all the way around the outer edge of the basket cover.
Embroidered Cover
MATERIALS
• 1 linen square 12˝ × 12˝ for background
• 1 embroidery stabilizer square 12˝ × 12˝ for background
• 1 burgundy cotton square 19½˝ × 19½˝ for front of basket cover
• 1 gray floral cotton square 19½˝ × 19½˝ for back of basket cover
• Rustic Wool Moire thread: 1 spool each of burgundy (785), tan (705), and medium green (231)
• Embroidery floss: 1 skein each of dark pink (DMC 632) and antique white (DMC 841)
• Freezer paper (such as Quilter’s Freezer Paper Sheets by C&T Publishing)
• Sewing machine
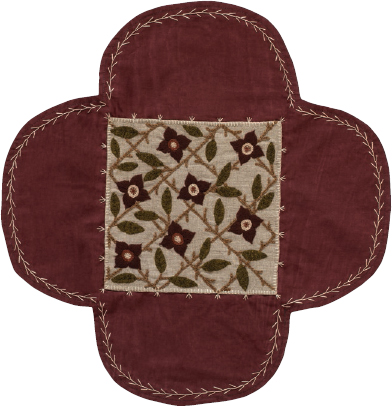
Embroidered basket cover by Kelsey Anilee Smith
Getting Started
Refer to How to Embroider as needed for additional details on these steps.
1. Transfer the embroidery pattern to the natural linen.
2. Following the manufacturer’s instructions, iron the embroidery stabilizer to the back of the linen.
Making Your Project
Refer to Stitching Your Projects for details on embroidery stitches.
1. Stitch the pattern using the embroidery stitch guide (below). All wool sections are stitched with 2 strands of thread, and all embroidery floss sections are stitched with 3 strands.
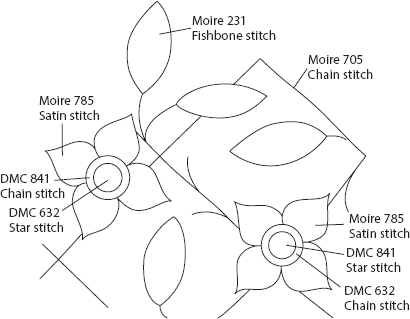
Embroidery stitch guide
2. Stitch the wool sections of the flowers; then add the embroidery floss embellishments.
3. Stitch the leaves. Finish by stitching the latticed branches.
Finishing
1. Using a steam iron on the wool setting, press the finished piece on the wrong side. Place a towel underneath the piece to keep from crushing the embroidery.
2. Trim and press to make a ½˝ hem all the way around the cotton square.
3. Make the basket cover, referring to the instructions in Making the Cover.
4. Using a sewing machine, topstitch ¼˝ around the whole cover.
5. Center the finished embroidered piece onto the top of the basket cover and blanket stitch it into place.
6. Add the embellishment stitches as desired around the center embroidery. Stitch the featherstitch around the outside edges of the basket cover flaps.

Detail of the embroidered flowers and leaves