Fish & Shellfish
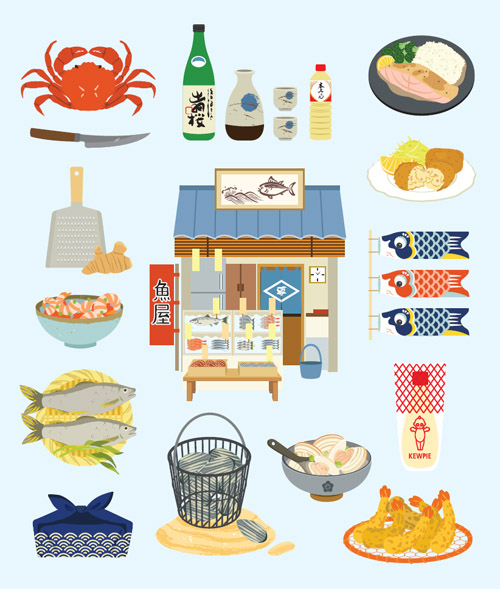
In my little neighborhood in Tokyo, there were two major places to buy fish: the big supermarket, which boasted a huge assortment of beautiful fish and shellfish packaged neatly in cellophane, and the local sakana-ya, or fish shop, in this case a small storefront run by a fishmonger and his wife and with opening hours that I could never quite figure out. The sakana-ya carried a smaller selection of perfect fish, shellfish, and other items from the sea, presented in their natural state—shiny scales, bright eyes, fins and tails intact. I always headed to the fish shop in hopes that it would be open. The fishmonger would walk me through what was good that day, and tell me how to prepare it. He introduced me to things from the sea that I had never seen or heard of, let alone eaten before, and gave me tastes of the sashimi (the freshest raw fish) so that I could learn what I liked—and what I didn’t. Sometimes I didn’t like a particular flavor or texture, but for the most part, the unusual items were both revelatory and wonderful.
Because Japan is an island nation, seafood has always been a focus of the diet, and much of what is eaten is simply grilled or simmered in a light sauce of soy and mirin. When I lived there, I could cook fish or shellfish every day for a year and still not have tried everything. Since the same variety and quality are not available outside of Japan, I have included only the recipes that I have found are possible to re-create authentically in my kitchen in the United States.
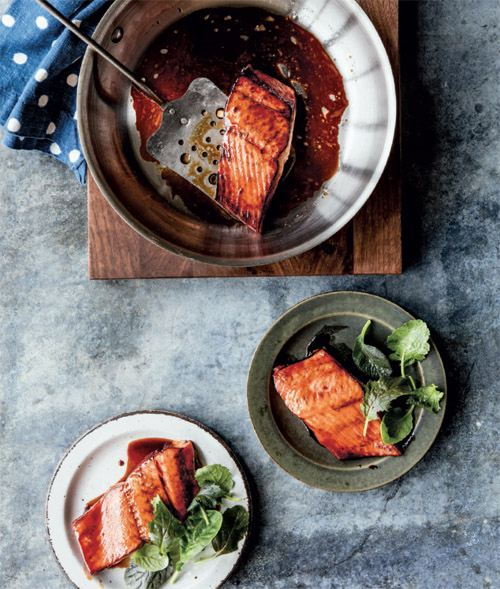
Salmon Teriyaki
Teriyaki is a misunderstood dish in the West. Order it in Japan and you will receive a piece of grilled or panfried fish enhanced with—not overpowered by—a balanced sweet-and-salty glaze of soy sauce, mirin, and sake. The glaze clings to the fish, rather than swamps it, flavoring it perfectly. The same sauce can be used to create yellowtail teriyaki, chicken teriyaki, or beef teriyaki.
FOR THE MARINADE
¼ cup soy sauce
1 tablespoon sugar
1 tablespoon mirin
1½ teaspoons sake
4 skin-on salmon fillets, each about 6 ounces and 5–6 inches long and ¾ inch thick
1 tablespoon canola or other neutral oil
SERVES 4
1 To make the marinade, in a small bowl, stir together the soy sauce, sugar, mirin, and sake until the sugar is dissolved.
2 Rub your fingers over the fish fillets to check for pin bones, removing them with needle-nose pliers or by pulling them with your fingertips. Pat the fillets dry with paper towels and arrange in a single layer in a shallow dish. Pour the marinade over the fillets, turning them to coat evenly. Cover and marinate in the refrigerator for 30–40 minutes.
3 In a large frying pan over medium heat, warm the oil. When the oil is hot, remove the fillets from the marinade, reserving the marinade, and add to the pan. Cook until medium brown on the first side, about 3 minutes. Carefully turn the fillets and cook the second side until light brown, about 2 minutes longer, watching that the glaze clinging to the fillets does not burn and reducing the heat to medium-low if needed. Pour the reserved marinade over the fish, gently shaking the pan initially to distribute the sauce evenly over the fish, and cook until the sauce is reduced to a syrup and the fish is dark brown, 1–2 minutes longer.
4 Transfer the fish fillets and sauce to individual plates and serve hot.
Broiled Salmon with Mayonnaise
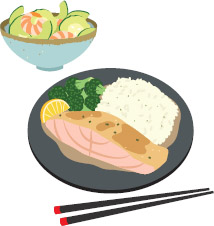
Shohei and I have been very lucky to have some wonderful Japanese babysitters for our two daughters, Nami and Aya. This recipe from Mizuki-san is assembled and cooked in less than a half hour. Only a little mayonnaise is used, yet it really dresses up the fish. Serve the salmon with Miso Shiru (see recipe), steamed broccoli and rice, or a side dish of Sunomono (see recipe).
4 salmon fillets, preferably skin on, each about 6 ounces and ¾ inch thick
Salt
Unsalted butter for greasing
4 tablespoons Japanese mayonnaise, preferably Kewpie brand, or regular mayonnaise mixed with 1 teaspoon fresh lemon juice or ½ teaspoon rice vinegar
SERVES 4
1 Rub your fingers over the fish fillets to check for pin bones, removing any you find with needle-nose pliers or by pulling them with your fingertips. Pat the salmon fillets dry with paper towels and salt generously on both sides. Arrange in a single layer in a shallow dish, cover, and refrigerate for at least 10 minutes or up to 1 hour, allowing the salt to “cook” the outer layer and the saltiness to penetrate better than sprinkling with salt and cooking immediately.
2 When you are ready to cook, preheat the broiler with a rack set about 4 inches from the heat source. Lightly butter a rimmed baking sheet and place the fillets, skin side down, on the baking sheet. Broil until lightly browned and bubbly, 6–8 minutes. Carefully turn the fillets (they have a tendency to stick and break) and broil on the second side until the skin is browned and crisp, about 4 minutes longer.
3 Remove the baking sheet from the broiler and top each fillet with 1 tablespoon of the mayonnaise, spreading it evenly or, if the mayonnaise is in a squeeze bottle, squeeze on top in attractive squiggles. Return the salmon to the broiler and broil until the mayonnaise is browned, about 2 minutes longer.
4 Transfer the fillets to individual plates and serve hot.
Salmon with Butter & Soy Sauce
On most days, my mother-in-law heads to the fish market and buys whatever fish looks good that day—and something always does. Here at home, fresh salmon is one of the most reliable fish you can buy. Happily, it lends itself very well to this recipe, which is also known as munieru in Japan — an adaptation of the French style a la meunière (dusted with flour and sautéed in butter).
4 skin-on salmon fillets, each about 6 ounces and ¾ inch thick
½ teaspoon salt
1 cup all-purpose flour
1½ tablespoons unsalted butter
1 tablespoon canola or other neutral oil
2 teaspoons soy sauce
SERVES 4
1 Rub your fingers over the fish fillets to check for pin bones, removing any you find with needle-nose pliers or by pulling them with your fingertips. Pat the fish fillets dry with paper towels and sprinkle on both sides with the salt. Pour the flour in a shallow bowl or on a piece of aluminum foil and spread into a shallow layer.
2 Heat a frying pan large enough to fit all 4 fillets over medium heat or work in batches. One at a time, and just before cooking, place a salmon fillet on top of the flour and lightly and evenly dust both sides, gently shaking off any excess. Transfer the dusted fillets in batches to a plate. When the pan is hot, add the butter and oil, dividing it as needed. When the butter foams, add the salmon fillets, skin side down, and cook until browned with crisped skin on the first side, 2–3 minutes. Carefully turn the fillets and cook on the second side until browned, with an opaque center when tested with a small knife, 2–3 minutes longer.
3 Just before removing the fillets from the pan, drizzle them with the soy sauce and gently shake the pan to distribute evenly. Transfer the fillets to individual plates and serve hot.
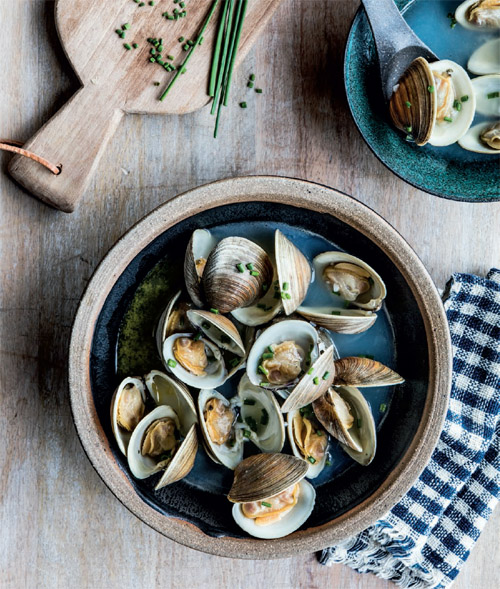
Steamed Clams in Sake & Butter Broth
If you have access to fresh clams, this is a quintessential Japanese dish. The most difficult part of this recipe is removing the sand from the clams. This dish is served in homes and turns up on izakaya (see recipe) menus. The broth should be drunk after the clams have been eaten, which is why you want to make sure it is sand-free.
1 pound small, live hard-shelled clams such as Manila or small littleneck
Salt
2 tablespoons unsalted butter
2 cloves garlic, finely minced
2 cups sake
½ bunch fresh chives, thinly sliced, for garnish
SERVES 2
1 Wash the clams under running cold water. Fill a large, wide, deep bowl half full with cold water, add 1 tablespoon salt, and stir until dissolved. Submerge the clams in the bowl and let stand for 1–2 hours (the amount of time for the clams to purge their sand depends on the clam type and where the clams were purchased). Change the soaking water frequently, adding more salt each time, and check if there is sand in the bottom of the bowl. When the bowl is free of sand, drain the clams, rinse thoroughly in fresh water, and drain again. Discard clams that do not close when touched.
2 In a Dutch oven or other large, heavy pot over medium heat, melt 1 tablespoon of the butter. When the butter stops foaming, add the garlic and drained clams. Immediately add the sake, cover, and cook, without lifting the lid, until all the clams have opened, and checking after about 5 minutes. Uncover and discard clams that failed to open. Add the remaining 1 tablespoon butter and stir to mix. Ladle the clams and their broth into bowls, garnish with chives, and serve hot.
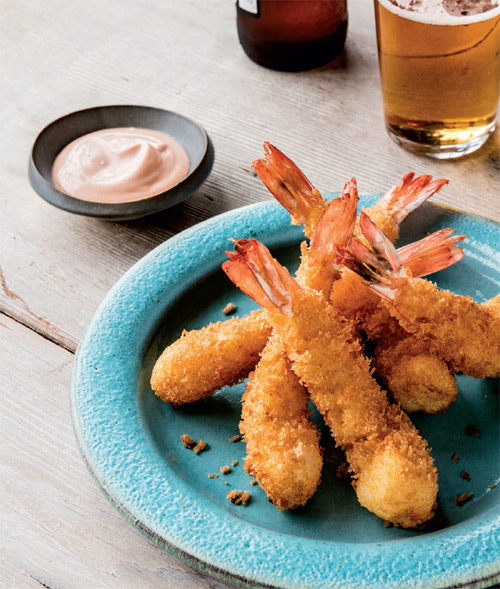
Crispy Panko-Fried Shrimp
Cooked in the same style as Tonkatsu (see recipe), this is the best fried shrimp you’ll ever eat. The light panko coating produces incredible crispiness with no grease, and the shrimp fry quickly so it is not a time-intensive meal. I buy more shrimp than I need, bread the extra, and then freeze them for a quick dinner on another day.
12 extra-large shrimp, peeled and deveined
½ cup all-purpose flour
1 large egg
About 2 cups panko (see recipe)
Canola or other neutral oil for deep-frying
Prepared tartar sauce, or ¼ cup mayonnaise mixed with 2 tablespoons tomato ketchup or pickle relish to taste, or tonkatsu sauce (see recipe) for serving
SERVES 4
1 To keep the shrimp from curling during frying, make 3–4 shallow horizontal cuts across the belly of each shrimp, then stretch it lightly without breaking it until it is straight. Spread the flour in a small, shallow bowl. Break the egg into a second shallow bowl and beat with a fork or chopsticks until well blended. Spread about 1 cup panko in a third shallow bowl and spread a little panko on a flat plate.
2 One at a time, lightly dust each shrimp with flour, coating evenly and shaking off any excess, dip in the egg, then roll in the panko. Using your fingertips, lightly press the panko in place and place the shrimp on the prepared plate. Add more panko to the bowl as needed.
3 In a wok or deep, wide saucepan, pour 3 inches of oil and heat to 350°F on a deep-frying thermometer or until a bit of panko dropped into the hot oil rises immediately to the surface. Working in batches to avoid crowding, drop the shrimp one at a time into the oil and fry until medium to dark brown, about 3 minutes. Using chopsticks or tongs, transfer the shrimp to a wire rack or paper towels to drain.
4 Spoon the tartar sauce into a small bowl and serve the shrimp right away, passing the sauce at the table.
 VARIATION Kaki Furai (Crispy Fried Oysters): Substitute 20 medium or large jarred oysters for the shrimp. Drain well, then bread and deep-fry as directed. Serve with shredded green cabbage and tomato wedges drizzled with salad dressing and tartar sauce and/or tonkatsu sauce and lemon wedges alongside.
Creamy Crab Croquettes
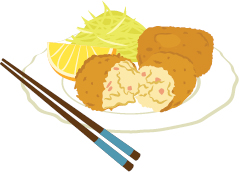
With a crispy outside and an interior of molten white sauce laced with crabmeat, this is an indulgent and spectacular version of the korokke recipes (see recipe) in the Vegetables chapter.
Although a little time-consuming, believe me, this recipe is well worth the effort. While you’re at it, make extra and freeze them to fry for another day. These are a real showstopper.
1 tablespoon unsalted butter
½ yellow onion, minced
¾ cup fresh or canned crabmeat, picked over for shell fragments and cartilage
1 tablespoon white wine
FOR THE WHITE SAUCE
3 tablespoons unsalted butter
¼ cup all-purpose flour
1½ cups whole milk
Pinch of salt
About 1 cup all-purpose flour
1 large egg
About 2 cups panko (see recipe)
Canola or other neutral oil for deep-frying
Lemon wedges or ½ cup tomato ketchup diluted with ¼ cup hot water for serving
SERVES 4
1 In a small frying pan over medium-high heat, melt the butter. When the butter foams, add the onion and cook, stirring often, until translucent, 2–3 minutes. Add the crabmeat, stir, and add the wine. Cook for about 1 minute to evaporate any liquid, remove from the heat, and set aside.
2 To make the white sauce, in a saucepan over medium heat, melt the butter. When the butter foams, add the flour one tablespoonful at a time and stir constantly to create a smooth paste, about 3 minutes. Do not allow it to color. Slowly add the milk, stirring constantly to prevent lumps. Cook, stirring constantly, until the mixture is thick, glossy, and the consistency of mayonnaise, about 10 minutes. Add the salt, stir well, then add the crab mixture and stir just until combined.
3 Spread the crab mixture in a 1-inch layer in a cake pan and let cool completely. Cover the pan with plastic wrap and refrigerate for at least 2-3 hours or up to overnight so it solidifies and is easier to handle.
4 Spread ½ cup flour in a small, shallow bowl, refilling the bowl as needed. Break the egg into a second shallow bowl and beat with chopsticks or a fork until well blended. Spread about 1 cup of the panko in a third shallow bowl, refilling the bowl as needed. Spread a little panko on a flat plate.
5 Remove the crab mixture from the refrigerator just before cooking. Using a metal spatula, divide the mixture into 8 equal portions. One at a time, using your hands and working quickly (the heat of your hands softens the mixture, so the less you touch it, the better), form each portion into a small rectangle or cylinder, about 3 inches long and 2 inches wide, and gently dust each croquette with the flour, shaking off any excess. Coat with the egg and then with the panko, lightly pressing the panko in place with your fingertips, and place it on the prepared plate.
6 In a wok or deep, wide saucepan, pour 3 inches of oil and heat to 350°F on a deep-frying thermometer or until a bit of panko dropped into the hot oil rises immediately to the surface. Working in batches of 4 croquettes to avoid crowding, carefully drop the croquettes into the oil one at a time and fry until golden brown, 6–7 minutes. Using a slotted spoon or spatula, carefully remove the croquettes so they don’t break open and transfer to a wire rack or paper towels to drain.
7 Serve the croquettes hot with lemon wedges or with the ketchup mixture.
 VARIATION Corn Kurimu Korokke (Creamy Corn Croquettes): Substitute ¾ cup fresh or thawed, well-drained corn kernels for the crabmeat.
Shrimp in Mild Tomato Chili Sauce
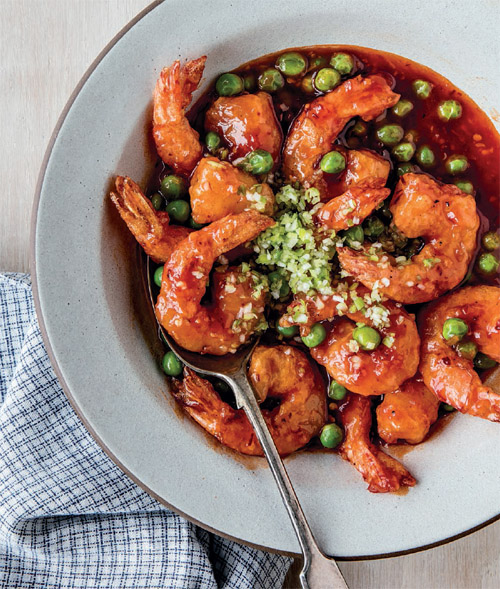
My kids will eat nearly anything if ketchup is involved, but even adults with more evolved tastes will find that this seemingly unsophisticated dish has a complex flavor. In Japan, this is both a popular lunch-counter option and home-style main course. Scatter some frozen green peas for taste and color just before serving.
¾ pound shrimp, peeled and deveined
1 tablespoon cornstarch
1 tablespoon dry sherry
1 large egg white
3 tablespoons tomato ketchup
½ teaspoon soy sauce
1½ teaspoons sake
1 teaspoon sugar
2 cups canola or other neutral oil
¼ yellow onion, minced
½ teaspoon minced garlic
2 tablespoons peeled and minced fresh ginger
1 teaspoon chili bean paste
2 green onions, including tender green tops, minced, for garnish
2 tablespoons frozen peas (optional) for garnish
SERVES 4
1 In a small bowl, combine the shrimp, cornstarch, sherry, and egg white and stir to evenly coat the shrimp. Let stand at room temperature for 15 minutes.
2 Meanwhile, in another small bowl, stir together the ketchup, soy sauce, sake, and sugar until the sugar is dissolved. Set the bowl near the stove.
3 In a wok or large frying pan over high heat, warm the oil. When it is hot, add the shrimp and stir with a wooden spatula until they are a little crispy, 5–6 minutes. Using tongs or a slotted spoon, transfer the shrimp to a bowl.
4 Pour out all but 2 teaspoons of the oil. Set the wok over medium heat and swirl to coat the bottom and sides with the oil. Add the yellow onion and cook for 1 minute. Add the garlic and ginger and stir-fry briefly, just until fragrant. Add the chili bean paste, stir well, and then stir in the ketchup mixture. Return the shrimp to the pan, raise the heat to high, and cook, stirring, until the ingredients are well combined and the shrimp are coated with the sauce, 1–2 minutes longer.
5 Transfer the shrimp to a serving dish, garnish with the green onions and peas (if using), and serve right away.
