Installing a base operating system
Abstract
This chapter presents the myriad of operating systems available for the BeagleBoard family of devices. Design goals for selecting a Linux distribution as a base for the penetration testing system are discussed. Various Ubuntu options are provided. New kernel changes and their effects on Ubuntu for the Beagles are outlined. The chapter concludes with the procedures for loading an operating system on a microSD card for use in a Beagle.
Introduction
As we learned in the last chapter, the BeagleBoard.org has been shipping open hardware boards since 2008. In this chapter, we will briefly examine some of the operating system options listed at the BeagleBoard.org website. Once we have a feel for what is available, we will talk about what makes a good penetration testing Linux distribution. After selecting an appropriate base operating system, we will discuss particulars and how recent kernel changes affect our decision. Finally, we will conclude this chapter by detailing the procedure for creating a microSD card to house our chosen operating system on our Beagles.
Non-Linux Options
Time for a little honesty. Given that we are looking to have some hacking fun and build something for penetration testing, we are fairly certain we will end up with some version of Linux. That said, I wanted to briefly present some non-Linux options available for the Beagles for completeness and to demonstrate the versatility of these boards.
Windows CE
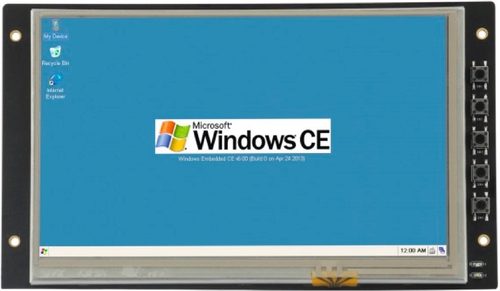
You might be thinking you can't run a proprietary operating system on open hardware, but in this case, you can. Given that the BeagleBoard-xM and BeagleBone Black have more computing power than many systems running Windows XP, you might wonder why not run a more full version of Windows than Windows CE (commonly known as WinCE and officially renamed to Windows Embedded Compact). The answer is that Windows CE runs on ARM systems with board support packages (BSPs), while desktop versions of Windows are not ARM-compatible. Adeneo used the unified BSP supplied by Texas Instruments as a base in order to create a BSP for the BeagleBoard-xM (http://www.adeneo-embedded.com/en/Products/Board-Support-Packages/BeagleBoard). Based on comments at the BeagleBoard.org site, people prefer to run something else on the Beagles (http://beagleboard.org/project/WinCE7+BSP+for+BeagleBoard-XM/). Windows CE running on a BeagleBone Black with a seven inch Chipsee touchscreen cape is shown in Figure 3.1.
QNX
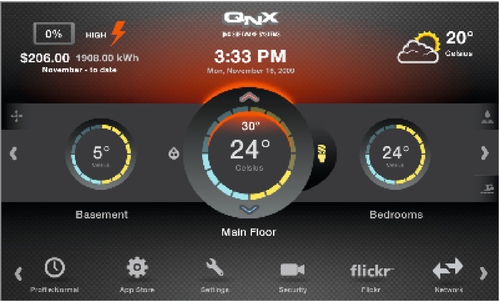
The QNX Neutrino Real Time Operating System (RTOS) is available for Beagle family of devices (http://www.qnx.com/products/neutrino-rtos/neutrino-rtos.html). Real-time operating systems are used in embedded devices where the system response time must be deterministic and as short as possible. A typical RTOS is lightweight and tightly integrated with hardware via support for interrupts and timers. The QNX RTOS features a microkernel design. The company provides a few reference designs to demonstrate the capabilities of QNX Neutrino (http://www.qnx.com/products/reference-design/ti-reference-design.html). The QNX smart energy reference design running on a BeagleBoard is shown in Figure 3.2.
FreeBSD
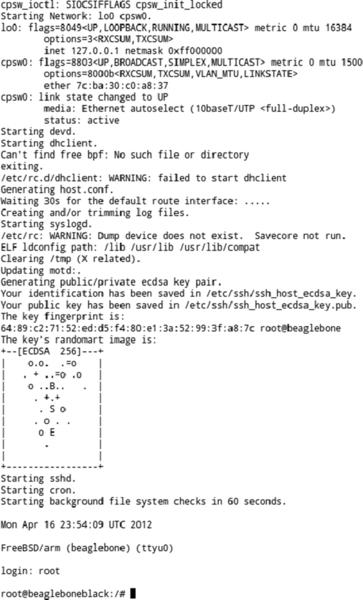
FreeBSD is based on the Berkeley Software Distribution (BSD) version of UNIX. Linux is based System V (SysV) UNIX, the other major branch of UNIX. The two flavors of UNIX are just different enough to cause users a bit of grief. Many commands are shared between BSD and SysV, but command parameters and arguments often differ. There are some in the security community that feel that BSD systems are more secure than SysV systems. If you subscribe to this theory, you are in luck as FreeBSD is available for the Beagle family of boards (http://beagleboard.org/project/freebsd/). A Beagle-compatible running FreeBSD is shown in Figure 3.3.
StarterWare
What kind of an operating system is StarterWare? Technically, it isn't an operating system at all. For some applications, a full operating system may not be required. Skipping an operating system allows extra performance to be squeezed out of a device. There is normally a cost, however. You can think of an operating system as a pretty face shielding you from the ugly details of dealing with hardware. For example, you can give an operating system a file to be stored and it determines which disk sectors to use, creates a directory entry, and communicates with the hard disk controller. Texas Instruments' StarterWare provides a set of libraries with support for USB, graphics, SPI, I2C, GPIO, interrupts, and networking for anyone wishing to build bare-metal applications without starting from scratch (http://www.ti.com/tool/starterware-sitara).
Android
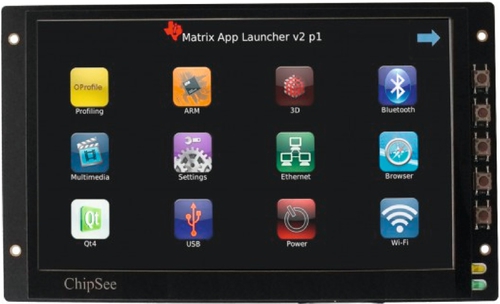
Although it was originally developed for mobile phones, the Android operating system has also become popular for embedded systems. Texas Instruments provides development kits for several versions of Android (http://www.ti.com/tool/androidsdk-sitara). Circuitco provides instructions on how to install Android on their website (http://circuitco.com/support/index.php?title=Android). As you may know, Android is based on a Linux kernel. Many commands are shared between Android and Linux as a result. Without further ado, let us move on to discuss the many Linux options available to us when using the BeagleBoard.org devices. A BeagleBone Black with a Chipsee touch screen running Android is shown in Figure 3.4.
Linux Options
Not surprisingly, several versions of the Linux, the most popular open-source operating system, are available for the open hardware in the Beagle family. Linux is billed as an operating system by programmers for programmers. Linux has a reputation for extracting the most performance out of hardware, especially when it comes to lower-end or older hardware. That is not to say that it isn't great for high-end hardware as well. While Windows users have only recently stopped running everything in 32-bit compatibility mode, Linux users have had a 64-bit operating system available to them since 2001. In fact, a 64-bit Linux kernel was available two years before AMD released the first processors based on the AMD64 architecture.
You might be surprised to discover how many devices you use secretly run Linux. Many networking devices run Linux. Special versions of Linux (such as OpenWrt) have been created specifically to replace the Linux that ships with a commercial device. Smart televisions and other modern appliances have been known to run Linux. No other operating system can match Linux's long list of supported platforms.
Linux is also a clear winner among hackers. A large number of security tools are available on Linux. Tools that are available on multiple platforms are primarily written for Linux first and then ported to other operating systems. The collaborative open-source environment lends itself to the development of necessary security tools, such as full-featured wireless drivers that support monitor mode and packet injection. Linux affords the user many choices. A plethora of shells are available. Users are free to chose from a collection of windowing environments or can forgo a GUI altogether. Multiple programs that perform common tasks, such as editing text files, are available to support users' preferences.
Ångström
When you hear the word Ångström, you probably think of the unit of measurement (10− 10 m). Ångströms are used to describe the wavelength (color) of light and the size of small things such as atoms and molecules. The Ångström Distribution is also an obscure Linux distribution used in embedded systems (http://angstrom-distribution.org). The developers of this Linux flavor make a point of saying that it is to be called the Ångström Distribution and not Ångström Linux. The Ångström Distribution's attributes are summarized in Table 3.1.
Table 3.1
Ångström Distribution
| Performance | Good—built to optimize the Beagles |
| Package manager | opkg (similar to dpkg on Debian) |
| Desktop application repository support | Fair |
| Hacking application repository support | Poor—intended for embedded Linux |
| Community support | Fair—small community running this distribution |
| Configuration | Nonstandard tools are used |
| Comments | Comes with the Beagles but is likely completely foreign to most users |
Ångström has shipped with every BeagleBoard.org device starting with the original BeagleBoard and continuing through the BeagleBone Black (as of this writing, it was just announced that future boards may ship with Debian Linux). This is not surprising given the background of the BeagleBoard designer and what was available for the ARM-based devices in 2008 when the original BeagleBoard debuted. The majority of Linux desktops users are likely unfamiliar with Ångström. While Ångström ships with all the Beagles, we'll briefly cover the process of building Ångström to give you a better feel for this Linux flavor.
Software (including operating systems) for embedded systems is often built on more powerful desktop systems. This process is known as cross compiling (more about this in the next chapter). The biggest reason to do this is that many embedded devices lack the computing horsepower to build software in a reasonable amount of time. Ångström is built using the OpenEmbedded software framework (http://openembedded.org). The OpenEmbedded build process utilizes the BitBake build tool (http://developer.berlios.de/projects/bitbake). BitBake allows users to create recipes describing how software packages may be built, including any other software components required for a successful build.
The process of building Ångström is very straightforward. First, you will need to download the OpenEmbedded BitBake setup scripts. According to the Ångström Distribution website, these scripts can be obtained from the project Git repositories using git clone git://git.angstrom-distribution.org/setup-scripts. The Ångström servers don't seem to be the fastest or most reliable. If you experience difficulty, you might want to use GitHub instead. The appropriate command is git clone https://github.com/Angstrom-distribution/setup-scripts.
Once the setup scripts have been downloaded, the second step in building Ångström is to create a kernel. All software is built using the oebb.sh shell script. This script uses a MACHINE environment variable to specify the target architecture. This could be set in start-up scripts or manually from within a shell. It is probably easier to set the variable on the command line before running the script. Environment variables can be set for a particular command by prefacing the command with VARIABLE=value statements (bet you didn't know that if you are new to Linux). The following commands will configure your environment to build software for the Beagles, update your files, and build a kernel:
MACHINE=beagleboard bash ./oebb.sh config beagleboard
MACHINE=beagleboard bash ./oebb.sh update
MACHINE=beagleboard bash ./oebb.sh bitbake virtual/kernel
The previous commands will take a considerable amount of time to run. Because of how the script is written, OpenEmbedded layers, which have nothing to do with the Beagles, will also be downloaded. Once you have a kernel built, the final step is to use your chosen BitBake recipe to build a root filesystem. For example, MACHINE=beagleboard bash ./oebb.sh bitbake console-image should build a command line-only root filesystem. The sanity checker will notify you if your desktop system is missing any required tools. If you are building from Ubuntu, the sanity checker will likely complain that makeinfo is missing. This utility is contained in the texinfo package.
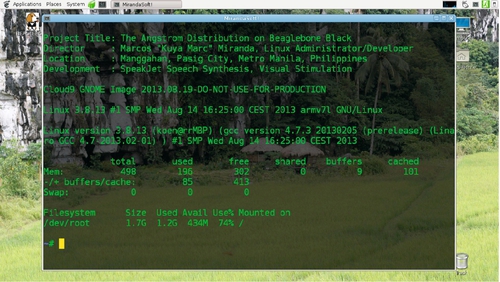
Texas Instruments has done some tweaking to Ångström in order to achieve the best performance on the Beagles. Several utilities for building embedded systems based on Ångström are available. BoneScript, created by Jason Kridner of Texas Instruments, is a Node.js library for easily performing GPIO that is part of the standard Ångström Distribution for the Beagles. While Ångström allows users to easily created embedded devices, its repository support leaves something to be desired. In particular, many of the standard desktop applications and penetration testing tools are missing from the Ångström repositories. A BeagleBone Black running Ångström is shown in Figure 3.5.
Arch Linux
Arch Linux was created to be simple, lightweight, and flexible (http://archlinux.org). Arch Linux was originally developed for the Intel architecture but has been ported to run on ARMv5, ARMv6, and ARMv7 (http://archlinuxarm.org). Arch is very up-to-date and well optimized for each hardware platform. For example, Arch makes full use of the “hard float” math processor that is integrated into the ARMv7 Cortex-A8 found on the Beagles. Arch is intended to be easy to use for experienced Linux and UNIX users. Arch's attributes are summarized in Table 3.2.
Table 3.2
Arch Linux
| Performance | Good—very lightweight |
| Package manager | Pacman |
| Desktop application repository support | Very good |
| Hacking application repository support | Poor—very few tools for ARM |
| Community support | Good—vibrant community, especially on desktop |
| Configuration | Straightforward |
| Comments | Support for ARMv5, ARMv6, and ARMv7 |
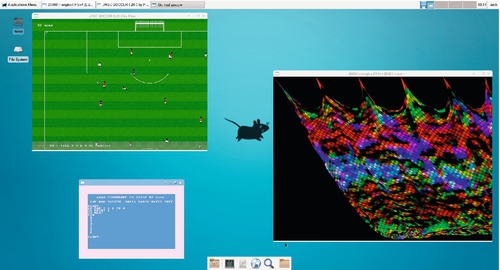
Detailed instructions on how to install Arch Linux on the BeagleBone Black can be found at http://archlinuxarm.org/platforms/armv7/ti/beaglebone-black. Installation involves several steps. First, two partitions must be created on a microSD card using fdisk. The first partition houses the bootloader and must contain a FAT16 filesystem of at least 64 MB. The second partition should be formatted as ext4 and contain a root filesystem. The second installation step is to create filesystems on the microSD card partitions using mkfs. Third, bootloader and root filesystem images are downloaded from archlinuxarm.org. Fourth, the images are untarred onto the microSD card. If your system is small enough to fit into the eMMC of the BeagleBoard or BeagleBone Black, it may be reinstalled to eMMC after booting from microSD. This is not an option for our penetration testing systems with a root filesystem, which is larger than 6 GB. A screenshot of Arch Linux running on a BeagleBone Black is shown in Figure 3.6.
Gentoo
Gentoo is a powerful and highly customizable Linux distribution. One distinctive feature of Gentoo is that nearly everything is built from source. This provides a high level of customization with potential for substantial performance improvements. Building from source allows all the features of a specific CPU to be used to their fullest. By leaving out support for unneeded features, executables can be made smaller. Smaller executables load quicker and consume less memory. Gentoo's attributes are summarized in Table 3.3.
Table 3.3
Gentoo Linux
| Performance | Excellent—everything is custom compiled |
| Package manager | Portage |
| Desktop application repository support | Good—better on desktop version |
| Hacking application repository support | Good—better on desktop version |
| Community support | Good |
| Configuration | Somewhat different from other popular distributions but fairly easy |
| Comments | By default, everything is built from source, which can yield excellent performance, but package installation tends to be time-consuming |
Installing Gentoo is a highly educational and often frustrating task. If you have some experience with Linux and want to learn more about it, I highly recommend you install Gentoo at least once, even if you do so on some old unused hardware. Gentoo is normally installed in stages. First, a very basic system is installed. Second, standard build tools are installed. In addition to compilers and make, Gentoo uses a powerful package management tool called Portage. Third, Portage is used to install the many packages that comprise a full Gentoo system. If a package is in the repositories, it is easily built using Portage by issuing the command emerge < package name >. Things get a bit more interesting if a package is not available from the Gentoo repositories.
The process for installing Gentoo on a Beagle is different from the desktop installation. For starters, you need a desktop Gentoo system with a microSD reader before you can install Gentoo on a Beagle. The desktop Gentoo computer is used to create a microSD card with Gentoo on it for the Beagle. Details of the installation process can be found at http://dev.gentoo.org/~armin76/arm/beagleboneblack/install.xml. As with the desktop edition, installing Gentoo is a bit more involved than most other Linux variants.
First, required building tools must be emerged. Second, a cross compiler must be built. Third, a copy of the U-boot bootloader (complete with patches) must be downloaded and built. Fourth, a kernel must be downloaded (including firmware), configured, and built. Fifth, the microSD card must be formatted. Thankfully, a script is provided for this task. Sixth, a basic root filesystem must be downloaded and transferred to the microSD card. Seventh, a Portage snapshot must be downloaded and copied to the root filesystem on the microSD card. Eighth, a number of items (root password, networking, filesystems, hostname, system services, etc.) must be configured. Ninth, the kernel and U-boot must be transferred to the microSD card. Finally, the Beagle can be booted from the microSD media and further packages may be emerged.
Building a Gentoo system can take several days. The reward for this extra effort is a finely tuned system. You might also be entitled to some bragging rights among the local techie population. Most common desktop applications can be found in the Gentoo repositories. Other distributions provide better support for penetration testing applications, however. Building applications can be a time-consuming process. For these reasons, Gentoo might not end up as our first chose as a base for our penetration testing Linux distribution.
Sabayon
In the physical world, Sabayon is an Italian dessert. Sabayon Linux is a derivative of Gentoo Linux. One of the goals of Sabayon is to provide users with small office/home office (SOHO) server functionality (NFS, Samba, BitTorrent, Apache, etc.) out of the box. It also provides many codecs, which permit it to be used as a home theater PC (HTPC). Sabayon's attributes are summarized in Table 3.4.
Table 3.4
Sabayon Linux
| Performance | Excellent—based on Gentoo |
| Package manager | Portage |
| Desktop application repository support | Good |
| Hacking application repository support | Good |
| Community support | Poor—not too many users at present |
| Configuration | Same as Gentoo |
| Comments | Gentoo for SOHO and home theater applications |
Like Gentoo on which it is based, Sabayon uses rolling releases. What this means is that systems based on Sabayon can be kept up-to-date without having to wait for the next release to become available. Unlike Gentoo, Sabayon provides system snapshots that can be used to install a large set of packages without having to build them all from source code. Detailed instructions for the BeagleBone can be found at https://wiki.sabayon.org/index.php?title=Hitchhikers_Guide_to_the_BeagleBone_(and_ARMv7a). Not surprisingly, the process is similar to that for installing Gentoo.
Buildroot
Buildroot is not a Linux distribution per se. Rather, Buildroot is a system for cross compiling completed embedded Linux systems (http://buildroot.uclibc.org/). Because it is geared toward building embedded Linux systems, there is no package repository full of applications included with Buildroot. This is clearly not the best option for a base of our penetration testing system. Buildroot's attributes are summarized in Table 3.5.
Nerves Project with Erlang/OTP
Erlang is a programming language this is used along with the OTP libraries to build scalable soft real-time systems (http://www.erlang.org/). The Nerves project uses a Linux kernel built with Buildroot and Erlang cross compilation tools to create firmware images for the BeagleBone Black (http://nerves-project.org/). While Nerves might be a good choice for creating devices that could be used in penetration tests, it does not appear to be the best choice for building a base penetration testing operating system. The Nerves project's attributes are summarized in Table 3.6.
Fedora
Red Hat Linux is one of the oldest distributions still in widespread use. In 2003, Red Hat discontinued Red Hat Linux and since that time has only officially supported Red Hat Enterprise Linux (RHEL). Fedora (originally known as Fedora Core) is the community edition of Red Hat that was created to fill the void left when the nonenterprise edition of Red Hat went away. The Fedora project is partially sponsored by Red Hat. In fact, RHEL is a branch of the Fedora code base. The community develops Fedora and Red Hat chooses which features are to be included in RHEL. Incidentally, GNU licensing requires Red Hat to provide source code for RHEL, which is available (without support) as CentOS (http://www.centos.org/). Fedora's attributes are summarized in Table 3.7.
Table 3.7
Fedora
| Performance | Average |
| Package manager | Red Hat Package Manager (RPM) |
| Desktop application repository support | Unknown |
| Hacking application repository support | Unknown |
| Community support | Poor—Beagle image was released and then pulled |
| Configuration | Standard tools |
| Comments | Not nearly as well supported as desktop Fedora |
Fedora is primarily a desktop Linux distribution, but ports to other architectures such as ARM are available (http://fedoraproject.org/en/get-fedora-options#2nd_arches). Like RHEL and a few other distributions, Fedora uses Red Hat Package Manager (RPM) for package management. Repository support is good. Installing Fedora is straightforward. Download an image from http://fedoraproject.org/en/get-fedora-options#2nd_arches, write it to a microSD card, and you are done. There was a BeagleBone Black-specific image available, but as of this writing, the image has been pulled because it was a problematic mix of an Ångström kernel with a Fedora root filesystem. A screenshot of Fedora running on a BeagleBone Black is shown in Figure 3.7.

Debian
Debian was created by Ian Murdock in 1993 (http://www.debian.org/doc/manuals/project-history/). It was named after Ian and his then-girlfriend, now wife, Debra. Debian has been ported to a large number of architectures. It uses the Debian package manager (dpkg) for package management. Repository support for Debian is good, but many of the derivative distributions (such as Ubuntu) have much better support. There are a large number of distributions derived from Debian. Of these, Ubuntu is the most popular. Debian's attributes are summarized in Table 3.8.
Table 3.8
Debian
| Performance | Average |
| Package manager | Dpkg—Debian package manager |
| Desktop application repository support | Good |
| Hacking application repository support | Poor—better on desktop version |
| Community support | Very good |
| Configuration | Standard tools |
| Comments | Good community support, mostly thanks to the work of a few individuals |
One frequently heard complaint about Debian is that it is not updated as frequently as other Linux distributions. Strangely, derivative distributions are usually much more up-to-date. Debian is well supported on the Beagles. Detailed instructions on how to install Debian can be found at http://elinux.org/BeagleBoardDebian. Thanks to its popularity, installing Debian on your Beagle is straightforward. An up-to-date image can be installed over the Internet or a demo image may be installed.
To perform a network installation, first, download the script using git clone git://github.com/RobertCNelson/netinstall.git. Then, the software is downloaded and copied to a microSD card (of at least 1 GB) using the following commands:
cd netinstall
# sudo ./mk_mmc.sh --mmc /dev/sdX --dtb "board" --distro wheezy-armhf
# where board is omap3-beagle-xm for BeagleBoard-xM or
# am335x-boneblack for BeagleBone-Black
# sdX is the device for your microSD card i.e. sdb
# For example for BeagleBone Black with microSD at /dev/sdb
sudo ./mk_mmc.sh –mmc /dev/sdb –dtb am335x-boneblack –distro wheezy-armhf
Installing a demo images is similar. A demo image is downloaded, extracted, verified, and then installed to a microSD card using a script. The following commands will perform a demo image installation (note that this is the most current image as of this writing; you might want to check the webpage for more recent editions):
# download an image from Robert C Nelson's website
wget https://rcn-ee.net/deb/rootfs/wheezy/debian-7.1-console-armhf-2013-09-26.tar.xz
# (optional) verify the image with md5sum and check with website
md5sum debian*.xz
# unpack the image (note the capital J)
tar xJf debian*.xz
cd debian*
# install using script
# sudo ./setup_sdcard.sh --mmc /dev/sdX --uboot board
# where board is beagle_xm for BeagleBoard-xM
# or bone for the BeagleBone (Black)
# so for a microSD card at /dev/sdb targeting BeagleBone
sudo ./setup_sdcard.sh --mmc /dev/sdb --uboot bone
These systems are command line only. If you want to install a windowing environment, you will need to add the appropriate packages after installation. One benefit of this is that the root filesystem is small enough to be stored on the eMMC on the BeagleBone Black with space left over from some utilities.
Ubuntu
Ubuntu and its derivatives are extremely popular. Ubuntu has occupied one of the top spots at DistroWatch for several years (http://distrowatch.com). Ubuntu, which debuted in 2004, is maintained by Mark Shuttleworth's company, Canonical (http://ubuntu.com). Canonical claims that Ubuntu is the most popular open-source operating system in the world. The word ubuntu describes a South African philosophy, which encourages people to work together as a community. Unlike Debian on which it is based, new versions of Ubuntu are released every six months. Many consider Ubuntu to be one of the easiest Linux distributions for beginners. Ubuntu's attributes are summarized in Table 3.9.
Table 3.9
Ubuntu
| Performance | Good—supports ARMv7 with hard float |
| Package manager | Aptitude/dpkg |
| Desktop application repository support | Very good |
| Hacking application repository support | Very good |
| Community support | Excellent |
| Configuration | Standard tools |
| Comments | According to Canonical, Ubuntu is the world's most popular Linux distribution. Thanks to a few individuals it is well supported on the Beagles |
Because it is so popular, Ubuntu enjoys excellent repository support. The Ubuntu package manager, apt (advanced packing tool), is extremely easy to use. Installing a new package is as easy as running sudo apt-get install < package name > from a shell. Updating all the packages on a system is a simple matter of updating the local repository information and then installing any available update using the command sudo apt-get update && sudo apt-get upgrade. If you are unsure of an exact package name or think a utility might be contained within another package, you can find the correct package name by executing the command apt-cache search < package or utility name >. Graphical and text-based frontends are also provided to make package management even easier.
While there are numerous windowing systems available for Linux systems, the two primary window managers in widespread use have been Gnome and KDE for several years. Both systems have their dedicated followers. Canonical has developed their own windowing system known as Unity. Not surprisingly, some of the KDE and Gnome zealots don't like Unity. Kubuntu is available for users who prefer KDE and still want to run Ubuntu (http://kubuntu.org). This book is being written with LibreOffice and other open-source tools running on a Kubuntu system. Ubuntu Gnome is available for those that prefer Gnome (http://ubuntugnome.org).
Unity, KDE, and Gnome are all a bit large to run on our Beagles with their limited RAM. One of the lightweight windowing systems is typically used on the Beagles and low-powered desktops. When a lightweight desktop is used for a desktop system, the distribution is renamed. For example, Xubuntu is a version of Ubuntu with the Xfce desktop (http://xubuntu.org). When running on an ARM-based system, we normally just say we are running Ubuntu, even though we are not running the Unity desktop.
There are a number of options when running Ubuntu on our Beagles. We can choose a major version, variant within that version, and a particular kernel. Due to some recent changes in Ubuntu and the Linux kernel, these choices are not as trivial as they first sound. Newer devices, such as the BeagleBone Black, only support later Ubuntu and kernel versions, which are somewhat incompatible with previous versions. This will be discussed in-depth following our discussion on what makes a good penetration testing Linux distribution.
Desired Attributes for Penetration Testing Linux Distribution
Now that we have a feeling for what is available to run on our Beagles, it seems logical to ask ourselves what features should be found in the optimum penetration testing Linux distribution. The chosen distribution should offer good performance and community support, repositories that contain most of the tools we want to use, easy configuration, and reliable operation.
What constitutes good performance? All of the Beagles use ARMv7 Cortex-A8 processors. These chips feature “hard float” math processors. Running an operating system built with “soft float” support to be compatible with the older ARM architectures would be like running Windows 98 on an i7 machine. Good performance starts with a good base, which in our case means an appropriate kernel with “hard float” support. On top of that base, we need to build an operating system with an efficient filesystem, optimized drivers, and only essential services.
You will struggle. There will be problems. This comes with being a technology pioneer. This is why you want to pick a Linux distribution with good community support. One of the big pluses of the Beagles over some similar boards is the supportive community. Live chat, e-mail lists, and discussion forums are all available to Beagle users. The e-mail lists are very active. It is not unusual to receive multiple answers to a question concerning one of the more popular Linux distributions in under an hour. Don't be surprised if the designer of your board and/or the lead developer from your Linux distribution responds to your question.
Good repository support can make a Linux distribution easy to use. Conversely, if you constantly find yourself tracking down packages on the Internet or, even worse, building tools from source, you might find yourself in the market for a new Linux distribution. Many distributions have good support for desktop applications. While this is somewhat important for our purposes, we are much more concerned with support for standard hacking tools. Having a selection of text editors available can be nice, but not as nice as being able to easily install aircrack-ng, Wireshark, and Scapy (a Python networking tool).
We are trying to build flexible devices that can be used as dropboxes, hacking drones, or penetration testing desktops. This requires an easily configurable operating system. Systems should be easily configured and reconfigured using familiar tools. The chosen operating system should allow unneeded features to be disabled at will, networking parameters to be changed, and remote configuration.
Reliability is very important in our application. Having a remote hacking drone that can run off of batteries for two days is pointless if the device cannot be trusted to run for more than a few hours without locking up or crashing. When devices are run off of wall power or electricity leached from a PC in our target organization (such as a hacking drone embedded inside a Dalek desktop defender toy), they might need to run indefinitely without crashing.
Examining the nine Linux distributions presented above, Ubuntu emerges as a clear winner. The biggest thing in its favor is the strong support for hacking applications on the ARM platform. As the world's most popular Linux distribution, Ubuntu enjoys excellent community support. Thanks to a few dedicated individuals, optimized versions of Ubuntu are available for the Beagles. While you certainly could build a system on Arch Linux, Gentoo, or Debian, it would likely take longer than using Ubuntu. Which would you rather spend time on, building your operating system or creating awesome hacking scripts?
Ubuntu Options
Now that we have decided on Ubuntu, you might think our work is done. You would be wrong. Ubuntu provides us with a number of options. The first decision to be made is which Ubuntu version should be used. As of this writing Ubuntu 13.04 and 13.10 are available for the Beagles (older versions are also available if you aren't using the BeagleBone Black). An experimental version of Ubuntu 14.04 is also available. Because it is current enough for our purposes and well tested, we will use Ubuntu 13.04 in this book.
Having settled on Ubuntu 13.04, there are still a few decisions to be made. Should the operating system be installed to the eMMC on the BeagleBone Black? There is enough eMMC space for a console-only Ubuntu installation. The root filesystem for The Deck is over 6 GB. If we put the operating system on the eMMC, we will need to mount a USB flash drive and/or microSD card with all the utilities. It wouldn't be practical to attempt to install a windowing environment in this scenario. Also, since we will need extra storage anyway, the performance gains of using the built in eMMC would be lost (it may even be slower) and power requirements would likely increase. For these reasons, we will install our operating system based on Ubuntu 13.04 with a windowing system to an 8 GB or larger microSD card.
Now that we have decided what to install and where it will be stored, we must choose an installation method. The three primary installation methods are downloading a preconfigured image, network installation, and manual installation. Because we want to get on with the process of building up our tool collection (the subject of the next chapter), the manual installation is out because it takes too long and has a greater chance for error. Given that we are looking to build multiple systems, the network install is also out. Starting with a preconfigured image seems to make the most sense for our situation. The preconfigured images come with a basic root filesystem, which is untarred onto the microSD card. We will fill this filesystem with our tools and then reuse the install scripts to deploy our custom image to multiple systems.
Ubuntu Variants
Canonical provides images for the Beagles and other ARM-based systems. These images are not optimized, however. As of this writing, Canonical does not provide an image for Ubuntu 13.04. Ubuntu 12.04 is the latest version for which Canonical provides an ARM image. Fortunately for us, Robert C. Nelson has provided demo images and tweaked kernels for the Beagles. Nelson's demo images are a great starting point. They are console-only images, so we will need to install a windowing system before filling our toolbox with hacking tools.
Kernel Choices
The Ubuntu 13.04 images from Mr. Nelson use a 3.8 or higher kernel. As of this writing, a 3.8 kernel is the default for the BeagleBone and BeagleBone Black, and a 3.12 kernel is used for the BeagleBoard-xM. A patch is available to upgrade the kernel on the BeagleBone to the 3.12 version. If you experience trouble with the 3.8 kernel, you might consider installing this patch. Kernel images are available at Nelson's website here http://rcn-ee.net/deb/raring-armhf/. The 3.8 kernel represented a large change on the ARM platform. In prior kernel versions, ARM system manufacturers were essentially forced to provide customized kernels. This situation wasn't good for anyone, and so a new method of handling diverse hardware known as device trees was created.
Device trees
The BeagleBone Black was the first board to run the new device tree kernel, which caused some temporary pain. The end result was well worth the temporary discomfort, however. The device tree is a data structure used by the kernel to find and configure devices (including those built on to a main board) in a standard way across various architectures (http://elinux.org/Device_Tree). Device trees make life easier for designers of computers systems and add-on hardware.
Device trees will be covered in more detail later in this book. For now, think of device trees as an elegant way to easily support capes you buy and build. If you buy a commercial cape with an EEPROM that describes itself, the operating system can automatically attach and configure the appropriate devices using something called a device tree overlay. For capes you build yourself and other capes without the identification EEPROM, you can load one or more of the device tree overlays included with Ubuntu.
Creating a microSD Card
We have certainly covered enough theory in this chapter. It is time to get to work and actually install Robert C. Nelson's version of Ubuntu 13.04 on a microSD card. As mentioned previously, we will reuse this process later to install our complete penetration testing distribution image to multiple machines. You will need an 8 GB or larger microSD card if you want to install The Deck. It is well worth spending the extra money for a fast microSD card (class 10 or better). The pain of using a class 4 or class 6 card is not worth the savings. Also, all manufacturers are not equal. I have seen considerable variations when doing sustained reads and writes to cards in the same class.
Mr. Nelson has made installing Ubuntu on the Beagles (and other ARM-based systems such as the PandaBoard) very simple. The following instructions are taken from http://elinux.org/BeagleBoardUbuntu. If you have difficulty with the instructions provided here you may wish to consult the elinux.org page. You will need to download an image, optionally verify it, unpack it, and then run an install script:
# Get the 11-15-13 Ubuntu 13.04 image from Robert Nelson's site
# You might want to get something newer if building your own
wget https://rcn-ee.net/deb/rootfs/raring/ubuntu-13.04-console- armhf-2013-11-15.tar.xz
# verify the archive is not corrupted
# the correct checksum for this archive is
# 6692e4ae33d62ea94fd1b418d257a514
md5sum ubuntu-13.04*.tar.xz
# unpack the archive (will take a while, notice capital J)
tar xJf ubuntu*.tar.xz
# change to the newly created directory
cd ubuntu-13.04*
# only run this next command if you don't know the
# device name for your microSD card which should be inserted
sudo ./setup_sdcard.sh –probe-mmc
# now install to your microSD using
# sudo ./setup_sdcard.sh –mmc /dev/sdX –uboot board
# where X is the drive letter of your microSD card and
# board is beagle_xm for BeagleBoard-xM or
# board is bone for the BeagleBone or BeagleBone Black
# for example if card is at /dev/sdb and target is BeagleBone Black
sudo ./setup_sdcard.sh –mmc /dev/sdb –uboot bone
It will take several minutes to run setup_sdcard.sh script above. The script will set up the microSD card, install the correct kernel, and then copy over a small root filesystem. The time it takes to create the microSD card is primarily determined by the write speed of the card. When we later reuse this script and procedure, it will take much longer because the root filesystem will be much larger. The root filesystem for The Deck is over 6 GB, while the basic root filesystem supplied by Mr. Nelson is under 400 MB. The script is described more in-depth in Chapter 3 Appendix at the end of this chapter.
Summary
In this chapter, we examined the myriad of operating systems available for the BeagleBoard.org computer boards. We evaluated each of these choices against criteria for a good foundation on which to build a penetration testing distribution. Ubuntu 13.04 as customized by Robert C. Nelson emerged as a clear winner. We also saw how this base operating system can be easily installed using provided scripts. In the next chapter, we will take an in-depth look at the process of adding a useful collection of tools to this foundation in order to build a complete penetration testing system.
Chapter 3 Appendix: Digging Deeper into the Setup Script
A big part of why installing Ubuntu on the Beagles is so easy is Robert C. Nelson's comprehensive installation script. The script is over 1700 lines long. Most of the script is validation. Some of the most pertinent parts are included here. This first segment includes a copyright notice and basic setup. Other than the copyright notice, most of the comments have been added to explain the script:
#!/bin/bash -e
#
# Copyright (c) 2009-2013 Robert Nelson < robertcnelson@gmail.com >
# Copyright (c) 2010 Mario Di Francesco < mdf-code@digitalexile.it >
#
# Permission is hereby granted, free of charge, to any person obtaining a copy
# of this software and associated documentation files (the "Software"), to deal
# in the Software without restriction, including without limitation the rights
# to use, copy, modify, merge, publish, distribute, sublicense, and/or sell
# copies of the Software, and to permit persons to whom the Software is
# furnished to do so, subject to the following conditions:
#
# The above copyright notice and this permission notice shall be included in
# all copies or substantial portions of the Software.
#
# THE SOFTWARE IS PROVIDED "AS IS", WITHOUT WARRANTY OF ANY KIND, EXPRESS OR
# IMPLIED, INCLUDING BUT NOT LIMITED TO THE WARRANTIES OF MERCHANTABILITY,
# FITNESS FOR A PARTICULAR PURPOSE AND NONINFRINGEMENT. IN NO EVENT SHALL THE
# AUTHORS OR COPYRIGHT HOLDERS BE LIABLE FOR ANY CLAIM, DAMAGES OR OTHER
# LIABILITY, WHETHER IN AN ACTION OF CONTRACT, TORT OR OTHERWISE, ARISING FROM,
# OUT OF OR IN CONNECTION WITH THE SOFTWARE OR THE USE OR OTHER DEALINGS IN
# THE SOFTWARE.
#
# Latest can be found at:
# http://github.com/RobertCNelson/omap-image-builder/blob/master/tools/setup_sdcard.sh
#REQUIREMENTS:
#uEnv.txt bootscript support
# links to primary and backup sites for downloading images
MIRROR="http://rcn-ee.net/deb"
BACKUP_MIRROR="http://rcn-ee.homeip.net:81/dl/mirrors/deb"
# label for the boot partition on the microSD card
BOOT_LABEL="boot"
# unset several script variables
unset USE_BETA_BOOTLOADER
unset USE_LOCAL_BOOT
unset LOCAL_BOOTLOADER
unset ADDON
unset SVIDEO_NTSC
unset SVIDEO_PAL
#Defaults
ROOTFS_TYPE=ext4
ROOTFS_LABEL=rootfs
# save the current directory and create a temporary directory
DIR="$PWD"
TEMPDIR=$(mktemp -d)
After a good deal of validation the script boils down to just the following few lines.
#download the latest bootloader (default) or use a local one
if [ "${spl_name}" ] || [ "${boot_name}" ] ; then
 if [ "${USE_LOCAL_BOOT}" ] ; then
   local_bootloader
 else
   dl_bootloader
 fi
fi
#create the boot configuration files
setup_bootscripts
if [ ! "${build_img_file}" ] ; then
 unmount_all_drive_partitions
fi
create_partitions #create a vfat boot and ext4 root filesystems
populate_boot # copy bootloader and other files
populate_rootfs # untar the big root filesystem
The functions called in the above script are as follows. The functions have been annotated. Portions of the functions that do not pertain to the Beagles have been removed for brevity:
# this function downloads a bootloader
dl_bootloader () {
 echo ""
 echo "Downloading Device's Bootloader"
 echo "_________________________________"
 minimal_boot="1"
 # create some directories for our files to be downloaded
 mkdir -p ${TEMPDIR}/dl/${DIST}
 mkdir -p "${DIR}/dl/${DIST}"
 wget - -no-verbose - -directory-prefix="${TEMPDIR}/dl/" ${conf_bl_http}/${conf_bl_listfile}
 if [ ! -f ${TEMPDIR}/dl/${conf_bl_listfile} ] ; then
 echo "error: can't connect to rcn-ee.net, retry in a few minutes…"
 exit
 fi
 if [ "${USE_BETA_BOOTLOADER}" ] ; then
 ABI="ABX2"
 else
 ABI="ABI2"
 fi
 #this code just selects the correct bootloader
 #from a list
 if [ "${spl_name}" ] ; then
 MLO=$(cat ${TEMPDIR}/dl/${conf_bl_listfile} | grep "${ABI}:${conf_board}:SPL" | awk '{print $2}')
 wget - -no-verbose - -directory-prefix="${TEMPDIR}/dl/" ${MLO}
 MLO=${MLO##*/}
 echo "SPL Bootloader: ${MLO}"
 else
 unset MLO
 fi
 if [ "${boot_name}" ] ; then
 UBOOT=$(cat ${TEMPDIR}/dl/${conf_bl_listfile} | grep "${ABI}:${conf_board}:BOOT" | awk '{print $2}')
 wget --directory-prefix="${TEMPDIR}/dl/" ${UBOOT}
 UBOOT=${UBOOT##*/}
 echo "UBOOT Bootloader: ${UBOOT}"
 else
 unset UBOOT
 fi
}
# This function sets up boot scripts to be copied onto the boot partition
# The helper functions boot_uenv_txt_template and tweak_boot_scripts
# have been omitted because they are long and not terribly insightful.
# Feel free to download the script and have a look if you want to
# see a long list of switches and sed statements.
setup_bootscripts () {
 mkdir -p ${TEMPDIR}/bootscripts/
 boot_uenv_txt_template
 tweak_boot_scripts
}
# use the sfdisk tool to create two partitions
sfdisk_partition_layout () {
 #Generic boot partition created by sfdisk
 echo ""
 echo "Using sfdisk to create partition layout"
 echo "________________________"
 LC_ALL=C sfdisk - -force - -in-order - -Linux - -unit M "${media}" <<-__EOF__
 ${conf_boot_startmb},${conf_boot_endmb},${sfdisk_fstype},*
 ,,,-
 __EOF__
 sync
}
# Helper function for create_partitions
# this will format the boot partition as FAT16
format_boot_partition () {
 echo "Formating Boot Partition"
 echo "________________________"
 LC_ALL=C ${mkfs} ${media_prefix}1 ${mkfs_label} || format_partition_error
 sync
}
# Helper function for create_partitions
# this will format the root partition as ext4 unless you override it (don't!)
format_rootfs_partition () {
 echo "Formating rootfs Partition as ${ROOTFS_TYPE}"
 echo "________________________"
 LC_ALL=C mkfs.${ROOTFS_TYPE} ${media_prefix}2 -L ${ROOTFS_LABEL} || format_partition_error
 sync
}
create_partitions () {
 unset bootloader_installed
 if [ "x${conf_boot_fstype}" = "xfat" ] ; then
 mount_partition_format="vfat"
 mkfs="mkfs.vfat -F 16"
 mkfs_label="-n ${BOOT_LABEL}"
 else
 mount_partition_format="${conf_boot_fstype}"
 mkfs="mkfs.${conf_boot_fstype}"
 mkfs_label="-L ${BOOT_LABEL}"
 fi
 case "${bootloader_location}" in
 fatfs_boot)
 sfdisk_partition_layout
 ;;
 *)
 sfdisk_partition_layout
 ;;
 esac
 echo "Partition Setup:"
 echo "________________________"
 LC_ALL=C fdisk -l "${media}"
 echo "________________________"
 format_boot_partition
 format_rootfs_partition
}
# Copy required files to the boot partition
# Some of the details from this function have been removed for brevity
populate_boot () {
 echo "Populating Boot Partition"
 echo "________________________"
 if [ ! -d ${TEMPDIR}/disk ] ; then
 mkdir -p ${TEMPDIR}/disk
 fi
 partprobe ${media}
 # mount the boot partition so we can copy files
 if ! mount -t ${mount_partition_format} ${media_prefix}1 ${TEMPDIR}/disk; then
 echo "________________________"
 echo "Unable to mount ${media_prefix}1 at ${TEMPDIR}/disk to complete populating Boot Partition"
 echo "Please retry running the script, sometimes rebooting your system helps."
 echo "________________________"
 exit
 fi
 # create directories on boot partition
 mkdir -p ${TEMPDIR}/disk/backup || true
 mkdir -p ${TEMPDIR}/disk/debug || true
 mkdir -p ${TEMPDIR}/disk/dtbs || true
 # large number of lines that just copy files have been removed here
 # because they aren't insightful
 cd ${TEMPDIR}/disk
 sync # flush the buffers so everything is written to microSD card
 cd "${DIR}"/
 echo "Debug: Contents of Boot Partition"
 echo "________________________"
 ls -lh ${TEMPDIR}/disk/
 echo "________________________"
 # output should be similar to the following
 # total 6.4M
 # -rwxr-xr-x 1 root root 223 Nov 27 19:22 autorun.inf
 # drwxr-xr-x 2 root root 2.0K Nov 27 19:22 backup
 # drwxr-xr-x 2 root root 2.0K Nov 27 19:22 debug
 # drwxr-xr-x 2 root root 2.0K Nov 27 19:22 Docs
 # drwxr-xr-x 5 root root 2.0K Nov 27 19:22 Drivers
 # drwxr-xr-x 2 root root 2.0K Nov 27 19:22 dtbs
 # -rwxr-xr-x 1 root root 2.7M Nov 27 19:22 initrd.img
 # -rwxr-xr-x 1 root root 41K Nov 27 19:22 LICENSE.txt
 # -rwxr-xr-x 1 root root 103K Nov 27 19:22 MLO
 # -rwxr-xr-x 1 root root 0 Nov 27 19:22 run_boot-scripts
 # -rwxr-xr-x 1 root root 313 Nov 27 19:22 SOC.sh
 # -rwxr-xr-x 1 root root 110 Nov 27 19:22 START.htm
 # drwxr-xr-x 11 root root 2.0K Nov 27 19:22 tools
 # -rwxr-xr-x 1 root root 358K Nov 27 19:22 u-boot.img
 # -rwxr-xr-x 1 root root 1.3K Nov 27 19:22 uEnv.txt
 # -rwxr-xr-x 1 root root 3.2M Nov 27 19:22 zImage
 umount ${TEMPDIR}/disk || true # now unmount to prevent modification
 echo "Finished populating Boot Partition"
 echo "________________________"
}
# copy files to root filesystem
# this primarily involves untaring a large file
# some of the less insightful parts of this function have been removed
# for brevity
populate_rootfs () {
 echo "Populating rootfs Partition"
 echo "Please be patient, this may take a few minutes, as its transfering a lot of data.."
 echo "________________________"
 # create a temporary directory if it doesn't exist
 if [ ! -d ${TEMPDIR}/disk ] ; then
 mkdir -p ${TEMPDIR}/disk
 fi
 partprobe ${media}
 # mount the root partition
 if ! mount -t ${ROOTFS_TYPE} ${media_prefix}2 ${TEMPDIR}/disk; then
 echo "________________________"
 echo "Unable to mount ${media_prefix}2 at ${TEMPDIR}/disk to complete populating rootfs Partition"
 echo "Please retry running the script, sometimes rebooting your system helps."
 echo "________________________"
 exit
 fi
 if [ -f "${DIR}/${ROOTFS}" ] ; then
 # use correct flags for our file archive
 echo "${DIR}/${ROOTFS}" | grep ".tgz" && DECOM="xzf"
 echo "${DIR}/${ROOTFS}" | grep ".tar" && DECOM="xf"
 # pv displays a nice progress bar these lines use it if available
 if which pv > /dev/null ; then
 pv "${DIR}/${ROOTFS}" | tar - -numeric-owner - -preserve-permissions -${DECOM} - -C ${TEMPDIR}/disk/
 else
 echo "pv: not installed, using tar verbose to show progress"
 tar - -numeric-owner - -preserve-permissions --verbose -${DECOM} "${DIR}/${ROOTFS}" -C ${TEMPDIR}/disk/
 fi
 echo "Transfer of data is Complete, now syncing data to disk…"
 sync
 sync
 echo "________________________"
 fi
 # large number of copy statements and other lines to create config files
 # for the Beagles removed here
 cd ${TEMPDIR}/disk/
 sync # flush the buffers so everything is written to microSD card
 sync
 cd "${DIR}/"
 umount ${TEMPDIR}/disk || true # unmount to prevent modification
 echo "Finished populating rootfs Partition"
 echo "________________________"
 echo "setup_sdcard.sh script complete"
 if [ -f "${DIR}/user_password.list" ] ; then
 echo "________________________"
 echo "The default user:password for this image:"
 cat "${DIR}/user_password.list"
 echo "________________________"
 fi
 if [ "${build_img_file}" ] ; then
 echo "Image file: ${media}"
 echo "Compress via: xz -z -7 -v -k ${media}"
 echo "________________________"
 fi
}