
The best times of day to make photos are during the golden hours, which are roughly one hour after sunrise and one hour before sunset. This photograph was taken in winter during the hour before sunset. The fog rising above the snow is illuminated by the sun that is low in the sky. 15–85mm f/3.5–5.6 lens at 50mm, ISO 200, f/10 for 1⁄80 sec.
You’ve gotta taste the light, like my friend and fellow shooter Chip Maury says. And when you see light like this, trust me, it’s like a strawberry sundae with sprinkles.
— Joe McNally
The golden hours, also known as the magic hours, are considered to be the best light for photography and occur roughly an hour after sunrise and an hour before sunset. This type of light is soft and casts glowing golden hues on all it touches.
The sky tends to be clearer at these times of day, making for sharper photographs. Because the sun is lower, shadows become softer and longer and quite interesting. Some landscape photographers shoot only during the golden hours, as it’s most flattering for their work. When the sun is closer to the horizon, you can make wonderful use of side lighting, backlighting and front lighting, all of which we will discuss here.
When it comes to available natural light, it is best to search for the most ideal lighting situations, but sometimes that’s not possible. I’ll give you tips for shooting in any kind of light.
Soft light (such as golden hour light) is a photographer’s favorite. It is diffuse, indirect, devoid of harsh shadows and contains mostly midtones that create soft edges. It’s ideal for portraiture as it softens the appearance of wrinkles, blemishes and shadows under the eyes. If soft light is not available, move your subject to the shade or manipulate hard light with special tools like diffusers and reflectors.
Hard light is direct, harsh and contrasty, with very bright highlights and dark, well-defined shadows. Midday full sun is an example of hard light. Hard light is difficult to work with, although it can be used for dramatic, creative effects. (More on shooting in full-sun is available in the e-companion to this book. See CreateMixedMedia.com/artofeverydayphotography to find out more.)
Tips: First, no matter the kind of light, each light source has a direction. The part of your subject that is closest to the light will be highlighted, while the far side will be in shadow. So make sure your focal point is well lit. Second, eyes naturally go to the brightest point in a scene, so put your subject there.
Front lighting occurs when the sun is low in the sky and hits your subject straight on. This type of light is even, soft and works well for portraits, as the shadows fall behind the subject, leaving her face smooth and youthful-looking. Front-lit scenes can look rather flat, as shadows are what create depth and dimension. For this reason, be careful when using it for landscape photos, as depth is what makes landscape shots interesting.

Late afternoon front lighting casts even illumination over this scene, making for a pleasing shot that is devoid of harsh shadows. My wide-angle lens perspective, coupled with the reflections in the pond, give depth to an otherwise flat-looking scene. 15–85mm f/3.5–5.6 lens at 19mm, ISO 200, f/14 for 1⁄160 sec.

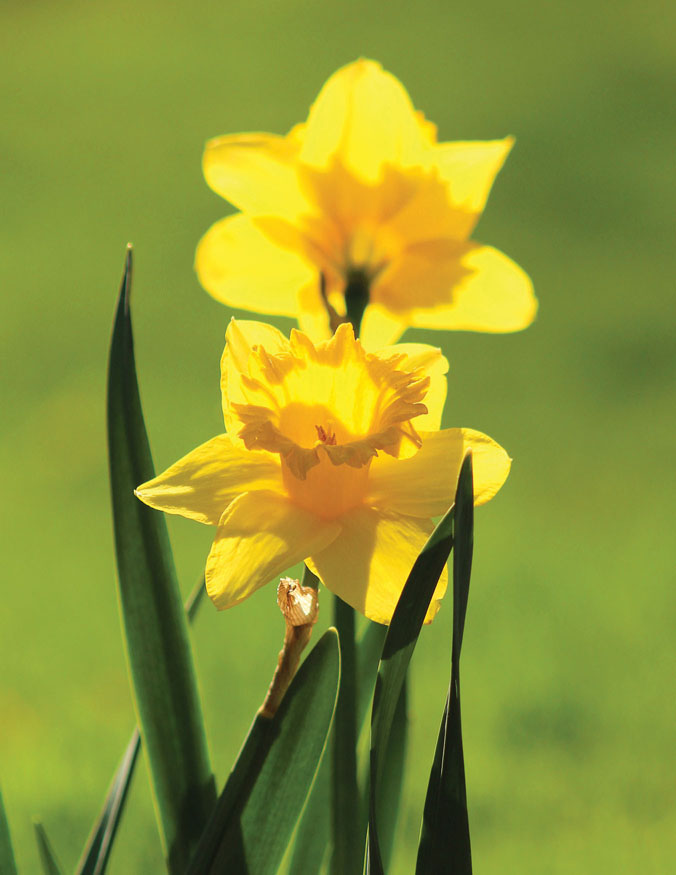
Golden hour evening light illuminates the semitransparent petals of the flowers in my garden, giving them a magical glow. 75–300mm f/4–5.6 lens at 155mm, ISO 100, f/5.6 for 1⁄400 sec.
Backlighting can be accessed during the golden hours when the sun is low in the sky. It falls behind your subject and hits the photographer’s face. These types of scenes contain mostly highlights and shadows with very few midtones in between.
The highlights are present behind the subject and create pleasing rims of glowing light, a halo effect around the head, while the subject’s face is often cast in shadow, sometimes deep shadow.
These deep shadows make for wonderful silhouette effects. If you don’t want a silhouette effect and wish to illuminate the subject’s face, you can use spot metering or use exposure compensation to increase exposure by a full stop or two. Fill flash is also an option. I often use backlighting for golden hour shots in my garden. The backlight illuminates the semitransparent petals of my flowers, giving them a magical glow.
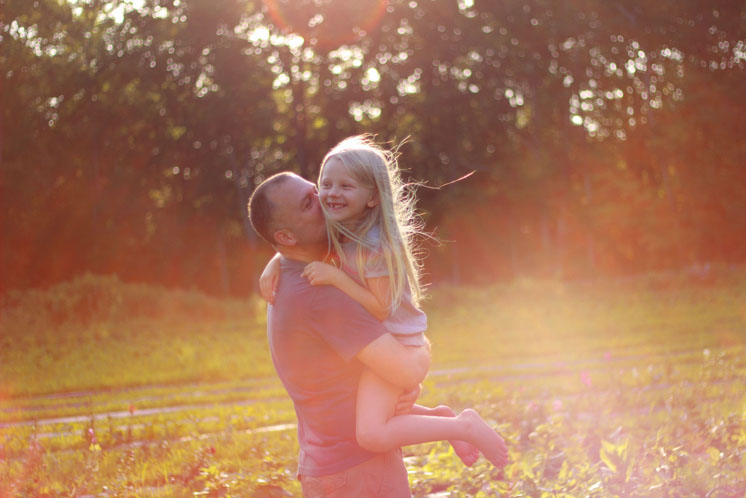
Another creative effect you can achieve by shooting into the sun is lens flare—a great example of where “wrong” can feel very right. Lens flares have interesting colors, often in delicious violet tones, and to me they spell pure dreamy. Higher-end lenses have special coatings that reduce lens flare, so your best bet for capturing wild and colorful ones is to use a less-expensive lens. My 50mm f/1.8 lens does a fabulous job of capturing strong flares that contain red, yellow, violet and sometimes prism-like effects. If you don’t want lens flare, attach a lens hood.

Backlit scenes can leave elements in the foreground in deep shadow, creating a soulful, mysterious silhouette effect. 15–85mm f/3.5–5.6 lens at 35mm, ISO 200, f/16 for 1⁄400 sec.

Shooting into the sun can create artistic lens flare effects around your subjects, and my 50mm prime lens does a particularly great job of it. The lens flare in this photo enhances a special moment between father and daughter. I used Spot Metering mode to ensure a good exposure of the subjects’ faces despite the backlighting. I took the shot with a wide-open aperture to create an ultrasoft background covered in bokeh. 50mm f/1.8 lens, ISO 100, f/1.8 for 1⁄1,000 sec.

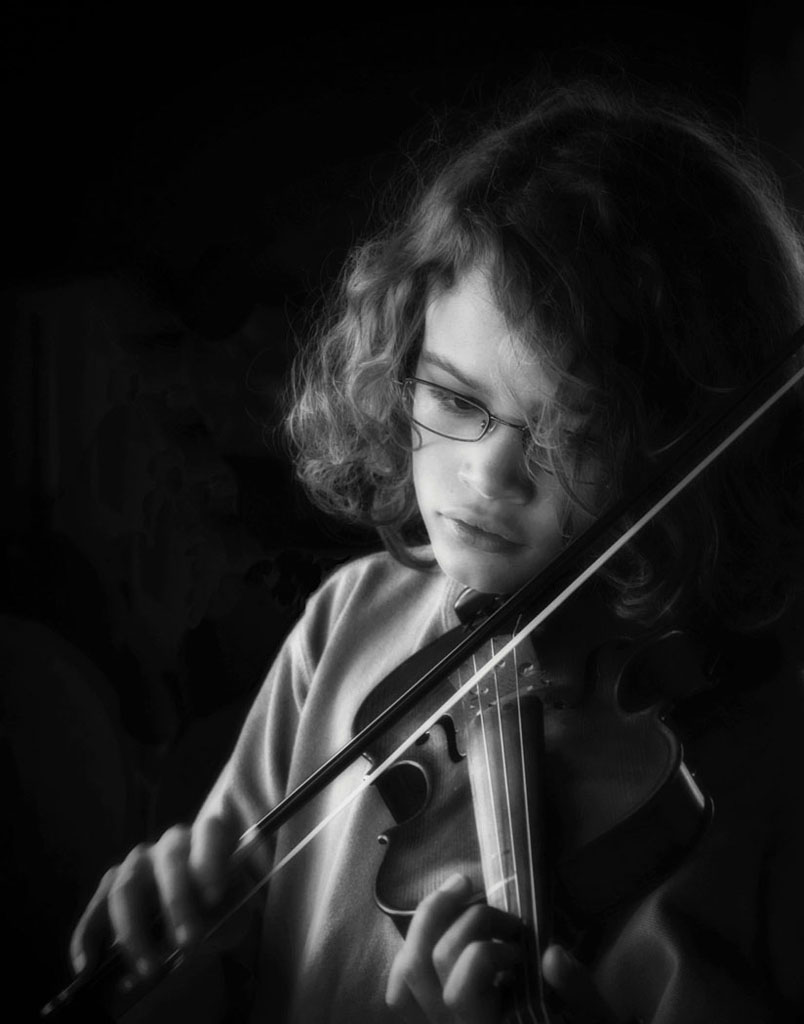
In this photograph, side lighting from a north-facing window illuminates the front of the subject and gradually fades into long shadows. This makes for a dramatic shot. 15–85mm f/3.5–5.6 lens at 59mm, ISO 800, f/5 for 1⁄40 sec.
Side lighting spells drama. Photographs that utilize side lighting will make your viewer go “Oooo!” When your subject is hit from the side with light, his features will become more defined, revealing every little detail, which in some portraiture cases can be unflattering. Parts of your subject will be well-lit, while other areas will fade into long shadows.
This is one of my favorite types of light to work with, especially with portraits of children, as their youthful, perfect skin and wide eyes look fantastic in just about any kind of light.
If you find that the side lighting is too harsh, you can use fill flash to fill in the shadows, preferably from a diffused external flash unit, which will give you more natural results. A reflector is another possibility—just bounce light onto your subject’s face to fill in some of the shadows.
Top lighting illuminates your subject from above, and occurs when the sun is high in the sky (midday). When the sun is bright, harsh shadows will fall downward on your subject. If this subject is a person, you won’t like the results; let’s just say he will look as if he hasn’t slept in a while.
Solutions are to use fill flash or a reflector to cast light onto the face (position the reflector under the chin), place a diffuser disc over the head to block out the sun, or simply head to the shade (just at the edge of the shade produces more pleasing results than deep shade).
If the sky is overcast, top lighting will cast a nice, even, soft light on your subject. You might still need the reflector to soften under-eye shadows. I often head out into the garden to photograph my flowers in overcast light.
When shooting scenes with overcast skies, try to leave out as much of the sky as possible, unless you are aiming for a when-wrong-is-oh-so-right creative result.

Midday, partly sunny, cloud-filled skies act as a massive reflector and offer perfect even light for photographs. 15–85mm f/3.5–5.6 lens at 15mm, ISO 100, f/16 for 1⁄200 sec.

Bounce Flash - This indoor photo was made using available light from a bright window and illumination from a diffused Canon Speedlite 580EX II flash unit being bounced off a white ceiling. 50mm f/1.8 lens, ISO 400, f/2.2 for 1⁄200 sec.
When taking photos indoors, natural light is preferable. Place your subject near a brightly lit window, north-facing being most preferable for a soft, diffused light.
If the light source is too harsh, use a sheer curtain to diffuse it. If you encounter a low-light situation indoors, there are a number of things you can do to get a well-exposed, clear shot.
Reflectors allow you to bounce light onto your subject and fill in shadows. You have the option to use a slower shutter speed in conjunction with a tripod; we’ll discuss minimum shutter speeds for handheld shots very soon, so hold tight. Set the ISO to 100 when using the tripod, to achieve the best image quality, unless you are taking a portrait and there’s a chance for subject movement. In that case, select a faster ISO speed, which in turn will give you the faster shutter speed you need to prevent subject blur.
When using a tripod, also be sure to use the timer or a shutter release cable or wireless remote, so that you don’t have to touch the camera to take the shot, which can cause blur. If you don’t have a tripod, a last resort is to crank up the ISO, making your DSLR more sensitive to the available light and unfortunately also reducing image quality.
Note: There can be multiple sources of light in your scene at one time. Multiple light sources often make the most delicious shots!

My friend and photographer Crystal Sullivan and I teamed up to make some portraits of her beautiful babe. We placed him near a fairly bright window, Crystal used a reflector to bounce light onto the shadows on the right side of his body, and I made lots of baby cooing sounds while shooting in Burst mode to ensure I got a few good captures. I used Spot Metering mode to correctly expose his face and to maintain a black background. (This is an alternative to using exposure compensation to capture true black tones in your photos.) Crystal and I did not want to use flash with such a young child and knew the low light would call for a slower shutter speed (especially because I kept ISO at 400), so I had to press the shutter button when the baby was completely still, to avoid subject blur. Using Continuous Shooting (Burst) mode gave me more nonblurry pictures to choose from. 15–85mm f/3.5–5.6 lens at 31mm, ISO 400, f/4.5 for 1⁄80 sec.
As you have probably gathered by now, I am not a big fan of the camera’s built-in flash, as its hard, direct light can overly brighten subjects while darkening the background, and cause red eye. One of the few scenarios where I have seen the built-in flash look natural is when it is used in the bright light of day as a fill flash, to brighten dark shadows on the subject.
Most current DSLRs allow you to control the power of the built-in flash’s output up to a point, but with an external flash unit you get even more control, not only with controlling flash output but in manipulating the direction and angle of the flash head. This control yields more natural-looking photos. I am a fan of external flash units and use mine in low-light situations and to help correct lighting problems I encounter while working with the different types of light aforementioned. You can attach this kind of flash to your camera’s hot shoe, or remove it and attach it to a flash sync cord, which allows you more flexibility (some DSLRs have wireless capability).
Use external flash in one of two ways when it comes to low light and correcting lighting problems: (1) as a bounce flash or (2) as a fill flash.
Bounce flash is a technique generally used indoors, where you bounce the flash off a white ceiling. The ceiling acts as a reflector, casting even light all around your scene and softening shadows behind the subject. The external flash can point up to the ceiling, or can be rotated at a variety of angles, so that you can bounce light off various locations (including reflectors and white walls). High ceilings will not work, as the distance is too far away to achieve illumination. Stick to white ceilings (or white walls), as any other color will cast its hue onto your photo.
Use fill flash to brighten (fill in) dark shadows. You can use your DSLR’s wireless capability (or use a flash sync cord), which allows you to take your external flash off the camera and handhold it, pointing it at the darker areas of the scene that need brightening. An off-camera flash is also useful for creating directional light (like creating side lighting to add more depth and dimension to a shot).
Interested in some mobile apps that will enhance your smartphone’s low-light performance? Check out these three: NightCap, 645Pro, AvgNiteCam

Take a look at the effect each of these standard white balance settings has on the same photograph. 50mm f/1.8 lens, ISO 400, f/1.8 for 1⁄200 sec.