
Part One:

Planning Your Art Quilt
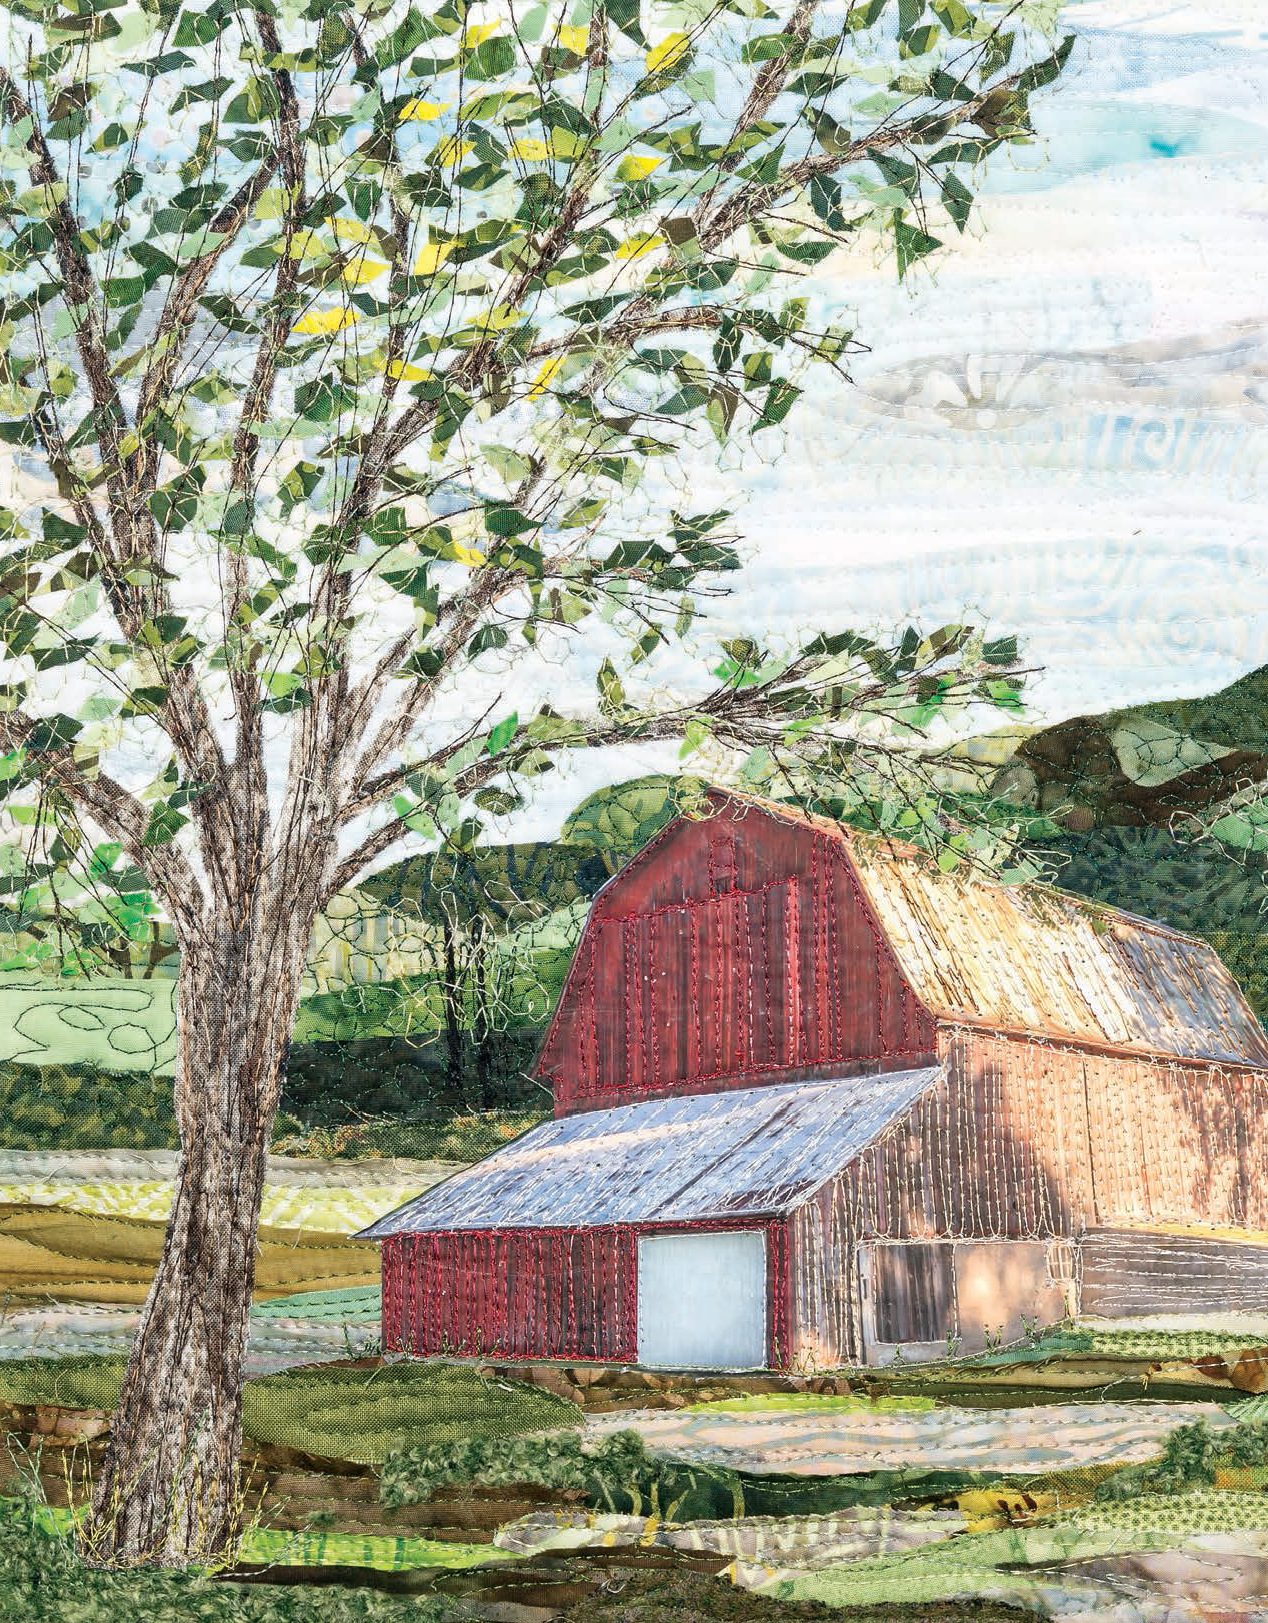
Port Oneida Barn
Port Oneida Barn
42" x 56"
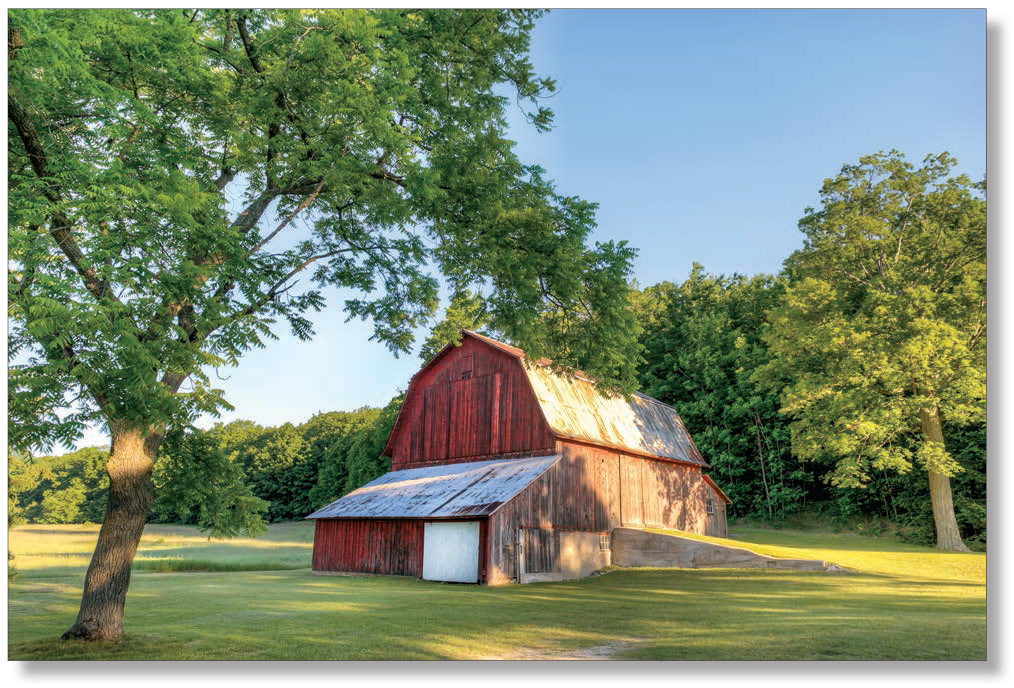
Inspirational photo
“Port Oneida Barn” uses various light blue fabrics for the sky. Dark Green batiks were used for the distant hills. Bright and light green fabrics were selected for shadows from the trees and barn. The barn was a photo transfer onto cotton fabric. The barn was placed to the side for good composition and enhanced by free-motion machine quilting, adding lines to the barn wood, roof, doors and windows. Large trees and a small clump of birches in the distance were fused on to take viewers’ eyes in. Green fabrics were fused and cut into small chips to form leaves. The leaves were then placed and free-motion machine quilted in a circular motion.
Part One: PLANNING YOUR ART QUILT
When designing a new quilt, it has to be a subject matter that “speaks” to me or excites me. There is nothing worse than working on a scene or using a color combination you do not like.
I find a subject or scene by looking through photos. I then study the photo and look for design elements and imagine how the fabrics will portray the image. I may change or add elements in the scene. Once I imagine the art quilt in my head, I can start the quilting process.
FINDING INSPIRATION
I find my inspiration in nature and being outdoors. Most of my landscape quilts are scenes from Northern Michigan where I have lived most of my life. I love to walk in the woods, especially in the spring, and see the wild flowers blooming. I enjoy studying the placement of the trees among the rolling hills and natural landscape. My husband and I like to travel to the Upper Peninsula of Michigan and hike in the woods seeking out waterfalls and enjoying the autumn color. I like to bike along Crystal Lake and study the color of the water different times of the day.
On a bright day, I admire the turquoise lines of the water and how they turn a deep blue at the drop off or an early morning sunrise with pastel colors above the water and trees. We spend many evenings at Lake Michigan walking the shoreline and enjoying the sunset. It is always amazing how the sky lights up just as the sun goes down, and each sunset is always different.
I enjoy skiing in Michigan and Colorado. I love the sparkle in the snow as the sun hits the ground, and I try to capture this in my quilts with Angelina Fiber and metallic threads. Of course, the sun shines a lot more in Colorado than Michigan in the winter!
I dote on my perennial garden and have numerous floral quilt designs. I study the sky with its cloud formations and delight in the different colors from white to gray to bright blue.
I also search for pictures in magazines, calendars and notecards. I have notebooks in which I save these pictures and ideas, so when I am looking for inspiration, I can go to my notebooks for new quilt designs.
Often I will combine two or three photographs. For example, I will use the composition of one lake scene, but add the sunset color of a second photograph.
When I am traveling, I also take photographs for new quilt ideas and inspiration. You will see some of these designs in the gallery starting.
COLOR
Many people agonize over color and have a hard time picking out the right fabrics. I think as an artist I have a natural feel for color and have a tendency to know where to put color and what color to use. If you don’t already have this knack, I believe it can be learned with practice and using the color wheel.
I keep a color wheel on a bulletin board in my studio and refer to it when I need guidance. A color wheel can be purchased at most art supply stores.

All colors come from mixtures of the pure primary colors of red, blue and yellow. These are the three “source” colors, and the relationships they have with each other are represented in the color wheel.
By mixing two primary colors, you get secondary colors. Blue and yellow make green. Yellow and red make orange. Red and blue make purple.
The colors that appear opposite each other on the color wheel are complementary colors. There are three pairs of complementary colors – orange and blue, yellow and purple and green and red. A fun project to try with complementary colors is to make three separate quilts using the same scene but a different complementary color scheme in each quilt. Complementary colors really work with each other. When you are making a quilt and are stumped on what colors to use or thinking it needs a spark of something, use a complementary color, and it will be pleasing to the eye.
I love the complementary colors of green and red (Christmas!) and use them often in my art quilts.

Complementary colors of red and green.

Complementary colors of orange and blue.
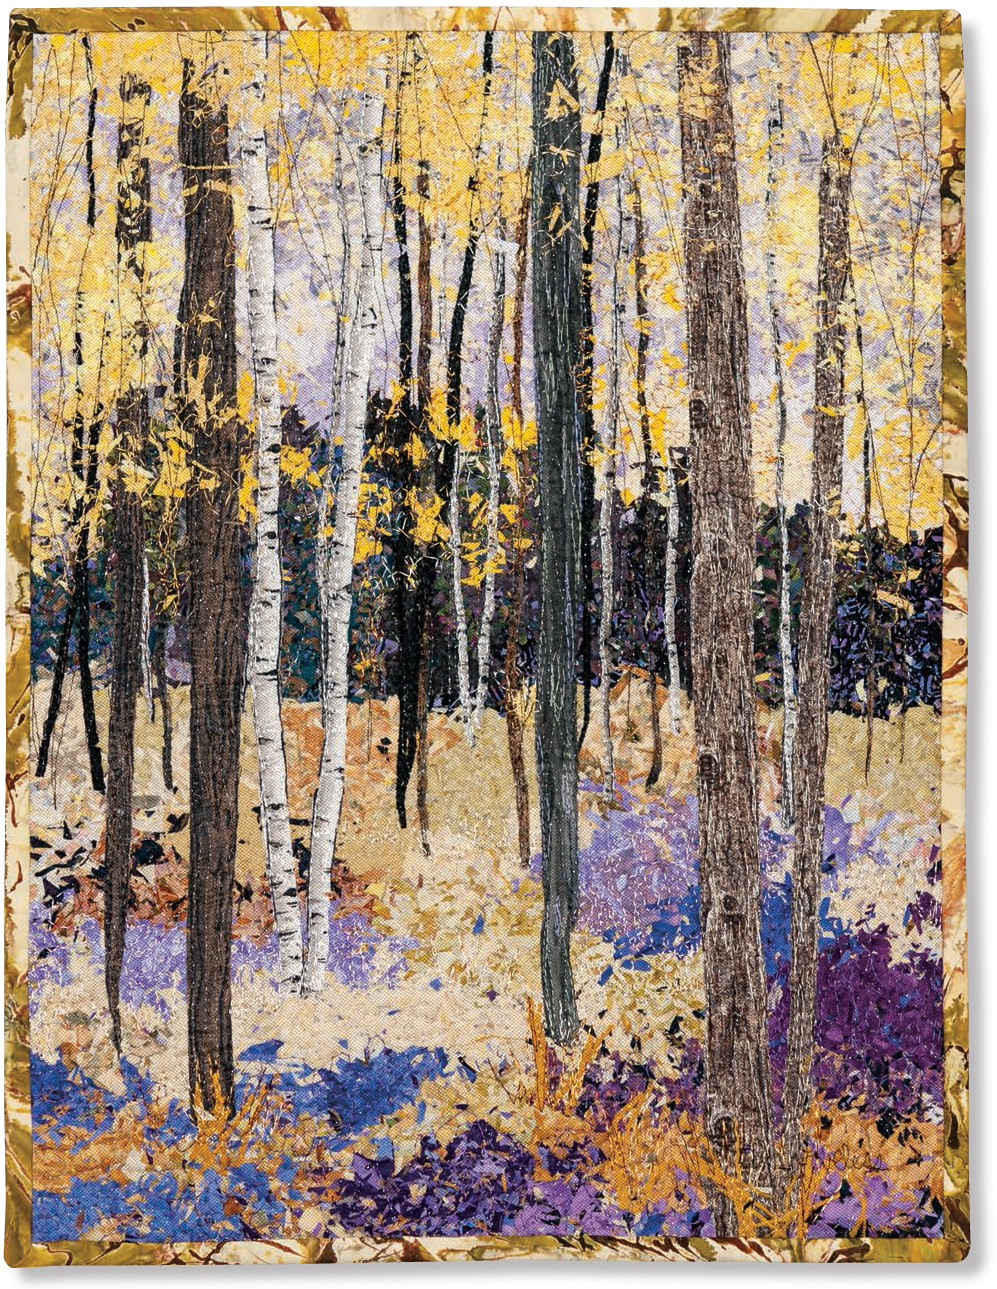
Complementary colors of yellow and purple.
COLOR VALUES
Color values are very important when making an art quilt. When shopping for fabrics, the medium colors are usually the “pretty ones” that we are attracted to and tend to buy. But there is also a need for the “not so pretty ones.” You need to make sure you have dark, medium and light values to make an effective art quilt.
When I am planning a quilt and choosing fabrics, I separate one color into three piles – light green, medium green and dark green, for example. When I plan a water scene, I take all my blue “water” fabrics and place them in value order starting with the lightest blue and ending up with the darkest navy – everything else is in between. In Lake Collage, the darkest navy blue is farthest out into the water along the horizon line, and that directs the viewer’s eye into the distance.
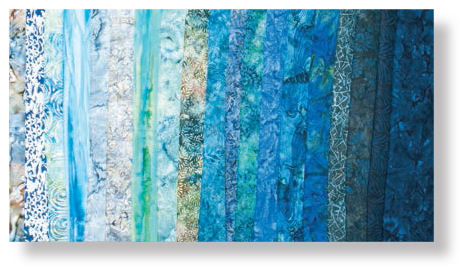
Water fabrics in light to dark values.
Another rule that I use consistently when working with value is that, most of the time, lighter colors advance into the scene or are farther away – except in water scenes, depending on the time of day.
Darker colors will appear closer, so I often use dark colors in the foreground or the bottom of my landscape quilt scene. Using values of color this way will take your eye into the quilt scene and give your quilt perspective and distance. Study your photograph that you are working with, and look for the values in the scene. Depending on what time of day your photo was taken will dictate the values.
Another trick I use with color to get the eye to travel around the quilt is using small chips of bright neon or bright colors. Many times I use neon green for the leaves in the trees or bright red leaves on the ground to take your eye into a piece.

Seasons quilt
I like to use solid black in every quilt scene. Black will magically brighten all the colors in your quilt. I often use skinny black trees in the distance to pop all the other colors in my quilt.
Another excellent way of studying color values in your photograph is to make a black and white photocopy of the picture that you are working from. This will help you interpret the light, medium and dark values. Or you might challenge yourself and make a landscape quilt with no color, using neural shades of white, gray and black. It is amazing how much shading and contour your landscape will have by using all neutral colors. I have a popular design called “Birches” that uses only black, white and gray fabrics.
One of my most popular series of quilts is titled “Seasons,” shown below. I adapt one photograph by splitting it into four sections and create four separate quilts. By using a different color palette, each panel represents one season.
Spring is the season of new life and new beginnings. I study leaves when they are first budding out and observe varieties of yellow/green color. I use yellow/green chartreuse colors in the leaves of my spring quilt. I also delight in trillium wild flowers that are so plentiful in Northern Michigan. I like the way the white petals are in contrast with all the other colors on the forest floor.
When summer arrives and everything is in full bloom, I use rich emerald greens and purple together. I sometimes place purple sweet pea flowers in the foreground. I also think of the water and cool colors of summer and like to capture the lake and its vivid colors of blue and turquoise.
Autumn is full of warm, rich colors. I use red, orange and yellow for my fall seasons, and sometimes even a hint of purple.
Winter is full of neutrals of white, gray and black. But a sunny day will bring out a bright blue sky, which can contrast nicely in a landscape scene. Many times in a snow scene, I will add hints of lavender and pink for shading. You can include dark green pine trees for color in a winter scene.

Seasons quilt
FABRICS
I think choosing and planning the fabrics for an art quilt is the “fun” part of making a quilt.
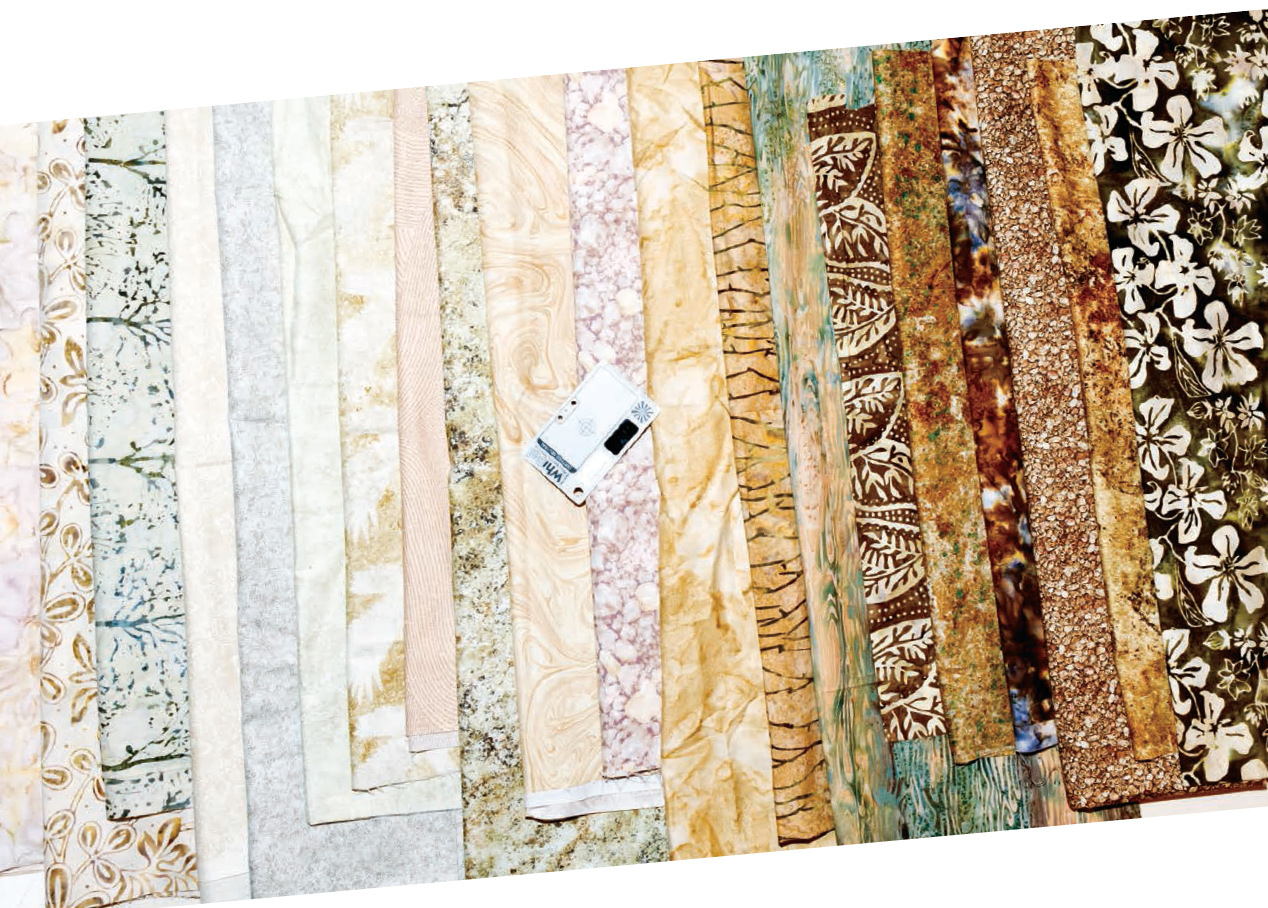
I like to use batik fabrics for three reasons. I like their intense and vivid color. I like the pattern and movement within one fabric. Other solid cottons look “flat” to me compared to batiks. I also like their quality in that they don’t fray like other cottons. If fabrics fray, I usually just go with it and use the frayed edge for extra texture!
I include a wide variety of fabrics in my art quilts to create more interest. For example, I use as many sky fabrics as I can find in one scene. I sometimes follow a little rule in my head that I can only use each fabric once. This forces me to use a wide variety of fabrics.
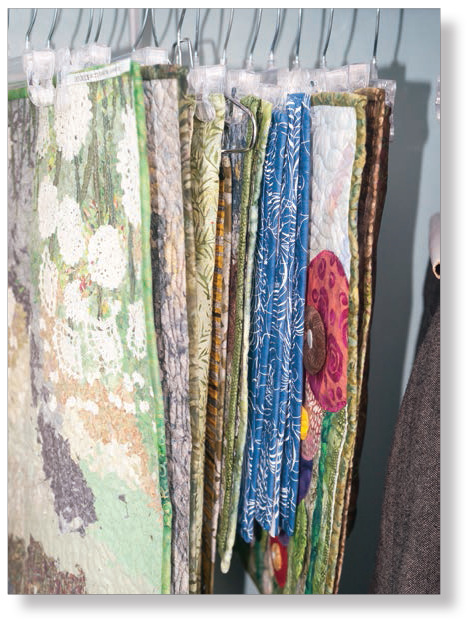
I continually shop for fabrics and seek out new quilt shops when I am traveling. Adding to your stash and having a wide variety of colors and prints is imperative. One of my mottos is “never enough fabric.” My daughter, Kate, once purchased a sign for me to hang in my quilt studio that said: “She who dies with the most fabric wins!”
I am constantly searching and shopping for tree bark and birch tree printed fabrics. Many people ask if I ever dye my own fabrics. I have done a little bit a dyeing but have not been happy with the colors and results. I find buying batik, as well as hand-dyed and printed fabrics, is much easier, and you can buy every shade and color you can possibly think of. So I have a wide variety of batik, hand-dyed and cotton printed fabrics in my quilt studio.
I sometimes follow a little rule in my head that I can only use each fabric once. This forces me to use a wide variety of fabrics.
SPECIALTY FABRICS AND FIBERS
For the first few years of my landscape quilting career, I used all cotton fabrics. Then, as I gained experience, I started experimenting with other fabrics to achieve wonderful and interesting textures. I use linen, silk, wool, yarn, Angelina Fiber, recycled clothing, upholstery fabrics, monk’s cloth, polyester sheers and anything else that I find interesting.
Linen: A natural fiber great for dune and lake scenes. It comes in a variety of colors, and its woven texture adds great texture to the sand or ground.
Silk: I use white and off-white 100% sheer silk to twist and couch on the dune areas.
Indian Silk Strip ribbon: Soft, raveled, dyed silk ribbons are very useful for embellishing flower petals and grass. They can be purchased from Stef-Francis.
Monkscloth: It is traditionally used for cross-stitch backing, but I like its woven texture, and it unravels very nicely for dune grass.
Wool: I use shades of brown and green wools and tweeds in my autumn collages: “Autumn Path” and “Autumn Colors”. The heavier, wooly texture makes great ground cover.
Polyester sheers: I use different shades of green polyester sheers for leaves in the trees.
Polyester sparkling netting: I use shades of blue, turquoise and green sparkling netting in my lake scenes to capture the illusion of sun hitting the water. I also stitch on top of the netting with metallic thread.
Tulle: I like 100% polyester, which is a soft, tight, weave fabric often used in bridal nettings and comes in a variety of colors. I use tulle for softening areas, layering for reflections and making shadows.
Upholstery fabrics: I use anything that has the right color or texture to be incorporated in my landscapes.
Angelina Fiber: Angelina Fiber is a loose, polyester fiber that is sold in a variety of colors, including sparkling or iridescent. These fibers are available in fusible or non-fusible. The fusible can be ironed to make an iridescent solid piece of fabric that can then be cut into shapes to place in lakes, waterfalls or snow scenes. I usually use the non-fusible, shred the fibers and place under netting or tulle for extra sparkle. I use Angelina Fiber to catch light reflection in many of my lake scenes.
Yarn: I use any kind of yarn in earth tone colors to add texture to my quilts. Yarn can be pulled apart to look like dune grass and then stitched with gold thread. Eyelash yarn can look like trees and bushes. I like to stitch white, fuzzy yarn in the sky to look like fluffy clouds.
Cheesecloth: This is a very loose, woven fabric that can give a nice layering effect for sand in any design.
COMPOSITION
A good landscape art quilt should have great composition using interesting colors, values of color, lines and shapes. Establish relationships among objects and place details leading the viewer’s eye into and around the scene.
Scenes that are horizontal tend to be calming.
Placing the horizon line is very important whether it is a lake or woodland scene. The horizon line is the point where the sky appears to meet the earth. I like to think in thirds and try not to place the horizon line directly in the center of the scene. For example, in a lake scene I may make one-third sky, one-third water and one-third dune.

Think about the point of interest in a landscape scene. It may be a barn or lighthouse. Major objects should be placed off to one side, never in the middle. For example, a large tree could appear to the right side of a landscape, which would give a woodland scene depth.
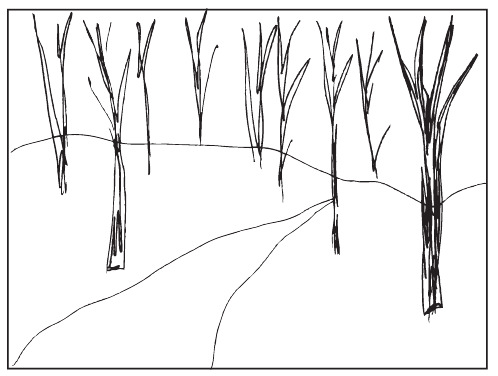
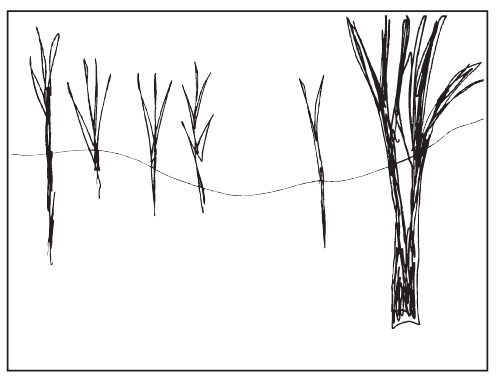
It’s a good idea to think about different widths of trees. I usually place thin trees in the distance, continue with medium width trees coming further down to the middle of my quilt and then a couple of larger trees extending off the bottom. I usually extend trees trunks to the top of the quilt.
I decide whether my quilt will have a horizontal or vertical orientation. I think scenes that are horizontal tend to be calming. I like my lake scenes horizontal versus vertical for this very reason. I find that my woodland scenes with a vertical orientation seem to have energy and emphasize the strength in trees.
Perspective in scenes is important because objects get smaller as they recede into the distance. Distant trees should get shorter and thinner. Distant pine trees should be smaller than the larger trees in the foreground. Often I put paths in a woodland scene. I place the path to one side of my composition, and the path will narrow to the vanishing point. The vanishing point in the diagram below is where the path disappears or ceases to exist.
SELECTING PHOTOGRAPHS
I use photos for almost all of my landscape quilt designs. When using a photo, I do not blow up the image, trace or transfer the design onto the batting. Rather, I use the photo (approximately 8" x 10") as an inspiration for my design. I study the photo for compositional lines, elements, color, light source and shadows. Sometimes I leave out items in the photo I do not like or add elements to my quilt design. I tack the photo on the wall where I am working and refer to it as I create the quilt. I draw – with a marker directly on the batting – compositional lines to guide my fabric placement.
Working with a good quality photograph is important, preferably photographs that have good contrast, composition, color and light and dark shadows. Taking photographs in the early morning or late afternoon will give longer shadows and true colors. I am very lucky to have access to wonderful landscape photographs of Northern Michigan since my husband, Steve Loveless, is a professional landscape photographer.
I sometimes take elements from several photographs to make a good composition for one quilt.
If you are not married to a professional photographer, then carry your camera with you wherever you go, so you will always be ready to take a picture when you see a good quilt possibility. You can also find great photographs from notecards sold in stores, on calendars and in magazines.
I sometimes take elements from several photographs to make a good composition for one quilt. I may take one panoramic photograph and split it into thirds and create a triptych of three separate quilts.
PHOTO TRANSFER
When making art quilt scenes with detailed objects such as bridges, barns, lighthouses and large birch trees, I many times print the image by photo transfer. I transfer images onto ink-jet cotton. I fussy cut (intricate cutting) the object out and pin this realistic image on my quilt. This saves me hours of constructing a realistic bridge. I then enhance the image with thread to add detail and integrate the image into the scene. Luckily I have my talented photographer, Steve, to print these images for me on his professional printer! You can print your photos at home on 8 1/2" x 11" ink-jet cotton sheets using an ink-jet printer.
COLLECTING YOUR MATERIALS
SEWING MACHINE
I use a Bernina Artista 630 and a 750 Quilters Edition – both have a stitch regulator. I also have a longarm Handi-quilter Avante 18 for my large wall quilts. I usually have these machines set up for free-motion machine quilting. I switch the foot and raise the feed dog when straight stitching is needed for the binding and sleeve on my art quilts.
You can free-motion machine stitch on most any home sewing machine. Many students have brought older model machines to class and they free-motion quilt beautifully. You do not need a new, fancy or special machine to free-motion machine quilt. You will need a free-motion foot, which is sometimes referred to as a darning foot or embroidery foot. The feed dog must be lowered on the machine, and most machines have this feature. Some home sewing machines have an additional stitch plate that attaches, which will disengage the feed dog. Having the appropriate size needle and adjusting the tension on your machine is also required.
NEEDLES
I use a 90/14 topstitch needle for almost all of my quilting. I find the 90/14 handles the medium thickness of most of my art quilts. I also like the topstitch needle because it has a larger eye for metallic and 30- and 12-weight threads.
THREAD
I use all kinds of threads. My rule is that if it is the right color and works in the machine, use it! I use 30- and 40-weight thread most of the time. I also use 12-weight thread in the foreground of my quilts to emphasize details such as grass. The smaller the number, the thicker or heavier the thread is. I use rayon and polyester embroidery threads that are shinier than cotton threads. I especially like variegated threads, which give variation without having to change the thread as often.
I use monofilament thread on areas where I do not want the stitching to show. For example, I may use monofilament thread to stitch on white yarn in the sky for fluffy clouds. Monofilament thread can be tricky to use. It tends to tangle and break easily. The upper or lower tension may have to be adjusted to keep it from breaking. Sometimes putting it in a vertical thread spindle or a separate thread stand on your sewing table may help it from tangling.

There are two kinds of monofilament thread: nylon and polyester. Polyester monofilament is stronger. Your machine may prefer one over the other. I like Monopoly by Superior Threads in clear or smoke.
I use a 90/14 topstitch needle for almost all of my quilting. I find the 90/14 handles the medium thickness of most of my art quilts.
I do not always match the thread to the fabric. If I want the stitching to show, I will choose a contrasting thread. Other times I want to hide the stitching, so I will match the thread to the area I am working on. I like Sulky Blendables, which are cotton and come in great variegated colors and weights.
BOBBIN THREAD
I use a neutral color, such as gray, in my bobbin, or I match my bobbin thread to the back of my quilt. Many times I professionally frame my quilts, so I do not care how the back looks. I use Bottom Line by Superior Threads, which is a thin, 60-weight thread. I find the thinner thread sinks into the back of the quilt and looks nice. You can also get more thread on a bobbin, so you do not have to wind bobbins quite as often.
BATTING
I use any brand of cotton batting for all my landscape art quilts.
FUSIBLE WEB
I use Steam-a-Seam 2. I like its tacky quality and consistency when removing the paper. It can be lightly fused with an iron or finger pressed, and the pieces will stick. You can also move pieces around after lightly ironing, which I find myself doing quite frequently.
My second choice of fusible web is Pellon Lite EZ-Steam II. Be sure to read and follow the instructions.
OTHER EQUIPMENT
• Rotary cutter with extra blades
• Mat and straight-edge ruler
• Medium-size fabric scissors
(Omni-Grid or Fiskar with spring action)
• Black, medium sharpie
• Large, straight quilting pins
• Non-steam iron
• Acid-free glue stick
• Teflon sheet
• Spray baste
QUILTING
FREE-MOTION MACHINE STITCHING
Free-motion stitching can be done on a domestic or longarm sewing machine. Free-motion machine quilting means that the machine is set up so it can sew in any direction, even in circles. That process can also be referred to as free-motion embroidery or thread painting. Free-motion machine stitching adds wonderful texture and depth to an art quilt. It can draw the eye of the viewer in and around the quilt and will enhance and highlight areas. I usually free-motion stitch the background in a looser stitching and free-motion stitch more densely areas I would like to enhance. For example, tree trunks, leaves and flower petals.
To free-motion machine stitch, the machine needs to be adjusted according to the machine manual.
An embroidery foot, which is an open-toe circular foot, is used. Sometimes it is called a darning foot or a free-motion foot. I have a Bernina Stitch regulator (BSR), which is wonderful because it regulates stitch length automatically. Free motion stitching means that I can move a quilt freely, so I am regulating the stitch length. It takes some practice to make even stitches. Because I am regulating the stitch, I do not need to set a stitch length on my machine.
When I’m making a quilt, I usually spend half my time cutting and placing fabrics and the other half thread painting. Lots of thread work adds wonderful texture and detail! I like to enhance the trees in my woodland scenes, so I will stitch every tree. I usually stitch up one side of the tree adding highlights and knots as I go. I skip from one tree to the other without cutting my threads and then cut later. I stitch varigated brown thread on the brown trees to look like bark. After adding leaves, I stitch in a circular pattern to enhance the leaves. I then go back with dark brown thread and stitch thin “thread branches” to connect the leaves in the trees. I add “thread trees” in the distant woods to fill in areas and add depth. Then, I add different colored blue threads to water scenes thinking about waves and how the water ripples in the lake. I thread paint with metallic thread in areas to catch the sun’s reflection on the water. I like to thread grasses in various colors of gold.
LONGARM QUILTING
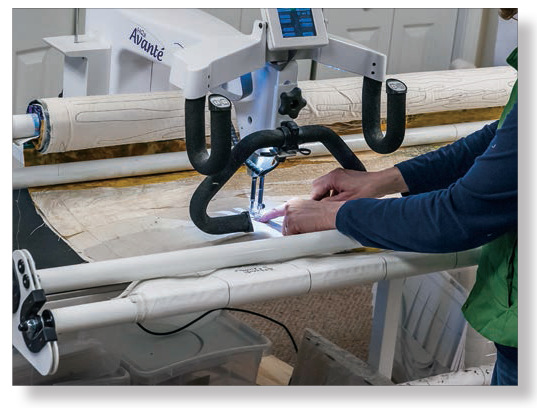
When working with large quilts, I recommend using a longarm machine. I purchased a Handi-Quilter Avante 18 three years ago, and that decision opened up quilting opportunities for me. I free-motion machine quilt all of my large art quilts on the longarm. I am pleased how the quilt stays straight and smooth after it is pinned onto the leaders. It becomes difficult on a regular sewing machine to quilt larger pieces because the quilt must constantly be rolled up to get to the areas that need to be quilted. With a longarm, the quilt stays stationary. The needle moves over it instead. It is like driving the sewing machine Cadillac, and is lots of fun.
Working on my longarm encouraged me to develop larger quilts. When I made my 2013 ArtPrize entry “Sleeping Bear Dune Lakeshore,” I was able to design large because I had my longarm. Creating a large quilt was very likely one of the reasons that I won ArtPrize.
When I first purchased my longarm, I had a problem with thread breakage. With my collage technique, there is a layer of fusible web sometimes 2 or 3 in places, so the quilt is thicker. I learned that I needed to use a larger needle, so I now usually use an 18- or 20-size needle.
My longarm handles all of the threads I use on my regular sewing machine. I change thread quite often, and need to adjust the tension every time, which can be time consuming. If my quilt is going to be framed and nobody will see the back, I usually do not spend a lot of time adjusting the tension. As long as it looks good on the top, I am happy!
If my quilt is going to be entered into a quilt exhibit (unframed), I will spend the time adjusting the tension. Often I will use the same weigth thread for the entire quilt, changing the colors only, to avoid adjusting the tension so frequently.

DOMESTIC MACHINE QUILTING
When using a domestic machine set your machine up for free-motion quilting. Lower the feed dogs so your quilt can move freely, and attach the embroidery foot. You also may need to adjust the top or lower tension. I usually use a 90/14 topstitch needle for all free-motion stitching, which handles most all threads. Refer to your sewing machine manual under “darning” or “free-motion stitching” for more information.
