15
RULE
Don’t use neutral colors on a page because they look dull
When you read the words “neutral colors,” do you picture the dullest beige possible? How boring! Like all colors, neutrals come in a variety of hues. Black, white, cream and gray—and their many shades—all fall into the neutral category. By their very nature, neutrals provide an unobtrusive backdrop for your photos, making the elements on your page really pop. Once you challenge yourself to work with neutrals and find out how versatile they really are, you’ll never again see neutrals as dull.

Artwork by Anilu Magloire
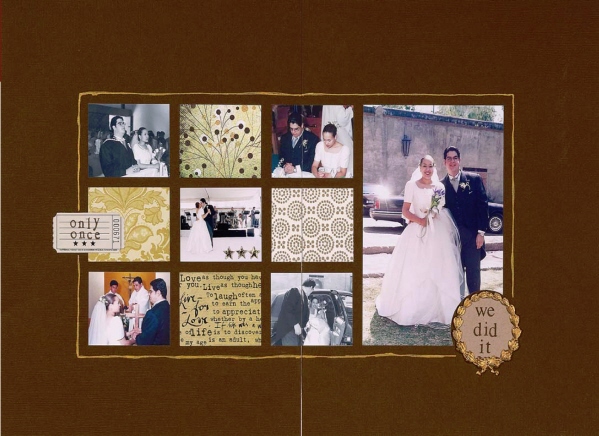
When creating a page in neutrals, you don’t have to mask your entire background in brown patterns. Try using a solid cardstock accented with bits of neutral prints. By cutting various brown patterned papers into a uniform size and shape, Anilu was able to achieve variety with little color. Clever use of a gold pen brings a bit of sophisticated shine to this neutral palette.
Supplies: Cardstock; patterned paper (7gypsies, BasicGrey); stamp (PSX); metal embellishment (Anna Griffin); ticket (Jenni Bowlin); Misc: adhesive, gold stars, ink, pen
YOUR CHALLENGE
Incorporate small pieces of neutral patterned papers on a page with a solid background.
Artwork by Ronee Parsons
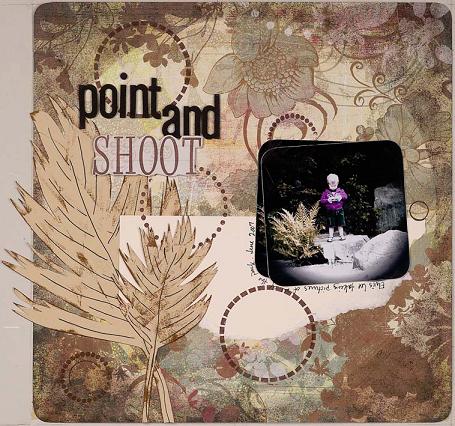
This page is covered in neutral colors, but it’s anything but dull. Instead of relying on color to give her page visual interest, Ronee used texture, layers and patterns—like hand-cut leaves and torn edges. She chose patterned papers in varying shades and tints of brown for her background, allowing for the bit of color in the digitally enhanced photo to pop.
Supplies: Cardstock; patterned paper (BasicGrey, Daisy D’s); letter stickers (American Crafts); stamps (Sugarloaf); stipple brush (Tsukineko); photo action by Valerie Foster (Do You Digi); Misc: adhesive, ink, pen
YOUR CHALLENGE
Create a layout using brown patterned paper for the background.
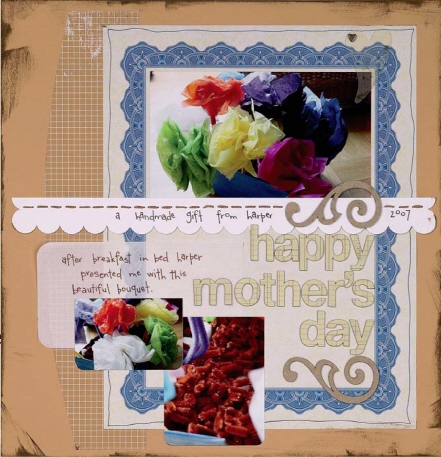
When working with neutrals, you aren’t limited to one color. On this page, I used various shades of white, cream and brown to make an interesting backdrop for colorful photos. Neutral colors are perfect for framing brightly colored images; neutrals don’t compete visually and can make the other colors appear even brighter.
Supplies: Cardstock; transparency (Hambly); chipboard letter (Heidi Swapp); chipboard shapes (Everlasting Keepsakes); heart (Heidi Grace); heart brad (Making Memories); Misc: adhesive, blank certificate, floss, ink, pen, vellum
YOUR CHALLENGE
Create a page that uses neutral shades from different color groups.
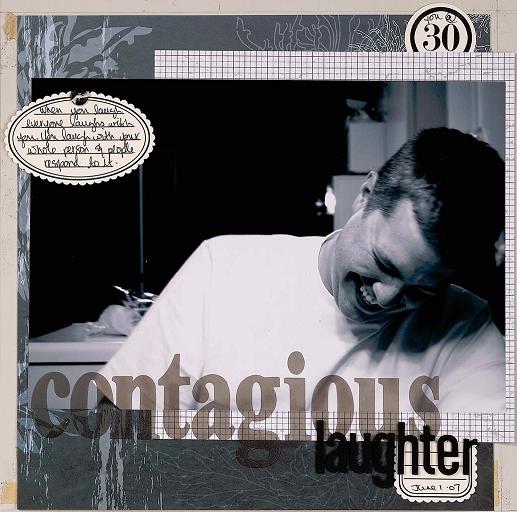
Black and white look stunning with both black-and-white and color photos. When using black and white, try including shades of gray along with a variety of patterns and textures to unify the two colors and bring your page to life. You really can’t go wrong with black and white; the combination will only serve to enhance your photos and create a timeless look.
Supplies: Patterned paper (CherryArte, Rouge de Garance); plastic letters (Maya Road); letter stickers (American Crafts); tag (Every Jot & Tittle); Misc: adhesive, button, floss, pen
YOUR CHALLENGE
Create a page using black, white and shades of gray.
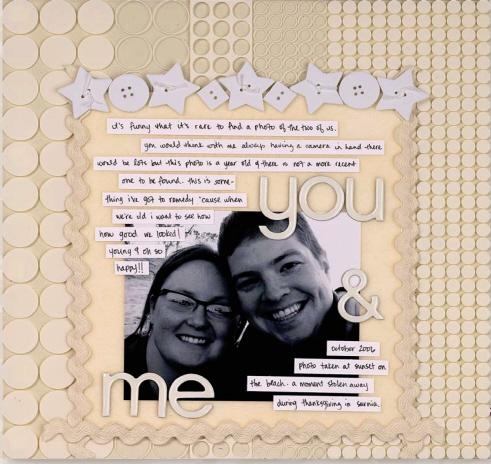
You may not have thought to mix white and cream because it seems contrary to rules about matching. But once you see the combination, you realize its potential. This layout’s use of white and cream, along with various textures, creates a quietly stunning backdrop for my photo and helps achieve the soft look I wanted for this page.
Supplies: Cardstock; transparency (Hambly); chipboard letters (BasicGrey); 3D gloss (Ranger); Misc: adhesive, craft foam, felt, floss, paint, pen
YOUR CHALLENGE
Create a page using only cream and white elements.

Create Foam Buttons
You will need: Paper punches, craft foam, pencil, leather hole punch
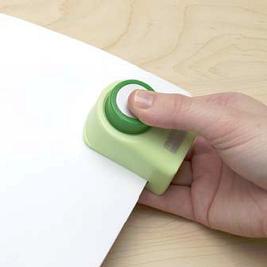
1 Use paper punches to punch various shapes from the craft foam.
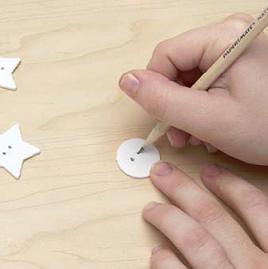
2 Mark two or four dots in the center of each shape with the pencil.
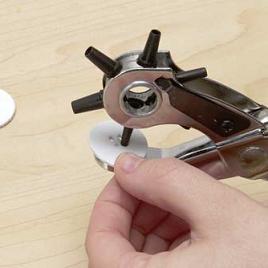
3 Punch holes, using the pencil marks as guides, into the foam shapes with the leather hole punch.
 Note: For this project, you can use a 1/8" (32mm) hole punch or other sharp object to make the holes in the foam. But note that the hole sizes will be different than with a leather hole punch I used and may change the look of the buttons.