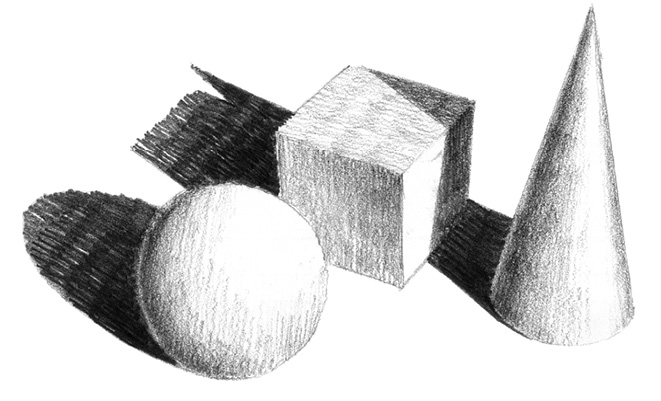
Values are the degrees of light and darkness in a drawing. They give additional form and depth to a basic structure. Observing the wide range of values that make up your subject will give you a better understanding of how light creates highlights and shadows on the form.
Observing Values Exercise
Take white foam shapes from your local craft store, set them up with a good light source, then observe the characteristics of the shapes, the highlights and how the shadows fall. Notice the wide range of values. You may need to paint the foam white to get an opaque surface that reflects light smoothly and accurately. Be sure to use latex paint, because spray enamel will melt Styrofoam.
Contrast
Differing values create contrasts that can affect the mood and composition of a drawing. The more extreme the difference between values, the greater the contrast. One way to achieve higher contrast in your drawing is to place your darks and lights side by side.
It's All Relative
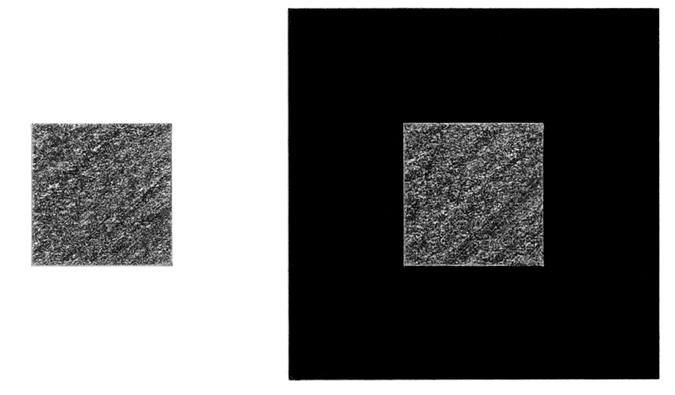
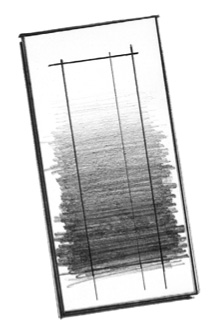
Value contrasts are relative. They appear differently according to their environment. The small square on the far left may appear darker than the small square on the near left, but both are the same value. The square on the left appears darker because it is placed directly against the pure white of the paper, providing more contrast.
Value Contrast Creates Impact
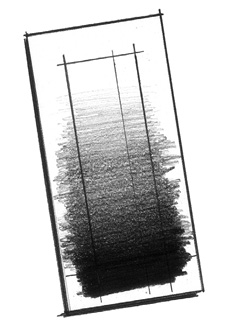
A drawing done without much contrast will not have much impact and will look flat and pale. The white smoke of the rocket on the right looks brighter against the dark background. The drawing on the right uses richer values, creating more contrast.
Making a Value Scale
MINI DEMONSTRATION
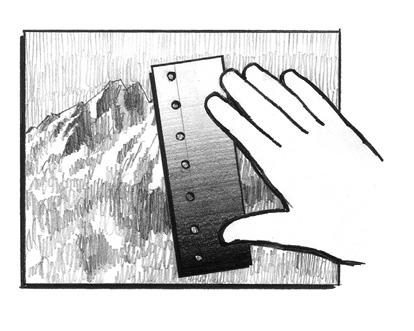
You can use a value scale to compare the values of a scene with that of a drawing. Hold the value scale up to the subject and look through the holes punched along the side. Where do the values in the subject fall on the value scale? As you begin to compose a drawing (see Chapter 5), it is always best to establish the highlights and very light areas. Sketch those in, then look for where the other values are in the subject. To fill in the other values, one option is to go from the lightest shades of the drawing to the darkest. Another way to map out the values is to fill in some of the darkest areas around the lightest areas, then work with the midtones last. Try each of these methods to see which one works best for you.
Must-Have Materials
4H, HB, 4B graphite pencils
4″ × 8″ (10cm × 20cm) drawing paper
Kneaded eraser
Hole punch
Scissors
Ruler
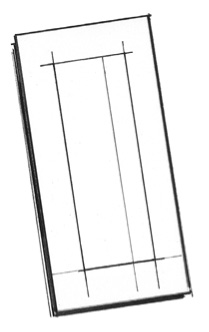
1 Draw a Rectangle
Draw a 2″ × 6″ (5cm × 15cm) rectangle on a 4″ × 8″ (10cm × 20cm) piece of drawing paper. Add a line down the middle right of the rectangle as a guideline for the holes you will punch out in the last step.
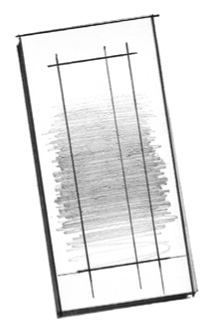
2 Create the Lighter Values
Keeping the top white, use a 4H pencil to create the lighter values with back-and-forth strokes.
3 Add the Middle Values
Add the middle values with an HB pencil.
4 Add the Darkest Values
Use a 4B pencil for the darkest values. With scissors, trim around the rectangle pattern you drew, and punch seven holes along one side with a hole punch.
5 Map Out the Value Variations in Your Reference Photos
Now you can hold your scale up to a picture or scene to judge the values as you work on your drawings.
Creating Values
When you draw, you use lines to suggest light and dark values. The grade of pencil, the sharpness of its point, the angle of the point on the paper, the amount of pressure applied to the pencil, and the surface of the paper all influence the values you create. Even the pencil strokes you use influence the values you create on the paper.
Often type of stroke and the direction of the lines is determined by the subject. When drawing wood, the pencil lines will follow the direction of the grain; when drawing a cat, the direction of the pencil lines will follow the contours of its body.
Making the Grade
Here are some basic lines strokes created with different pencil grades. Hard pencils are good for sharp, crisp line work, and they keep their points longer than soft pencils. Soft-grade pencils can make smooth, dark values. Consider duplicating these pencil strokes as an exercise, then get creative and invent other textures.
Different Folks Make Different Strokes
If you are right handed, it is natural for you to make lines moving from the upper right to the lower left. But lines may go any direction you like, depending on what is comfortable for you and the effect you want to achieve.
Light Effects
Values are used to create the effects of light and shadow in a drawing. To make your drawings look realistic, you will need to replicate these different light effects.
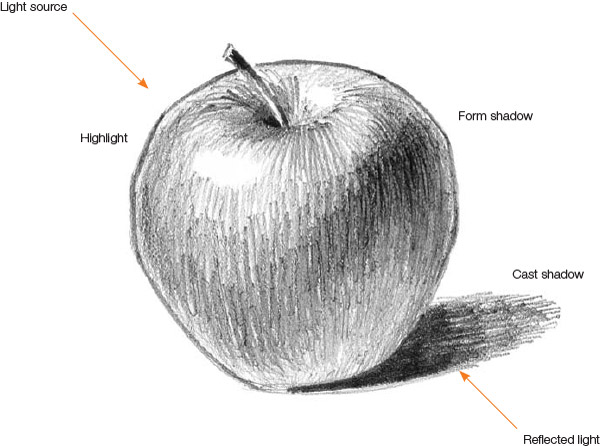
- Light Source. Basically, the origin of the light. To determine the shading and shadows of a scene, it is important to determine the position of the light source so you know from which direction the light is coming. The light source is usually the sun or a lamp, so the light usually comes from the top. A light source positioned at the top left or right will give more depth than one located straight above your subject.
- Highlight. A highlight occurs where light reflects off an object. In a drawing, this appears as a bright spot.
- Form Shadow. A shadow on an object that gives depth and dimension to its form.
- Cast Shadow. A shadow that is cast or thrown by one object onto another surface.
- Reflected Light. Light that bounces off a surface and adds light to a region of the object that would otherwise be darker.
Using Light Accurately Adds Realism and Depth to Your Drawings
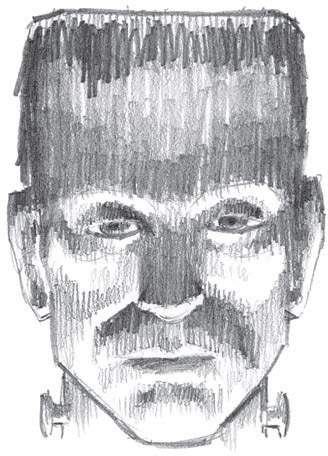
An Unnatural Light Source
It's more than just a bad haircut that made Frankenstein's monster look scary. Placing the light source below the subject contributes to his frightening looks.
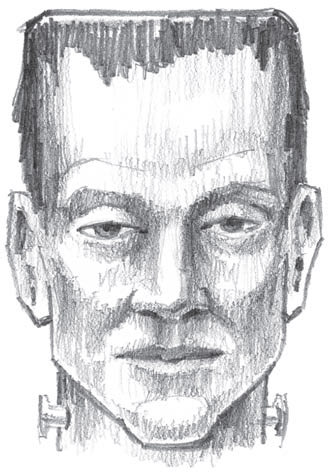
A Natural Light Source
Moving the light source from below the subject to above gives the monster a less frightening appearance.
Plotting Shadows
While the concept of plotting shadows may seem daunting, a basic understanding of it will help you to draw realistically. There are two primary methods of plotting a shadow. One is for when the light source is in the background and can be shown on the drawing; the other is for when the light source is in the foreground and cannot be seen directly. Both of these methods use the principles of linear perspective. You must also plot out the horizon line and vanishing points to be able to get the right perspective for the shape of the object's shadow.
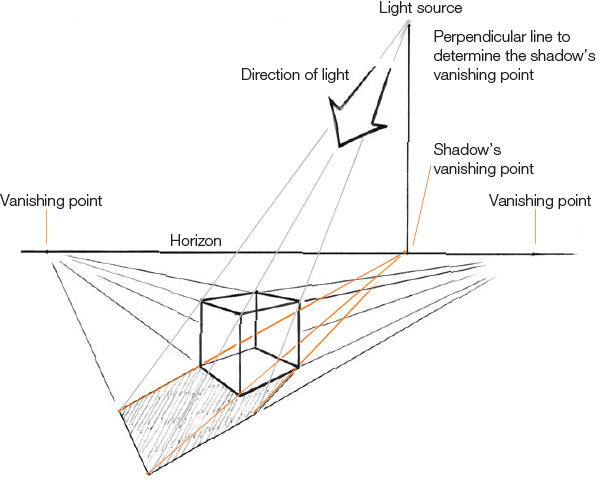
Light Source in the Background
In this example, the light source is in the background. Notice that there is a line coming straight down from the light source to the horizon. That point on the horizon is the shadow's vanishing point. From this vanishing point, draw lines passing through the bottom corners of the cube. Next, draw lines from the light source passing through the top corners of the cube. The intersections between the shadow's vanishing point lines and the light source lines will make the shape of the shadow on the ground.
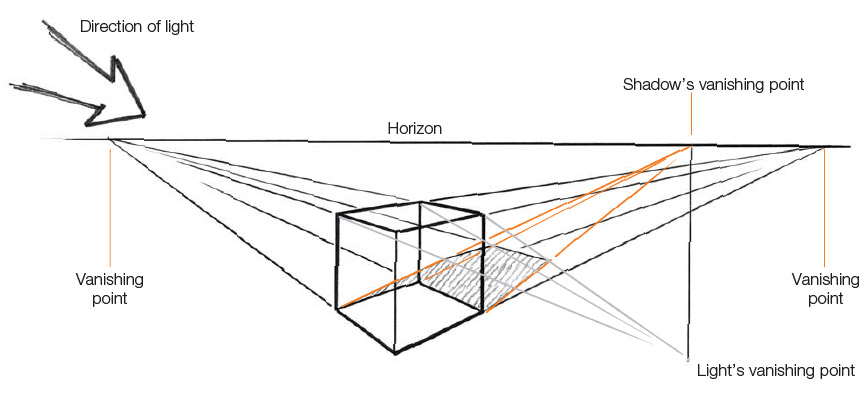
Unseen Light Source in the Foreground
Though the general direction of the light is assumed, the light source is so far away that it cannot be indicated in the drawing. Because of this, the direction of the light and where those lines would converge on the horizon will be a vanishing point. Then draw lines from this vanishing point and pass them through the bottom corners of the cube. Next, plot the lines coming from the vanishing point of the angle of the light source. Place this vanishing point below and perpendicular to the other vanishing point. From this point, draw lines that pass through the top corners of the cube. The intersection of these lines will form the shape of the shadow of the cube.
