DEMONSTRATION using water in your underpainting
If you don’t like the smell of even supposedly odorless Turpenoid™, try brushing or spraying your pastel with water for the underpainting and as you continue to work.
Unlike Turpenoid™, water does not “melt” the pastel but rather makes it a somewhat pasty blend. Use caution when spraying or brushing on water, and watch for lumps or paste-like areas. Those can be removed with a wet brush or scraped off with the side of a palette knife; if allowed to remain, they will prevent further pastel from adhering to the surface.
materials list
White Professional Grade Wallis Sanded Pastel Paper
Nos. 8 round brush
Spray bottle with distilled water
pastels
light pinky-lavender, middle-value lavender, light cool blue, dark cool blue, light blue-gray, middle-value blue-grey, middle value warm gray, dark blue-gray, light yellow green, middle-value yellow-green, middle value sage green, middle-value ashy green, middle value green, dark green, very dark greenish black, dark ashy green, dark blue green, light pink-white, light pink, middle value pink, middle value magenta, dark purple, dark magenta, light yellow ochre, middle value yellow, light pink-orange, middle-value pink-orange, dark burnt siena, dark brown, pure white


detail
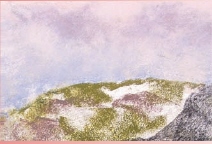
This is a close-up of the sky area after spraying it with water. Note that the water lays on the surface more than Turpenoid™ does.
1 Apply the First Layer of Pastel and Spray It with Water
Working on white Wallis Sanded Paper mounted to a board, apply the first layer of pastel and spray it with water. This is a rough block-in of colors, similar to those done in the early stages of other underpainting techniques, but keep the application of pastel light. Let some paper show through instead of covering all the white. Once the sky colors are blocked in, move quickly from dark to light values, keeping the shapes of color large.
Spray the surface lightly with distilled or purified water (chlorine in tap water may affect colors). Using an old or inexpensive brush (sandpaper will damage a good brush), lightly brush the colors together. After the pastel and water dry, add the next layer of color. Work from dark to light, breaking big shapes and masses of color down into smaller shapes and masses.

reference photo
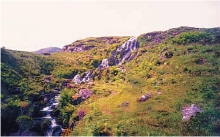
The reference photo for this painting is of a hillside on the Isle of Skye in Scotland. It was taken on a cloudy day, but the photograph shows not even a hint of the clouds I remember. Photographs often do not accurately depict detail and color in the sky.

2 Develop the Painting
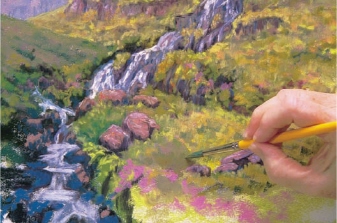
After you’ve added more color and created smaller shapes, you may want to use water again to help blend colors of similar values to create the impression of foliage. Here, a small area has been carefully sprayed and the brush is being used to bring the masses of color together. This technique could also be used to correct an area where you’ve made a mistake or changed your mind.

Skye Morning
11" × 14" (28cm × 36cm)
3 Finish the Painting
The finishing touches include creating the feeling of grasses in the foreground. On the left, this was done by holding small pieces of pastels in various greens and browns on their sides, making short quick vertical strokes with the entire side of the pastel. On the right, finishing touches of grasses were added with yellow ochre and green pastels, which layer nicely over the softer pastels underneath. Dark edges of the foreground rocks were created with very dark pastels, and their highlights applied with purple and magenta. Finally, the pink and yellow flowers were added with soft pastels.